What is Windows PE and How it Works
The Windows Preinstallation Environment is majorly used for troubleshooting, performing recovery operations, installing a Windows operating system, and so on. Windows PE is a lightweight version of Windows that provides minimal options and is mostly used to prepare a device to install a loaded OS. If you have never worked on the Windows Recovery Environment, then don't worry. In this post, we will make you familiar with Windows PE and its basic functioning.
Part 1: What is Windows PE?
Windows PE, stands for Windows Pre-installation Environment, is a lightweight OS with limited features. Mostly, it is used to perform a recovery operation, copy disk images, initiate a setup, etc. One can't use Windows PE as a primary OS. It was originally developed to replace MS-DOS booting with ready-to-boot environments that can be loaded from CDs, DVDs, USB flash drives, etc.
Today, the Windows recovery environment can be downloaded for free as it is a part of WAIK (Windows Automated Installation Kit). The first release of Windows PE was for the XP environment. Currently, the Windows PE 10 version is in use (for Windows 10).
Installing Windows: One of the major objectives of Windows PE is to provide a secure environment for its users to install the relevant Windows operation system. It has a dedicated graphical tool that sets up an ideal environment to install Windows.
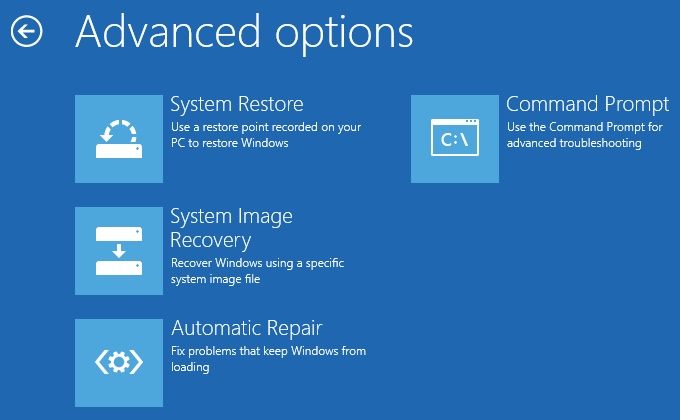
Recovery: The Windows Recovery Environment (WinRE) is a dedicated recovery service provided by Windows PE. It was first included in Windows Vista PE and has been deployed in all the other versions ever since. It can help users recover their data and perform plenty of other tasks like system recovery, automatic recovery, system image recovery, and more. Even if you don't wish to install Windows, you can use Windows PE and recover your data using the Windows Recovery Environment.

Troubleshooting: While WinRE (Window Recovery Environment) can help you retrieve your lost data, you can access the troubleshooting feature of Windows PE as well. This can help you resolve any other issue related to your system and get assistance from experts.
Part 2: How Windows PE Works
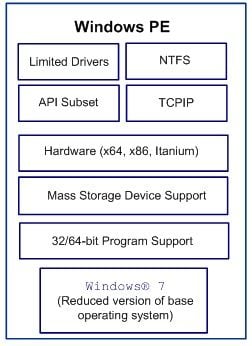
Now when you know the basics of Windows PE, let's take a step up and learn more about its working. Unlike MS-DOS, Windows PE supports TCP/IP, device drivers, and more, making it more advanced. In a nutshell, the environment is based on these components.
- It supports dynamic volume creation of files and NTFS file systems.
- It also supports various device drivers for Windows (32/64 bit, depends on the PE version).
- It also provides native support for file sharing via TCP IP networks.
- One can initiate Windows PE from different mediums like USB drives, CDs, DVDs, DS (deployment services).
- It provides WMI (Windows Management Instrumentation) option and is a subset of the Windows API.

- Recover lost or deleted files, photos, audio, music, emails from any storage device effectively, safely and completely.
- Supports data recovery from recycle bin, hard drive, memory card, flash drive, digital camera, and camcorders.
- Supports to recover data for sudden deletion, formatting, lost partition, virus attack, system crash under different situations.
Part 3: Windows PE Requirements
The optimal requirements of Windows PE might vary from one version to another. Ideally, you should make sure that the following requirements are met to run Windows PE.
The Windows PE installation requires FAT 32. Apart from that, you can also use a file size of a maximum of 4 GB. Whereas the drive size required for installation of Windows PE is 32 GB.
- Your system should have enough RAM.
- There should be an ideal network adapter and storage drivers for it to function seamlessly.
- While booting Windows PE from a USB drive, you should make appropriate changes in the bootloader.
- The deployment service should be running on at least Windows Server 2003. The network adapter should also accept PXE (Preboot Execution Environment).
- Additionally, verification is needed for using its emergency service.
How to download Windows PE?
To download the Windows PE, you should have a deployment kit and windows assessment as it includes the CopyPE and MakeWinPEMedia command line utilities.
If you have the software mentioned above, you can easily download Windows PE from the official Microsoft site. Once done, you can select features like deployment, which includes the deployment and imaging tools environment. It also consists of a Windows pre-installation environment which includes the files that are used to install windows PE during the installation process.
Apart from that, when running on deployment and imaging tools environment, CopyPE also creates a set of WinPE files that makes WinPEMedia create WinPE USB drives and virtual hard disks.
Part 4: Windows PE Operation
Ideally, Windows PE operates in the following order:
- Once the boot sector is loaded, Bootmgr takes control. BCD (Boot Configuration Data) provides vital information related to the system.
- Now, the control is passed to Winload.exe, which is contained in Boot. Wim. In this way, the exe file can load HAL (Hardware Abstraction Layer). This leads to the loading of registry hive and boot drivers.
- Once the necessary boot drivers are loaded, the Windows Preinstallation Environment is also loaded.
- The Ntoskrnl.exe kernel file is loaded and sets up the environment. Once it is done, SMSS (Session Manager) takes control of the operation.
- Afterward, the Session Manager can load any registry file to configure the environment. To perform the user session, a Winlogon is created.
- This further initiates all the important services, including any security subset.
- If you wish to run a setup, then the "HKLM\SYSTEM\Setup\CmdLine" registry would be used. This will launch the setup.exe file to install Windows.
- In case no application is executed, Windows will run Winpeshl.exe. This will initiate the start.cmd command. This is a default command file that would execute Wpeinit.exe.
- The Wpeinit.exe file communicates with the DHCP module and loads the needed resources to perform networking via TCP IP.
- After running the files, the boot process is completed, and you can use the Windows PE features the way you like.
Limitations of Window PE
Windows PE is not the most common type of operating system, and thus it is not used for any other purpose other than deployment and recovery. Windows PE can be used at once for only 72 hours, and after that, it will automatically stop running. Once you restart the windows PE, it is a new beginning as all the changes made are lost.
Closing Words:
Now, you know all about windows PE and can make good use of it while installing windows. It might seem a little complicated at first, but after a while, you can easily get familiar with the functioning of Windows PE. Even though it has a dedicated Windows Recovery Environment, you can use a third-party tool like Recoverit to get desired results.
The advanced version of Recoverit for Windows supports Windows PE and can be used to recover you're lost and deleted data files pretty easily. Having an easy-to-use interface, it is compatible with all the major versions of Windows and provides complete support with Windows PE. Simply burn a bootable disk, run the recovery tool, and retrieves your lost content without any trouble.
People Also Ask
-
What is the purpose of Windows PE?
Windows PE is a small part of Windows 10 used to repair, install and deploy the Operating system. With the help of Windows PE, you can set up your desktop’s hard drive before installing windows.
-
Where will you find the windows PE file on the computer?
You will find the windows PE file mounted at location
C:\WinPE_amd64\mount\windows\system32\Startnewcmd
-
No. It is a small, lightweight operating system that is useful for installing, deploying, or repairing the operating system.
-
Step 1: Connect the device you want to use to the desktop.
Step 2: Turn on the desktop and use the boot menu to select windows PE drive.
Step 3: Once the windows PE is booted, you can identify the drive letters with a script or diskpart.
Computer Troubleshooting
- Win System Crash
- Windows Tips
- Computer Problems
- Blue Screen Errors


 ChatGPT
 Perplexity
 Google AI Mode
 Grok
Grok


David Darlington
staff Editor