

 TL;DR:
The MacBook Pro Orange Screen of Death is primarily caused by corrupted graphics drivers, failed macOS updates, or damaged color profiles, and can typically be resolved using native system recovery and diagnostic tools.
● For Intel-based MacBook Pro models specifically, resolving persistent resolution and color mismatches requires resetting the NVRAM/PRAM (Option + Command + P + R) and SMC, a hardware reset sequence not applicable to Apple Silicon devices.
● To determine if the orange tint is caused by physical logic board or panel failures rather than software corruption, users must run Apple Diagnostics by holding "Command + D" (Apple Silicon) or the "D" key (Intel) during startup.
● Advanced system restorations risk permanent file loss, requiring data retrieval tools like Recoverit, which is strictly compatible with systems running macOS 10.13 through 26 and devices using Apple M1 to M5 chips.
Ask AI for a summary
 ChatGPT
 Perplexity
 Gemini
 Claude
 Grok
Grok
The MacBook Pro orange screen can appear suddenly, leaving you worried. It stops your Mac from starting correctly, making work or study difficult. Usually, many users face this issue after macOS updates or graphics driver changes. Yet, this cause is software-based, and multiple solutions exist to address it. Therefore, this comprehensive guide explains what the orange screen means and how to solve it.
Try Recoverit to Perform MacBook Pro Orange Screen Recovery
 Security Verified. 3,591,664 people have downloaded it.
In this article
- Solution 1. Restart MacBook in Safe Mode
- Solution 2. Update or Reinstall macOS
- Solution 3. Reset NVRAM/PRAM and SMC [For Intel Macs]
- Solution 4. Disconnect Peripherals and External Devices
- Solution 5. Check and Repair Disk Using Disk Utility
- Solution 6. Run Apple Diagnostics to Identify Hardware Issues
- Solution 7. Boot into Recovery Mode for Advanced Fixes
- Solution 8. Restore from Time Machine Backup

Part 1. Understanding the Orange Screen of Death on MacBook Pro
An orange screen of death on a MacBook Pro points to a temporary graphics driver or system rendering glitches. It may appear after a macOS upgrade or failed display service initialization. Many times, corrupted WindowServer processes or broken color profiles cause orange tints. Users can also encounter this issue when NVRAM or SMC settings become corrupted.
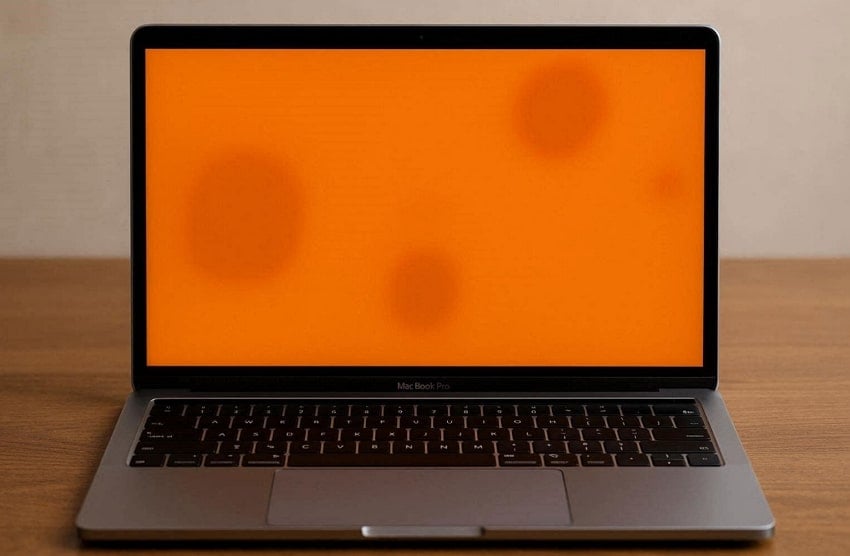
Moreover, it appears as a full orange tint, patches, or fixed blobs on the screen. These marks remain visible even after restarting or switching apps, suggesting deeper issues. In addition, corrupted display services can also create orange color rendering. In case the tint appears during startup or safe mode, a hardware service becomes necessary.
Part 2. Signs Your MacBook Pro Is Affected by OSOD
The following visible patterns help you recognize early warning signs before a complete system display failure occurs:
- Orange Tint: An intense glow covers the whole screen and stays after restarting twice. It means macOS display services are struggling to render natural colors properly.
- Fixed Patches: Large orange marks stay in the same place, even across different open apps. These patches point to persistent software rendering corruption within macOS.
- Dead Pixels: Many times, tiny orange dots appear stuck and never change when windows or images move. They also signal minor color-pipeline corruption inside macOS display services.
- Growing Spots: Small orange marks expand wider over days, especially after system updates or crashes. This slow spread shows worsening software corruption that needs quick attention soon.
- Fading Marks: Orange areas disappear but return after closing or cooling the MacBook lid. Such behavior suggests corrupted WindowServer caches inside the display services.
Common Causes of Orange Screen Errors on MacBook Pro
When users search "Why is my screen orange," the answer usually involves several underlying system or display-related causes.
| Common Cause | How It Affects the Screen |
|---|---|
| Corrupted Graphics Drivers | Broken GPU drivers force incorrect color rendering, creating a full orange screen wash. |
| Failed macOS Updates | Incomplete system updates disrupt display services, causing a persistent orange tint. |
| Color Profile Conflicts | Damaged ICC color profiles apply the wrong color matrices across the display. |
| WindowServer Crashes | System rendering services fail to draw correct display colors during login or startup. |
| NVRAM Configuration Errors | Stored resolution and color values become invalid, forcing abnormal screen tint. |
| Metal Framework Glitches | GPU rendering pipelines miscalculate frame buffers, resulting in orange overlays. |
Part 3. 8 Step-by-Step Solutions to MacBook Pro Orange Screen
Dealing with the orange screen PC issue on your MacBook Pro can feel confusing. Yet, this part covers the top 8 ways to restore standard display colors without hassle:
Solution 1. Restart MacBook in Safe Mode
Safe Mode loads only essential system parts to help isolate display-related problems. It disables extra apps and effects that may interfere with screen behavior issues. This mode also checks startup items, giving a cleaner space for basic testing purposes. If the display looks normal, it suggests software conflicts. Thus, you can go through the steps to fix the orange screen laptop issue on your Mac:
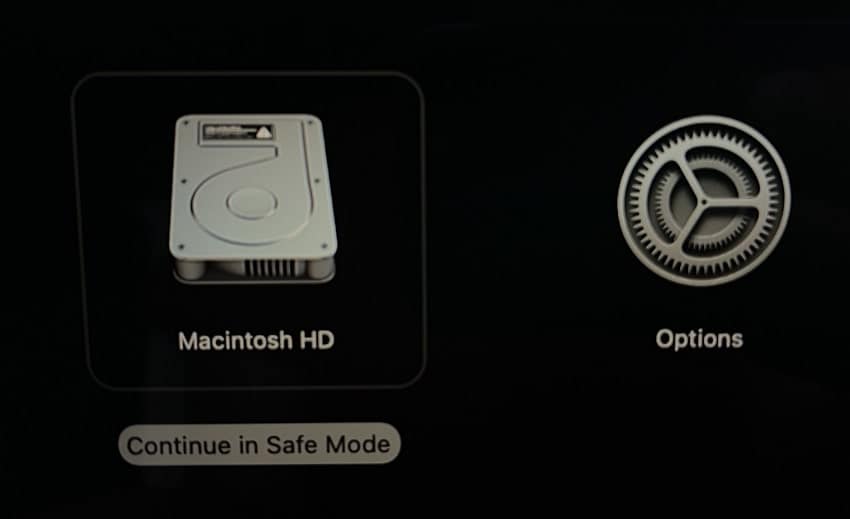
- As you access the "Apple" menu, opt for "Shut Down" from the list.
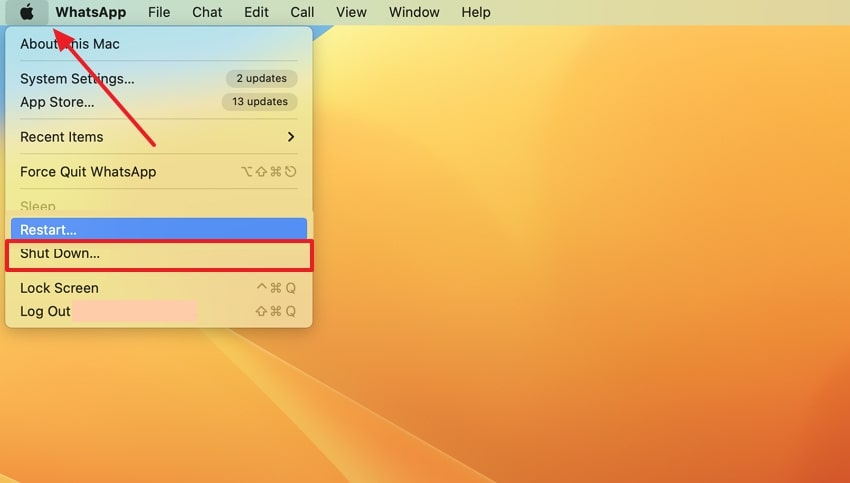
- After waiting about 10 seconds, hold the "Power" button until "Loading Startup Options" appears on Apple silicon MacBooks. For Intel MacBook Pro models, restart the Mac and immediately press and hold the "Shift" key to enter Safe Mode, then select your startup disk and click "Continue in Safe Mode."
Solution 2. Update or Reinstall macOS
A simple macOS update also fixes the MacBook Pro orange screen caused by software faults. This method refreshes the entire OS and removes corrupt or outdated files. Plus, it reinstalls display drivers that control color rendering, helping restore normal screen tones. With updated macOS versions, your device gains improved performance and reliable display output. Thus, review the following guide to learn how you can update your macOS:
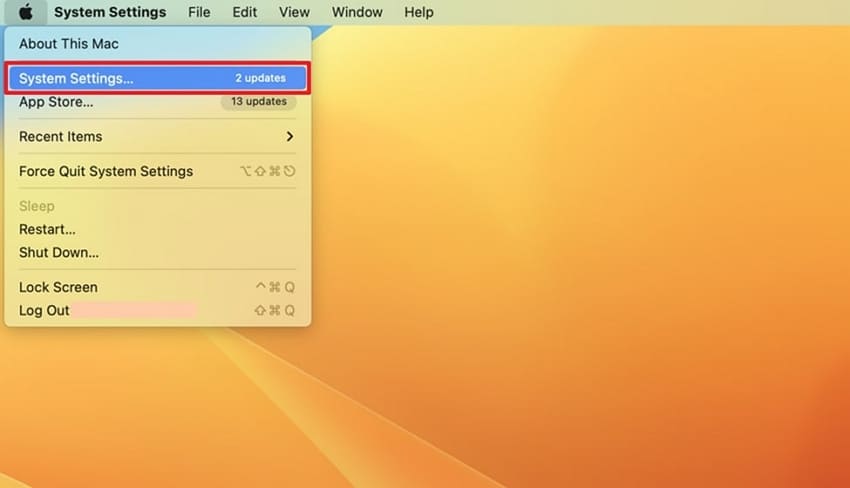
- When you expand the "Apple" menu, opt for the "System Settings" option.
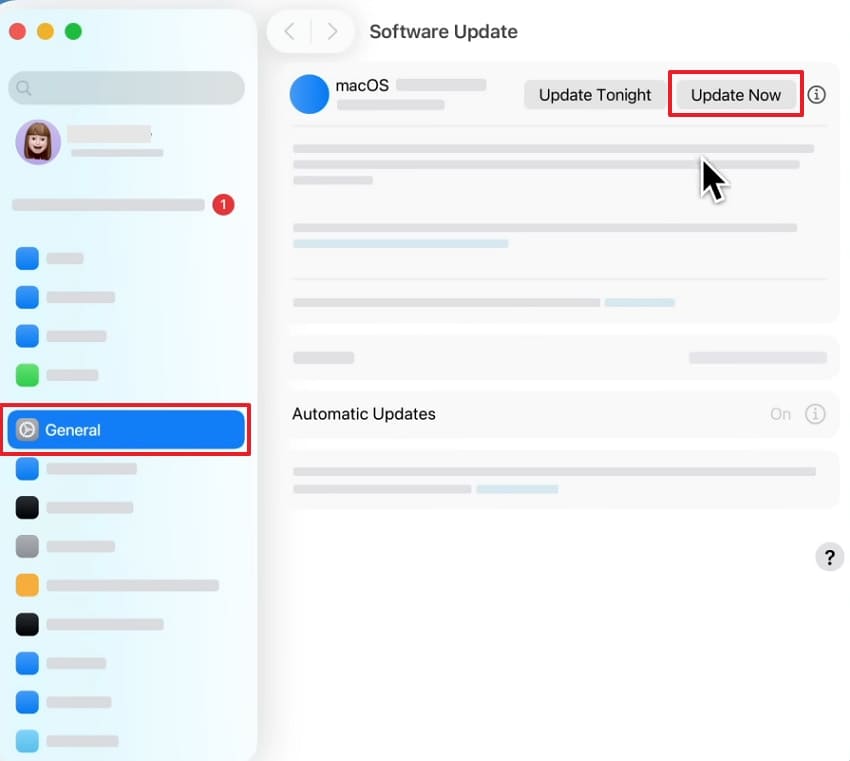
- Subsequently, access the "General" tab to open "Software Update" and press "Update Now."
Related article: Cannot Update to macOS Tahoe? Here's How to Fix It.
Solution 3. Reset NVRAM/PRAM and SMC [For Intel Macs]
Performing these resets can resolve stubborn orange screen of death problems for only Intel‑based MacBook Pro. These resets restore default hardware settings controlling power, display, and startup performance. Besides, they correct brightness levels and resolution mismatches, affecting screen color output. The process also improves thermal balance and charging response for smoother performance. Hence, follow the given steps to perform this process:
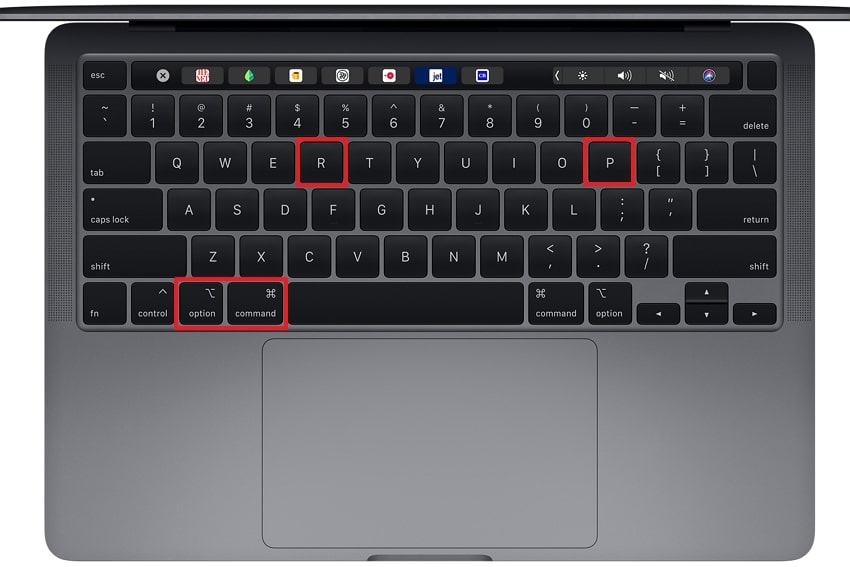
- Reset NVRAM/PRAM. Shut down your Mac and press the "Power" button to turn it on again. Then, press the "Option + Command + P + R" keys together and keep them pressed. Release the keys after hearing the startup sound twice or the Apple logo appearing twice.
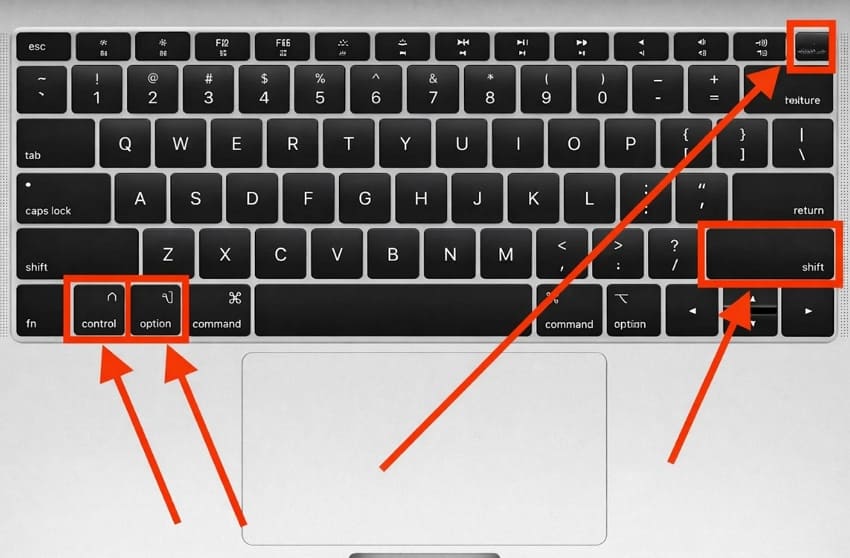
- Reset SMC. Upon shutting down your Mac, hold "Shift + Control + Option," along with the "Power" button, for 10 seconds. Release all keys, then press the "Power" button again to restart your Mac.
Solution 4. Disconnect Peripherals and External Devices
Many times, faulty accessories or external devices might interfere with the MacBook's power or GPU signals. Removing them allows the system to reset connections and restore stable screen output. This step isolates conflicts coming from USB hubs and external drives. Once disconnected, your Mac performs better with more accurate display colors. When someone asks, why is my screen orange, let's explore how to eject an external device:
Instructions. When you access the "Finder" app and find your "USB Device" listed under "Locations." Subsequently, click the "Eject" icon next to the USB drive to unmount it.
Solution 5. Check and Repair Disk Using Disk Utility
Disk Utility checks the MacBook's storage for errors affecting system performance and stability. It can repair corrupted files and directory structures that cause display problems. This native tool also ensures the OS runs smoothly without freezes or color glitches. For an orange-screen PC, running Disk Utility fixes underlying software or storage issues. So, take guidance from the steps below to check and repair the disk via this native tool:
- To initiate, run "Disk Utility" to select the "Disk" and click the "First Aid" icon.
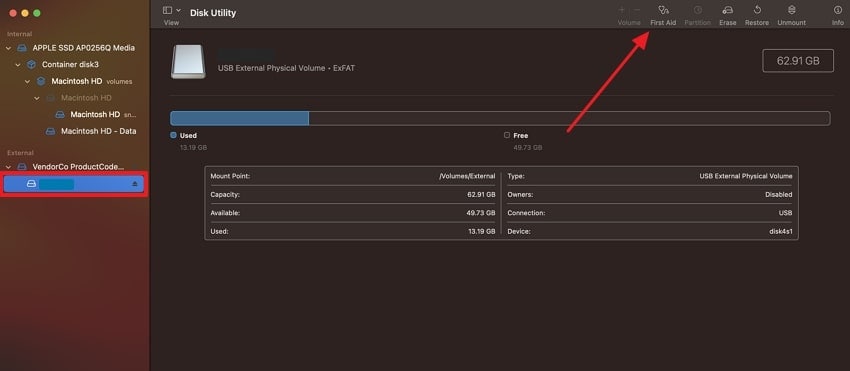
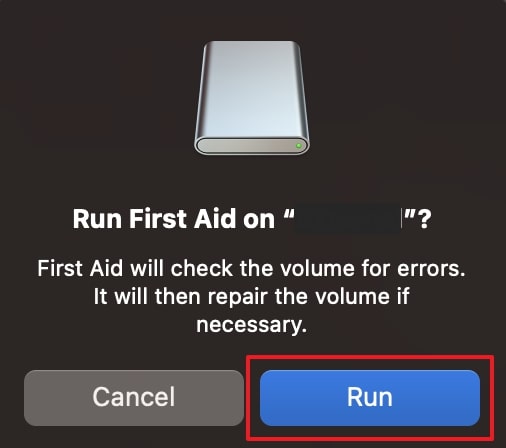
- Upon seeing a prompt, press "Run" to begin scanning and repairing the disk.
Solution 6. Run Apple Diagnostics to Identify Hardware Issues
Apple Diagnostics tests MacBook hardware components like the battery and logic board. It identifies errors and provides codes to help users decide if repair is necessary. The tool runs without affecting personal files and isolates hardware issues that may affect the display. For a MacBook Pro orange screen, Apple Diagnostics can reveal faulty panels or graphics issues. Hence, adhere to the given guide to run this native tool on your device:
Instructions. Shut down your Mac, then press and hold the "Power" button until Loading Startup Options appears. Release the button, then hold "Command + D" to open Apple Diagnostics on Apple Silicon MacBooks. Select your language, connect to Wi-Fi if prompted, and wait for the results. For Intel MacBook Pro models, turn on your device and immediately press and hold the "D" key until Apple Diagnostics starts.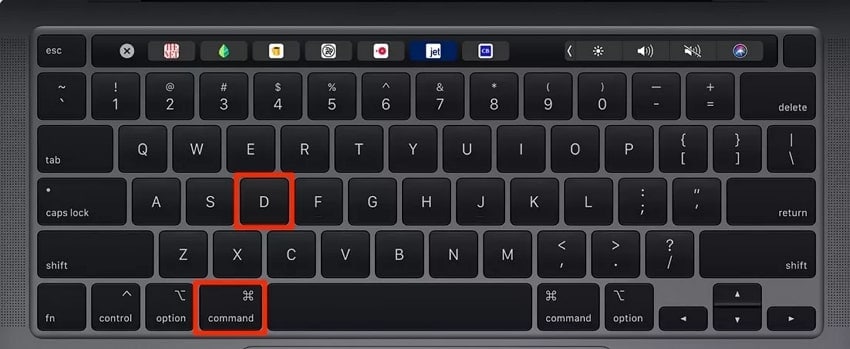
Solution 7. Boot into Recovery Mode for Advanced Fixes
Booting into Recovery Mode offers powerful tools to fix orange screen laptop display errors. It allows the use of Disk Utility and Terminal to fix system issues. This mode helps to address deep software problems that a normal startup cannot resolve on your device. Plus, users can even reinstall macOS without risking personal data stored on the Mac. Thus, go through the given steps to boot into safe mode to reinstall macOS:
- For Apple silicon MacBooks, hold the "Power" button until Loading Startup Options appears, choose "Options," and click "Continue." For Intel MacBook Pro models, turn on the device and immediately press "Command + R" until the Apple logo appears. Enter the administrator passcode, select "Reinstall macOS," and click "Continue."
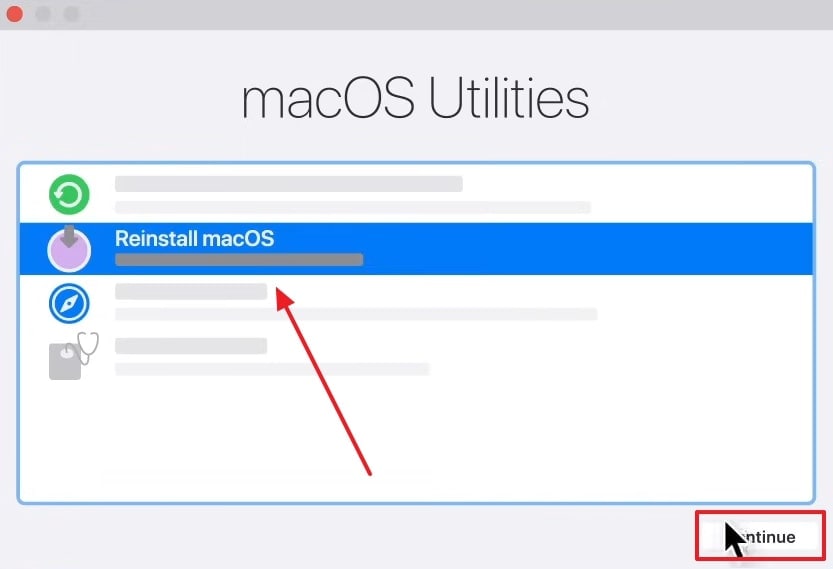
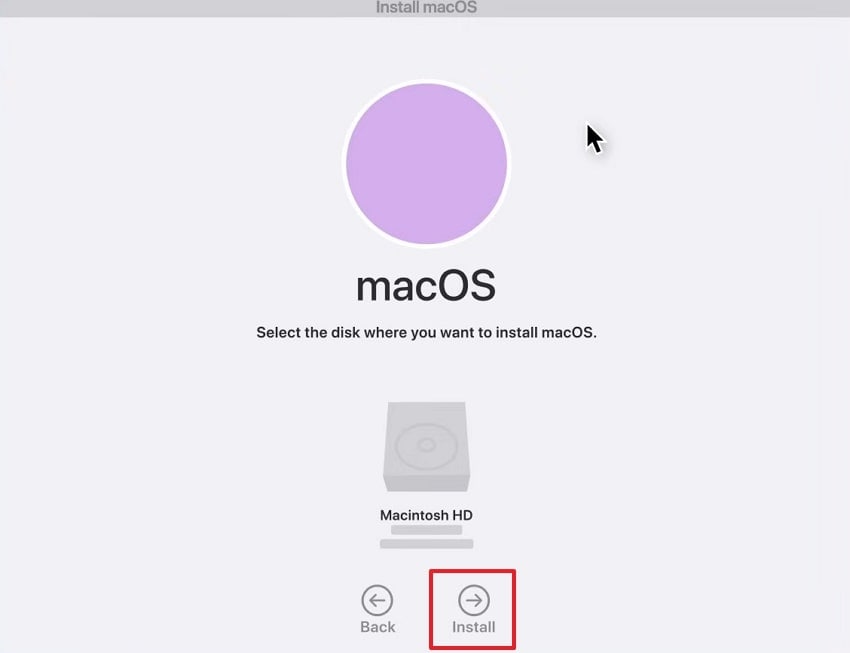
- Here, go through the on-screen instructions until you select the required macOS disk and click "Install." It will then start reinstalling macOS on your device through Recovery Mode.
Solution 8. Restore from Time Machine Backup
You can also restore your device from a Time Machine backup to fix the orange screen PC. This feature returns the entire system to a working state from a previous backup. It replaces corrupted files and settings while keeping your personal data safe. Moreover, Time Machine provides selective recovery options for specific dates or folders. Hence, review the steps below to restore your device from a backup:
- On Apple silicon models, press and hold the "Power" button until the startup options screen appears, then select "Options" and continue to Recovery. On Intel MacBook Pro devices, power on the Mac and immediately press "Command + R" until the Apple logo shows. Enter your passcode, choose "Restore From Time Machine Backup," and tap "Continue."
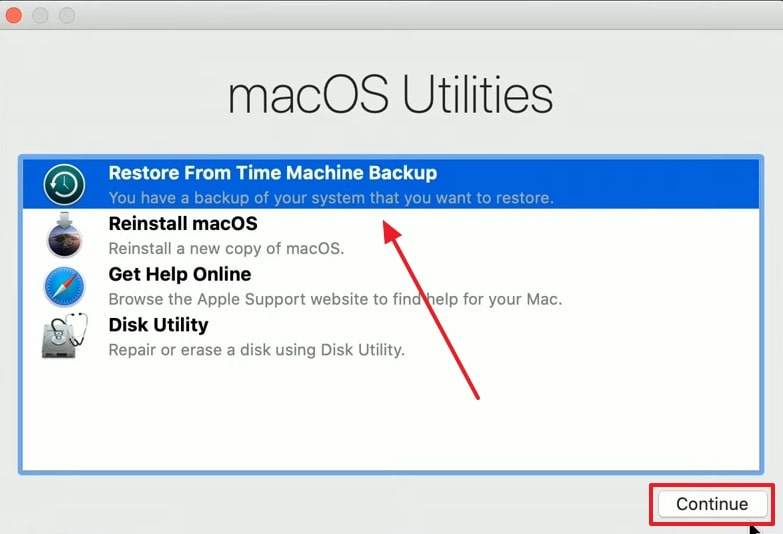
- On the following prompt, opt for the "Continue" option.

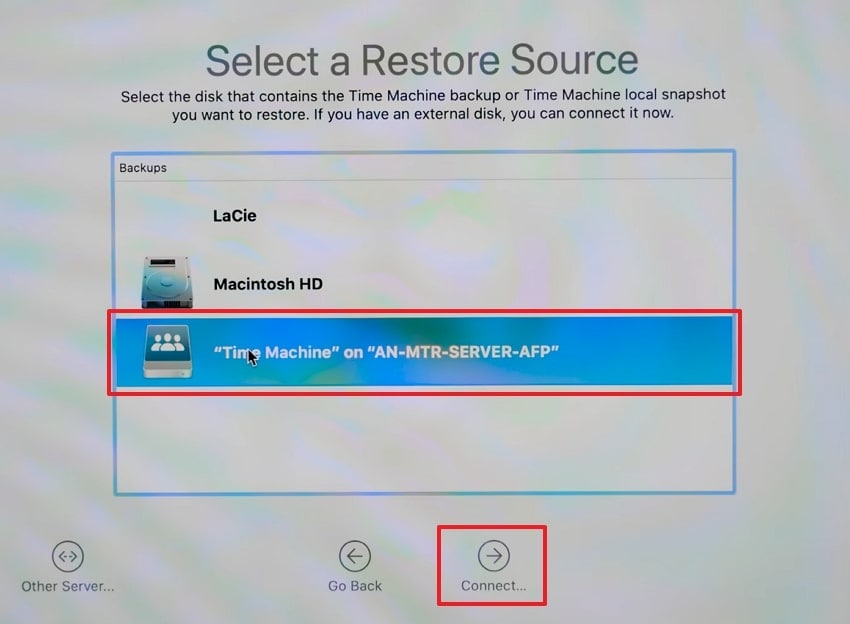
- Select your "Time Machine" disk to click "Connect…" and adhere to the displayed guide. Next, pick the backup date you want and click "Continue" to initiate restoration.
Part 4. Preventive Measures to Avoid Future Orange Screen Errors
Preventive steps can help users avoid future display issues and costly repairs. So, following proper care tips reduces the chances of encountering the orange screen of death:
- Avoid Configuration Corruption: Do not interrupt macOS updates or force shutdowns during system changes. Interrupted updates can corrupt display services and trigger orange screen errors.
- Control System Load: Keep your MacBook free from excessive background processes and outdated drivers. Heavy system load can destabilize graphics services and cause abnormal screen tints.
- Manage Color Profiles: Avoid installing untrusted ICC color profiles or third-party display tools. Damaged profiles can apply incorrect color matrices and produce orange overlays.
- Update Software: Install macOS updates promptly to fix known bugs. Regular patches improve stability and reduce OSOD risk over time.
- Check Peripherals: Disconnect unused external devices and avoid faulty adapters. Incompatible accessories can interfere with graphics drivers and trigger temporary display color issues.
Pro Tip. Safeguard and Recover Files with Recoverit During OSOD Fixes
During OSOD fixes, your files face a high risk of permanent loss from system instability. To address and recover those files, Recoverit stands out as a tool to retrieve data from your orange screen PC. This advanced program can recover 1000+ file types, including photos and documents. It even supports macOS 10.13 through 26, along with M1 to M5 chips for broad device compatibility.
With average scan times under 5 minutes, the program also provides a dedicated 99.5% recovery rate. Before recovering, its AI Smart Recognition detects devices for tailored recovery plans. Once recovered, users can preview recoverable files before saving them to prevent duplication. Plus, the tool works with more than 1 million devices, from cameras to external drives.
Key Features
- RAID Recovery: Restores data from RAID arrays, including RAID 0 and 10 configurations.
- Time Machine: Works with Time Machine backups for selective recovery of files and folders.
- AI Health: Monitors devices with AI and S.M.A.R.T., predicting potential failures.
Guide to Recover Files with Recoverit During OSOD Fixes
Adhere to the given tutorial to retrieve your lost files via this dedicated Mac data recovery tool:
- Select the Desired Scan Location
Access the "Hard Drives and Locations" tab in Recoverit and choose the drive where your file was lost during the OSOD fixes.
- Choose the Files to Recover
Upon finishing the scan, browse the results to select your preferred files and click "Recover."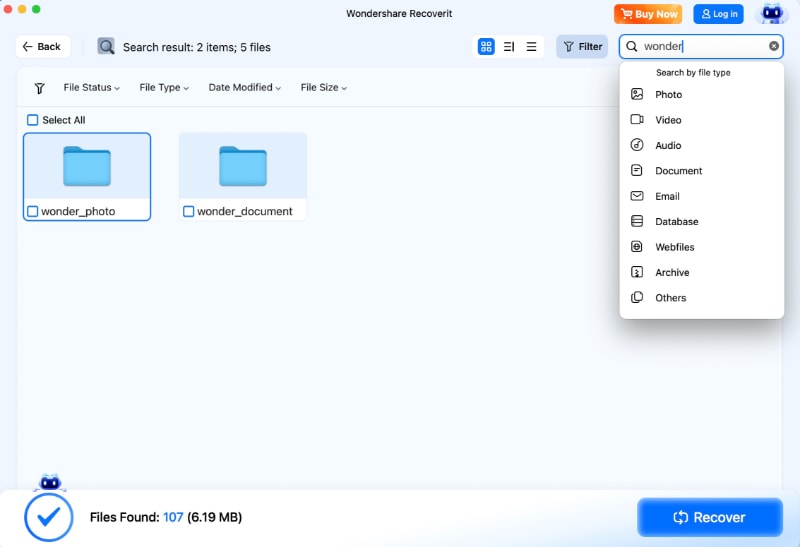
- Export Your Recovered Files
Here, check the recovered files and click the "Recover" button again to save them on your Mac.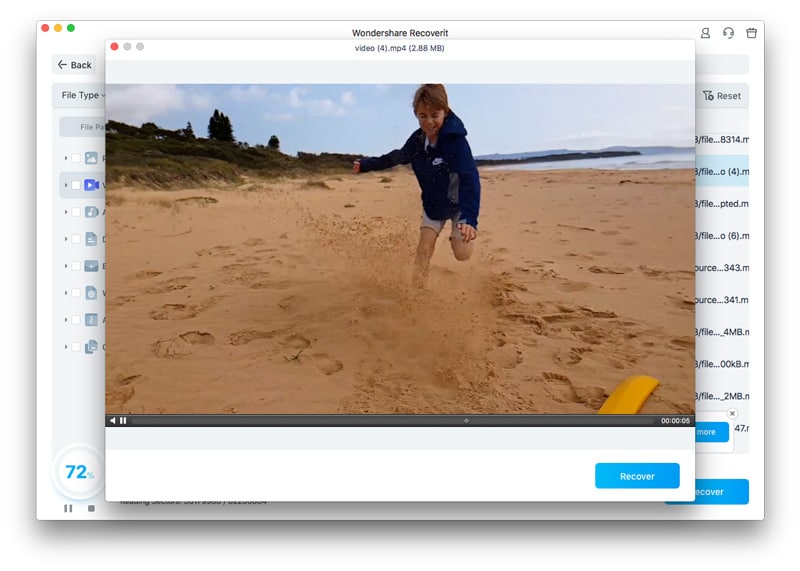
Conclusion
In summary, facing a MacBook Pro orange screen can disrupt work and create frustration. Following the 8 solutions helps fix display issues safely and restore standard colors. Moreover, preventive measures reduce the chances of future orange tints or pixel problems. Apart from that, many users notice data loss while fixing the OSOD issue. At this point, you should use Recoverit to retrieve 1000+ data types effortlessly.
FAQ
1. What triggers the MacBook Pro orange screen?
Many times, hardware faults and heat exposure on the screen cause this issue. Loose GPU connectors or failing LCD layers may create persistent orange tints on the display. Besides, software conflicts sometimes worsen color output but are less common than physical damage.2. How long does it take to fix an orange screen laptop issue?
Minor software solutions like updates or safe mode restart usually take a few hours. Yet, hardware repairs or component replacements may extend the process to several hours or days. So, preparing backups beforehand helps prevent file loss during prolonged repair procedures.3. Can I recover files lost during OSOD fixes?
Yes, Recoverit retrieves files even after crashes or system errors occur. It restores over 1000 file types from external drives and internal storage safely. Plus, AI Smart Recognition ensures personalized recovery strategies for every connected storage device.


