Feb 05, 2026 • Filed to: Windows Computer Solutions • Proven solutions
The cache memory in our system can sometimes give away a lot of details about us. Also, it can consume a significant amount of our system's RAM and affect its processing as well. Therefore, users are always recommended to clear memory cache regularly. If you are using a Windows 7 system and would like to clear cache memory on it, then you have come to the right place. In this post, we will let you know how to clear memory cache in Windows 7 permanently without facing any trouble. Let's get it started!
Just like every other operating system, Windows 7 also accumulates your most frequently or recently used data in its cache. This data can sometimes get accumulated and end up taking a lot of space on your system. It can even affect the processing speed of your system as well by occupying a large chunk of its RAM. Therefore, it is highly recommended to clear memory cache in Windows 7.
While you can always clear cache memory using the Windows native interface, it won't give you the desired results. This data can later be recovered by someone. If you don't want to compromise your privacy, then we recommend taking the assistance of a third-party tool to clear memory cache permanently. We have discussed both of these options in this guide.

If you would like to know how to clear cache and cookies in Safari on Windows, please refer to this guide: how to clear cache and cookies in Safari.
Files on your computer can also be deleted completely. Check out the page to learn how to permanently delete files from Windows and Mac.
Part 1: How to Clear Memory Cache on Windows 7
To start with, you can simply take the assistance of the Windows 7 native interface to clear memory cache on your system. It is a freely available solution and won't consume a lot of time or effort as well. To clear cache memory in Windows 7, you can simply follow these steps:
1. Firstly, go to the desktop on your system and right-click anywhere you want. This will provide a list of various options.
2. Now, select the "New" option and choose to create a new shortcut.

3. The system will launch a wizard to create a shortcut. Firstly, it will ask you to provide the location of the item for which you wish to create a shortcut on the desktop.
4. Instead of clicking on the "Browse" button, you need to manually provide the location as "%windir%\system32\rundll32.exe advapi32.dll,ProcessIdleTasks".

5. You can simply copy and paste the location to make sure that you won't make any mistakes.
6. Click on the "Next" button and provide a name to the shortcut. For your convenience, you can give any relevant name to the shortcut.

7. Once the shortcut is created, you can double-click it to open it. It won't do anything evident to the system but will clear its cache automatically.
The best part about this shortcut is that you can use it anytime you want. Simply launch the shortcut and it will clear the cache on your Windows system. Nevertheless, this won't be a permanent solution. Your Windows cache won't be deleted permanently from your system and can later be recovered. To know how to clear memory cache in Windows 7 forever, go through the next section.
Part 2: How to Completely Delete Windows Cache Files
Stellar BitRaser for the file is a highly efficient and reliable tool that can be used to get rid of any kind of content from your system permanently. It provides a one-click solution to clear the memory cache from your computer or any other system traces and files. It can also be used to wipe an entire disk, delete Internet activities, remove applications, and perform other various tasks. While doing so, it won't harm your system in any way and delete your data without any scope of further recovery. The following are some of its major features.
- The tool can be used to clear cache memory, Windows update, dumped files, and system traces of several kinds permanently.
- It can also delete files and folders of all sorts without any recovery scope.
- Besides that, BitRaser can also remove applications, Internet activities, logs, and more.
- It can also be used to perform a scheduled and automatic deletion of data.
- To provide an added assurance, it generates an erase certificate in the end as well.
- The tool features different kinds of sophisticated and advanced algorithms.
- It supports all the leading versions of Windows.
Step 1: Download Stellar BitRaser for the file on your Windows 7 computer and launch it.
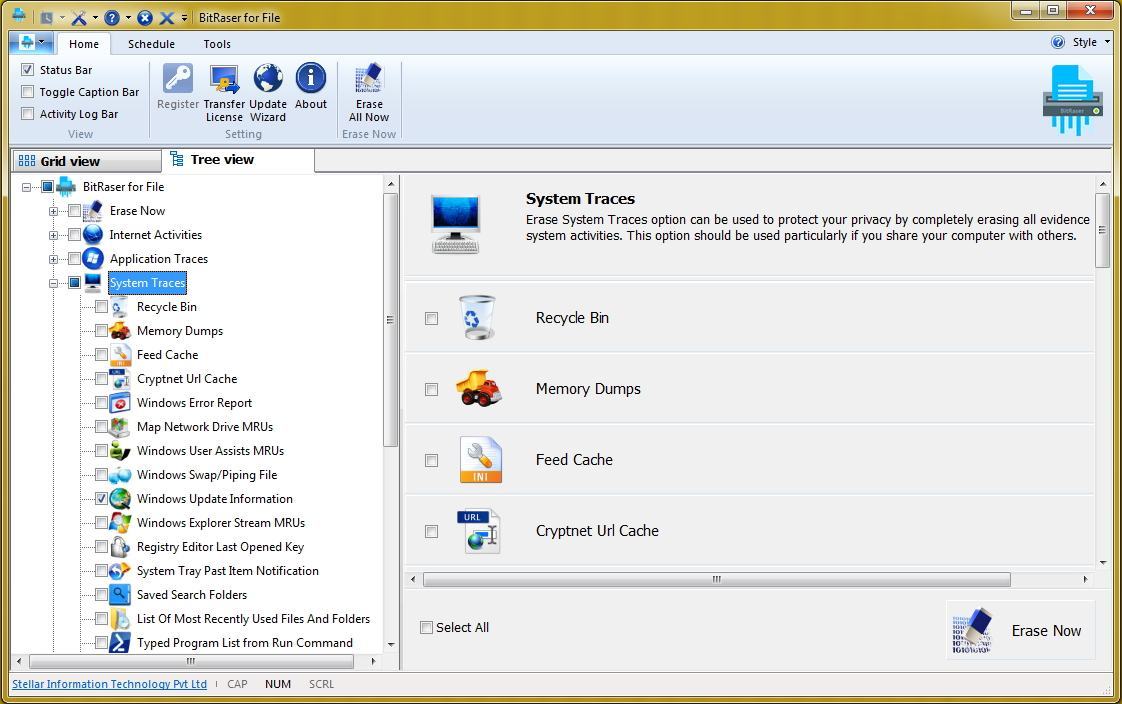
Step 2: Click on the "System Traces" option to clear cache memory or any other kind of system data.

Step 3: This will provide an in-depth list of various system traces. To clear memory cache, make appropriate selections and click on the "Erase Now" button.
Step 4: You might have to wait for a while as BitRaser will delete all the selected content from your system.
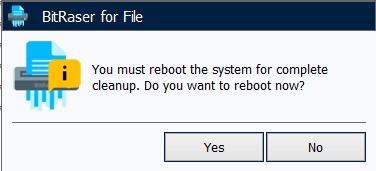
Step 5: Click on the "Yes" button to restart your system. This is a crucial step and it is recommended that you should restart your system, in the end, to complete the process successfully.

If you want, then you can follow the same steps to perform multiple passes. Even though your data would be deleted after a single pass, you can get added assurance with multiple (ideally three) passes.
By following these steps, you would be able to clear memory cache in Windows 7 without any trouble. Take the assistance of Windows 7 to clear cache memory from your system without any scope of recovery. It is a highly advanced tool and will certainly make your life a whole lot easier!
Computer Troubleshooting
- Win System Crash
- Crack Bios Password
- Fix Run Dll Errors
- Fix Taskbar Disappeared Error
- Fix BootMGR Image Corrupt
- MBR Errors Fixed
- Windows Tips
- How to Edit DLL Files
- How to Test Hard Drive Speed
- Bootcamp Windows 10 No Sound Issue
- Download iCloud on PC
- Difference between File Systems
- Fix Computer Overheat
- Computer Problems
- Best Bad Sector Repair Tools
- Audio Not Working in Windows 10
- Fix Windows 10/11 Error Code 0xc000014c
- Fix Windows 10 Error Code 0xc0000034
- SMART Status Bad Error
- Fix Grub Loading Error
- Remove Admin Password
- Blue Screen Errors

 ChatGPT
 Perplexity
 Google AI Mode
 Grok
Grok


David Darlington
staff Editor