

 TL;DR:
You can recover unsaved Word documents by reopening the application to trigger the Document Recovery pane, or by manually locating .asd backup files hidden in the default C:\Users\[YourUsername]\AppData\Local\Microsoft\Office\UnsavedFiles directory for Windows or ~/Library/Containers/com.microsoft.Word/Data/Library/Preferences/AutoRecovery for Mac.
● Microsoft 365's AutoSave continuously saves documents to cloud storage like OneDrive, whereas Auto-Recover creates local .asd temporary files every 5 to 10 minutes specifically to recover data after an unexpected application or system shutdown.
● If the automatic recovery pane does not appear upon rebooting, manually retrieve the file by navigating to File, selecting Info, clicking Manage Document, and choosing Recover Unsaved Documents.
● To locate older or hidden temporary backups directly through your operating system, you must first enable the Hidden Items view in File Explorer before searching for the .asd file extension.
Ask AI for a summary
 ChatGPT
 Perplexity
 Gemini
 Claude
 Grok
Grok
The advanced AutoSave feature plays an essential role in preventing data loss by automatically storing versions of your document. When enabled, the file is automatically saved whether it is on the local drive or connected to cloud storage.
However, people still find difficulty in finding the exact word autosave location. So, in this article, we have narrowed down all the efficient methods that you can easily consider using. So, if you are also the one who is facing this issue, then read the article to the end.
Try Recoverit to Perform Word Document Recovery
 Security Verified. 3,591,664 people have downloaded it.
In this article

Part 1. Understanding Word AutoSave Location: Where to Find Autosaved Word Documents
Word's AutoSave location is where Microsoft Word stores temporary backups of your documents. These auto-saved file savings are set on specific intervals to protect your content from accidental loss due to crashes. Furthermore, it is a plus point for those who normally forget to save their documents and then have to do double work of rewriting them.
Difference Between AutoSave and Auto-Recover
These 2 terms may sound familiar due to which people normally get confused between them. However, they are both related to each other but offer different features. So, before you explore the word auto recovery location, have a look at this quick comparison table:
| Features | AutoSave | Auto-Recover |
|---|---|---|
| Function | Real-time, continuous saving | Periodic backups for crash recovery |
| Storage | Cloud only (OneDrive, SharePoint) | Local or cloud (temporary files) |
| Frequency | Instantly, as you work | Every 5–10 minutes (default interval) |
| Requirements | Microsoft 365 and cloud location | All Word versions |
| Purpose | Editing, collaboration, version history | Recover the document after an unexpected shutdown |
| Access | Shown in the document's title bar/cloud | Via the Document Recovery pane after a crash |
Part 2. Default Word AutoSave Location: Where to Find Autosaved Word Documents
Now, let's explore the typical pathways for both Windows and Mac where Word stores autosaved or Auto-Recovered files in these locations:
| Operating Systems | Type | Default Locations |
|---|---|---|
| Windows | Recent Versions | C:\Users$$YourUsername] \AppData\Local\Microsoft\Office\UnsavedFiles |
| Older Versions | C:\Users$$YourUsername] \AppData\Roaming\Microsoft\Word | |
| Mac | Recent Versions | ~/Library/Containers/com.microsoft.Word/Data/Library/Preferences/AutoRecovery |
| Older Versions | ~/Library/Application Support/Microsoft/Office/OfficeVersion/AutoRecovery |
How to Check or Change AutoSave Folder in Windows
Before you start customizing Word's backup, here’s how to quickly check or change the word auto recovery location on your Windows system:
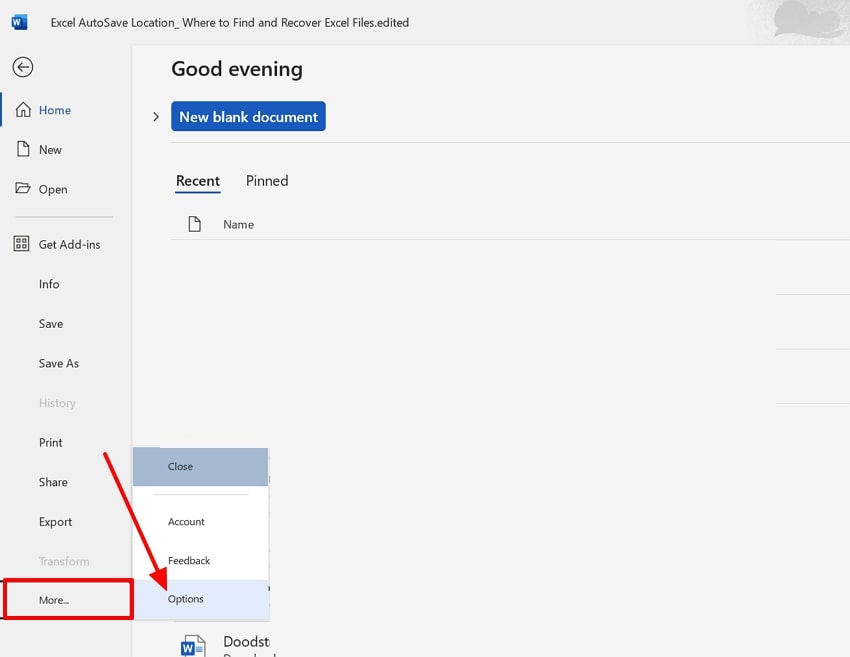
- Open the Word app and click on the "File" menu to access its further setting options.

- Here, click on the “More” option at the bottom of the interface and hit the "Options" option from the pop-up.
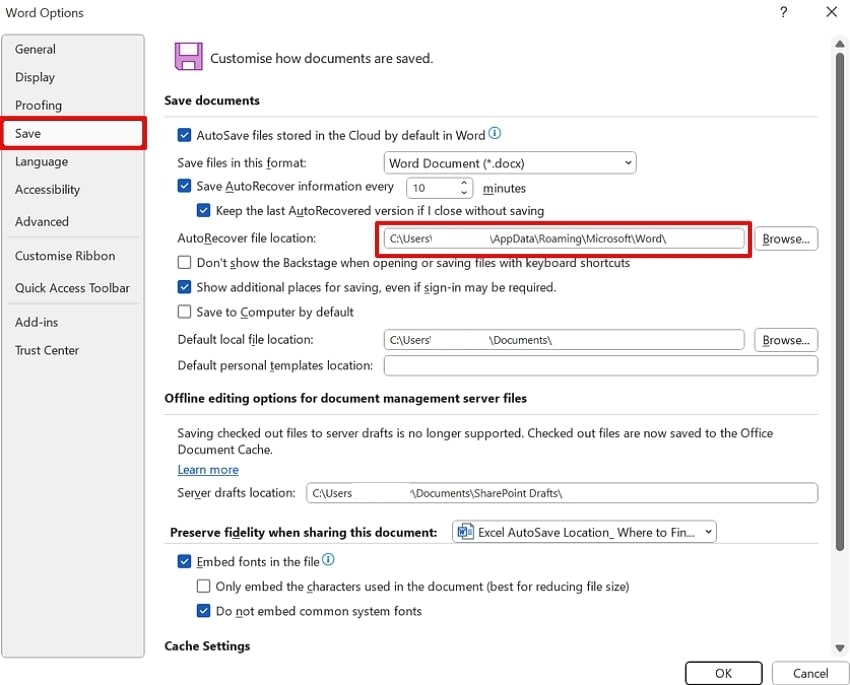
- Now, choose the "Save" option from the left tab and select the desired auto save location within the "Autosave File Location" bar.
Guide to Check or Change AutoSave Folder in Mac
Once you're familiar with the Windows process, here’s how to check or change the autosave location Word Mac for smoother file recovery:
- Initiate by clicking on the Word menu and selecting the “Preferences” option from the pop-up menu that appears.
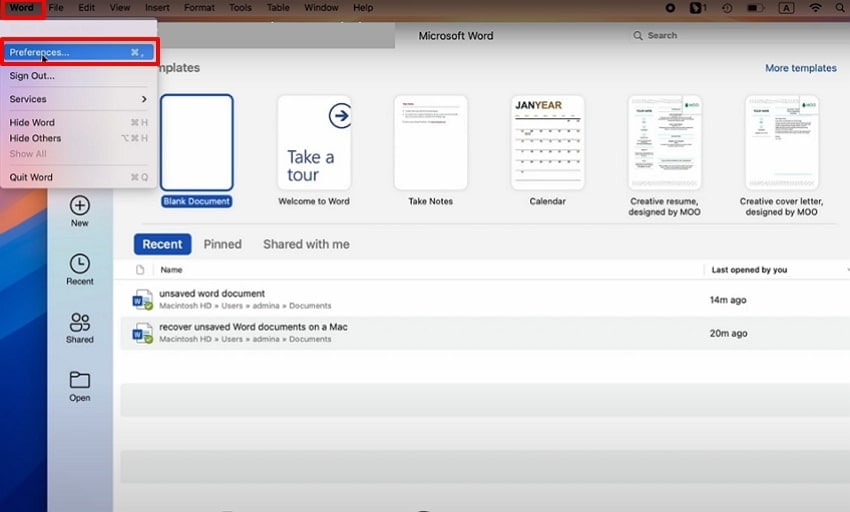
- From the “Word Preferences” interface, hit the "Save" option within the "Output and Sharing" tab.
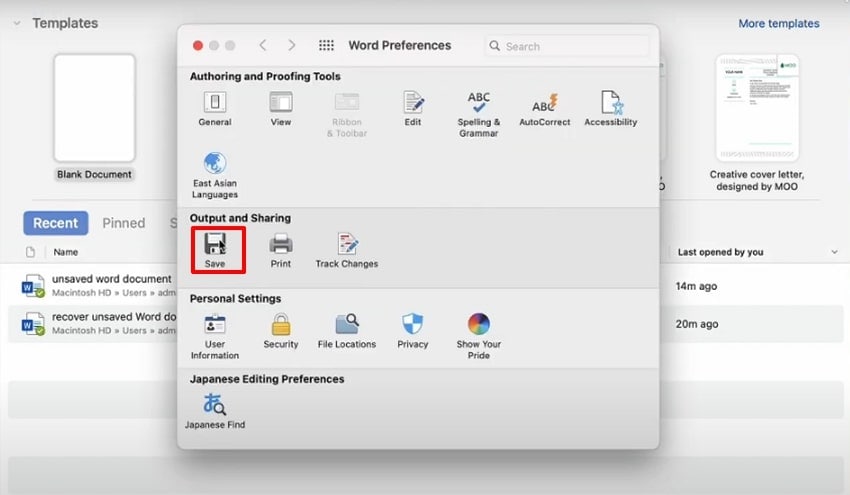
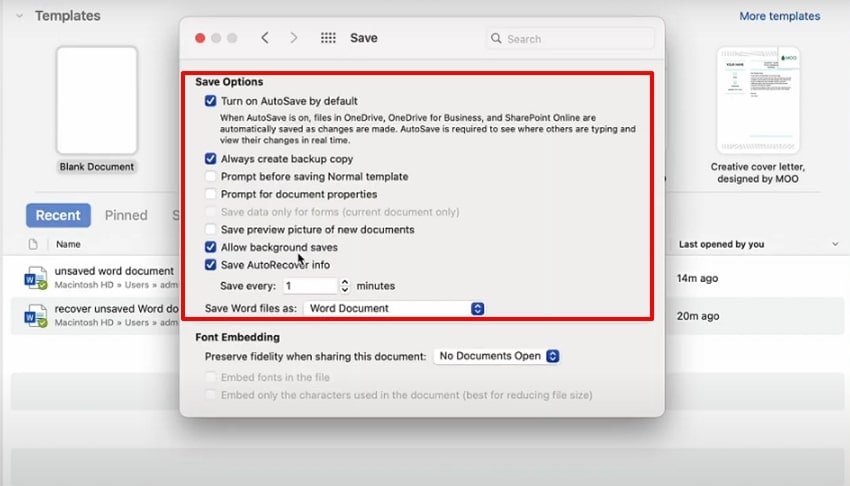
- Here, choose the desired auto-save file setting, including the target saving folder for a smoother workflow.
Part 3. How to Recover Word Documents from AutoSave Location - 5 Ways
To know Where to find autosaved Word documents, let’s explore the five most effective methods to recover them quickly:
1. Use Word’s “Recover Unsaved Documents” Feature
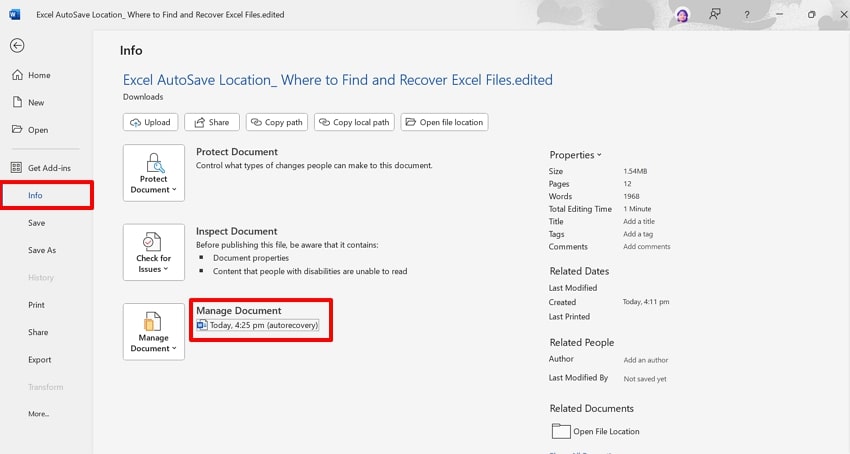
If you lost your Word file due to any uncertain reason, start by checking the auto-recover files within MS Word. This method lets you recover files that you haven't manually saved, often saving the latest changes. It instantly adds the data into Word's automatic recovery backup to ensure that even the temporary files get saved. Being a straightforward method, it does not require any technical skills, so let's explore its guide:
Instructions. Begin by clicking the “File” menu in the top-left corner of the interface. Now, choose the “Info” option from the left tab and navigate to the “Manage Document” option. Here, click the Auto-recovery file if available, then save the document to avoid further loss.
2. Find the AutoSave/AutoRecover Location Manually
Sometimes MS Word doesn't show you recovered files in its apps, so you can consider searching for them in your File Explorer app. Within this method, users simply enable the hidden file option and search with the desired file path. This approach offers more direct control over recovery and can also help access older files. So, let's explore a stepwise guide of this method to know the MS Word autosave location:
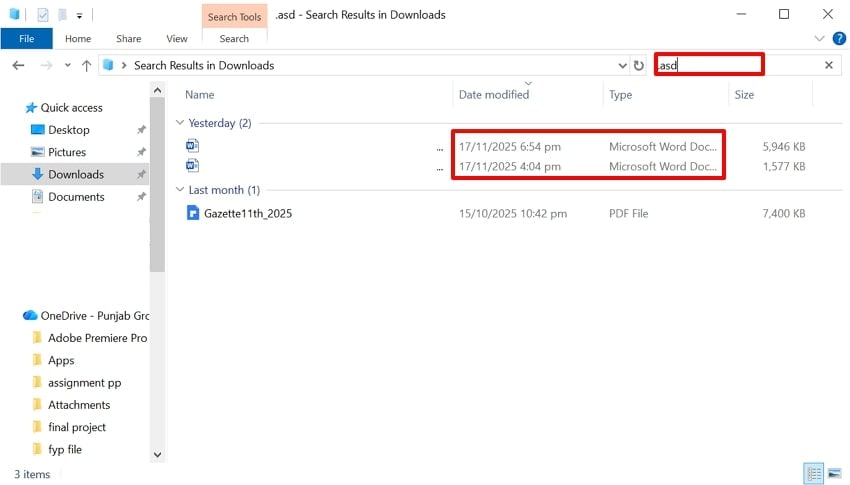
- Open the File Explorer app and click on the “View” menu at the top. Afterwards, enable the “Hidden Items” option to access the older files.
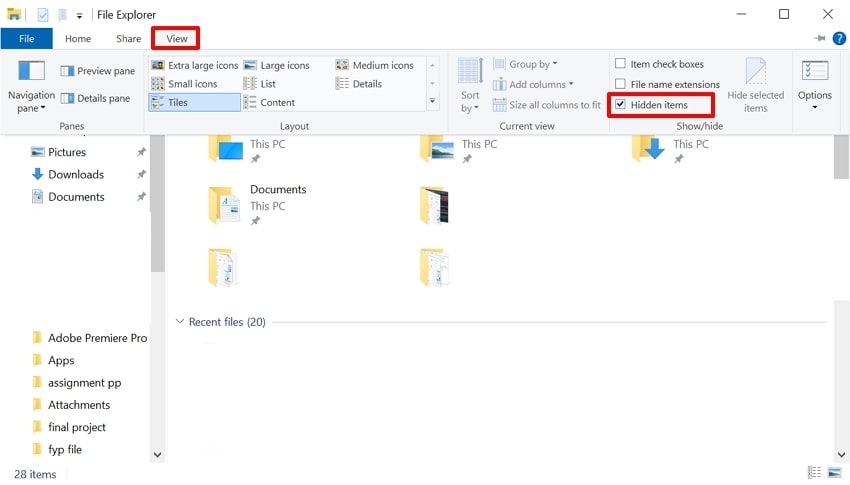
- Within the Downloads folder, write ".asd" in the search bar. It will instantly show all the auto-saved files from which you can choose based on the latest date modified.
3. Check the Document Recovery Pane
To find the word auto recovery location, this is one of the quickest methods; simply reopen the app after rebooting the PC. It provides multiple saved versions of the saved files to let you choose the suitable one. Furthermore, it also offers you with basic information like the time stamp and file status. The foremost part is the auto-recovery pane opens itself, so have a look at the following detailed stepwise guide:
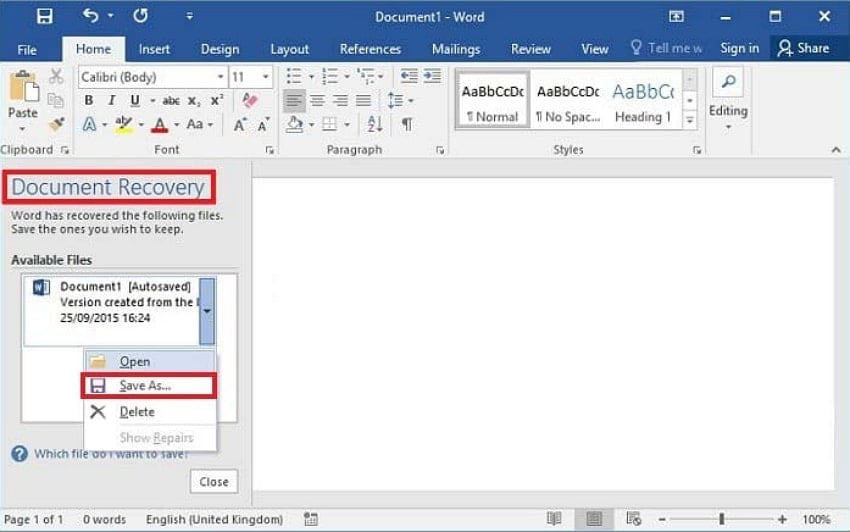
- After losing a file due to any unforeseen reason, instantly restart the Pc and again launch the Word app. Upon entering, it will instantly show all lost files available versions in the "Document Recovery" pane. Right-click on the desired file and hit the "Save as" button.
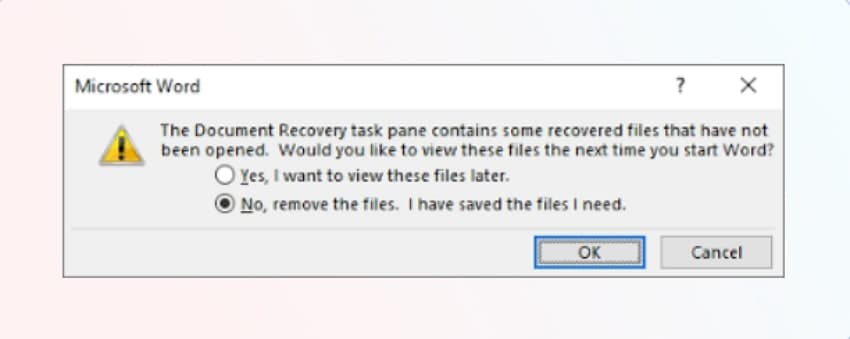
- Here, this pop-up will appear, enable the required option according to your needs, and hit the "OK" button.
4. Unsaved Files Location (Default Path)
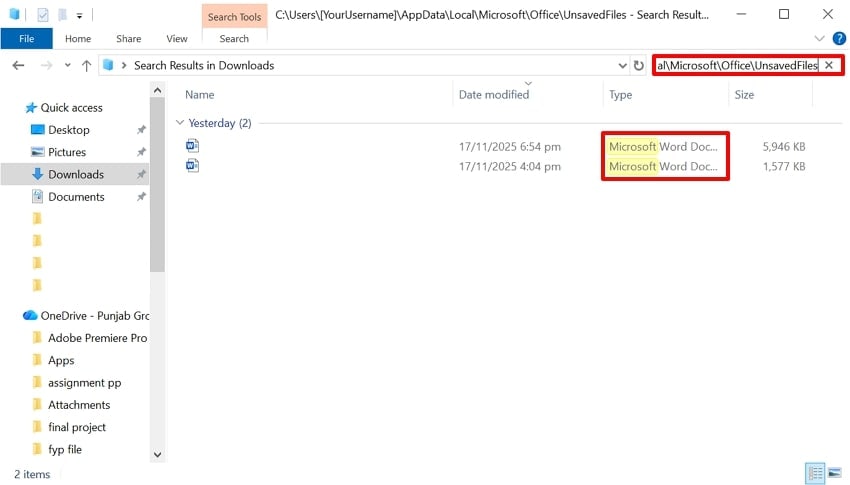
Users can opt for this method as it provides direct access to the folder where temporary and autosaved versions are stored. Sometimes Word documents didn't appear in the auto-recovery pane but were saved in the file explorer backup. Moreover, you have the edge of opening that recovered file into other editing apps. So, if you want to explore word autosave location, then follow the given detailed guide:
Instructions. Open the File Explorer app and enable the “Hidden File” option within the “View” menu. Now, go to the Downloads folder and write the file path “C:\Users\ [YourUsername] \AppData\Roaming\Microsoft\Word” within the search bar. It will instantly show you all hidden auto-saved file versions.
5. Enable and Adjust AutoSave/Auto-Recover Settings
Enabling and adjusting AutoSave and Auto-Recover settings in Word is vital because it ensures your work is saved regularly and automatically. Enabling frequent auto-saving ensures that every minor update is saved to avoid data loss. The primary feature of automatic backups lets you focus on writing rather than manually saving. So, let's explore the expert guide to know Where to find autosaved Word documents:
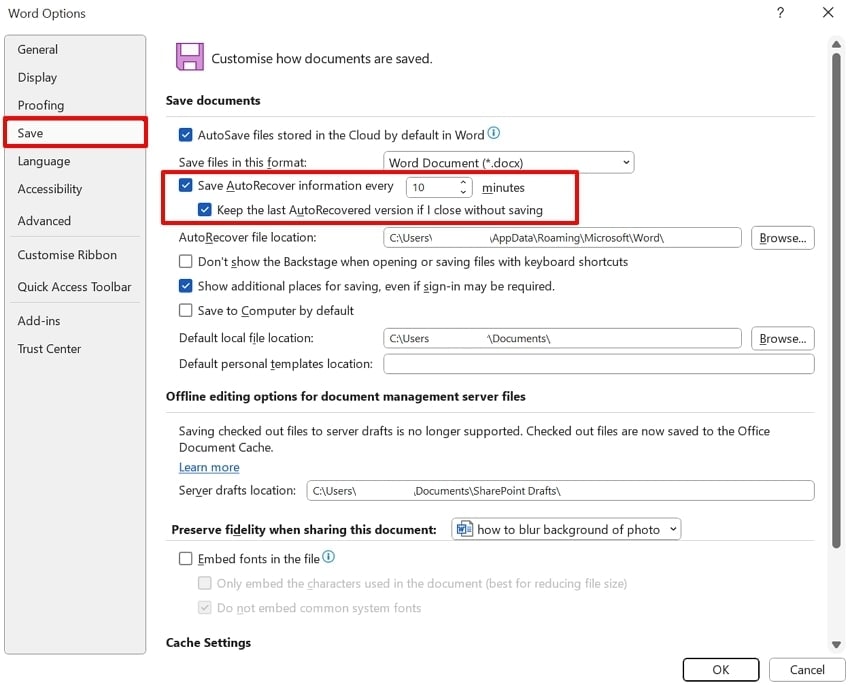
Instructions. Open the Word app and choose the “File” menu from the top menu bar. Afterwards, choose the More option, then select “Options”. After this, select the Save option and choose the desired minutes for auto-recovery.
Part 4. Word AutoSave Location: Where to Find Autosaved Word Documents Using Recovery Software
You might have a submission for your final thesis tomorrow, and you worked late into the night to complete it. However, suddenly your Word crashes, and your hard work is gone in an instant. At this hour, you can't even rewrite it, and you get frustrated. Instead of worrying, we recommend using Recoverit, which lets you recover your essential Word files instantly.
This tool lets you retrieve data by simply selecting the desired location and scanning mode. Furthermore, users can easily retrieve files in any format, including images, emails, documents, and videos. The foremost point is that you can even preview the recovered results to ensure they're complete and accurate. Users can access it from any operating system, including Windows, Linux, and Mac.
Key Features
- Scanning Mode: Wondershare Recoverit provides both Quick and Deep scanning modes to let you choose according to your desired data loss scenario.
- Supporting Devices: It provides wide support for both internal and external storage devices, including SD cards, DSLRs, Memory cards, and more.
- Batch Processing: Users can access the batch processing system to easily restore multiple files in a single go to save their extra time and manual work.
Detailed Guide to Use Recoverit For Recovering Word Files
If you are unable to find the word auto recovery location and want to restore the file using Recoverit, then read the following guide:
- Choose the Location for File Recovery
In the “File Recovery” section, select the “Hard Drives and Locations” tab. Afterwards, choose the desired location of the lost file within the “Quick Access” tab.

- Run the Scanning Process and Pinpoint the Search
Upon selecting a location, it will automatically start the scanning process with Quick Scanning mode. Here, you can also speed up the process by searching through “File Type” or “File Location.”

- Preview Before Saving the File
Once your files are recovered, you can preview the files before you press the “Recover” button to save them.

Conclusion
In summary, users can easily access various versions of autosaved files in the Microsoft Word app. In this article, we have provided 5 efficient DIY methods to find the word autosave location. However, if these method fails, we recommend using Recoverit, which lets you retrieve your essential data while ensuring high accuracy.
FAQ
1. Where does Word save autosaved files if documents are stored in the cloud?
If the auto-save feature is enabled, the file gets automatically saved in your OneDrive folder. You simply go to OneDrive and navigate to the Documents folder to access its autosaved files.2. Can the AutoSave location in Word be changed?
Absolutely, users can even change the word auto recovery location by accessing its “Save” settings in Word. Furthermore, you can customize auto-saving intervals to achieve more accurate backups with each new update.3. What file types does Word use for unsaved or autosaved documents?
Word saved or backup files are autosaved or saved as .asd (AutoRecover), .wbk (backup), and .tmp (temporary files). Moreover, it can also save with a tilde symbol before the word file name in the device folder.4. Does Word always autosave documents if AutoSave is enabled?
Yes, it automatically saves the file if auto-save is enabled. However, if you are unable to access, use Recoverit to recover all essential files by using different scanning modes.


