

From school reports to business proposals, Microsoft Word is the most used word processor worldwide. However, as simple as it may seem, small formatting errors like extra or blank pages can become your headache. While working on a lengthy and complex document, extra spaces or page break can bring unwanted pages. If that’s your professional document, eliminating such blank pages becomes crucial.
Meanwhile, you also have to consider the ideal layout, which could get disrupted if you don’t know exactly how to delete a blank page in Word. To resolve the conflict, read this guide which brings separate detailed guides for Mac and Windows users, as the process might slightly differ.
Try Recoverit to Perform Word Document Data Recovery
 Security Verified. 3,591,664 people have downloaded it.
In this article

Part 1. Why You Might See a Blank or Extra Page in Word?
Sometimes, you may find extra pages in your document, no matter on the top, middle, or bottom. Remember that they aren't errors but the result of invisible formatting elements. To learn potential reasons, navigate below before exploring how to remove blank pages in Word:
- Extra Content Forcing New Page: Often, invisible characters like empty paragraphs can lead to new page creation. Besides, if you hit the "Enter" key to adjust the layout, it would add blank lines and create extra pages.
- Table or Objects Pushing Content: Extra spacing after the last sentence and images extending beyond the page limit can create a blank page. Despite that, when you add large tables and charts that don't fit the current page, Word will treat it as needing space.
- Formatting Glitches: Usually, custom styles can include hidden spacing and push Word to add blank pages. In this regard, a heading with “Keep With Next” and other line spacing settings can push content to start a new page.
- Section & Page Breaks: The forgotten or misused page breaks and section breaks can lead one to learn how to delete extra pages in Word. It happens even with a single misplaced break that pushes content to a new page and leaves a blank one behind.
- Headers & Footers: They can also stretch your content, especially when they are too large or contain extra spacing. Moreover, blank pages come in a file when it has different headers/footers in sections and formatting isn't correctly adjusted.
Find out how to fix the issue and learn simple methods to recover corrupted Word files.

Part 2. How to Delete a Page in Word on Windows?
Understanding the reasons for a blank page's emergence might have laid a foundation for learning how to delete a blank page in Word. You can delete an extra page using Word’s native feature and your keyboard’s shortcut keys. In this regard, enabling paragraph markers or accessing the page navigation pane could greatly help. Anyhow, being a Windows system, immediately delve into the page deletion process demonstrated below.
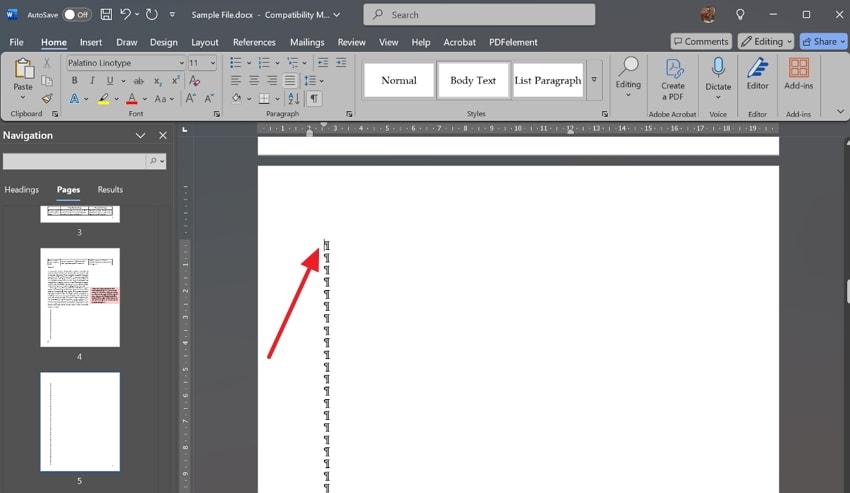
Step 1. Open the Word document, head to the targeted page, and click the "Paragraph Marks" icon at the top. You can press "Ctrl + Shift + 8" keys simultaneously to enable hidden formatting symbols.
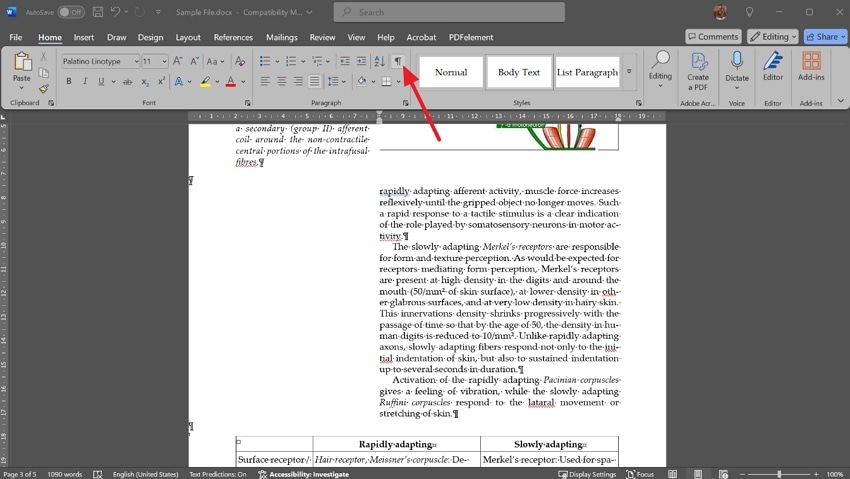
Step 2. Use the “Backspace” key from your keyboard to manually remove content until the page gets deleted.
Part 3. How to Delete a Page in Word on Mac?
While having a lengthy Word file with complex formatting, you must be hesitant to remove a page. It might be because you don't want to disturb formatting and lose anything. If so, know that deleting a page with content or without content on Mac is almost the same as on Windows. However, there is a slight difference in keys and layout of the screen; thus, there is a guide below:
Step 1. To tackle the "how can I delete a blank page in Word" query, launch the Word file on Mac. Now, press the "Command (⌘) + 8" keys to enable paragraph marks and reveal hidden formatting and icons.

Step 2. Finally, place the cursor at the end of the page to be deleted and use “Backspace” until it gets removed.
Part 4. How to Remove a Blank Page in the Middle of a Word Document?
Before submitting a document completely finalized, you might fear editing anything. It's quite normal, but what if the file got an unwanted blank page in the middle? In this scenario, you should enable Word's navigation pane feature to quickly locate it. For professional help, follow the guidance below showing how to delete extra pages in Word without impacting the file's layout:
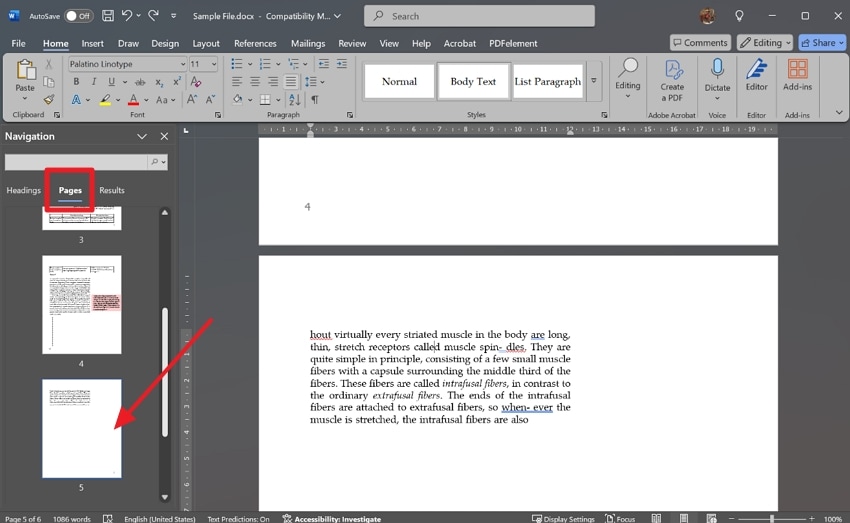
Step 1. From the top toolbar of the Word file, choose the "View" tab and check the "Navigation Pane" box in the "Show" section.
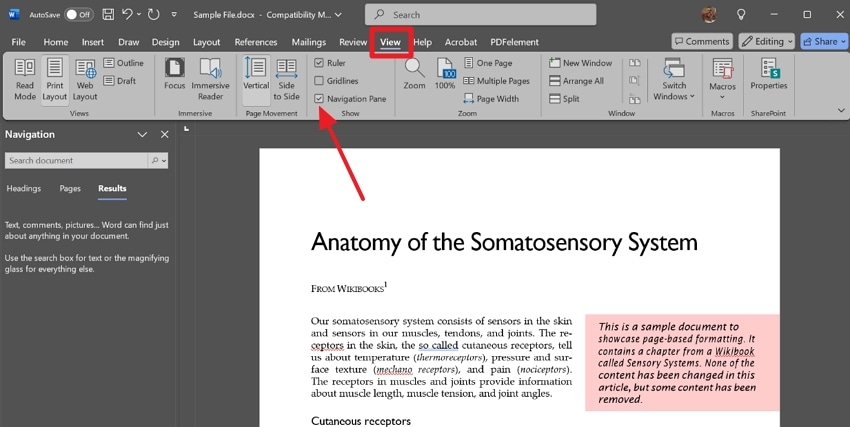
Step 2. Head to the left navigation pane, click the “Pages” option to scroll down and locate a blank page.
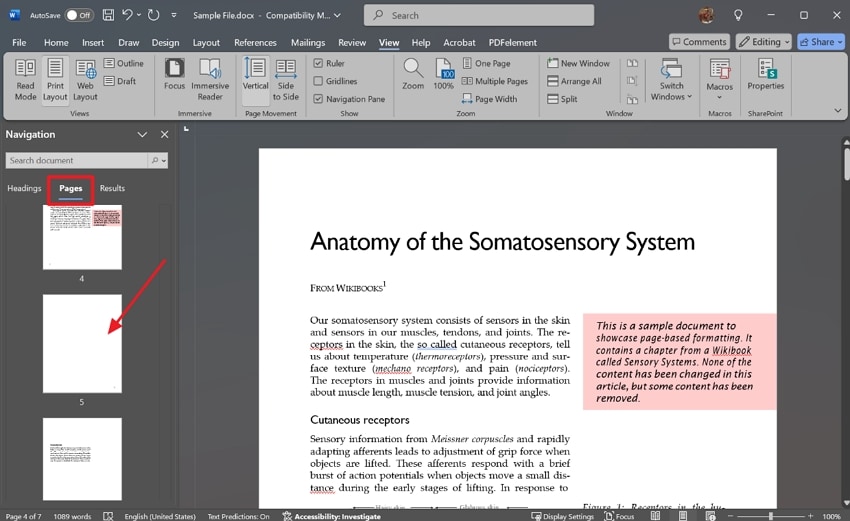
Step 3. Once you access the extra page, hit the "Ctrl + Shift + 8" keys together and reveal hidden formatting. Place the cursor at the top paragraph mark of the blank page and continue pressing "Delete" until the page vanishes.
Part 5. How to Remove a Specific Page in Word Using Keyboard Shortcuts?
If you are looking for the shortest way possible to remove a page, the “Find” feature of Word can help you. Unlike the manual way, you can't control the document formatting as it's an automatic approach. It is suitable for situations when you find the whole page unnecessary and wish to remove it in one go. Hence, when formatting isn't a root cause, learn how to remove blank pages in Word ahead:
Step 1. Enable the navigation pane by expanding the "Editing" list and choosing "Find" from it.
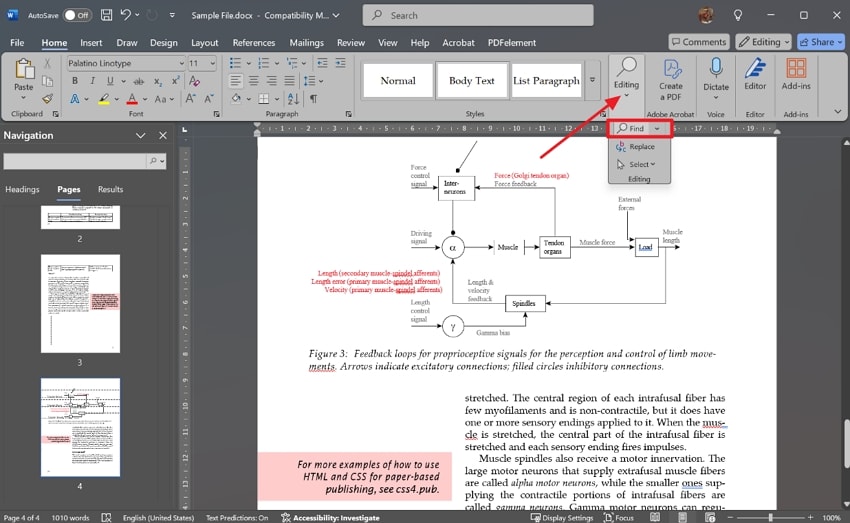
Step 2. As you get the "Page" navigation pane at the left, scroll down and click the specific page you intend to remove.
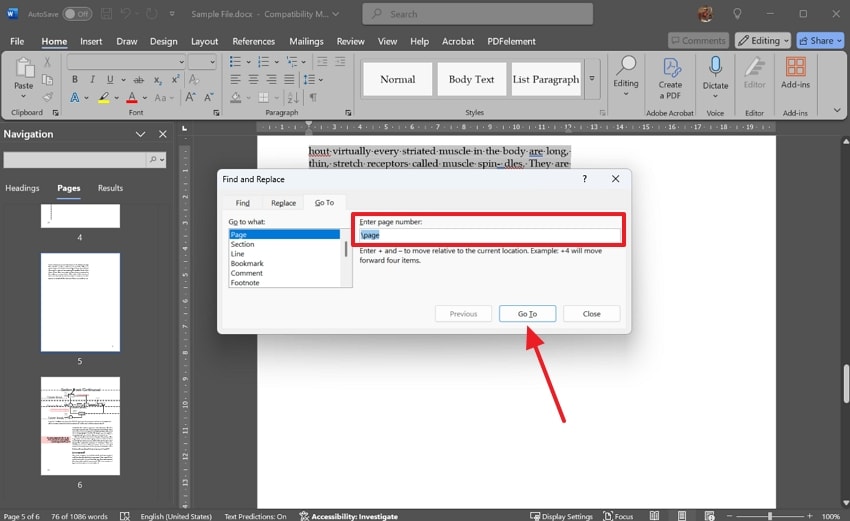
Step 3. Hit the "Ctrl + G" keys from your keyboard and get the "Find and Replace" dialogue box. In the text box of "Enter Page Number," type "\page" and press the "Go To" button. It will select the entire page content, and you need to press "Backspace" after closing the Find window.
Bonus Part. Recover Accidentally Deleted Word Documents Using Wondershare Recoverit
While learning how to delete extra pages in Word and experimenting with relevant approaches, it is quite normal to lose the file. However, the situation can turn frustrating when you don't have its backup, and it was a crucial one. In such a scenario, you are advised to get help from Recoverit, which is designed to retrieve accidentally lost files.
With over 99.5% success rate, the retrieval of your important Word file is guaranteed. Besides, it has an intuitive interface that anyone can easily adapt for recovery processings. No matter if you have a Windows or Mac, this industry-leading solution works on both with the same effectiveness. Notably, it lets you preview recovered files and examine retained layouts before you save them to your system.
Key Features
- Deep Scanning: Recoverit utilizes intelligent deep scanning technology to even retrieve hidden files. Meanwhile, it retains the original layout and formatting of Word files, ensuring nothing is lost.
- File Format Support: With over 1000 file type support, it can restore your accidentally deleted emails, photos, videos, and even their fragments. Also, it has a batch recovery feature, which means you get files retrieved all at once.
- Support for Storage Devices: It supports more than 2000 storage devices, meaning data can be retrieved from memory cards, Linux systems, and a lot more. What’s more, the tool guarantees your data security and keeps your data virus-free.
A Quick Guide: How to Retrieve Deleted Word Document Through Recoverit?
Hence, knowing “how can I delete a blank page in Word" isn't enough; you should also know the retrieval process of your deleted Word file. That's why, below is a quick guide with Recoverit to regain access to your accidentally lost file.
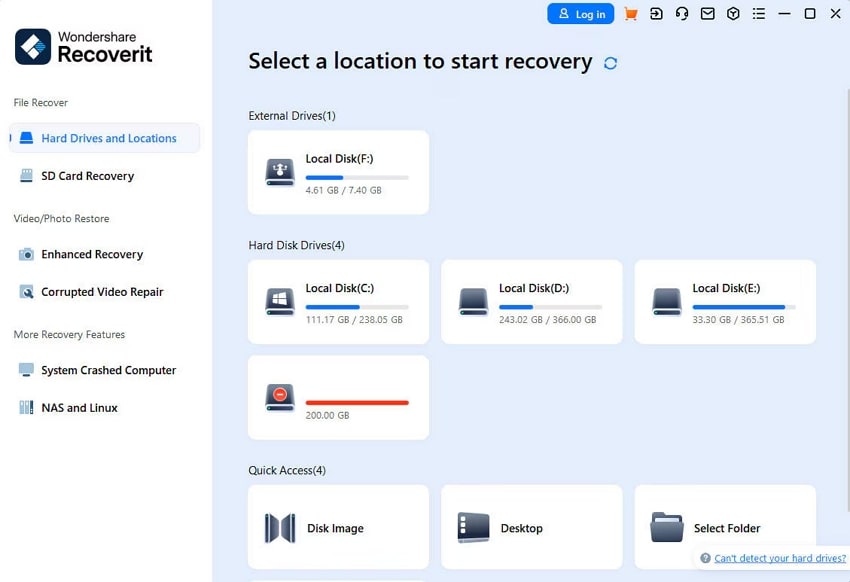
Step 1. Specify Location And Initiate Recovery
Get access to the “Hard Drives and Locations” screen using the left panel. There, locate the folder from where the file was lost, whether it's from the “Quick Access” folder or other disks.
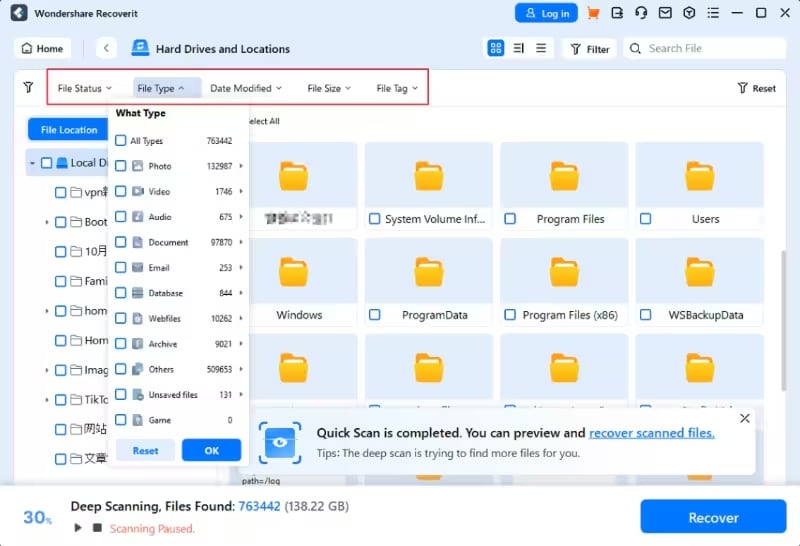
Step 2. Wait for Deep Scanning or Filter Search
After choosing a location, deep scanning will automatically begin, as seen from the bottom left. You can narrow down the search further with the top search bar or filters on Recoverit.
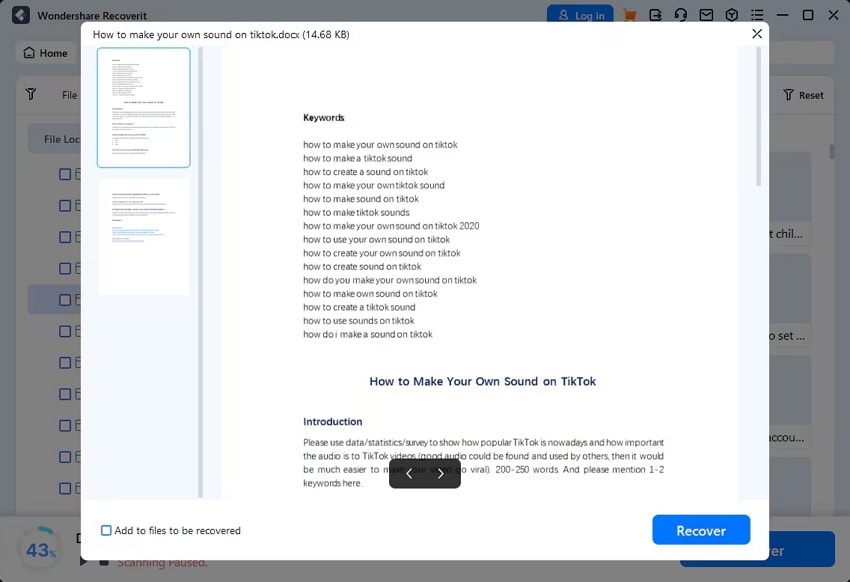
Step 3. Preview the Recovered File and Save it
In the end, double-click the file to get its preview and use the “Recover” button to export it.
Bonus Tip. Backup Your Word Files Automatically With OneDrive
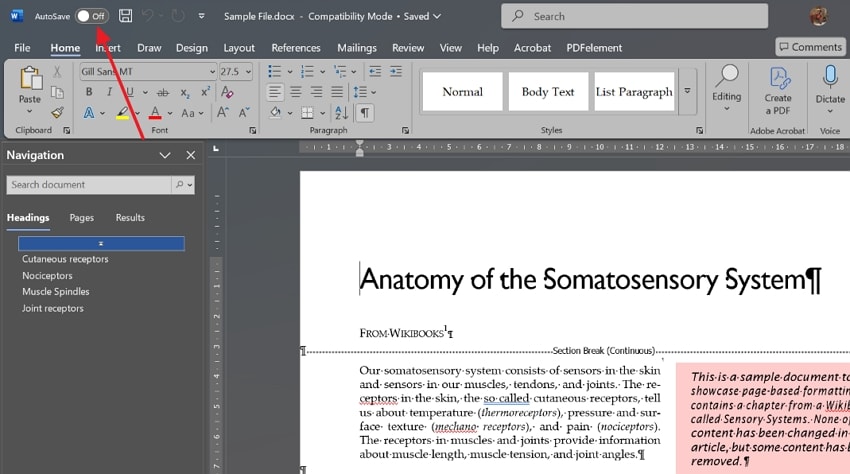
No doubt, the above process revealing how to recover deleted Word files with Recoverit is fruitful. However, you must know practical ways to protect your documents from unexpected loss. Thus, you should utilize OneDrive cloud storage service, which is already integrated with Word. All you need is to set up the OneDrive folder and enable its Auto-save feature on your system through the given instructions:
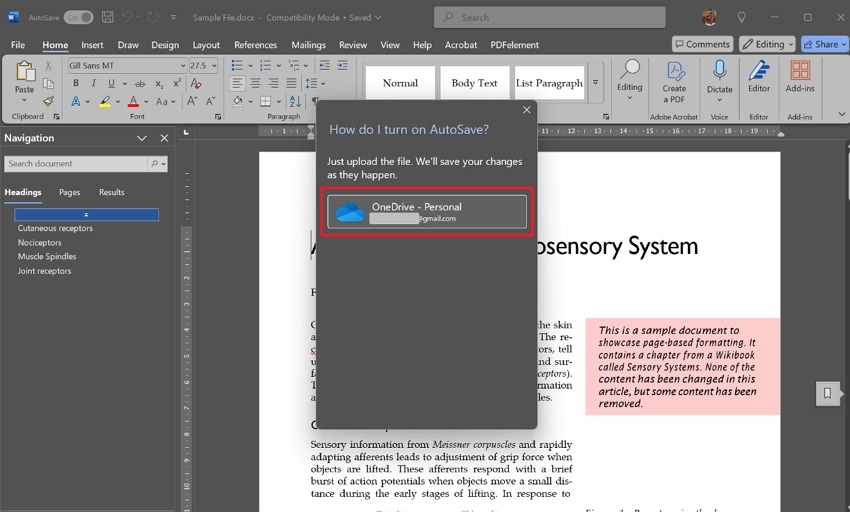
Step 1. Launch a Word file and toggle the “AutoSave” option at the top-left corner.
Step 2. Afterward, tap your OneDrive account from the next pop-up and wait for syncing.
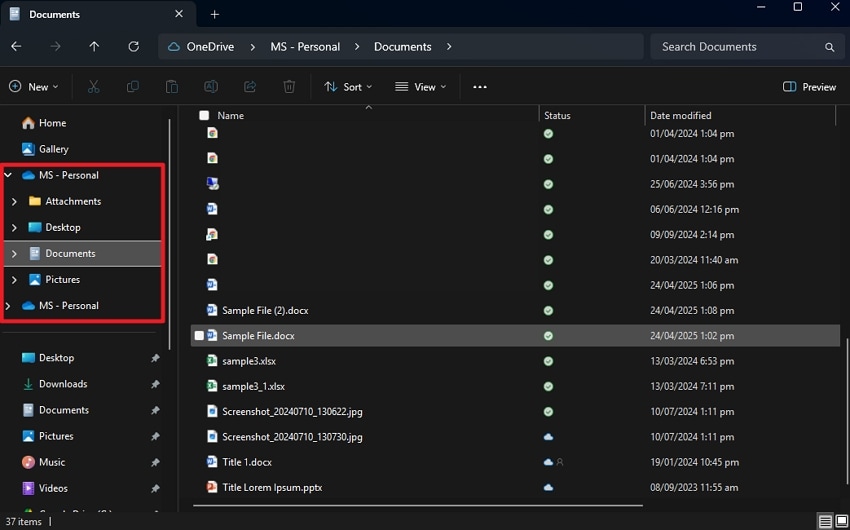
Step 3. You can locate the backed-up file by expanding the "OneDrive" folder icon in File Explorer and choosing the "Documents."
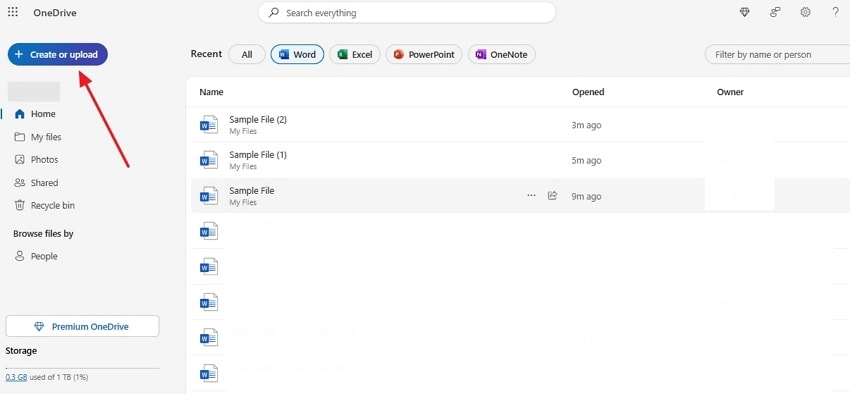
Step 4. One can use their OneDrive credentials and sign in on another device. They will find a synced and backed-up file in the "Home" section. Besides, users can manually log in to OneDrive on their PC and manually back up files using the "Create or Upload" button.
Conclusion
To wrap up, you can delete unwanted or blank pages from Word documents without impacting formatting. This guide elaborated on the easiest ways about how to delete a blank page in Word on Mac and Windows. While using any of them, if you mistakenly deleted your crucial file, use Recoverit and regain access. Yet, it's always suggested to use cloud storage services and create backup of documents.
FAQ
1. Are there any Word page remover free available online?
Yes, countless online tools can help you remove extra pages without using Word. For this purpose, Aspose Word Page Remover and GroupDocs Remove Word Pages are top of the list.2. What to do when a section break creates blank pages in Word?
To delete the section break, place your cursor after the section and access the “Page Setup” menu using the “Layout” tab. There, choose “Continuous” from the “Section Start” menu and click “OK” to apply changes.3. While deleting extra pages from my lengthy document, my system crashed. Can I still recover it?
You can restart Word and see if Word recovers an unsaved file, but if that won’t happen, use Recoverit. It can retrieve lost documents even after a sudden shutdown or system crash while preserving all data.
 ChatGPT
 Perplexity
 Google AI Mode
 Grok
Grok


