

 TL;DR:
You can upgrade specific Synology NAS RAID configurations without data loss, provided you follow supported upgrade paths and add new drives that are larger than the smallest existing disk in your storage pool.
● Changing an existing setup without erasing data is restricted to five specific paths: Basic/JBOD to RAID 1 or 5, RAID 1 to RAID 5, RAID 5 to RAID 6, and SHR to SHR-2.
● Creating a new RAID array or restoring a previous setup permanently deletes all existing data, and choosing the "Better performance" mode during creation disables SHR and SHR-2 options.
● Choose SHR if you plan to mix hard drives of different storage capacities, or select RAID 5 if you are exclusively deploying drives of identical sizes.
Ask AI for a summary
 ChatGPT
 Perplexity
 Gemini
 Claude
 Grok
Grok
Do you have a NAS with multiple hard drives? For your information, it is possible to switch storage pools' RAID configurations without erasing previously stored information. For example, on your Synology NAS, you could set up a RAID 1 storage pool and switch it to a RAID 5 pool later on if you add more drives. In this step-by-step guide, I'll show you how to do Synology NAS RAID setup.
In this article
What Does RAID Setup Mean
RAID, also known as the Redundant Array of Independent Disks, is a technology that combines multiple independent hard disks to function as a unit. This technology provides benefits such as increased data reliability, improved input/output performance, and increased failure tolerance through various RAID types.
When multiple disks are linked together using RAID technology, the result is known as a RAID Array or RAID Volume. Please remember that a RAID Volume is not a replacement for data backup, nor does it protect against viruses, malicious users, or accidental data loss.
Do you already know what RAID configuration you want? Keep reading.
Different RAID Setup Options for Synology NAS
Setting up or changing a RAID configuration is simple; all you have to do is figure out how it works. In this article, we will look at three different options explained below.
Option 1. Create a New Synology RAID Setup
If you haven't already set up a Synology RAID, you can use any RAID configuration you want. Remember that each RAID setup option requires a specific number of drives. See the full context below:
| From | To | Minimum number of drives |
| No RAID | Basic or JBOD | 1 |
| No RAID | Raid 0 or 1 | 2 |
| No RAID | Synology SHR | 2 |
| No RAID | Raid 5 | 3 |
| No RAID | Raid 6 or 10 | 4 |
| No RAID | Synology SHR-2 | 4 |
Adhere to the following steps if you want to create a new Synology RAID setup.
Go to the HDD/SSD page and check that each drive's status is Normal or Not Initialized.
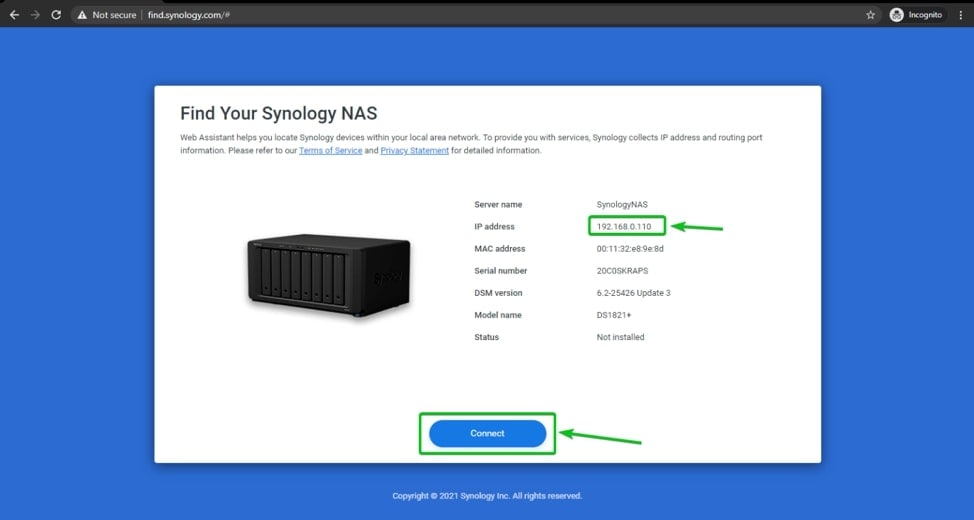
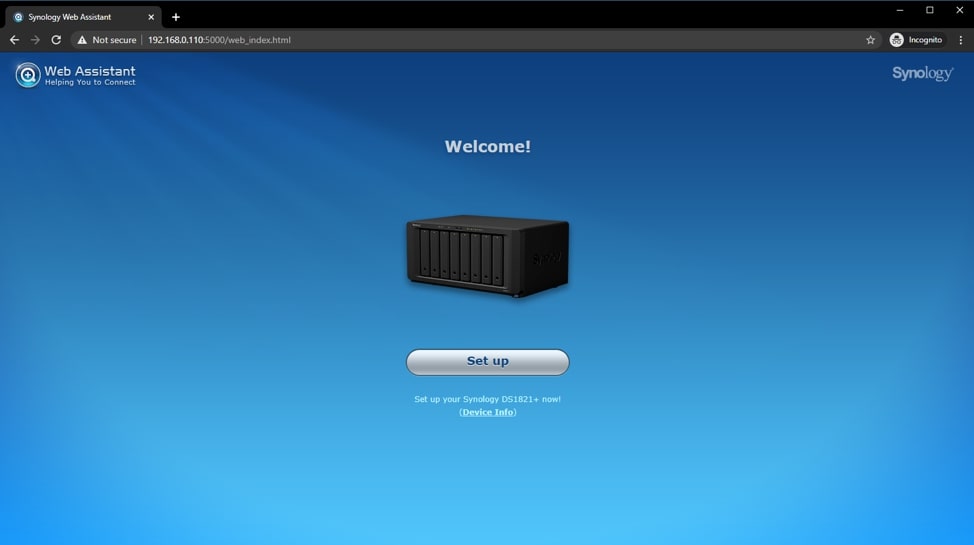
Step1. To access and find your NAS, navigate to http://find.synology.com in a web browser. Then, click Connect.
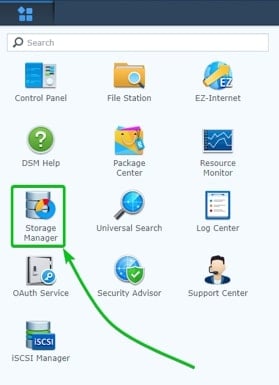
Step2. Select Storage Manager from the main menu in the upper left corner.
Step3. Select Storage pool from the menu on the left side of this screen, then click Create.

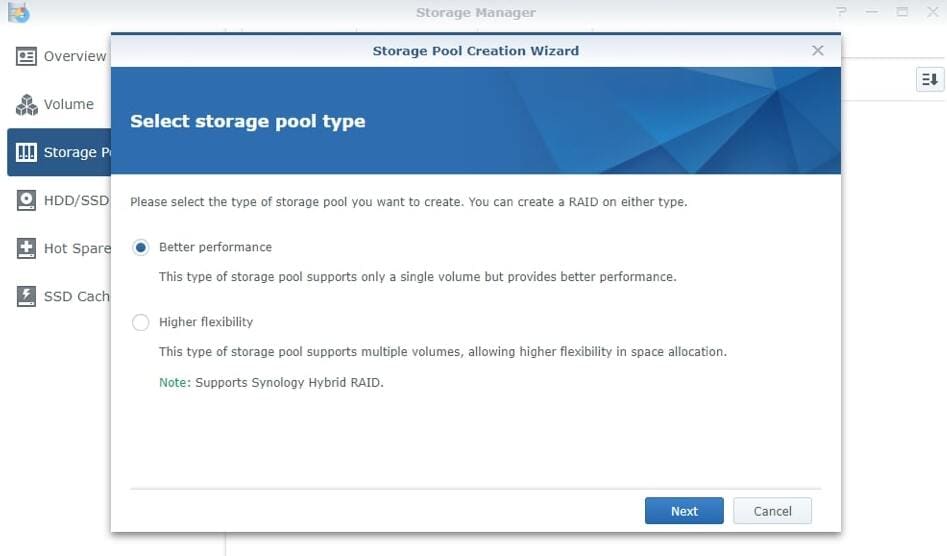
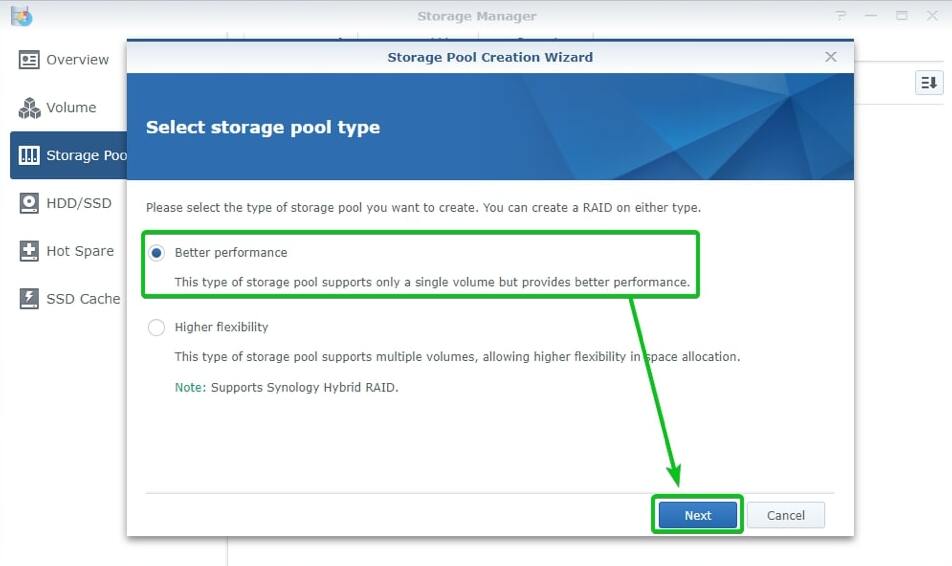
Step4. If you only want to create one Volume with faster file transfer, select Better Performance; otherwise, select Higher Flexibility if you want to create multiple volumes.
Step5. Select the type of RAID you want and press Next.
Step6. Choose which hard disks you will use in this RAID configuration. Then, check your selections again, and click Apply to confirm your settings.

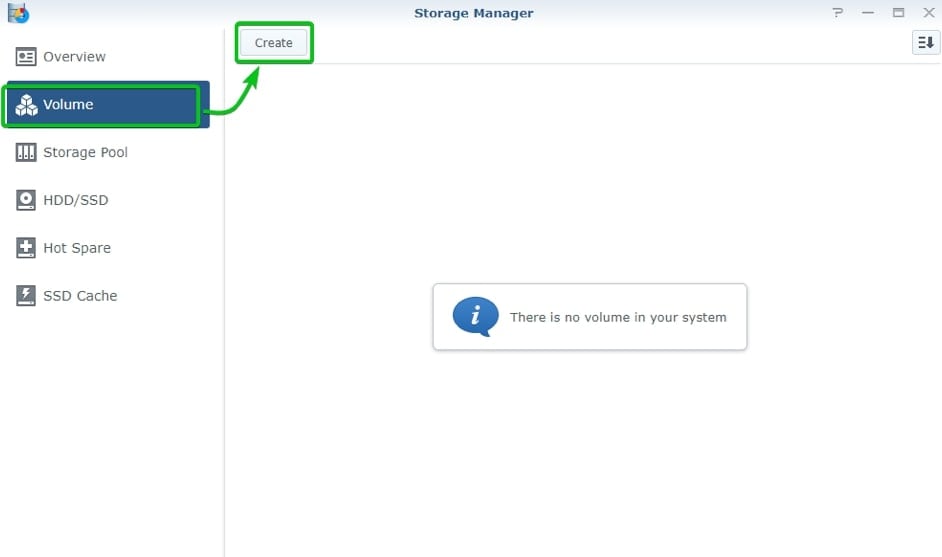
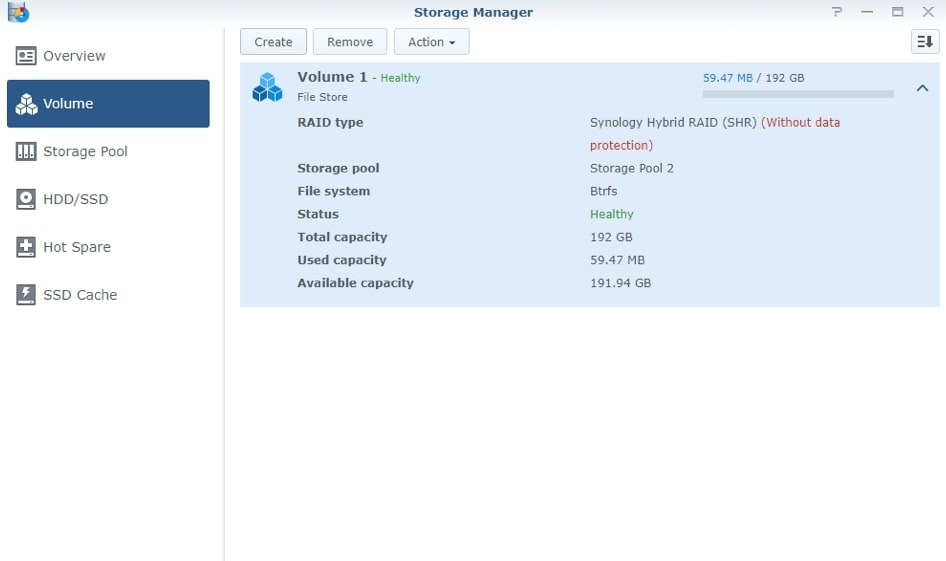
Step7. In Storage Manager, navigate to Volume and press the Create button.
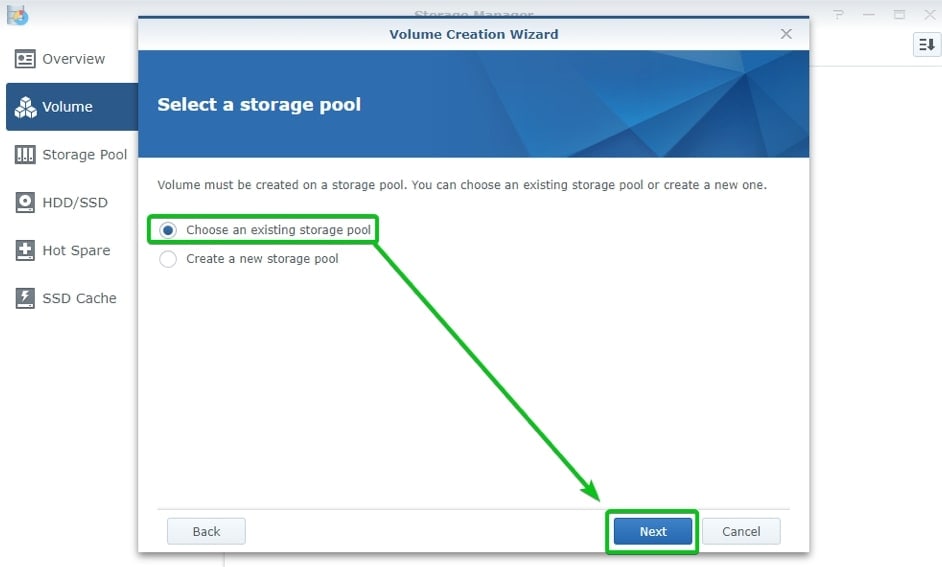
Step8. Please continue to the next page by leaving it at Choose an existing storage pool.
Step9. Choose the volume size, then follow the steps below and click Apply.
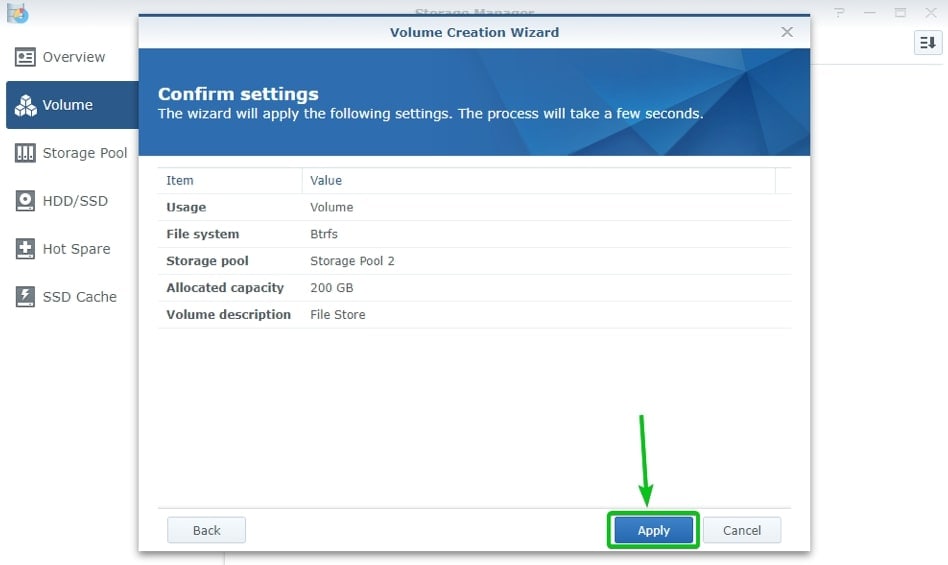
Step10. Your disks have now been converted to a RAID configuration.
Option 2. Change the Synology RAID Setup
Are your hard drives already set up in Synology RAID, but you want to replace or change them without having to lose your data? The good news is, it is possible! However, your choices are limited. There are only five possible changes, which are as follows:
| From | To | Minimum number of drives |
| Basic or JBOD | RAID 1 | 2 (1 more than basic) |
| Basic or JBOD | RAID 5 | 3 (2 more than basic) |
| RAID 1 | RAID 5 | 3 (1 more than RAID 1) |
| RAID 5 | RAID 6 | 4 (1 more than RAID 5) |
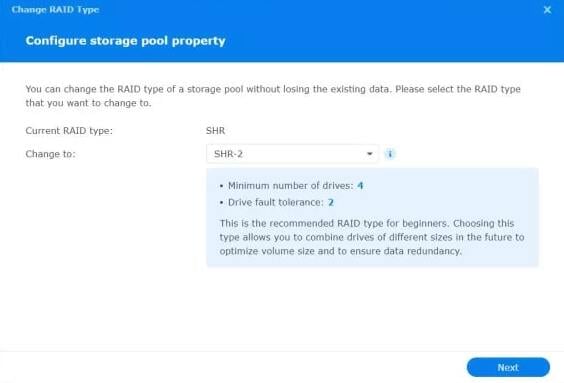
| SHR | SHR-2 | 4/5 (2 more than SHR) |
Here are the steps to change the Synology RAID setup. Follow the instructions carefully.
Verify that the storage pool status is Normal.
When introducing additional drives to a storage pool, the new drives must be larger than the storage pool's smallest drive.
New drives must have an Initialized or Not Initialized status.
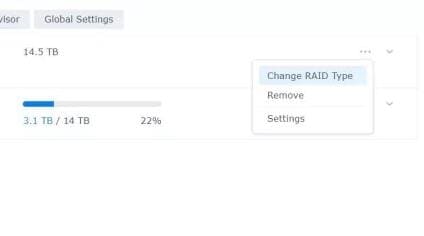
Step1. To access the NAS user interface, navigate to http://find.synology.com in a web browser. Then, connect your computer to your NAS drive. Select Storage Manager > Volume > Management.

Step2. Select Change RAID Type and click Next.
Step3. Select the desired RAID configuration and press Next. The RAID configuration has now been modified.
Option 3. Restore a Synology RAID Setup
Do you want to restore a previous Synology RAID configuration? Take the following steps:
Step1. Navigate to your NAS's configuration page. Connect a computer to the same network as the NAS.
Step2. Select Storage Manager > Volume > Delete. After deleting, press Create from the top menu. Then, select the disks you want to use and press Next. Pick the desired RAID configuration and click Next.
The RAID configuration has now been completed. It may take a few hours for the volume to be fully operational. The status in the volume overview indicates when it is completely ready for use.
How To Recover Lost Data After the Synology RAID Setup
Since it is mentioned that creating a new Synology RAID setup and restoring it will occur in data loss, it is troublesome since it can intervene in work or personal time. When this happens, there is usually only one course of action available: Synology NAS RAID data recovery.
The best RAID data recovery handles many data loss situations to recover your important data easily and safely. And this is what Wondershare Recoverit RAID data recovery software does. Millions of users trust this software as it quickly handles all the challenging tasks in the background.
Steps to recover lost data after the Synology RAID setup with Recoverit RAID data recovery:
Step1. Open the NAS Recovery Mode
Launch Recoverit RAID data recovery after installation and go to NAS and Linux in the left menu. Now, choose the NAS Recovery. It will allow Recoverit to look for the NAS storage devices from which you lost the data.

Step2. Connect Your NAS Device
Once Recoverit has finished searching, you will see detectable NAS devices under NAS Servers. Locate the device where you lost the data and click it.
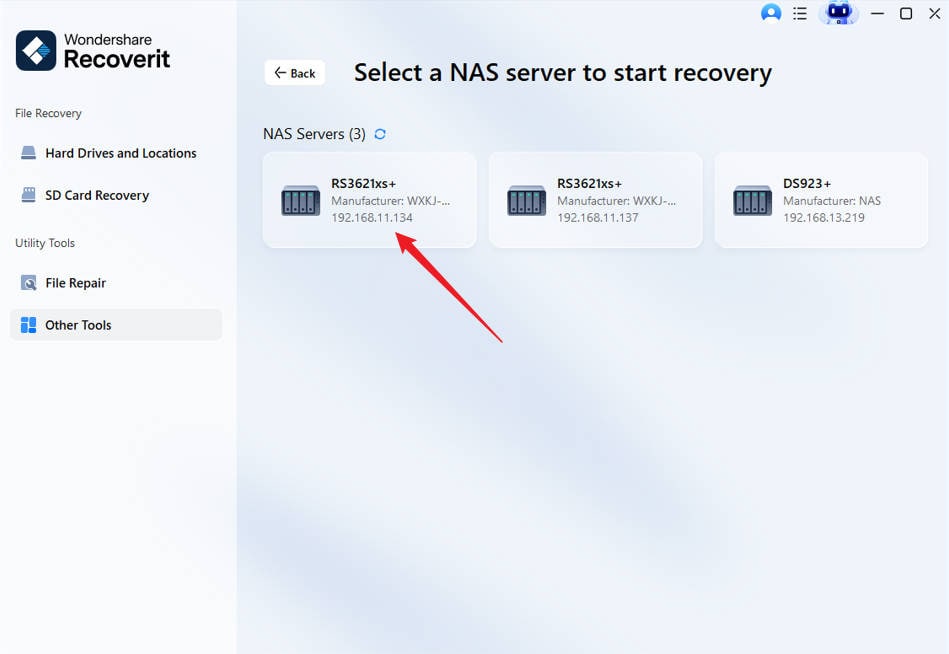
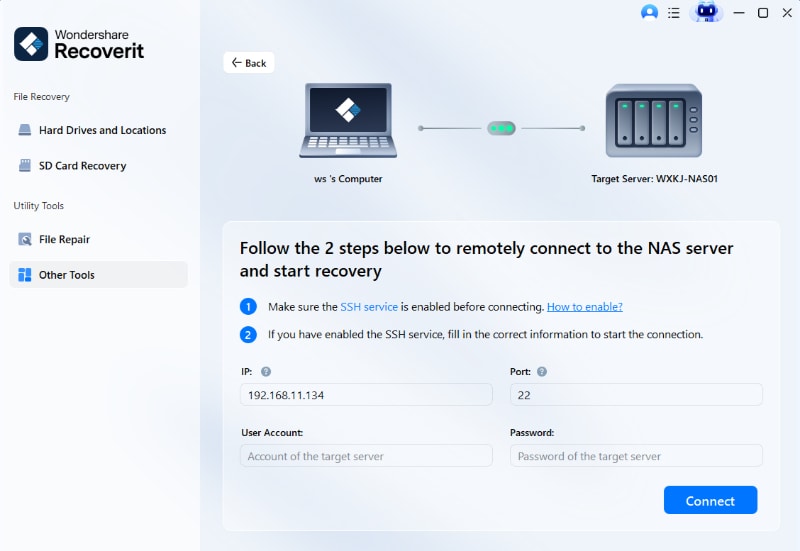
Fill up the requested information. After that, Recoverit will create a remote connection as soon as you click Connect.
Step3. File Scan and Recovery
Once the connection is established, the software will begin automatic scanning to search for lost or deleted data on the selected NAS device.

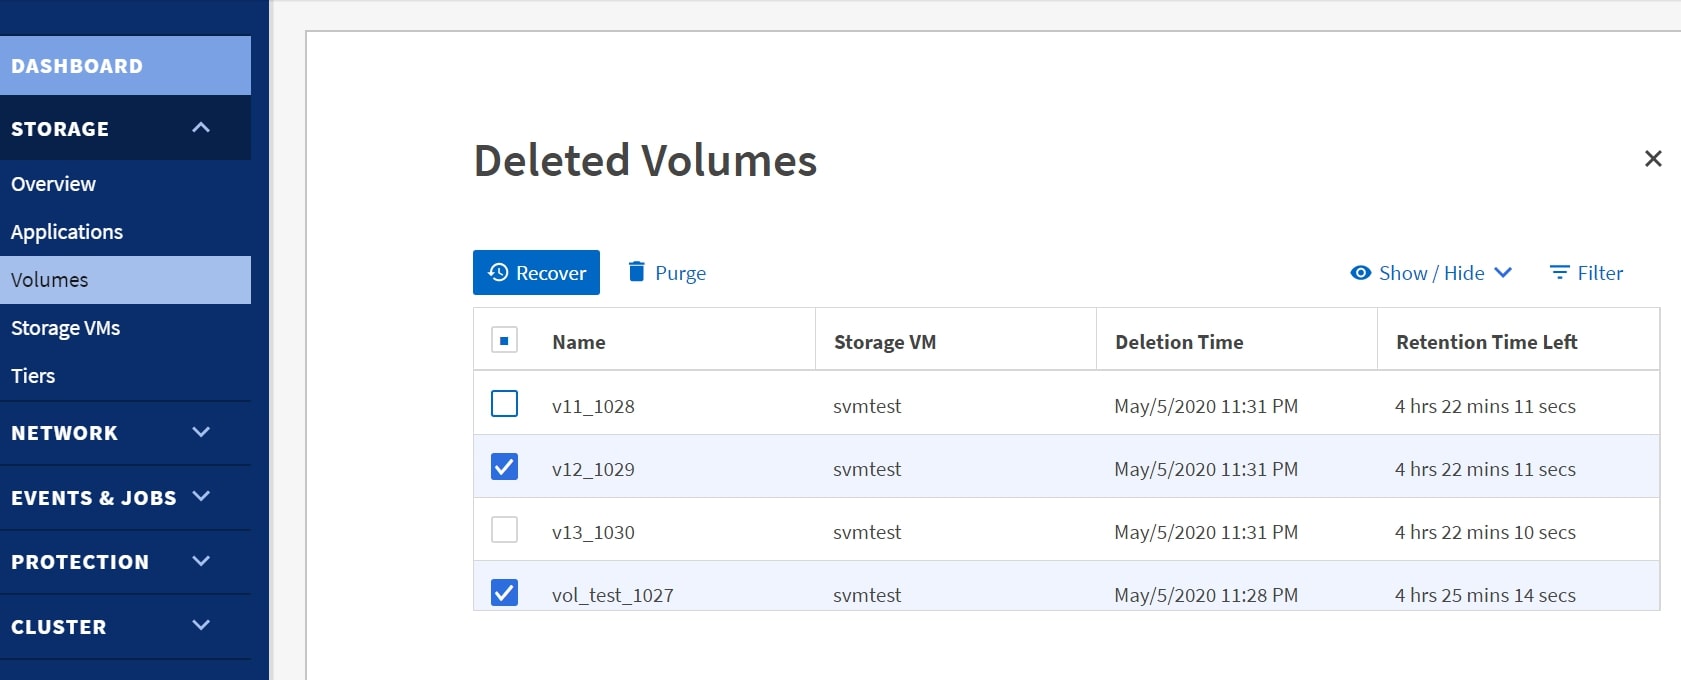
You can preview the scanned files during or after the scan. Finally, select your desired files and click Recover to begin the restoration process.

Specify where you want the recovered files saved. Note that you must choose a different path from the one where your data was deleted or lost.
FAQs
-
What RAID should I use for Synology?
The most frequently advised RAID level for NAS deployment is RAID 5, which successfully balances performance and redundancy. A single drive is locked up to retain all the data needed to rebuild a storage device in the event of a failure. -
Can you change the RAID without losing data Synology?
Yes. Switching storage pools' RAID configurations are possible without erasing previously stored information. For example, if you add more drives, you could set up a RAID 1 storage pool and switch it to a RAID 5 pool later. -
Should I use RAID 5 or SHR for my Synology NAS?
From the perspective of the user, SHR's main advantage is flexibility. You can use RAID 5 from the standpoint of usable space but use SHR if you plan on using identical-sized hard drives and, under no circumstances, mixing drives. -
Should I leave my Synology NAS on all the time?
Your files are saved on the NAS server and can be synced, or kept up to date automatically, on all your devices. This service must always be available, so you must always turn on the NAS.
Conclusion
This guide helps you understand the 3 different RAID setup options for Synology NAS: creating a new Synology RAID setup, changing, and restoring it. However, these methods have a huge possibility of having data loss which will give you trouble. So, I recommend using Recoverit RAID data recovery software for a secure and easy RAID data recovery.


