
 TL;DR:
You can set up ZeroTier on a Synology NAS by installing Docker from the Package Center and deploying the ZeroTier container using SSH terminal commands.
● Enabling the SSH service in the Synology Control Panel is necessary to access the root account for script execution, which carries system risks if terminal commands are entered incorrectly.
● Linking the NAS requires fetching the Network ID from the ZeroTier dashboard, executing a join command in the Synology Terminal, and manually authorizing the device connection back in the dashboard.
● Operating as a peer-to-peer network rather than a traditional VPN, this configuration bypasses remote servers to establish direct, 256-bit encrypted connections that minimize latency for remote clients.
Ask AI for a summary
 ChatGPT
 Perplexity
 Gemini
 Claude
 Grok
Grok
Accidentally deleted important files on Synology NAS?
No worries. Wondershare Recoverit can get back your lost files within 3 steps. The ultimate and professional NAS data recovery software is totally reliable and 100% safe.
A Synology NAS is essential for building private cloud storage that keeps your files easily accessible and secure. However, if you want to improve the security of your vital documents and simplify your network management, you’ll need the help of solutions such as ZeroTier.
Like Wireguard and OpenVPN, Zerotier can work flawlessly on Synology, making it the perfect solution for upping the ante on your security. However, installation can be somewhat confusing to first-timers. Learn how to install ZeroTier on Synology NAS in a few simple steps.
What Is ZeroTier VPN?
ZeroTier isn’t just a simple Virtual Private Network (VPN). It’s a VPN and SD-WAN packed into a single solution that simplifies network management and minimizes latency in one fell swoop.
It uses its own proprietary protocol, offers top-of-the-line 256-bit end-to-end encryption, and runs on a peer-to-peer (P2P) network.
With ZeroTier on Synology, you can seamlessly add multiple remote clients, allowing them to communicate without obstacles as if they were in the exact same location.

ZeroTier has a robust free plan suitable for individual users without extensive needs. Depending on their unique needs, developers, small businesses, and enterprises can choose between Professional, Business, and Enterprise plans.
Benefits of Using ZeroTier VPN for Synology NAS
The main benefit of using ZeroTier lies in its P2P functionality. Whereas traditional VPN providers offer secure, encrypted connections between clients through remote servers, ZeroTier cuts the middleman. It allows different devices to connect directly to one another.
The connection is still fully encrypted and almost impenetrable by third parties, made even more secure by eliminating unnecessary traffic rerouting.
In a sense, that means it’s not really a VPN at all. A VPN serves to connect networks or clients on a network through remote servers. ZeroTier connects clients to each other, building up the network in the process and performing the same functions as if all the clients were connected physically (as through an ethernet). Therefore, it’s more akin to a Global Area Networking solution or a Virtual Distributed Network (VDN) rather than a simple VPN.
This P2P functionality offers the added benefit of minimized latency. Since the connection doesn’t have to travel through remote servers and be routed, ZeroTier can offer excellent speeds with virtually no lag.
Further reading: Recover deleted files from Synology NAS
How To Set Up ZeroTier VPN on Synology NAS?
While ZeroTier is fully compatible with Synology NAS, you cannot install it directly. You’ll first have to start with Docker.
Take a look below to find out how to install ZeroTier with Docker on Synology.
Step 1Configure Synology for Installing Docker
To get started on the right foot, you’ll first need to configure your Synology NAS and prepare it for Docker installation. The whole process is quite simple, but you will need to be careful as you’ll need SSH root access. If you make a mistake, it could spell trouble.
You’ll want to follow the next steps:
- Sign in to your Synology account;
- Go to Control Panel;
- Go to Terminal & SNMP;
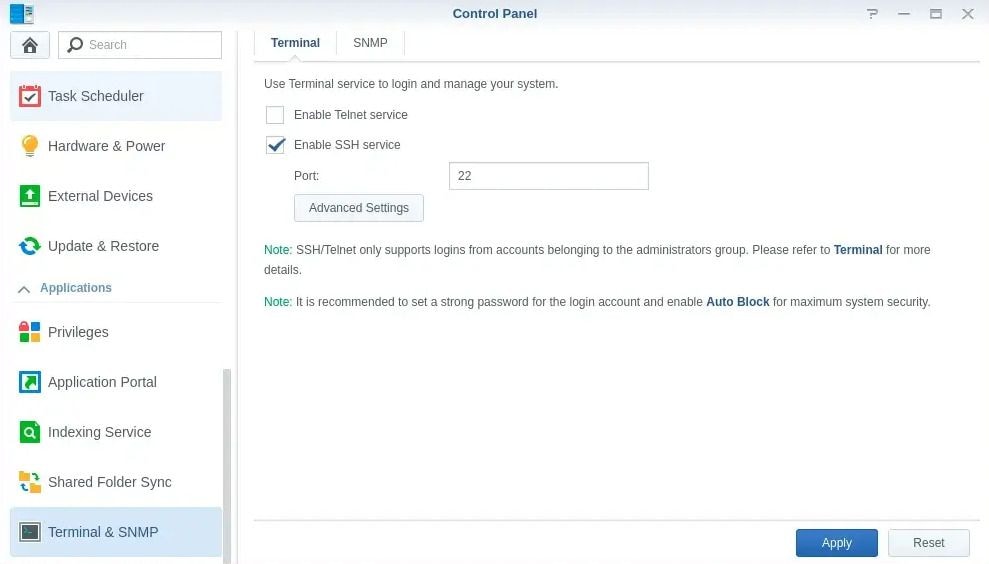
- Click on Enable SSH service;
- Click Apply.
When you’ve enabled SSH service, log in using the same password and username as your main Synology account.
Go to your root account, create a new script, and follow the commands from the ZeroTier document.
Step 2Install Docker
Docker is the most commonly used platform that relies on OS-level virtualization to allow you to test and deploy apps and programs quickly.
Considering its popularity, it comes as no surprise that Synology offers official Docker support, which you’ll need for installing ZeroTier.
To install Docker on your Synology NAS, you just have to follow a few simple steps:
- Visit the Synology Web Graphic User Interface (GUI);
- Click on the Package Center;

- Type “Docker” in the search bar;
- Click on the Docker app;
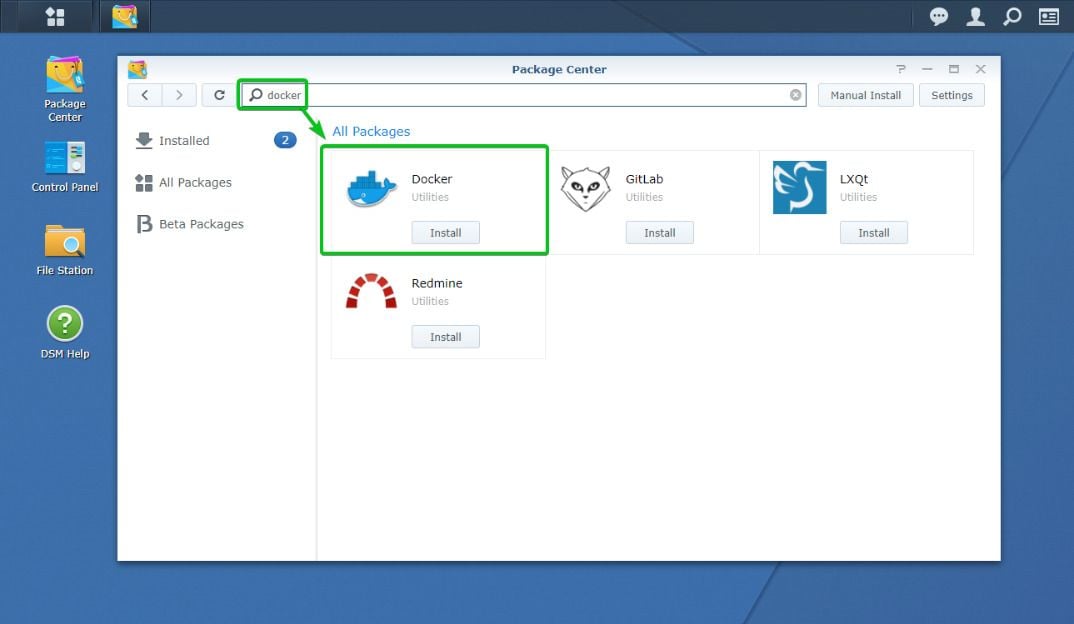
- Select Install;
- Select your installation volume and click Next;
- Select Apply.
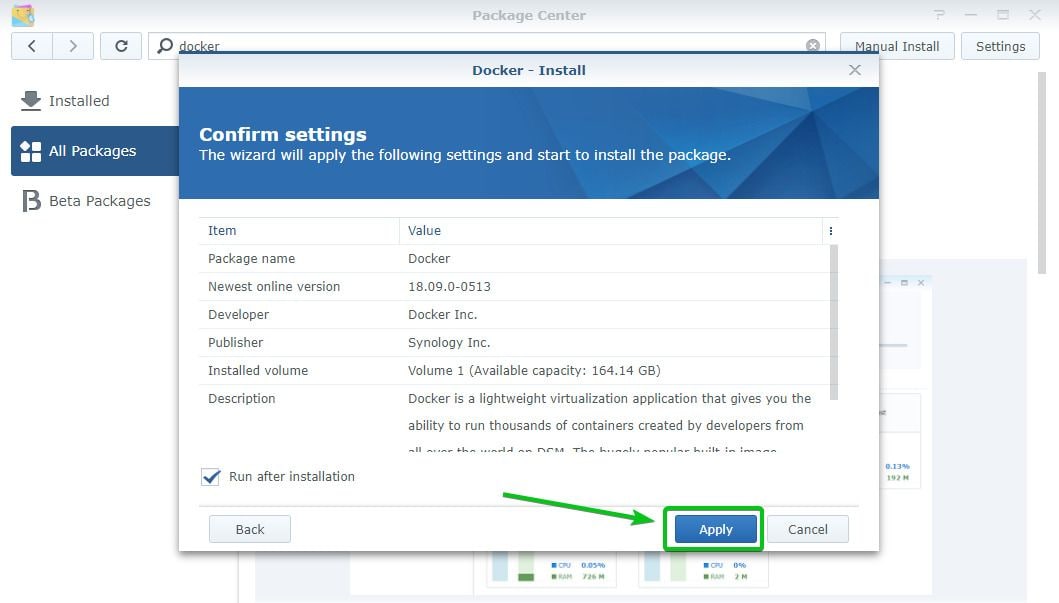
It could take some time for Docker to finish up its installation. Once complete, you can access Docker either from the Package Center or the Synology Web GUI. Then, go back to your Synology terminal and use the SSH connection.
Step 3Install and Configure ZereTier on Synology NAS
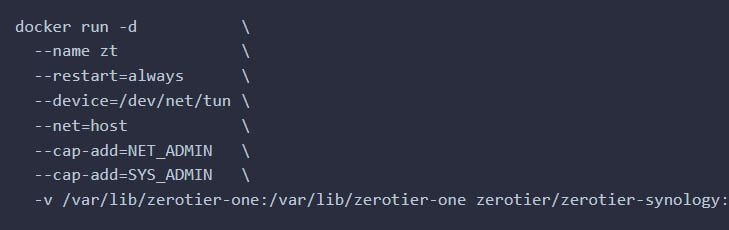
With the Docker up and running, you can start installing ZeroTier on Synology NAS:
- Go to Synology Terminal;
- Create a directory for storing ZeroTier identity and configuration;

- Deploy the Docker container.
All there’s left to do is link your Synology NAS with the ZeroTier network.
Step 4Link Synology With ZeroTier Network
To link ZeroTier Network and Synology, you’ll need to follow the next steps:
- Go to the ZeroTier dashboard;
- Find Network ID;
- Go to Synology Terminal;
- Run the command to join your network using network ID;

Once you’ve completed the abovementioned steps, go to your ZeroTier dashboard and enable Synology to connect to your network. With this, your ZeroTier installation on Synology NAS is complete.
Conclusion
While ZeroTier installation might seem confusing at first glance, it shouldn’t take you long to finish it. Make sure to follow the original ZeroTier documentation to the T to ensure that you make no errors that will complicate processes.
With your ZeroTier installed, you can get back to work and ensure a seamless, secure connection with all the devices in your network.
For Windows XP/Vista/7/8/10/11
For macOS X 10.10 or later


