
 TL;DR:
To successfully recover a deleted camcorder video, immediately stop recording to prevent overwriting the data, check computer backups or the camera's hidden directories first, and run a software scan on readable SD cards while saving the recovered files to a completely separate drive.
● Standard recovery software only scans readable SD cards or accessible built-in flash memory; older camcorders using MiniDV tapes or DVDs require specific playback hardware, and mechanically failing internal hard drives need professional lab services.
● If the camera uses the AVCHD format, look for .MTS files inside the PRIVATE/AVCHD/BDMV/STREAM directory and always copy the entire folder tree instead of isolated clips to preserve essential playlist and management data.
● Long HD or 4K recordings often become fragmented during deletion; if an ordinary scan yields a truncated or unplayable MP4 or MOV file, you will need a specialized fragmented-video scan like Recoverit Enhanced Recovery, though overwritten segments cannot be recreated.
Ask AI for a summary
 ChatGPT
 Perplexity
 Gemini
 Claude
 Grok
Deleted a clip from your camcorder, or can't find footage you know you recorded? Stop recording on the affected card or drive first. If the video is only misplaced, you may find it in the camcorder's folders or an existing backup. If it was deleted from a readable SD card, recovery software may locate the remaining data before another recording overwrites it.
The safest method depends on where the original video lived. A Sony Handycam using an SD card, an older camcorder with a built-in hard drive, and a tape-based camera do not use the same recovery workflow. Start with the storage and symptom checklist below, then follow only the matching path.
In This Article
Part 1. Protect the Footage and Identify Its Storage
Camcorder video recovery starts with one question: which storage medium actually held the missing clip? That determines whether you should look for an existing file, restore a backup, scan a card, or stop before risking hardware damage.
Stop Recording and Preserve the Original Media
Power off the camcorder after its current operation finishes. If the footage was on a removable card, safely remove it and set it aside. Do not shoot a test clip, delete other videos, format the card, rebuild the camera's management database, or run CHKDSK or Disk Utility First Aid on the original media while the missing footage still matters.
Prepare a reliable card reader and a separate healthy drive with enough free space for any recovered video. An SD card's physical lock switch, when present, may help prevent some writes in compatible readers, but it is not a substitute for careful handling.
Choose the Recovery Path That Fits the Problem
Use this quick check to avoid scanning the wrong device or trying to repair a file that is not actually missing.
| What you see | Most useful first action | What it does not mean |
| Camera shows no clip, but the card opens on a computer | Check the original video folders without altering them; then scan the card if the clip is absent | An empty gallery does not prove the video data was erased |
| Video was copied to a PC and then deleted there | Check the PC Recycle Bin or Mac Trash, then any backup of that computer folder | The computer's Recycle Bin is not a reliable undo for deleting a clip on the camera card |
| The clip exists but freezes or will not play | Copy the accessible files and their folder structure elsewhere, then evaluate the copy | Playback failure is not automatically file deletion |
| Camcorder uses built-in storage rather than a removable card | Check the model's supported computer connection mode without initializing the storage | Every camcorder is not a removable USB drive |
| Card or drive repeatedly disconnects, overheats or is physically damaged | Stop DIY scanning and consult a professional recovery lab | Software cannot correct failed storage electronics |
Once the original medium is stable, use the following non-destructive checks before attempting a recovery scan.
Part 2. Look for the Original Video or a Backup First
A recording can appear missing because its file is in an unexpected camera directory or because a copied version was deleted from a computer. These checks do not require writing to the original camcorder card.
Method 1: Check Camcorder Folders, Including AVCHD
If the card is readable but the video is absent from the gallery, check its original folder structure. Many camcorders store footage in subfolders rather than directly under DCIM. On some AVCHD models, footage is inside PRIVATE/AVCHD/BDMV/STREAM as .MTS files; related folders may contain playlist and clip information. Sony documents these folder paths in its official camera and camcorder folder reference. Its memory card transfer guidance also cautions against modifying AVCHD files or directories from a connected computer.
Step 1. Connect the powered-off camera's removed card to the computer with a compatible reader. Open the card in File Explorer and inspect DCIM, PRIVATE, and AVCHD where present. Do not rename, move, or delete files on the card.
Step 2. If expected directories are not visible, choose File Explorer's Hidden items setting. In Windows 11, it is normally under View > Show; older Windows menus may look different.

Step 3. If you find the original clips, copy them to another healthy disk. For AVCHD footage, keep a copy of the complete AVCHD folder tree when possible so your editing or playback software retains the associated management files. Verify playback on the copy before reusing the card.
A playable copy means you do not need a deleted-file scan. If the expected clip is not present, leave the card unchanged and continue to Part 3. For a format-specific walkthrough, see MTS and AVCHD video recovery.
Method 2: Check the Computer's Recycle Bin or Trash
If the recording was already imported to a Windows PC or Mac before its local copy was deleted, this is the first place to check. The Recycle Bin generally helps with deleted local files, not clips erased inside the camcorder or from removable storage.
Step 1. On Windows, open Recycle Bin and look for the clip name, source folder, or deletion date. On Mac, open Trash and check for the imported footage.

Step 2. Restore the identified video to a safe local folder. If the original destination is on the affected card, first choose a separate computer folder instead. Open the restored video to check that it has the intended content, audio, and duration.
If the item is absent, check computer backups or continue with a scan of the storage that originally held the deleted copy, not automatically the camcorder card.
Method 3: Restore an Existing Cloud or External Backup
This route applies only if you previously uploaded, synchronized, or copied the camcorder footage to a cloud account, external drive, NAS, or editing-project backup. A cloud service does not normally contain camcorder footage unless you transferred it there.
Step 1. Open the account or backup disk you actually used. Check the original project folder, dated import folders, archive directories, and the service's own deleted-items area if a previously uploaded copy is missing. For OneDrive, Microsoft documents its online Recycle Bin restoration steps.

Step 2. Download the right recording to a different healthy location. Compare the file size, recorded date, video length, and playback with any other known copies.
When the backup is complete, use it and avoid unnecessary scanning. Otherwise proceed to the original storage card if it remains readable.
Part 3. Recover Deleted Camcorder Videos from a Readable Card
If the video is truly missing and the camera's removable SD, SDHC, SDXC or another supported card is still detected, a recovery scan may find video data that the file system no longer lists. Stop all recording first: a fresh clip or a format operation can reuse space occupied by deleted footage.
Method 4: Connect the Original Card Without Changing It
If the card and reader are physically stable and the computer detects the expected storage capacity, prepare to scan the card safely. Do not accept a Windows or macOS prompt to format or initialize the card.
Step 1. Remove the card after powering off the camcorder and insert it into a compatible external reader. If the reader is not detected, try one different reader or port without running repair commands.
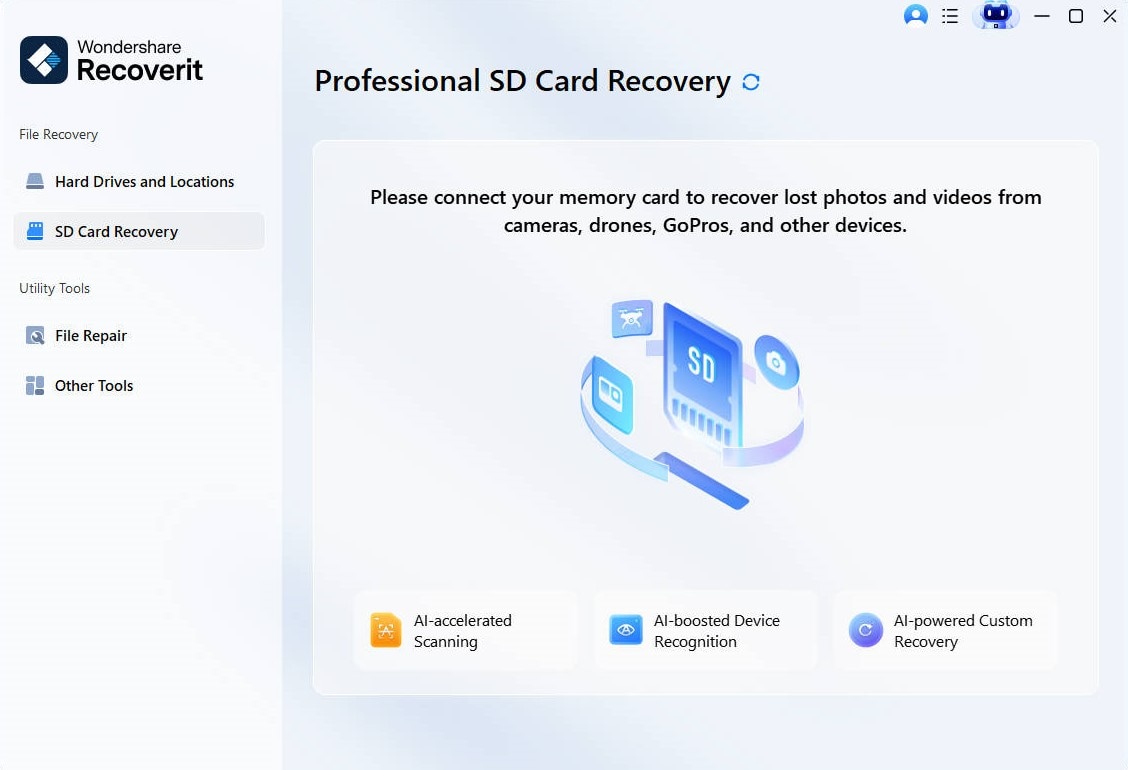
Step 2. Launch Recoverit on the computer and open SD Card Recovery. Confirm the detected card matches the expected storage device before selecting it. The workflow is described in the official Recoverit Guide.
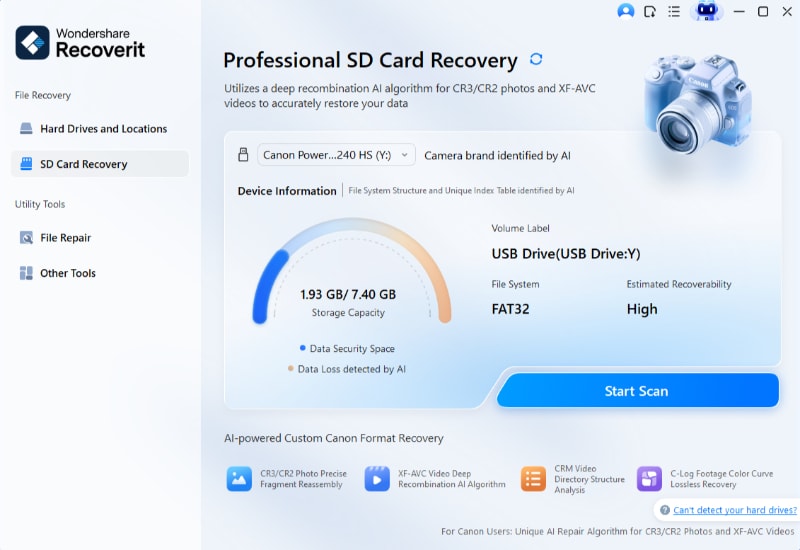
If the card appears normally, begin the scan below. If the card is physically damaged or repeatedly drops offline, stop and use professional assistance rather than repeatedly rescanning.
Method 5: Scan with Recoverit Video Recovery
If the memory card remains readable but the camcorder clip is absent from its visible folders and backups, you can scan the original storage for recoverable content. Recoverit Video Recovery can search supported, computer-readable card storage for recoverable video files; it cannot restore video data already overwritten by new recordings.
Step 1. Select the correct card inside SD Card Recovery and choose Scan. Keep the card attached and let the scan finish to obtain the available results.
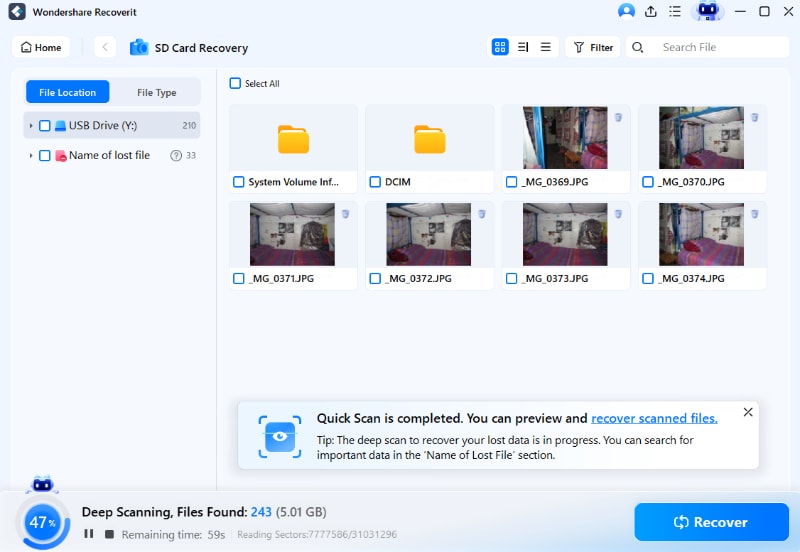
Step 2. Review available video categories, paths and extensions. Camcorder footage may be stored as MTS, M2TS, MP4, or MOV, depending on the camera and recording mode. Original names and directory structures may not survive deletion.
If you can identify the correct clip, preview it where supported and continue to the next step. If a large recording is missing, divided into incomplete fragments, or truncated in a normal scan, consider Enhanced Recovery below.
Method 6: Save the Footage Somewhere Else and Verify Playback
Step 1. Select the clips that look relevant, use Preview if available, then choose Recover. Set the destination to the computer's separate healthy drive or another unaffected external disk, not the original camcorder card.
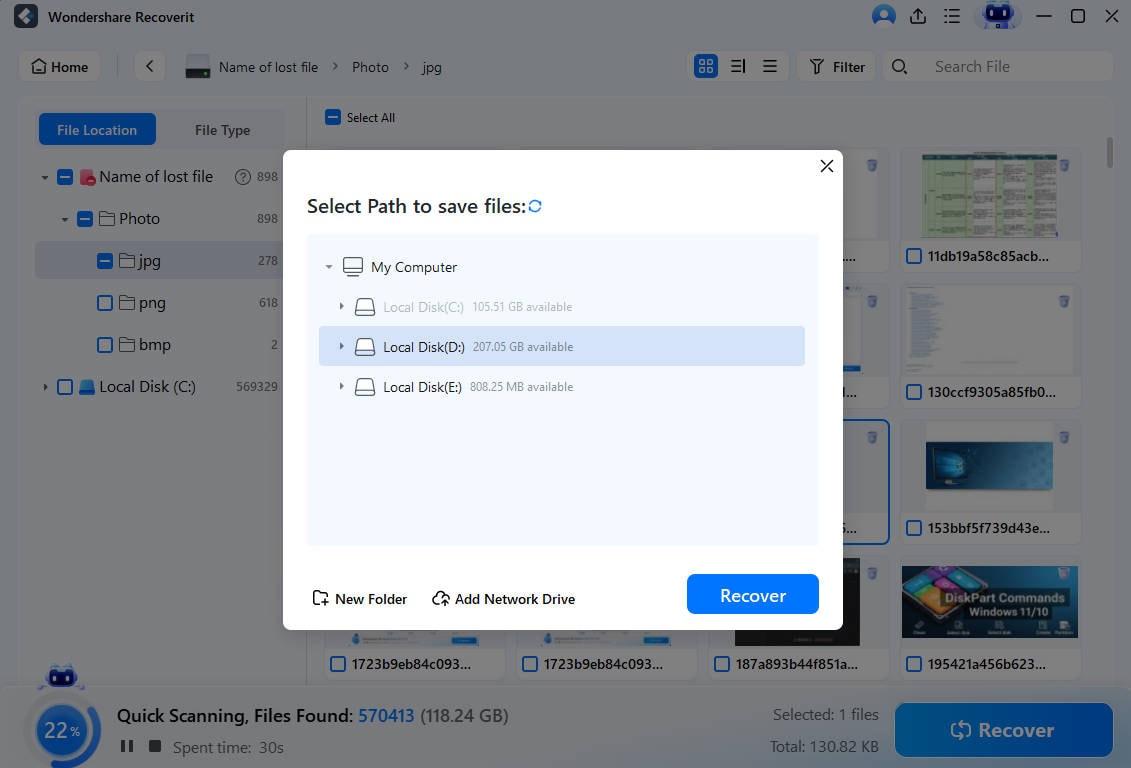
Step 2. Open each recovered video from the destination disk. Check the opening and ending scenes, approximate recording duration, audio, and playback continuity. A file that exists or displays a thumbnail is not proof that its entire recording survived.
If the video plays from start to finish, preserve the recovered copy and make a second backup before returning the card to service. If it freezes, lacks scenes, or stops early, keep the untouched original card and try the more focused large-video workflow next.
Method 7: Try Recoverit Enhanced Recovery for Large or Incomplete Recordings
If a long HD or 4K recording appears fragmented and an ordinary scan finds only a short or unplayable segment, a video-focused scan may be worth trying. Recoverit's Enhanced Recovery offers a video-fragment-focused scan on supported media. Recoverability still depends on the remaining data and the available recording format.
Step 1. Open Enhanced Recovery from Recoverit's tools and select the same original, readable card. Its position in the interface may vary by platform.
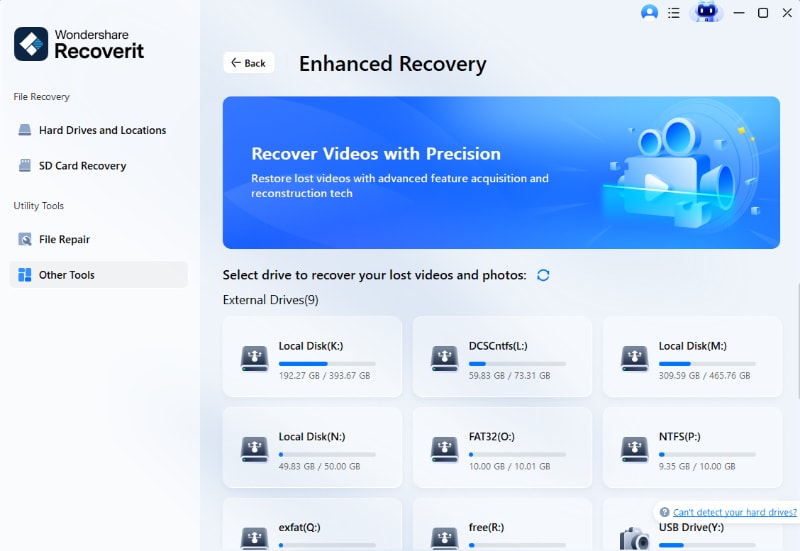
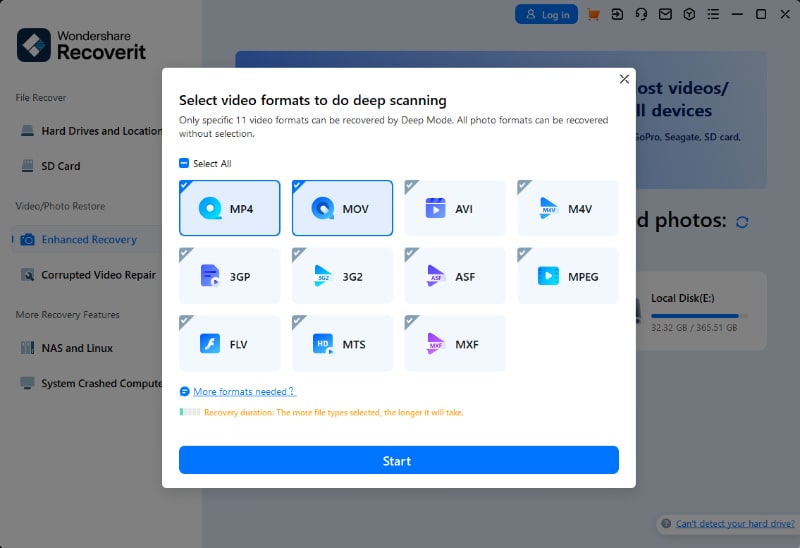
Step 2. Choose the applicable video format if it is offered in the format selector and start the enhanced scan. Do not assume every proprietary format is available in every recovery mode.
Step 3. Allow the video scan to finish, then preview the results and recover the best available copy to a different disk.
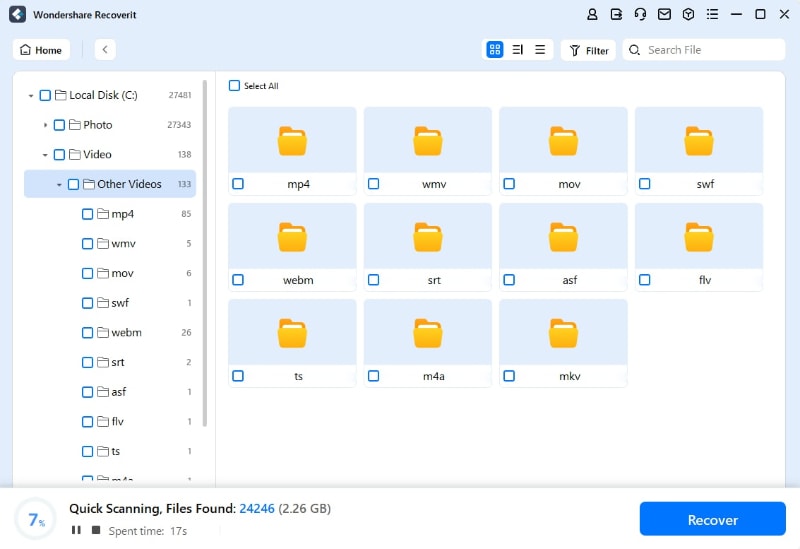
Verify the entire recovered clip, not just its first seconds. CGSecurity's digital-camera video fragmentation documentation explains why some recovered MOV and MP4 files may not play intact after ordinary file carving. If required video data is missing, neither fragment matching nor file repair can recreate overwritten scenes.
Part 4. If Your Camcorder Uses Built-In Storage, Tape or Disc
The SD card procedure does not fit every camcorder. Before connecting older equipment or removing any media, identify the model's recording medium in its manual and avoid operations that modify the source.
Built-In Hard Drive or Internal Flash Memory
Some camcorders, including certain Sony Handycam models, save footage to a built-in hard drive or internal memory instead of a removable card. The original footage may be recoverable if the camcorder exposes that storage as an accessible drive to a computer, but USB connection modes and filesystem behavior vary. Do not assume a camera connected for playback can be sector-scanned.
If the device is still stable, use its official connection or file-transfer method to identify any accessible clips and copy them elsewhere. If the storage cannot be safely presented as a readable device, avoid dismantling the camera or repeatedly powering it on. A damaged internal HDD, failing motor, or unstable connection warrants professional assessment. Sony also documents the availability of model-dependent memory-card recovery support rather than guaranteeing a universal recovery method.
Tape-Based and DVD Camcorders
MiniDV tape and camcorder DVDs are different from flash memory cards. A tape may require compatible playback hardware to transfer existing footage; a DVD may need a suitable disc reader and finalized recording structure. Scanning a random card reader will not recover footage from either medium. If the tape is creased, the disc is damaged, or a recording mechanism is malfunctioning, preserve the media and consult a specialist instead of attempting repeated playback.
For a brand-specific SD-card workflow, see Sony Handycam video recovery; for AVCHD recordings, see the dedicated MTS recovery guide.
Part 5. Check the Recovered Video and Prevent Another Loss
After recovery, the next goal is a verified copy that remains usable in your editor or player. A few checks now can prevent an incomplete file from becoming your only archive.
If a Recovered Camcorder Video Will Not Play
First, confirm you are opening the recovered copy rather than altering the original card. Try the file in a compatible player and compare its duration with the expected recording length. For AVCHD media, importing a copied complete folder tree into software that understands AVCHD can be more useful than opening an isolated MTS fragment. Do not change a file extension as a substitute for missing media data.
If the clip is incomplete, keep the card protected and revisit Enhanced Recovery where applicable. If the file is present and fully copied but corrupted, investigate file repair on a separate copy. File repair and deleted-file recovery solve different problems, and neither guarantees restoration when recorded data has been overwritten.
A Simple Two-Copy Camcorder Backup Routine
After a shoot, copy the entire recording folder structure to one working drive and a second backup drive. Check file counts and play the beginning and end of important recordings. Only then consider formatting the memory card in the camcorder according to its manufacturer's instructions. Keep original media untouched until copies have been checked, especially for events that cannot be filmed again.
For broader card-loss scenarios, the SD card video recovery guide covers deleted, formatted, and inaccessible card cases in more detail.
Conclusion
To recover deleted camcorder videos, stop recording first, find out whether the original footage was stored on an SD card or inside the camera, and check existing video folders and backups. If a removable card is still readable but the clip is gone, scan that original card and save recovered footage to another drive. Inspect the full video before reusing the card. If storage hardware is unstable or the camera uses tape or DVD, use the model-appropriate path instead of forcing an SD-card recovery workflow.
FAQ
-
Can I recover deleted videos from a Sony Handycam?
Sometimes. If the Handycam recorded to a readable SD card and the data has not been overwritten, stop recording and scan the card. First check its recording-mode folders, which may use AVCHD or MP4 structures. Built-in HDD models need a different connection assessment. -
Where does a camcorder save AVCHD videos?
Depending on the camera, AVCHD footage may be stored inside PRIVATE/AVCHD/BDMV/STREAM, AVCHD/BDMV/STREAM, or a similar recording directory. MTS clips may be accompanied by playlist and clip-information files. Keep the original folder structure intact when copying footage. -
Can Windows Recycle Bin recover a video deleted directly from a camera card?
Do not rely on it. Recycle Bin is useful for some files deleted from a computer folder, but deletion from removable camera media often bypasses that workflow. Check the card's actual folders and backups, then consider a recovery scan of the original readable storage. -
Will software recover a formatted camcorder SD card?
It may recover some clips if the card is stable and the relevant data has not been overwritten. Stop recording, avoid another format or repair operation, and save recovered files to a different drive. Results depend on the card and what happened after formatting. -
What if my recovered MTS or MP4 video is truncated?
Keep the recovered copy and the original card. A fragmented recording may require a video-focused scan, but a missing or overwritten segment cannot be recreated from nothing. Verify duration and playback from start to finish before treating a file as restored. -
Can I recover footage from a physically damaged camcorder HDD?
Desktop recovery software is not a fix for mechanical damage or failed electronics. If the internal drive clicks, repeatedly disconnects, or cannot be safely accessed, stop attempts and seek a professional data recovery assessment.


