

 TL;DR:
You can recover deleted hidden photos and videos from Audio Manager by restoring them from previously enabled system backups, cloud storage accounts, or by using dedicated data recovery software.
● Built-in Windows utilities like File History and Backup and Restore allow you to revert files to previous versions, but this strictly requires that these backup features were actively enabled before the media was lost.
● If your device automatically or manually synced to cloud storage like Google Drive prior to an accidental deletion, virus attack, or factory reset, you can download the hidden media directly from your account.
● When no prior backups exist or files bypass the computer's Recycle Bin due to size limitations, Windows and Mac users can utilize Wondershare Recoverit to run Quick or All-Around Recovery scans on the storage location to extract the erased items.
Ask AI for a summary
 ChatGPT
 Perplexity
 Gemini
 Claude
 Grok
Grok
Have you accidentally lost pictures and videos from the Audio Manager? It can be a very frustrating experience. Now, the thing is that these files aren't permanently lost. This means that there is still some chance of the data being recovered.
Irrespective of the reason for which the photos and videos were deleted, you can get them back. However, you must ensure that you are following the audio recovery methods properly to avoid or prevent any further damage. Of course, you wouldn't want your previous files to be lost again.
If you cherish the memories that the videos and photos hold, go through the methods on how to recover pictures from audio manager properly.

Try Recoverit to Recover Pictures from Audio Manager
![]() Security Verified. Over 7,302,189 people have downloaded it.
Security Verified. Over 7,302,189 people have downloaded it.
In this article
Part 1: What is Audio Manager?
Audio Manager is one of the main system components of various operating systems, especially Android. The Audio Manager in Android controls different device settings such as volume levels, audio output routine, and ringer modes.
Therefore, Audio Manager is the hub for all the audio functions of a device. With Audio Manager's help, you can switch between the audio streams and manage audio functions. You can also use Audio Manager to check the audio availability of a device.
Part 2: How it Stores Hidden Pictures/Videos?
The hidden photos and videos will be stored in the File Manager of your system. You may navigate through the different devices to get access to all the data. It is also advisable to check if these hidden pictures and videos are available in the file browser.
However, your hidden pictures and videos will not be available in your Gallery. Therefore, if you want to access these files, you may have to use a third-party app or software to get the data.
Part 3: Reasons for Audio Files Loss
Audio file loss can happen for a variety of reasons. Before understanding recovery methods, it is essential to understand the reasons behind these losses. Knowing the cause of audio file loss can help you figure out which one would be the best method for recovering the file:
- Accidental deletion: One of the most common errors can happen, leading to the complete deletion of the audio file from your device. You may try to delete one file but accidentally delete the audio file. Moreover, this can happen by mistake when trying to free up extra storage space.
- Factory reset or device formatting: If you accidentally format your device and completely opt for a factory reset, all the data in your system will be lost. This can lead to the device data being completely erased, even the audio files on your system.
- Virus or malware attack: Virus and malware attacks are one of the malicious things to happen to your system. These attacks can corrupt all your system's daily files and hamper your item's function, which you will not even know, and your entire system will be affected.

- Physical damage or hardware failure: Always look out for your system's physical damage and hardware failure. Data will be lost when the device is physically damaged or has any other kind of hardware damage. Therefore, you will end up losing even the saved audio files in your system.
- Software glitches or bugs: Software glitches and bugs can randomly happen in your system. These are occasional glitches and bugs but can tend to hamper the entire functioning of the system. As a result, the data will become inaccessible, signifying the loss of audio files.
Part 4: How To Recover Deleted Audio Files Android?
Recovering deleted files on Android must not be a struggle. You must use the proper methods. Recovering audio and videos from the Audio File Manager will require you to follow the steps appropriately to recover the data easily.
Here are all the methods on how to recover deleted videos from audio manager:
Way 1: Retrieve Deleted pictures/videos Using Wondershare Recoverit
You can retrieve the deleted pictures and videos using data recovery software such as Wondershare Recoverit. Wondershare Recoverit is available for free download for Windows and Mac users. It is beginner-friendly software, so you won't have to deal with it much.
Wondershare Recoverit uses advanced algorithms to recover deleted files. This ensures that you can recover your precious lost data with a few clicks. Moreover, it will help to recover and save data against different data loss scenarios.
You need to follow the steps given below on audio manager data recovery using Wondershare Recoverit:
Step 1: Download, install and launch Wondershare Recoverit on your system. Choose the Deleted File Recovery option.
Step 2: Under the Hard Drives and Locations option, choose the location from which the data is to be scanned.

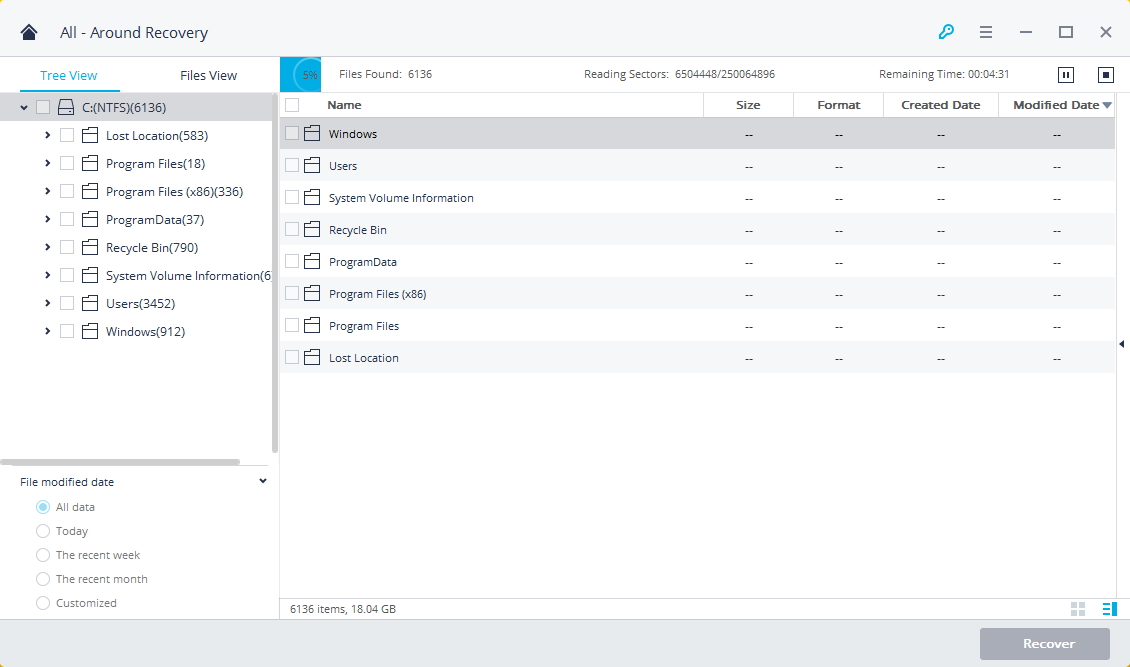
Step 3: You can filter the data and specify the type of videos or photos you want to recover. Therefore, the search will begin with the applied filters. The Quick Scan will begin.

Step 4: Recoverit will begin scanning the files. You can initiate the All-Around Recovery scan if the files aren't found through Quick Scan. Through this mode, more files on your computer’s hard disk will be searched for.
Step 5: You can preview the files once the scanning is completed. If the preview button shows that the correct files have been recovered, click on the Recover button. Select a new path or location where the files can be stored.

Way 2: Recall Deleted Photos From the Recycle Bin
When photos are deleted from your system, they are directly transferred to the Recycle Bin. By default, these deleted photos stay in the Recycle Bin until they are finally deleted.
If the deleted photos aren't permanently deleted from Recycle Bin, you will still have the option to recover these photos. However, if you opt for recovery from Recycle Bin, you must keep an eye out for the file size. Recycle Bin allows files of only a specific size to be stored. Anything larger than that will be permanently deleted.
Below are the steps you will have to follow to recall deleted photos from the Recycle Bin:
Step 1: Double-click the Recycle Bin icon on your desktop to open it.
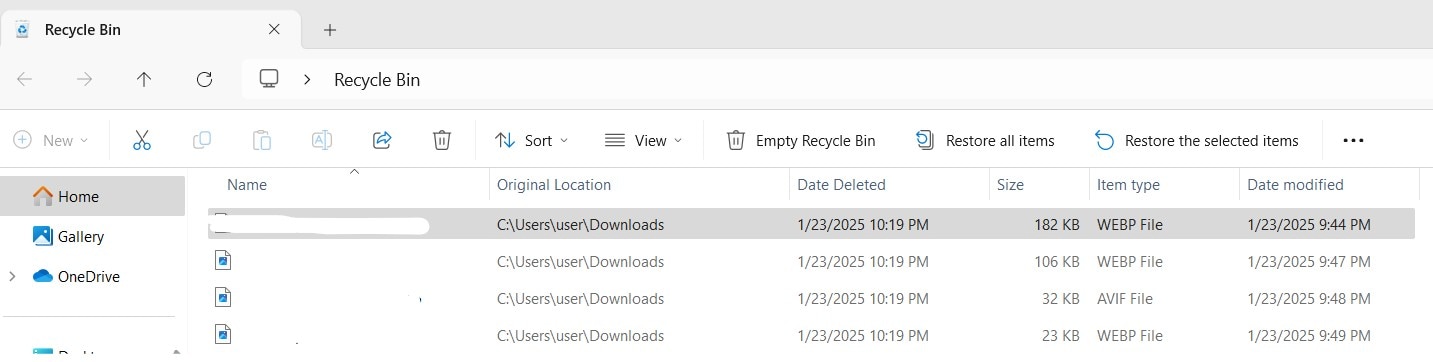
Step 2: Navigate through all the deleted photos and videos on the Recycle Bin to find the files you want to recover.
Step 3: Once the file is found, right-click on it and click the Restore button from the available menu.
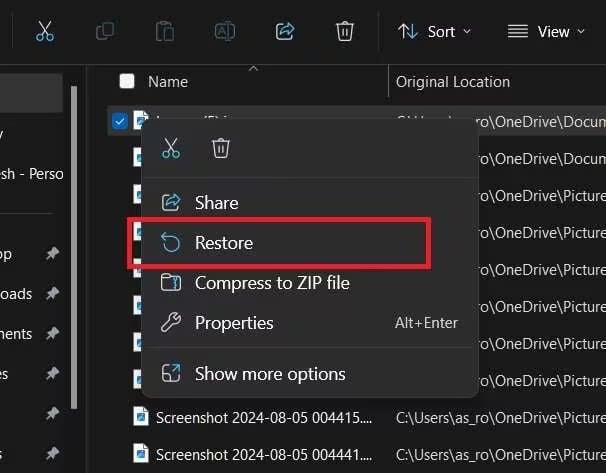
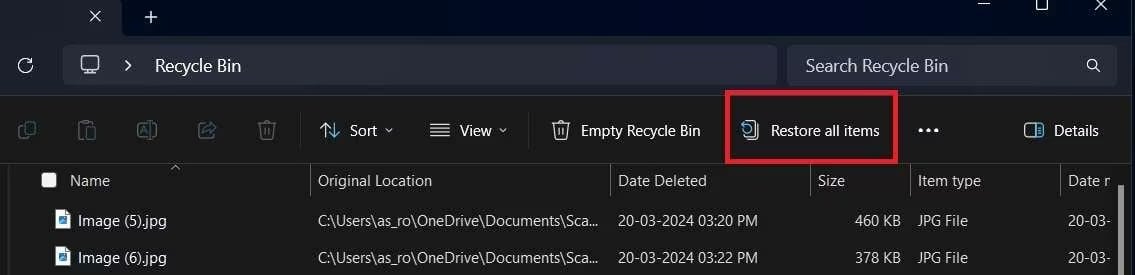
Step 4: If you want to restore all the deleted photos and videos available on the Recycle Bin, just select the files and click on “Restore all items” available on top of the screen. The files will be restored to their original location.
Way 3: Recover Erased Images Using File History
File History is the built-in Windows backup utility that restores data to its previous versions. However, you will have to turn on this feature in your system for it to work efficiently and eventually recover the data.
The File History feature must be enabled before the loss of the photos. Only in that situation will File History create a backup, and you'll be able to recover the photos. If the File History feature is on, you'll be able to recover the photos to their previous versions, even if that was mistakenly deleted. You may also take a backup of the files in external storage. So, connect it to your system to enable the backup.
You can follow the steps given below to audio manager file recovery using File History:
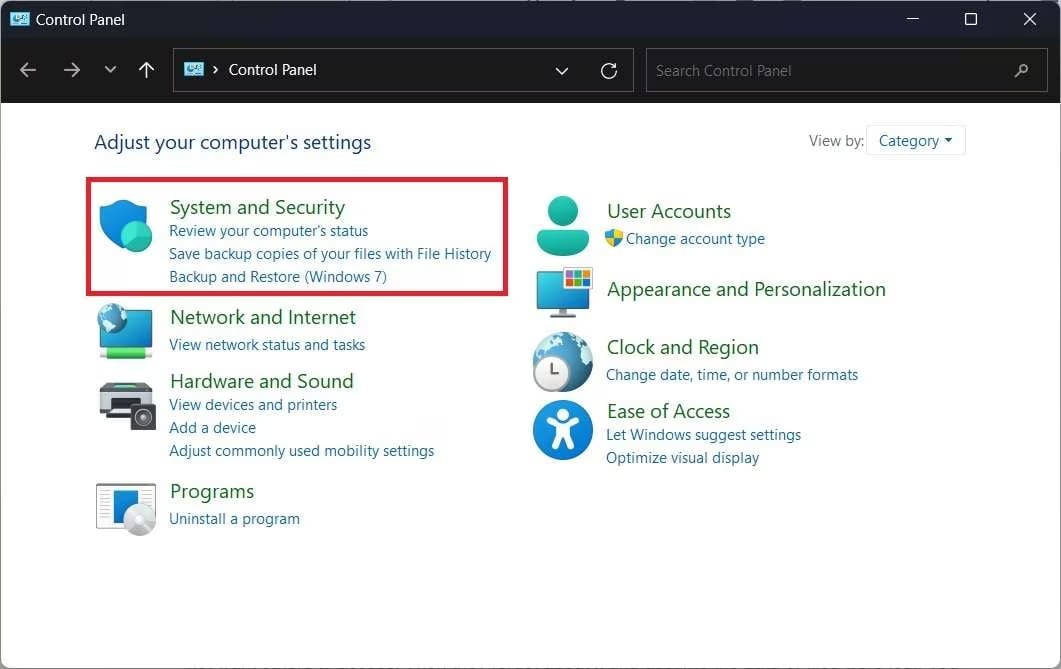
Step 1: Type Control Panel on the search bar and open it.
Step 2: Visit the System and Security section in the Control Panel.
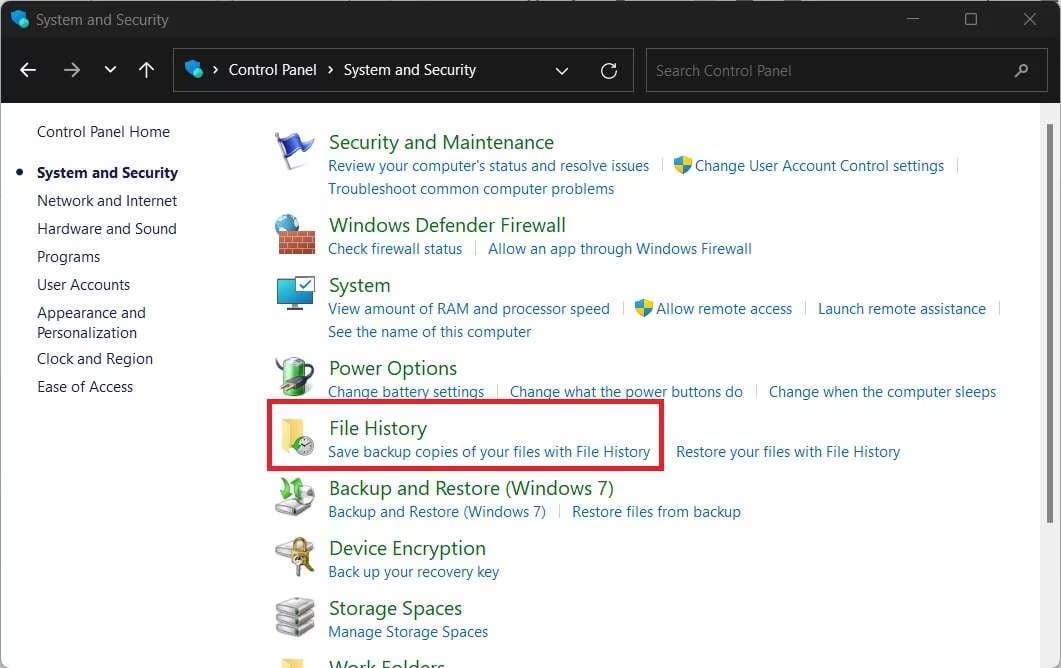
Step 3: Click on the File History section and select the folder from where the respective photos or videos were deleted. Choose Restore your files with File History to initiate the action.
Step 4: The different file versions will be available on the screen. Choose the version that you want to restore and click on Restore. The files will be permanently recovered to your screen.
Way 4: Recover Deleted Photos From a Backup
If you had taken a backup of all the deleted photos and videos on a cloud storage like Google Drive, you could easily recover it. However, the backup to Google Drive should have been done manually or automatically via a phone.
The photos and videos will be uploaded to Google Drive, and you can download them from there. Google Drive is one of the most convenient cloud storage systems, and you can easily store and download data. You must have a Google account so that you can create your backup on Google Drive.
Follow the steps given below to perform audio manager deleted photos recovery from a Backup:
Step 1: Visit the official website of Google Drive and sign in using your Google account ID.

Step 2: Find the folder where the videos and photos were stored. Navigate through the folders to find the files.
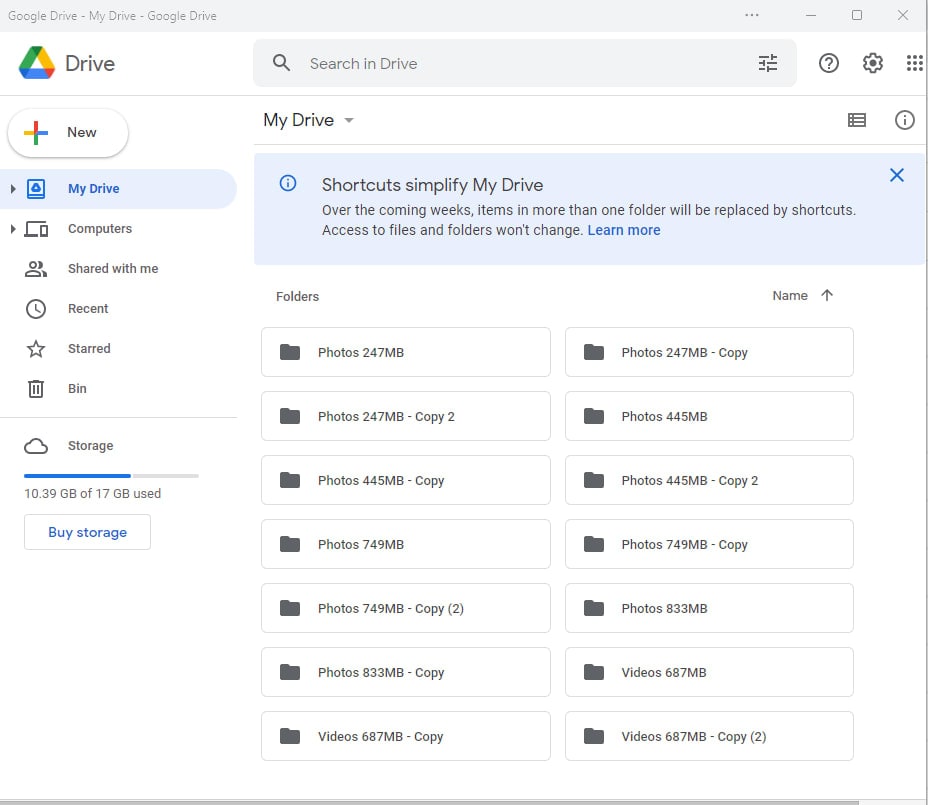
Step 3: Once you find these folders in your folder, open it, click on the three dots towards the right, and hit the Download button.
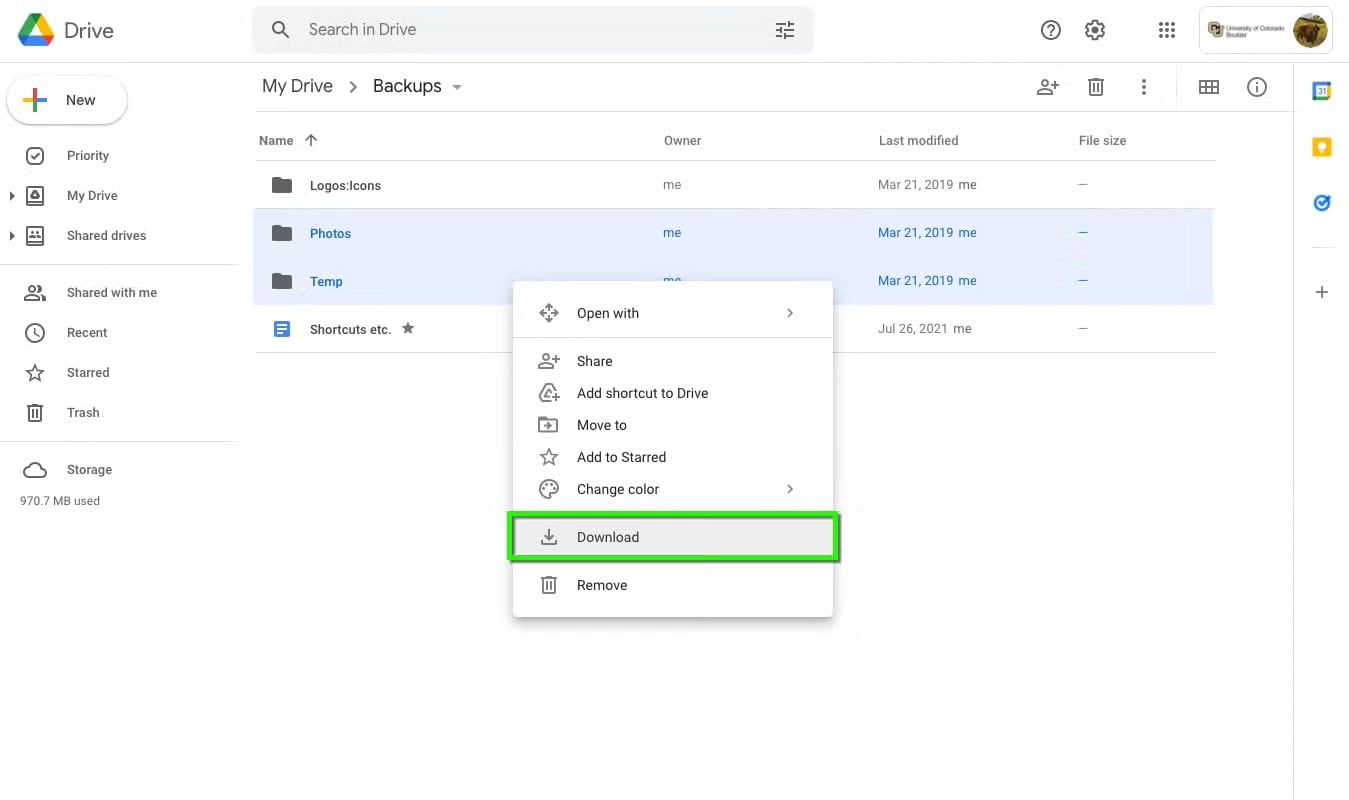
The system deleted photos and videos will be stored in the Download folder of your system. You can now navigate all the photos and videos from here.
Way 5: Recover Erased Photos to Previous Versions
If you want to recover the deleted photos from their previous versions, you must check the backup folder of your Windows system. The Windows system has an in-built backup system in the Control Panel, which will allow you to recover the files easily.
Before you use this feature, you must ensure that the photos and videos are backed up in your system. You can check your system data to ensure whether or not the particular version is available and if you can restore it. The Backup and Restore feature of Windows systems can work fine for audio manager photos recovery.
You may follow the steps given below to recover the deleted photos from the previous version:
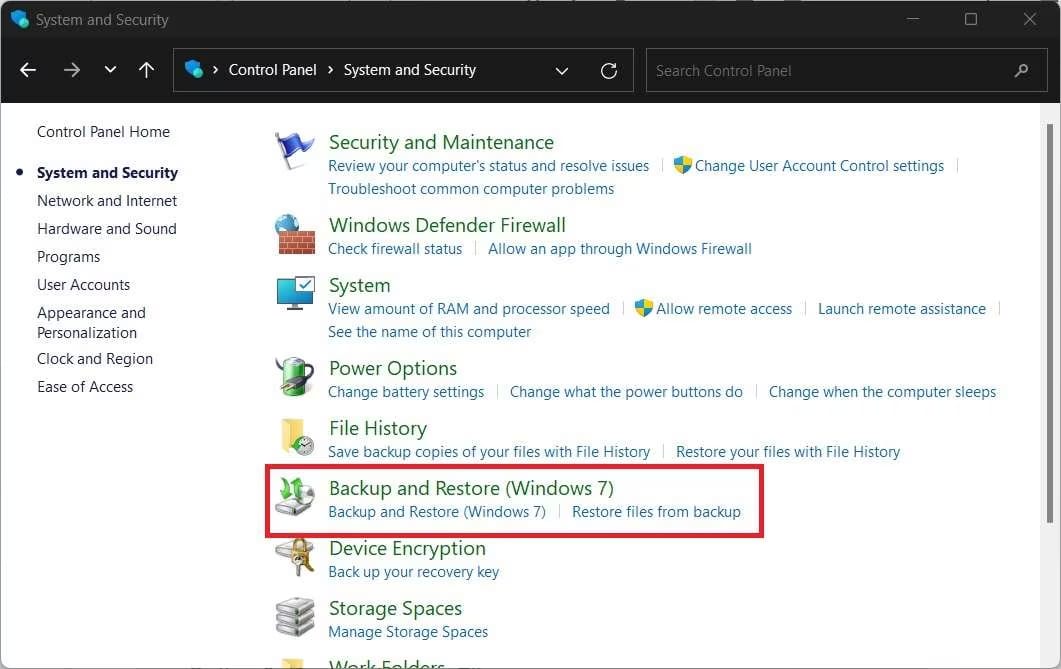
Step 1: Launch the Control Panel on your computer and choose the System and Security section.
Step 2: You will receive a wide range of lists, click on the Backup and Restore section. Right underneath will be the option to restore files from Backup; hit on it.
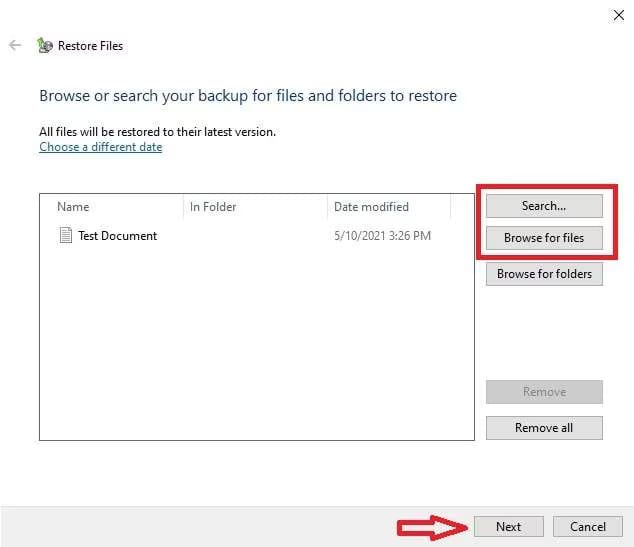
Step 3: Click on the Search or Browse for Files button on the right side of the Restore Files window to look for the deleted photos and videos. As soon as the photo or video is found, click on Next. You will be redirected to a new window.
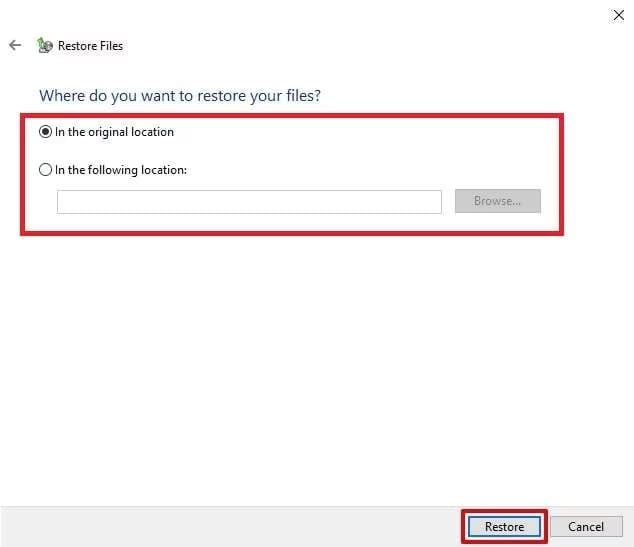
Step 4: You will be given two options to restore the files- in their original location or in a new location. Choose a new location where you want to save the files. Hit the Restore button. The files will be restored in the system.
Part 5: Preventing Future Data Loss
There is no doubt that when you have files in your system, they will be prone to data loss. Your main purpose should be to ensure that you reduce the risk of data loss as much as possible. Therefore, you will have to be a little mindful so that you can easily prevent the risk of data loss in the future. These include:
- Regular backups of hidden files: You must regularly backup all the files on your computer. It is a good idea to even back up hidden files. This paves the way for the easy success of data restoration by creating an extra source from which you can recover the data in case it is lost.
- Using alternative secure storage apps: Your phone or computer doesn't always have to be the source where you secure the files. It is also advisable to create an alternative source for storing the files. For example, you may choose an external device such as an SD card or a USB drive. So, even if the files are lost from your system, you shall be able to recover them in the future.
Conclusion
Deleted photos and videos from your system can be extremely difficult to deal with, especially if they're special information. However, this does not mean that you can't recover the data. It is advisable to use a professional data recovery software using which you can opt for audio manager photos recovery. For example, Wondershare Recoverit Data Recovery software can work wonders when it comes to recovering the deleted photos and videos of the system.
Try Recoverit to Recover Videos from Audio Manager
![]() Security Verified. Over 7,302,189 people have downloaded it.
Security Verified. Over 7,302,189 people have downloaded it.
FAQ
-
1. How to find audio manager hidden files?
The hidden audio Manager files will be in your system's Files folder. You should navigate through the File Manager to look for these files. -
2. How to recover deleted audio from file manager?
You may use data recovery software to recover deleted audio from the file manager. You may also recover the audio from the backup. These backups are usually saved in cloud storage or available in the website's Trash Bin. Therefore, you can store the data. -
3. How do I recover photos from the Audio Manager?
You can recover photos from Audio Manager using data recovery software such as Wondershare Recoverit. You may also recover these photos from the File History and System Restore feature.


