All your drives on Ubuntu are divided into multiple partitions. Multiple partitions let you store data separately on the same drive. In general, keeping your OS on one partition and your personal files on the other is a good idea.
Once a partition is created, it has a specific size, and you're limited to it. Many users realize later that they need more size or their needs simply change and have to shrink specific partitions. Luckily, there are ways you can resize an Ubuntu partition to expand or shrink its size.
In this post, we'll tell you everything you need to know about changing the Ubuntu partition size and give you the exact steps you must follow during the process. So, let's start.
In this article
Preparations for Resizing Ubuntu Partitions
Before you resize a disk partition on Ubuntu, you need to know some important things. You should know some factors when resizing an Ubuntu partition to ensure the process goes smoothly. Here's what you need to know:
- Avoid resizing an Ubuntu partition while it's mounted. That includes all partitions on your Ubuntu, both the ones with system files and the ones with personal files. In other words, to resize a partition on Ubuntu, you must run your system via USB.
Ubuntu Live can boot your system from a DVD or USB. When you get to the part, select "Try Ubuntu without installing" to quickly resize partitions without installing a new OS. - Resizing a partition can result in various issues. Even if you do everything correctly and your system is in great shape, you never know when something might happen. That's why you should back up your data on your resizing drive. Additionally, consider getting data recovery software to recover lost files from the resized partition.
- It's also important to know that you can't expand an Ubuntu partition without enough space on the drive. You can check this by looking at the graphic interface in GParted.
Boot From USB or Disk to Resize Your Ubuntu Partition
You will need a bootable USB drive with a Ubuntu or CD installation to resize your partition. Insert the CD or the USB flash into your computer and restart it. If you don't have one, you can download the Ubuntu ISO from the official Ubuntu website and burn it to a disk.
Alternatively, after downloading the ISO file, you can use a Startup Disk Creator app in Ubuntu to create a bootable USB. Once you've inserted your bootable USB media, restart your computer and press F1, F2, or Delete during the load screen to enter BIOS.
Change the boot order to a USB drive and restart. You will get to the installation window below:

Select your language and click Try Ubuntu to boot your system from the drive.
Once you've done that, you can resize your Ubuntu partition.
How to Resize Ubuntu Partitions Using GParted
One of the best ways to resize your partition is to use the GParted tool. This tool can't resize partitions using a simple graphical interface. But before you can use it, you will have to install it. Luckily, GParted comes with the default package repository.
Installing GParted on Ubuntu
- Open the terminal by pressing CTRL + ALT + T.

- Start updating your package list by typing the command "
sudo apt update."
- Wait until the update is complete and run "
sudo apt install gparted" to install GParted on Ubuntu.
- Once GParted has been installed, type "
gparted" to access the tool.
Before we get to the steps for resizing Ubuntu partitions using GParted, let's talk about the tool itself and what you'll see:

- The area marked with the number 1 is the graphical representation of the drive. Here, you can see your partitions, their location on the drive, and the space they take.
- The area marked with the number 2 includes the details of all partitions on the drive, including unused space, used space, size, formatting, and names. A partition can't be modified if it has a key icon next to it. You can also see how much unallocated space you have on the drive.
- The area marked with the number 3 lets you change between the drives on your computer.
Resizing Ubuntu Partitions in GParted
- Locate the partition you want to resize on Ubuntu. In our example, there's only a single partition, which takes about half the drive space.

- Right-click the partition and select Resize/Move.

- The first option to resize the partition is to click on the arrow and slide it left or right to configure it to the correct size (figure 1).
- The second option is to input the exact size of the partition in MiB or allocate the amount of free space this partition should have. (figure 2)
- Regardless of your method, the next step is to click Resize/Move at the bottom right corner. (figure 3)

- You can now see pending changes at the bottom of the tool that need to be confirmed. (figure 1) If you're happy with the changes you want to make, click on the green tick icon. (figure 2)

- Click Apply to go through with the changes.

- Wait until the process is complete. When you see the "All operations successfully completed" message, click Close.

- Check if the partition has been successfully resized and turn off GParted.

How to Change Ubuntu Partitions Using the Terminal
Another option to resize an Ubuntu partition is to use the terminal. It's the preferred method if you're using a Ubuntu server or some other terminal-based operating system. Alternatively, this is an excellent method to change the partition remotely.
Similarly to the GParted method, the Ubuntu partition you want to shrink or extend can't be mounted. You should also use Ubuntu Live instead of running the commands through the installed OS when resizing partitions with this method.
- Access the terminal by pressing CTRL + ALT + T.
- Type "
sudo lsblk -d | grep disk"
- Check the drive names and memorize the one on which you want to change partitions.

- Type "
sudo parted" to enter the tool for resizing partitions.
- Type "
select /dev/DEVICE" and replaceDEVICEwith your drive name.
- If the drive is successfully selected, you will see this message.

- Use the "
print" command to print out the information about the drive, including its partitions.
- You will get something like this.

- Type "
resizepart" to resize the partition.
- Type the partition number and press Enter.

- The next step is to type where the drive will end. Remember that two partitions can't intersect, and you must leave a bit of space between them.

- Type "print" to verify the changes you've made. In our case, we've increased the partition size to 30GB.

Bonus Tip: How to Recover Lost Partition Data After Resizing
If you've forgotten to back up your files or couldn't do it for some reason, you might lose files on your resized partition. Even if you follow all the steps correctly, it's possible to lose data. For example, if you change the file system or the partition type during the process or change from a primary to a logical partition, there's a high chance you'll lose data.
That's why you should use a capable data recovery tool like Wondershare Recoverit to recover deleted files or partitions successfully. For this method, you will need another computer with Windows or Linux.
Download and install the app on your working computer and follow these steps:
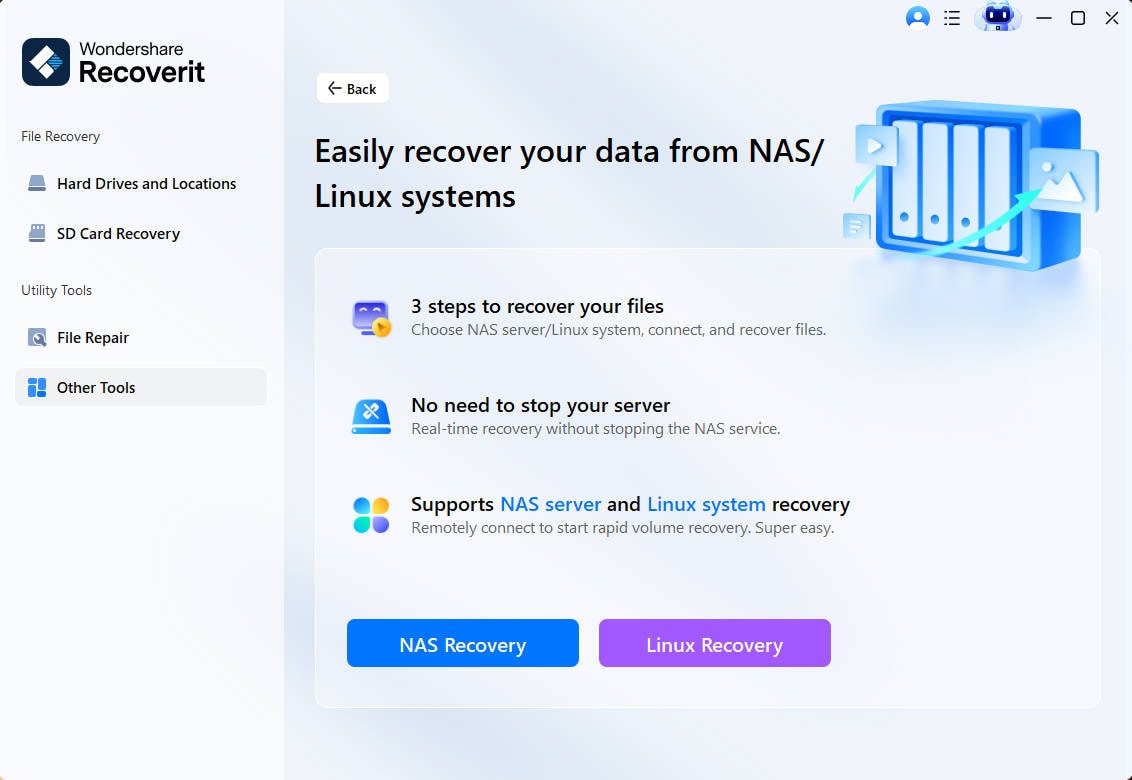
- Launch the app, select the NAS and Linux option and the left menu panel and click Linux Recovery.

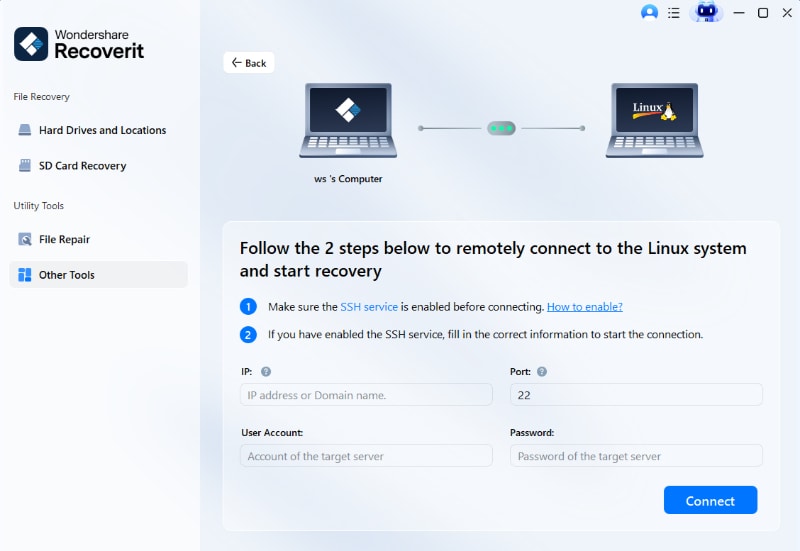
- You will see this screen. Add all the required information and click Connect.

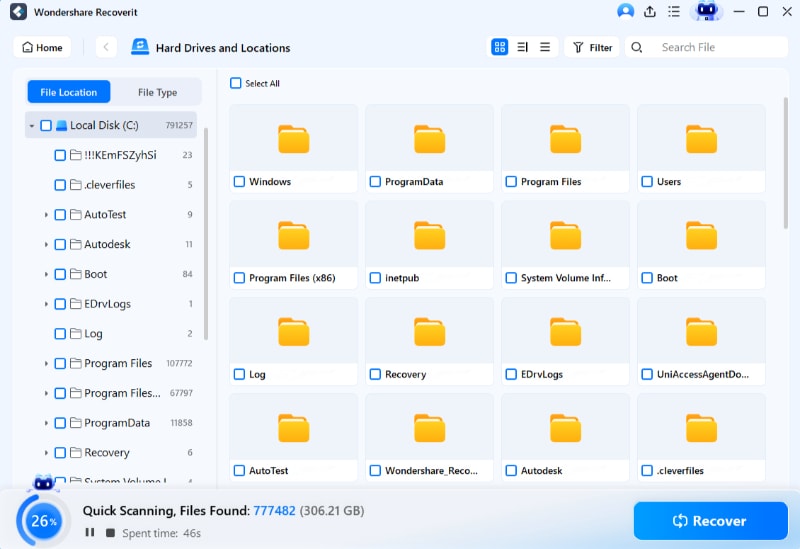
- The app will automatically start scanning your device. You can see progress in real-time and stop scanning if you've found the missing files.

- Once the scan is complete, select the files to preview them. If these are the files you want to recover, click Recover.

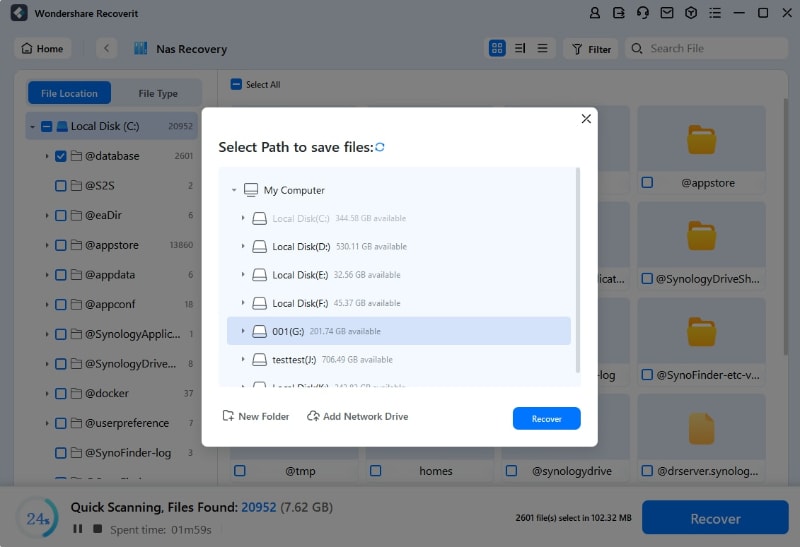
- Select the save destination on your working computer and click Recover.

Conclusion
We hope this guide helps you use the Ubuntu command line successfully to resize partitions. Whether you want to shrink or extend your partition, the steps remain the same – the only difference is the size changes you make.
Follow the steps carefully; we guarantee you can successfully change your Ubuntu partition size. Remember to back up your files and keep a recovery tool like Recoverit close by in case something goes wrong to ensure none of your files get lost.
FAQ
-
Can I shrink an Ubuntu partition?
Yes, it's possible to shrink and extend an Ubuntu partition using GParted and the terminal. The steps are the same. You only have to lower the size when allocating space. -
Why change an Ubuntu partition size?
You can change an Ubuntu partition size to reclaim unused space, improve performance, create new partitions, reallocate disk space, free up space on other partitions, or adjust the size of virtual disks. -
How do I change the size of my home partition in Ubuntu?
To change the size of your Ubuntu partition, you can use two fundamental methods: the Ubuntu Terminal or Gparted. -
How do I resize Ubuntu 20.04 in GParted?
To resize Ubuntu 20.04 in GParted, follow these steps:
1. Install and launch GParted.
2. Select the drive you want to resize.
3. Unmount the desired partition.
4. Resize the partition.
5. Apply changes and wait for the process to complete.
6. Reboot your system.


 ChatGPT
 Perplexity
 Google AI Mode
 Grok
Grok


