We would all like to keep our favorite memories with us forever. You may use the most reliable storage solutions, such as external hard drives, cloud storage, and others, to protect your valuable information from harm.
However, you cannot always predict what will happen and may lose your data unexpectedly. So you'll need a reliable recovery solution to retrieve your data from the worst-case scenarios. Windows File Recovery may have been on your search quest and you may wonder how to get started. You can check out our detailed guide on how to use Windows File Recovery below.
| How to Use Windows File Recovery | Scenarios |
| Mode 1: Default Mode | For Recently Deleted NTFS Files |
| Mode 2: Segment Mode | For Corrupted or Formatted NTFS Drives |
| Mode 3: Signature Mode | For All Other File Systems |
What is Windows File Recovery and Who Is It For?
Windows File Recovery is a software solution developed by Microsoft. It's designed to help you retrieve data you've lost on your Windows devices using the power of winfr command. This program doesn't have a graphical user interface, which is something you'd expect from powerful recovery solutions.
The tool is only available for Windows 10 and 11 devices. If you have an older operating system, you won't be able to use File Recovery. It isn't very feature-packed, but the tools and features it offers should be sufficient for a successful recovery journey. Let's look at some of the features:
- Supports NTFS, exFAT, FAT32, and ReFS file systems;
- Supports RAW file systems;
- Supports numerous devices, such as external hard drives, SSDs, USB flash drives, etc.
- Three recovery modes: default, segment, and signature;
- The tool creates a folder for the recovered files;
How to Download and Install Windows File Recovery Tool on Windows 10/11
Downloading File Recovery is quick and easy. However, before taking this step, you should check whether you have the required Windows version. Your Windows should be at least Windows 10 2004 version from 2020. If you have this version or higher, follow the steps below to download and install the tool:
- Head to the official Microsoft Store.

- Type Windows File Recovery in the search bar and press Enter.

- Click the Get button next to the application.

After a few minutes, you'll be ready to use File Recovery.
How to Select the Right Windows File Recovery Mode
Since File Recovery offers three different recovery modes, you may not know which one to choose for your needs. Below is a table to help you on this journey and make the most out of your recovery experience with Windows File Recovery.
| File System | Situation | The Mode You Can Choose | Scanning Speed(x/5) |
| NTFS | Recently deleted files | Default | ⭐⭐⭐⭐⭐ |
| NTFS | Corruption | Segment/Signature | ⭐⭐⭐ |
| NTFS | Formatting | Segment/Signature | ⭐⭐⭐ |
| FAT | Any data loss situation | Signature | ⭐⭐ |
| exFAT | Any data loss situation | Signature | ⭐⭐ |
| ReFS | Any data loss situation | Signature | ⭐⭐ |
As you can see, you can only use the Default and Segment modes for NTFS file systems. If the Segment mode doesn't work for these files, we advise you to jump into the Signature Mode. All other file systems will require you to use Signature.
How to Use Windows File Recovery: Command Examples
Using Windows File Recovery can be tricky, especially if you're new to the recovery world. After choosing the appropriate recovery mode, you can check out the step-by-step guides to help you navigate your journey.
Mode 1: Default Mode (For Recently Deleted NTFS Files)
- Open Command Prompt.

- Type
/nand enter the path for searching for the file. For instance, if you're searching for a docx file, type the following command:/n UsersNameFolderfile.docx.Change the user's name, folder, and file accordingly. - To search for a specific file in a specific folder, use the
winfr C: D: /n UsersNameFolderfile.docxcommand and change the elements accordingly. It will save your recovered files to the D drive.
- You can also search for multiple file types by adding them to the command. For instance, you can search for various file types using the
winfr C: D: /n .docx /n .xlsx /n .pptxcommand. - Press
y.
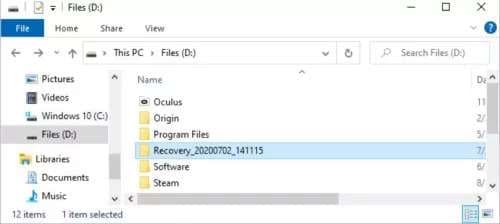
After this, you should find the recovered files in the Recovery folder, as mentioned earlier.
Mode 2: Segment Mode (For Corrupted or Formatted NTFS Drives)
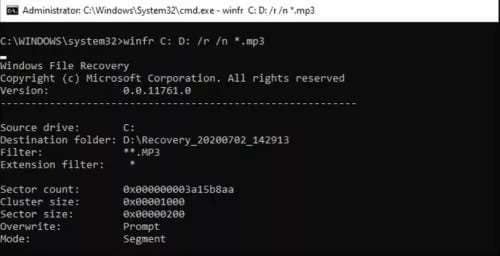
Segment recovery in File Recovery for Windows has all the same commands as the default mode. The only difference is that you must put an /r before the /n to activate this mode. For example, you'll run the segment mode by typing this command: winfr C: D: /r /n .mp3.
Mode 3: Signature Mode (For All Other File Systems)
The signature mode is also similar to the abovementioned recovery modes. However, you'll have to specify the mode in your commands by typing /x and /y:to specify the file types you'll be searching for.
For instance, if you want to search the drive E for missing JPEG files, you'll run the following command: winfr E: D: /x /y:JPEG.
You can also search for different file types, as presented in this example: winfr E: D: /x /y:JPEG,PDF,ZIP.

A Simpler, GUI-Based Alternative: Wondershare Recoverit
Although Windows File Recovery is a solid tool for retrieving your missing files, as you can see in the how-to guidance above, it may be one of the most complex methods available. You don't get a GUI and may be confused about which commands to run to get your deleted data back.
If you're a beginner in the field or don't want to mess with command lines, we advise you to use a third-party recovery solution, such as Wondershare Recoverit. This tool comes with the most advanced scanners in the world, able to extract your data from the worst-case scenarios.
The best part about the app is that it can recover any file type from any device or file system. It's more universal than the abovementioned tool, which is limited to Windows 10 and 11.
The app has been on the market for over 20 years and has a satisfied user network. It also has over 35 patented technologies to provide the smooth recovery experience.
Download the tool, and follow the steps below to learn how to recover your deleted files:
- Open the app and click on the Hard Drives and Locations option.
- Choose the location to scan.

- Once you've selected the location, the program will automatically start scanning. You can view the progress or pause the process in the next window.

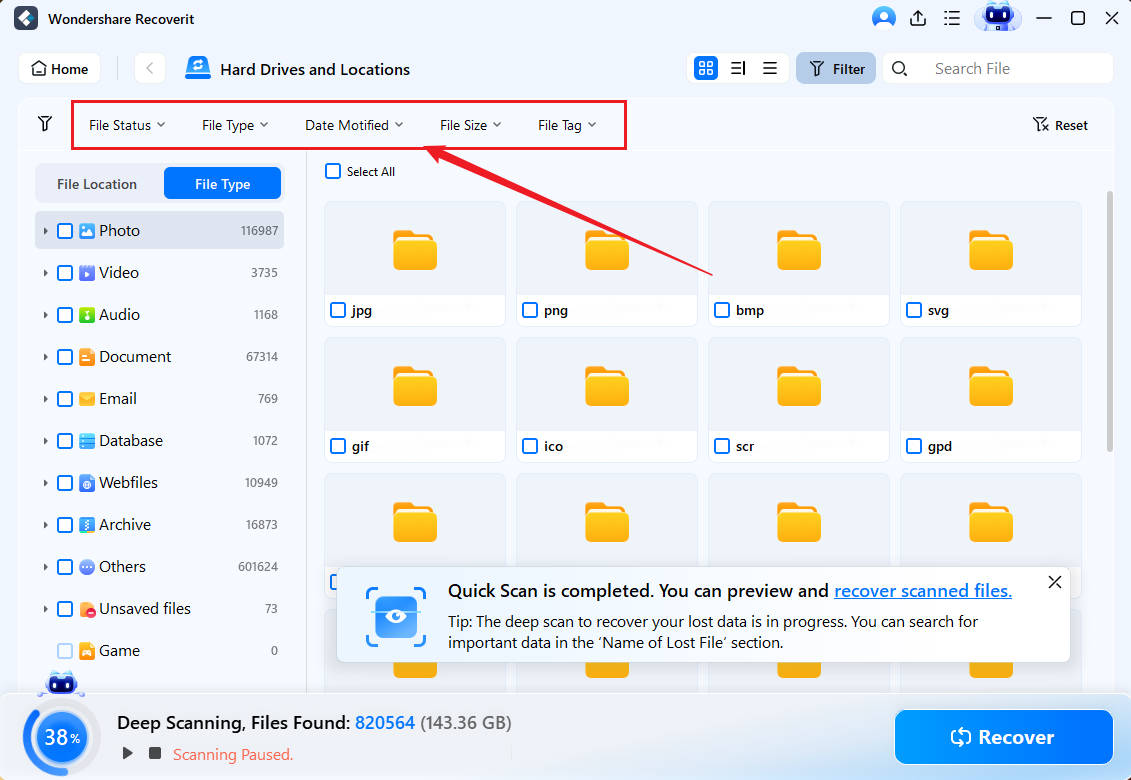
- You can filter your files by type and size to make things easier.
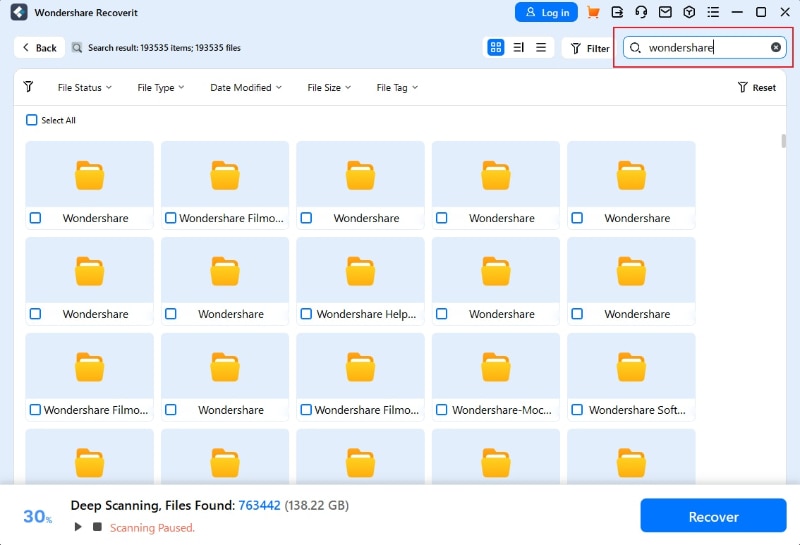
- You can also search for specific files by their name.
- After the program finishes scanning, preview the recovered files and select the ones to save. Click the Recover button.

- Choose where to save the files.
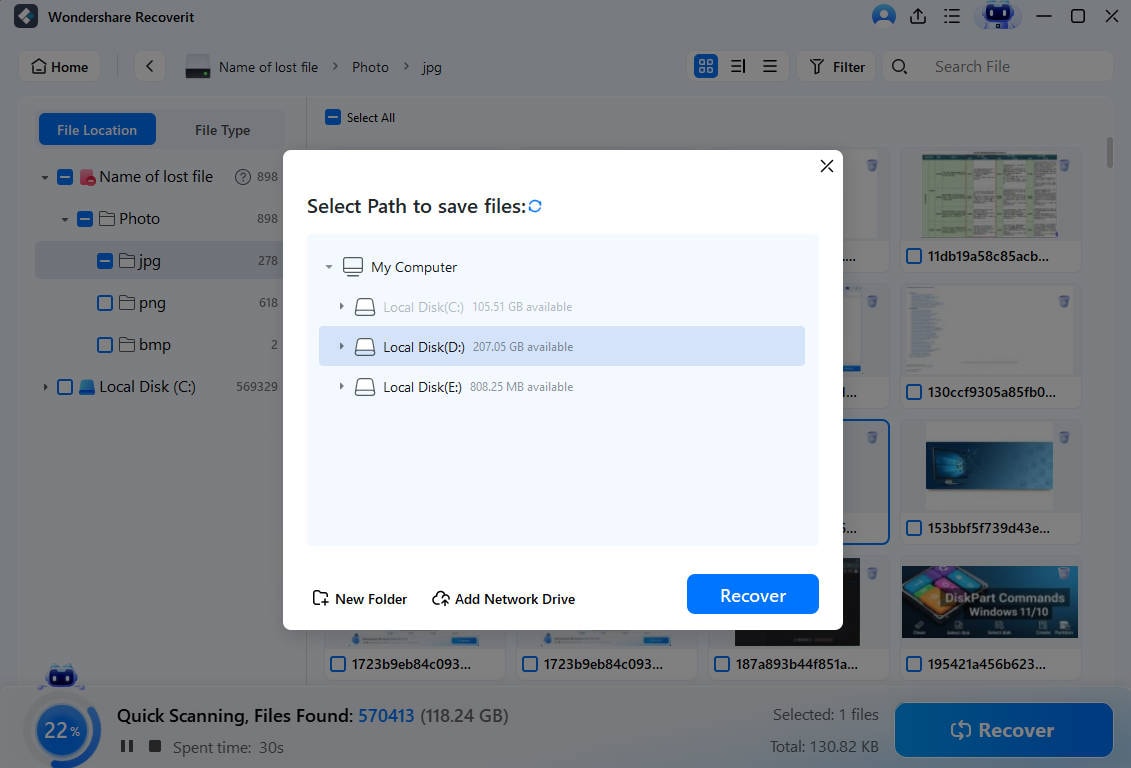
Wondershare Recoverit is intuitive and easy to use. You'll get your files back within minutes, making it one of the most powerful solutions available.
Conclusion
Protecting your data is crucial, especially in an era where danger is around every corner. Even if you have backup options, you may need a reliable solution to fall back on in case you lose your crucial data. Today, we've presented File Recovery, a Microsoft tool that can help you get your files back.
We've discussed its different recovery types and guides to help you navigate your journey. If this seems overwhelming, you can always opt for more universal, all-in-one tools. That's Wondershare Recoverit.
Frequently Asked Questions (FAQ)
-
Is Windows File Recovery a built-in tool?
No, you won't find File Recovery on your device unless you download it from the official Microsoft Store. File Recovery isn't a built-in feature that'll come as soon as you install the Windows operating system, but this may change. For now, you can only use it if you download it. -
What are the system requirements for Windows File Recovery?
File Recovery is a relatively new tool, so you shouldn't expect it to work with all devices and operating systems. Instead, you can try recovering your files with File Recovery only if you have Windows 10, 2004 version or higher.
If you have an older operating system, we advise you to try other solutions, such as Wondershare Recoverit. This universal solution works with all operating systems and devices, so you'll surely get your missing files back.
-
Is the Windows File Recovery tool free?
Yes! Windows File Recovery is entirely free to download and use. You won't have to spend a dime on your recovery journey if you know how to navigate the tool and have previous experience with command lines.


 ChatGPT
 Perplexity
 Google AI Mode
 Grok
Grok


