Dealing with Asus laptop black screen issues can be stressful and overwhelming, especially if this is your first time encountering this problem. However, there's no room for panic. You can try some of the fixes, like resetting your laptop or display, updating drivers, checking the connection, reinstalling Windows, doing a hard reset, and more if your Asus laptop is not turning on.
For more details? Let's scroll down and check it out.
Try Wondershare Recoverit to Perform Asus Computer Data Recovery

In this article
-
- Fix 1: Reset Your Laptop
- Fix 2: Reset Your Display
- Fix 3: Check Your Screen and Connection
- Fix 4: Do a Hard Reset
- Fix 5: Update GPU Drivers
- Fix 6: Update Asus BIOS
- Fix 7: Turn off Fast Startup
- Fix 8: Run CHKDSK
- Fix 9: Restart the explorer.exe Process
- Fix 10: Run SFC
- Fix 11: Do a System Restore
- Fix 12: Reinstall Windows
Causes: Black Screen on Asus Computers
Numerous reasons may lead to black screen issues on Asus laptops, and we'll present some of the most common ones below to help you troubleshoot and navigate your journey better.
| Causes | Solutions |
| 🚨Power concerns | Fix 1: Reset Your Laptop Fix 2: Reset Your Display |
| 🔌Connectivity | Fix 3: Check Your Screen and Connection |
| 🐌Outdated drivers | Fix 5: Update GPU Drivers |
| 👀BIOS settings | Fix 6: Update Asus BIOS |
| ❗Drive corruption | Fix 8: Run CHKDSK |
| 🔧Corrupted system files | Fix 10: Run SFC |
| Glitches | Fix 4: Do a Hard Reset Fix 7: Turn off Fast Startup Fix 9: Restart the explorer.exe Process |
| 🚨Firmware concerns | Fix 12: Reinstall Windows |
You should be able to repair the Asus laptop display issue in most cases. However, if the issue is caused by external or physical factors, such as hardware damage, we advise you to contact professional Asus laptop support.
Asus Laptop Black Screen Fixes
Here are the best fixes you can try to repair your Asus laptop's black screen.
Fix 1: Reset Your Laptop
Restarting your Asus computer with a black screen should be the first thing you do since this solution can fix minor bugs and issues. The process is easy, and you can follow these steps to learn how to restart your laptop using hardware:
- Press and hold the power button for 5 to 10 seconds until the laptop shuts down completely.

- Next, press and hold the same power button to turn the device on.
If this doesn't fix the issue, jump to some of the solutions below.
Fix 2: Reset Your Display
Your laptop may lose connection with your laptop's display, so you can reset it to get it up and running again. The process is simple, as shown in the steps below.
- Power on your device.
- Press the Windows + Ctrl + Shift + B keys simultaneously.

After completing these steps, you should regain your display and establish contact.
Fix 3: Check Your Screen and Connection
Before you proceed to more complicated solutions, we advise you to check whether your device receives enough power.
You can do so by turning your Asus laptop on and checking the power light. If it's flickering, the issue may not be as complex as expected. It's crucial to see whether your device receives power to get to the next solution.
Another thing you should try is turning your screen brightness up. Sometimes, your laptop may have automatic brightness adjustments, leading to lower lighting. Press the Fn + F6 keys on your keyboard multiple times to check whether the brightness improves.

Fix 4: Do a Hard Reset
A hard reset will return your device to factory settings, so it's crucial to recover and back up your data first. Once you perform this solution, your Asus device should be as good as new, so let's check out how you can do it.
- Turn off your Asus laptop.
- Unplug the charger from the laptop, disconnect all external devices, and remove the battery from your device.

- Leave the laptop like that for 30 seconds.
- Next, press and hold the power button for a minute.

- Reassemble your laptop and power it on.
After this, your Asus laptop should work perfectly and eliminate the black screen issue.
Fix 5: Update GPU Drivers
If your GPU drivers are outdated, they may be causing the issue and not allowing your Asus laptop to power on correctly. You should update your drives by following these steps:
- Restart your device 3–4 times until you enter the Windows Repair Environment.
- Head to Troubleshoot in the next window.

- Next, select Advanced Options.

- In the Startup Settings menu, press the F5 key to enter the Safe Mode.

- Once in Safe Mode, press the Windows + X keys and select Device Manager from the drop-down menu.

- Click on the arrow next to Display Adapters.
- Right-click on the GPU and select Update Driver.

After this, we advise you to restart your device and check whether the display will turn on.
Fix 6: Update Asus BIOS
You should update your BIOS as soon as you notice something's wrong with your Asus device. If the BIOS is outdated, it may lead to performance issues and the above-mentioned black screen. Follow the guide below to update the BIOS and give your Asus laptop a new life.
We must note that you'll need another working computer to download and transfer the files to the Asus laptop with a black screen.
- Open the Asus Support site on the working computer.
- Insert your Asus device's make and model and download the BIOS file accordingly.
- After downloading, right-click on the file and select Extract Files.

- Click Extract from the pop-up window.
- Right-click on the file again and rename the extension to .bin.
- Connect a FAT32 USB to the working computer and transfer the .bin file to it.
- Connect the USB to the Asus laptop with the black screen.
- While powering on the device, press Ctrl + R to enter Recovery Mode.

- Select the .bin file.
- Click Yes to update BIOS.

After this, your device will automatically restart, and your display shouldn't be black anymore.
Fix 7: Turn off Fast Startup
Fast Startup can improve the boot time of your Asus laptop, but it may not always work perfectly. If this feature has been enabled on your device for some time, it may lead to black screen issues. You can resolve it by following the guide below.
- Enter Safe Mode.
- Next, press the Windows + R keys and type powercfg.cpl into the box.

- Click on the Choose What the Power Buttons Do from the right side.

- Click Change Settings That Are Currently Available.

- Untick the Turn On Fast Startup and click Save Changes to apply.

Restart your device afterward for the best experience.
Fix 8: Run CHKDSK
If your drive is causing issues, running CHKDSK should resolve the issues with the black screen. You'll learn how to run this command below:
- Enter Safe Mode on your Asus device.
- Search for Command Prompt and select Run as Administrator.

- Next, type the chkdsk command and press Enter.

Once you do, the computer will start scanning and repairing potential issues. After the process is complete, we advise you to restart your device to apply the fixes and get your Asus laptop up and running again.
Fix 9: Restart the explorer.exe Process
The explorer.exe process is responsible for running your display and all other desktop processes perfectly, enabling good performance. If this program doesn't work properly, neither will your Asus laptop. We advise you to enter the Safe Mode and follow the steps below to restart this process.
- Once in Safe Mode, press the Ctrl + Shift + Esc keys to open the Task Manager.
- Click on Windows Explorer from the available options.
- Select End Task from the drop-down menu.

Next, you should restart your laptop and see whether your display will power on. You may have to repeat this process for the best results.
Fix 10: Run SFC
System File Checker or SFC is a powerful tool that detects and repairs damaged, corrupted, or missing system files that may be causing the Asus black screen issue. Running this command will give you insight into whether something's wrong with system files, so follow these steps to learn how to complete the process:
- Enter Safe Mode.
- Open Command Prompt and select Run as Administrator.
- Type the
sfc/scannowcommand and press Enter.
After this, let your device scan and repair nearly all problematic files. Once the program finishes the process, restart your Asus laptop.
Fix 11: Do a System Restore
If you've made some changes to your device's settings, these settings are likely causing the issue. One of the best ways to revert these settings is to use System Restore. The program will create working restore points, enabling you to get your Asus laptop back into a working state whenever needed. Here's how to do it:
- Open Safe Mode on your device.
- Search for Restore and click on the first option.

- Click on the System Protection tab and head to the System Restore option.

- Click the Next button in the following window.

- Tick the Show More Restore Points box.
- Select the desired restore point and click the Next button.

- Follow on-screen instructions to complete the process.
After this, your computer will automatically restart, fixing the Asus black screen issue.
Fix 12: Reinstall Windows
Reinstalling Windows will give your Asus laptop a new start and fix all possible software concerns leading to the black screen. However, to do this, you'll need another working computer and a blank USB to store the installation file. We must note that Windows reinstallation will surely wipe away everything from your laptop, so you should consider recovering your valuables using powerful solutions like Wondershare Recoverit.
Once you gather these devices, follow the steps below:
- Head to the official Microsoft website and click the Download Now button under Create Installation Media.

- Next, open the downloaded folder and double-click the Media Creation Tool file.

- Click Yes if a pop-up window appears.

- Read and accept license terms.

- Select the desired language and click the Next button.

- Connect the USB to the computer and click USB Flash Drive on the screen. Press the Next button.

- Select the USB you want to use and click the Next button.

- After completing these steps, connect the USB to your Asus device.
- Power on the device and select your USB as the boot option.
- Follow the Windows Setup to reinstall Windows on your device.
Your Asus computer should be as good as new.
Bonus: How to Recover Data From Your Asus Laptop While Attempting These Fixes
Some solutions above may wipe away everything stored on your device, such as Windows Reinstallation. Moreover, you may want to get your values back before fixing Asus laptop black screen. Therefore, in this bounus part, we advise you to check out Wondershare Recoverit as it has the industry's most robust recovery mechanisms and algorithms, with over 20 years of work experience and 35 patented technologies.
The tool has a 95% success rate, making it among the most reliable recovery solutions on the market. The best part is that it supports all file types and formats, so you won't leave anything behind.
To use Wondershare Recoverit successfully, you'll need another working computer and a blank USB drive. Download the app to the working computer and follow these steps to recover data from your black screen Asus laptop:
- Open the app and click on the System Crashed Computer option.
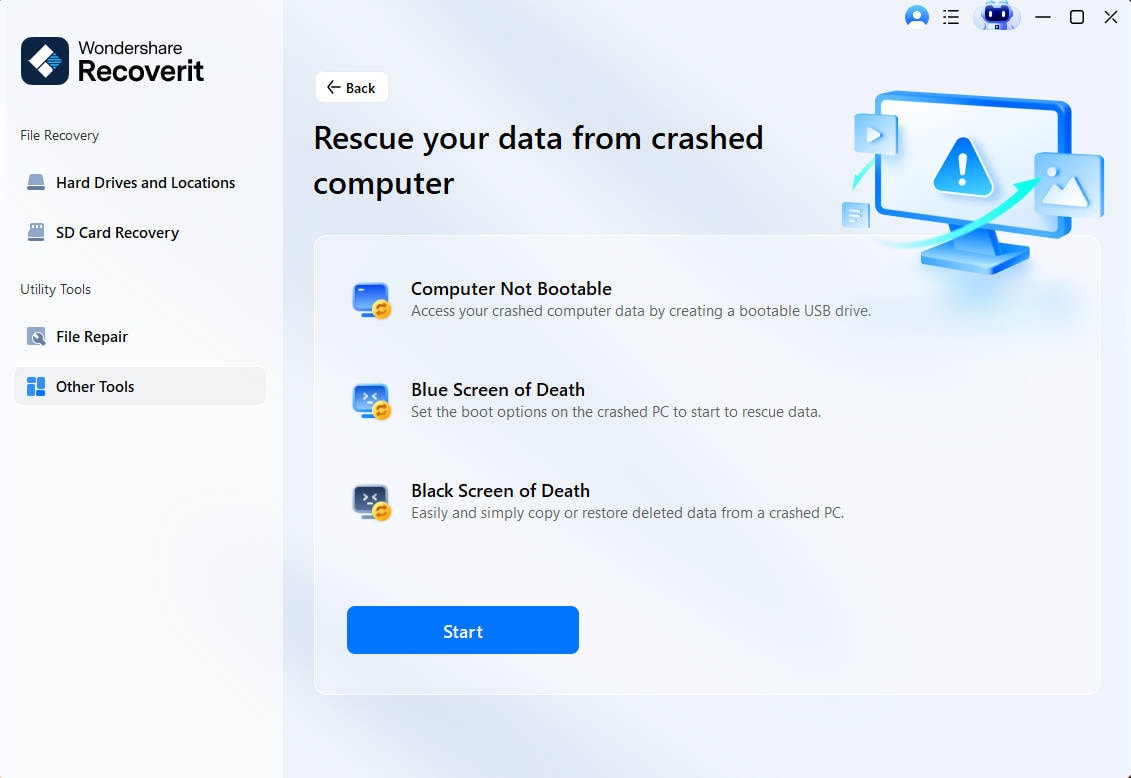
- Connect your USB to the working computer and select it in Wondershare Recoverit.

- The program will ask you to format the USB for better performance. Click the Format button from the pop-up window.
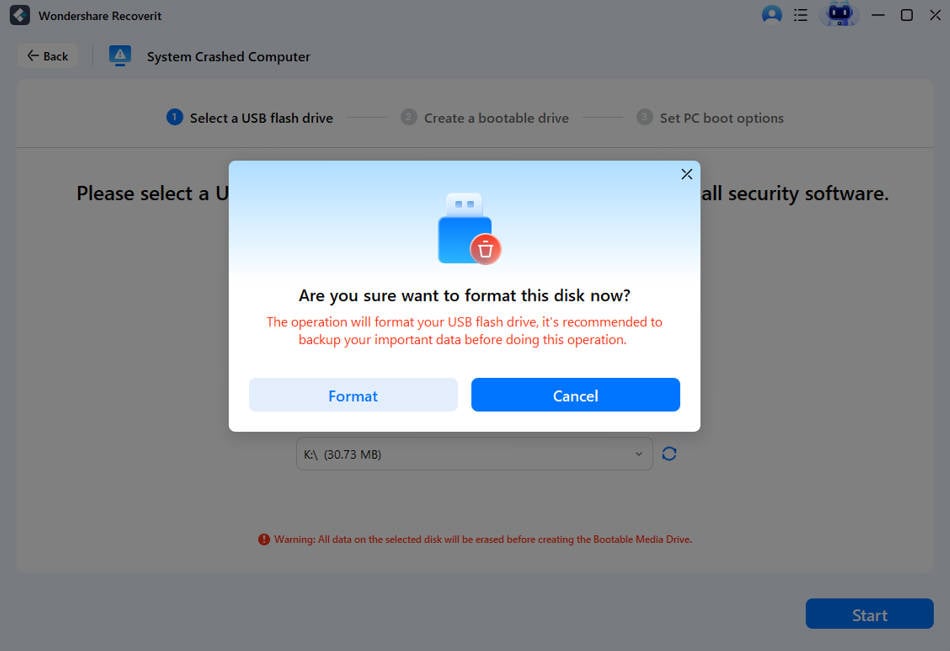
- After this, the app will create bootable media.
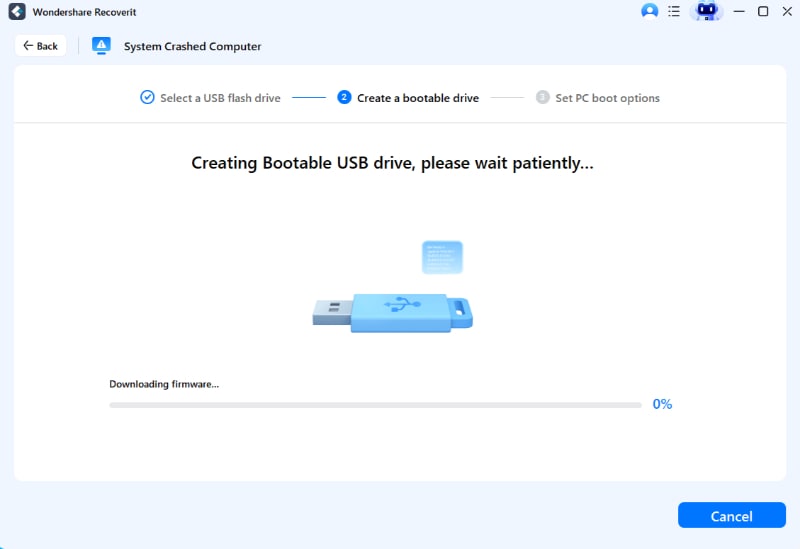
- Disconnect the USB from the working computer and plug it into your Asus laptop.
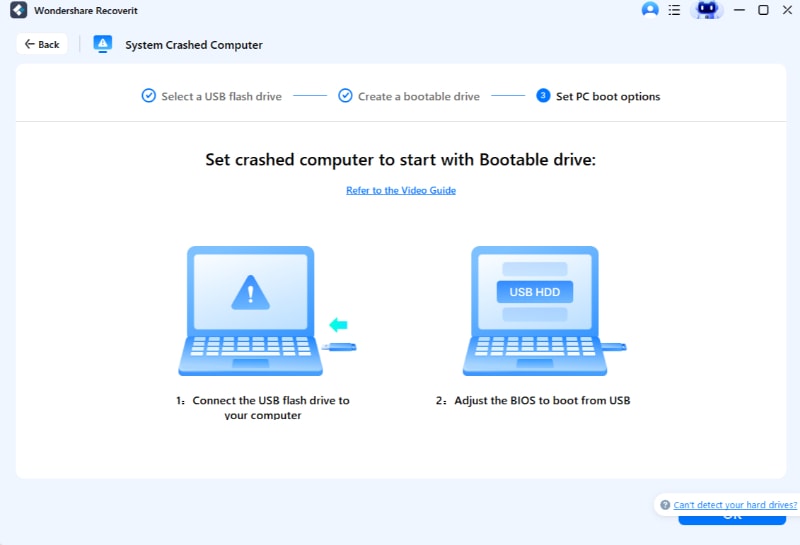
- Adjust the BIOS to boot from the USB.
- After booting, select Data Recovery.
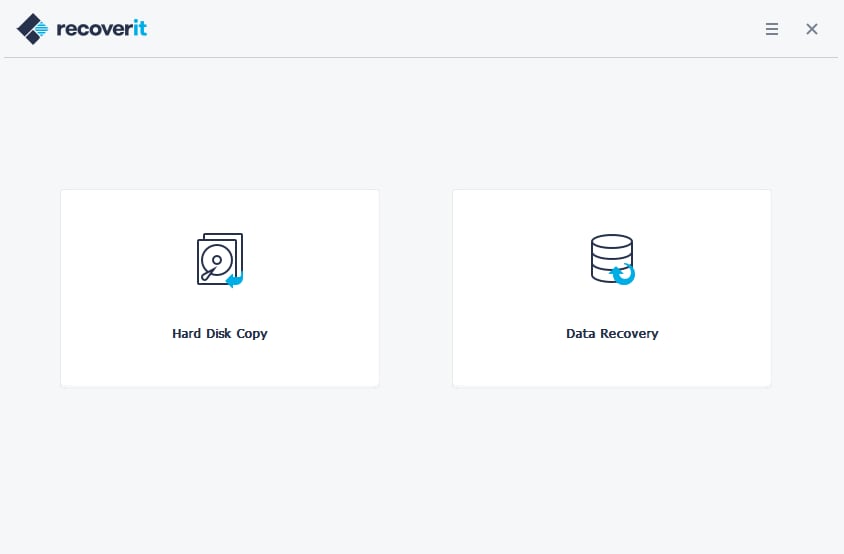
- Choose a location to scan.
- Choose where to save the data and click the Recover button.
Conclusion
Seeing a black screen on your Asus device is stressful, so we're here to help. Today, we've presented the best repair methods you can try to fix the issue and get your device up and running again. Some solutions included restarting your laptop, restarting the display, updating GPU drivers, reinstalling Windows, running CHKDSK and SFC commands, and many more. You can try all of them before contacting professionals.
Moreover, to protect your valuable data in the process, you can use Wondershare Recoverit to extract all your files in one go.


 ChatGPT
 Perplexity
 Google AI Mode
 Grok
Grok


