How to Fix Fixboot Access is Denied
To resolve the fixboot access is denied error caused by a corrupt EFI directory, damaged MBR, or partition errors, manually format and recreate the EFI structure via Command Prompt or execute a Startup Repair using Windows Installation Media.
● Recreating the EFI directory requires using the Diskpart utility to format the partition to FAT32, assigning a new drive letter, and generating new boot files using the BCDBOOT command.
● Accessing the Advanced Recovery environment to run Startup Repair or bootrec commands requires booting the system from a Windows installation USB, which you can create using a Windows disc image and Rufus.
● If all command-line fixes fail, a full Windows reinstallation will fix the error but erase the system partition, meaning files must be extracted first using a bootable data recovery tool like Wondershare RecoverIt.
Ask AI for a summary
When your computer runs into a booting issue, executing "bootrec /fixboot" is one of the ways to fix the error. However, there are many situations when users have reported to encounter another error after running the said command in Command Prompt.
The "fixboot access is denied" is a common Windows error that many people encounter while trying to fix an existing booting issue. Several reasons can cause the fixboot issue on your system and it is imperative to choose the right method accordingly.
So, if you're also facing the same error, stick along, the following guide explains different causes and appropriate solutions to troubleshoot the error.
What Causes the Fixboot Problem?
Like I said, several things can cause the "fixboot access is denied" error on your system. So, let's quickly discuss some of these causes so that you can easily identify the root of the problem.
Booting Issues
In the majority of cases, fixboot access is denied due to a booting issue. For instance, if your system has a corrupt BCD (Boot Configuration Data) or damaged MBR (Master Boot Record), the system is most likely to return the error. In this case, you'll have to follow a step-by-step process to repair the BCD or MBR to fix the issue.
Disk Partitioning
As surprising as it may sound, but improper disk partitioning can also cause the "fixboot access is denied" error. If your system partition drive has gone corrupt, it won't allow the boot manager to load the required boot files.
In addition to this, furthermore, the same corrupt system partition can also deny access while executing fixboot command. If that's the case, you'll have to repair the system partition using the Diskpart command in the Advanced Windows Recovery screen.
Corrupt EFI Directory
Corrupt EFI Directory is the most common reason why you may run into this fixboot error. So, to fix the error in this situation, you'll have to repair the corrupt EFI directory. The most convenient way to do this task is to completely format the EFI directory and recreate it by assigning a new drive letter.
Issue With "Bootrec" Command
Finally, you can also encounter the error if there's an issue with the Bootrec command itself. You can try to execute other bootrec commands to see if they work or not. In case they don't, there's a huge possibility that the fixboot error is caused by the "Bootrec" command only.
Solutions - How to Fix Fixboot Access is Denied
Since the fixboot error can be caused due to several reasons, you'll have to choose the most appropriate troubleshooting method. Here are a few solutions that'll help you fix fixboot access is denied error.
Create EFI Directory Structure
If a c corrupt EFI directory has caused the fastboot error, you'll have no other option but to format it. Once the corrupt EFI directory is successfully formatted, you can create a new one using the BCDBOOT command and assign it a new drive letter as well.
Follow these steps to format your corrupt EFI directory and create a new directory structure from scratch.
Step 1 - Given that you're already in the command prompt window, type the following command and press enter.
format X: /FS:FAT32 (Make sure to replace 'X' with the partition letter).

This will format the EFI directory and there'll be a new unassigned partition on your disk. At this stage, you'll have to recreate the EFI partition.
Step 2 - Create the new EFI directory by executing the following command.
bcdboot C:\windows /s X: /f UEFI
Now, try executing the fixboot command and see if you encounter the same "access denied" error or not.
Run a Startup Repair Using an Installation Media
For this solution, you'll need a Windows Installation Media. In case you don't have one, use Rufus to create a bootable USB drive using a Windows disc image. Once the Installation Media is successfully created, follow the below-mentioned instructions to perform a startup repair.
Step 1 - Boot your system using the Windows Installation media you just created.
Step 2 - Based on the operating system, follow the right steps to launch startup-repair.
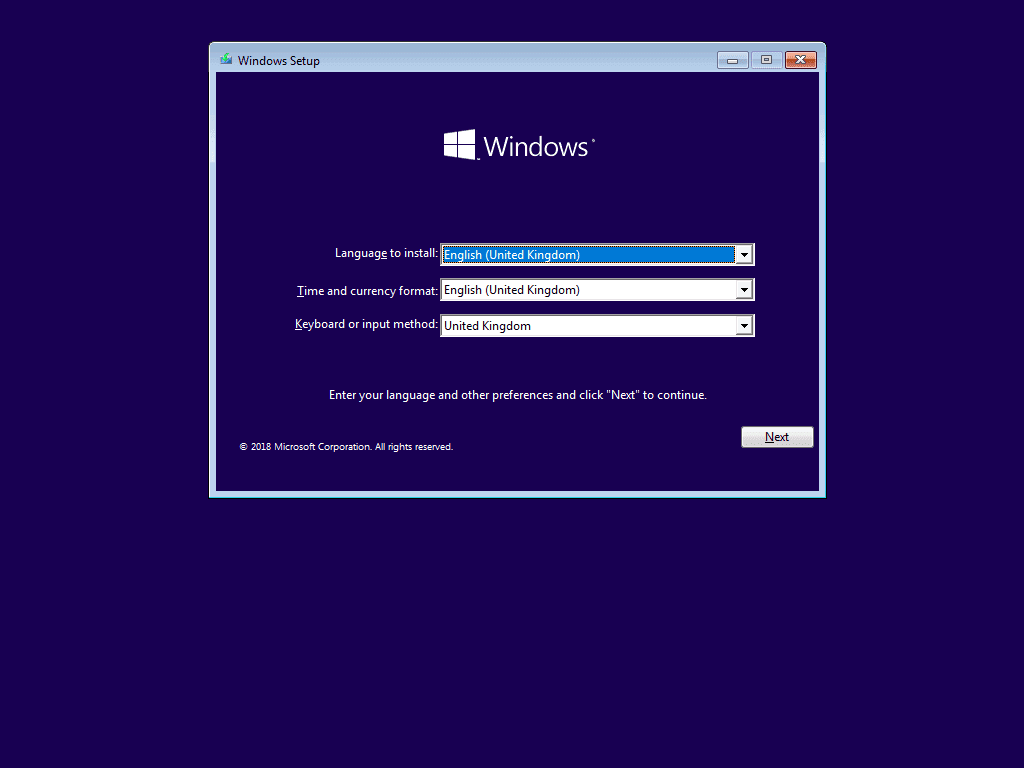
For Windows 7/XP/Vista - Once you're at the initial screen of the Windows installation process, select your preferred language, date & time, and click "Next". Now tap "Repair Your Computer" in the bottom-left corner to launch the Advanced Recovery window. Choose "Startup Repair" from the top of the screen and tap "Restart" to continue with the remaining process.
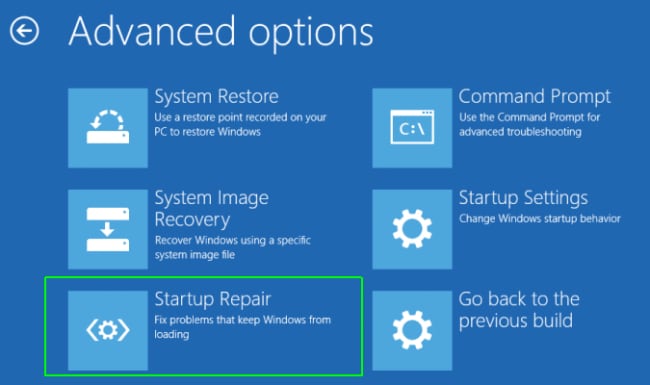
For Windows 10/8/8.1 Users - Like the previous step, choose preferred language & time and click "Next". In the next window, click "Repair Your Computer" and select "Troubleshoot". Now, click on "Advanced Options" and choose "Startup Repair" from the list.

Step 3 - Once the "Startup Repair" window launches, simply follow the on-screen instructions to successfully repair your computer.
Repair Broken EFI Bootloader
Here's the step-by-step process to repair a broken EFI bootloader.
Step 1 - Boot your system using the Windows Installation Media.
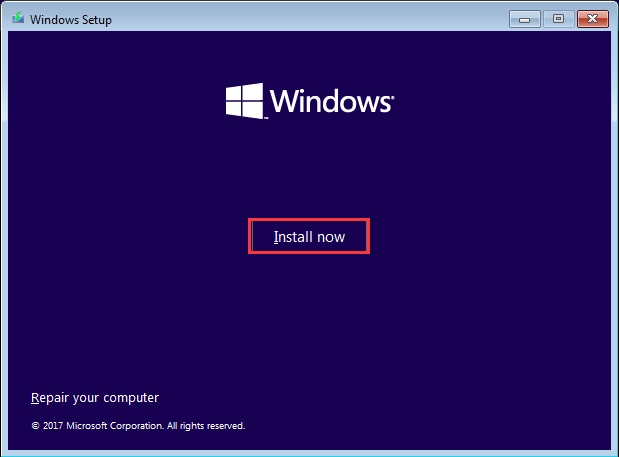
Step 2 - Select "Repair Your Computer" at the Windows installation screen.
Step 3 - Select Troubleshoot>Advanced Options and click "Command Prompt".

Step 4 - Once you're in the command prompt window, type "Diskpart" to launch the Diskpart utility.
Step 5 - Type "Sel Disk 0" to select the hard drive. Now, execute the "List Vol" command.
Step 6 - Use "Sel Vol " to select the EFI partition. Make sure that it is formatted in the FAT32 format.
Step 7 - Assign a new drive letter to the EFI directory using the "assign letter = " command.

Step 8 - Type "Exit" to the exit diskpart.
This will repair the broken EFI bootloader and you won't face the "Fixboot access is denied" error again.
Repair the Bootrec Command
In case the error is caused due to Bootrec command, follow these steps to repair it.
Step 1 - Perform the first three steps from the previous method to launch Command Prompt through the Advanced Recovery window.
Step 2 - Type the following command and press enter.
bcdboot N:\windows /s M:
Make sure to replace 'N' with the windows partition letter and 'M' with the system partition letter.
Try executing the "Bootrec" command again and check if the issue is gone or not.
Still Can't Fix the Error? Reinstall Windows Using Windows Installation Media
If none of these solutions work for your system, the only way to access your system and save the data is to reinstall Windows using a Windows Installation Media. However, this method will remove everything from the system partition. So, only proceed with this solution if you're willing to lose data.
Step 1 - Use Windows Installation Media to boot your system.
Step 2 - After selecting the preferred language and time, click "Next".
Step 3 - Click "Install Now" to initiate the Windows Installation process.
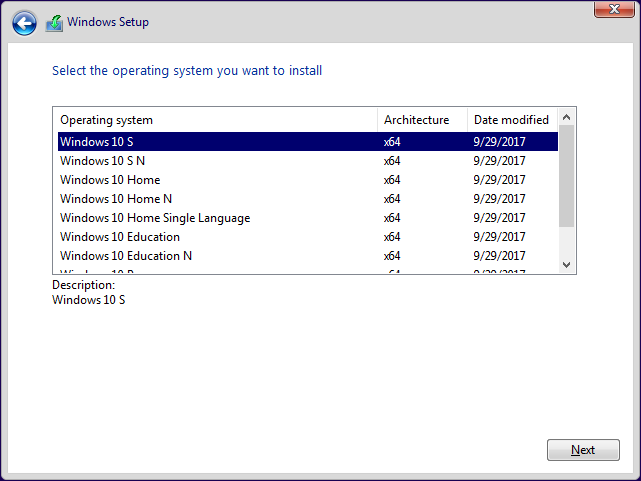
Step 4 - Choose the right operating system from the list and click "Next".
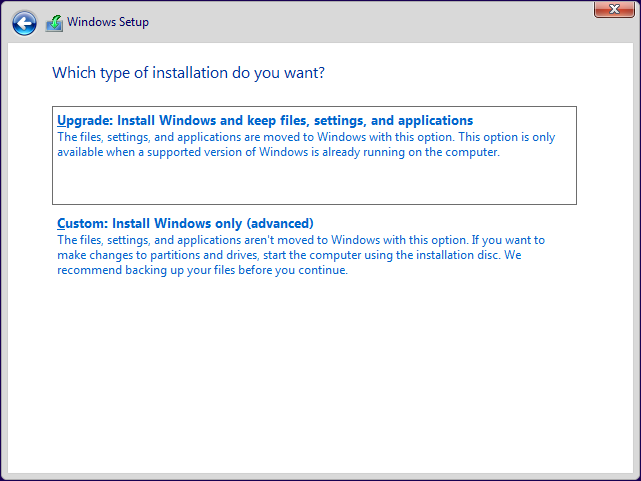
Step 5 - Click "Install Windows Only" and follow the next on-screen instructions to complete the process.
How to Recover Data from Computer When All Solutions Fail to Resolve the Issue
No doubt, when you're unable to fix fixboot access is denied error, reinstalling Windows will help. However, before removing the existing Window, you may consider recovering the files so that you don't have to lose any valuable data.
To do so, we recommend using Wondershare RecoverIt. It is a dedicated data recovery tool that's primarily designed to restore lost data from different storage devices. However, thanks to its "System Crash Data Recovery" feature, you can also use it to recover files from an unbootable PC. The tool lets you create a bootable USB that you can use to launch RecoverIt through the boot menu and restore all your files before reinstalling Windows.
Follow these steps to get back all your data using Wondershare RecoverIt on an unbootable PC.
Step 1 - Launch RecoverIt on a different PC and select "Recover from Crash Computer" at the main interface.

Step 2 - Insert the USB drive and tap the "Create USB Bootable Drive" radio button.

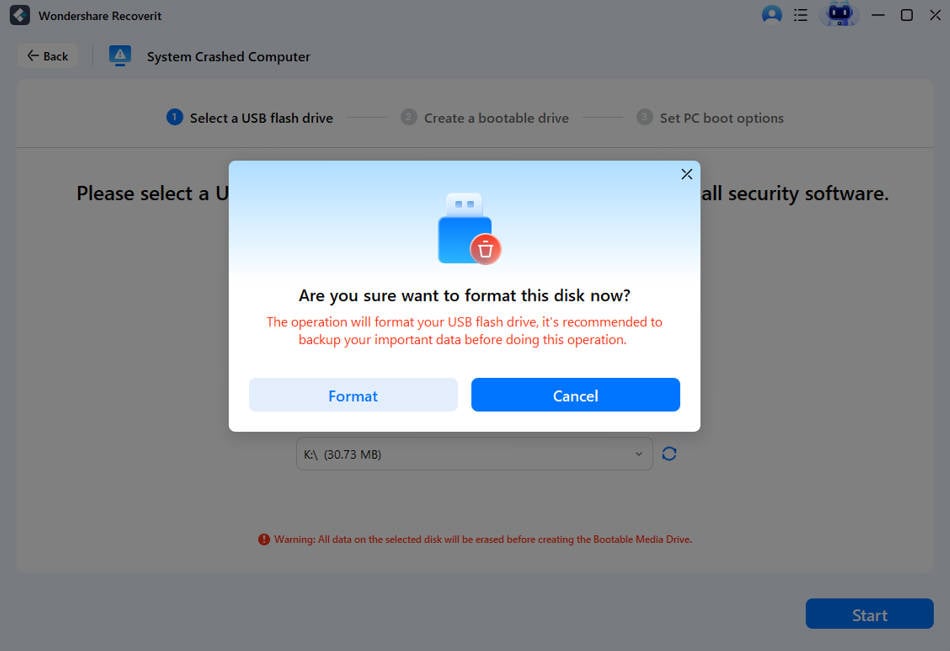
Step 3 - Tap create and click "Format Now" to format the USB drive.
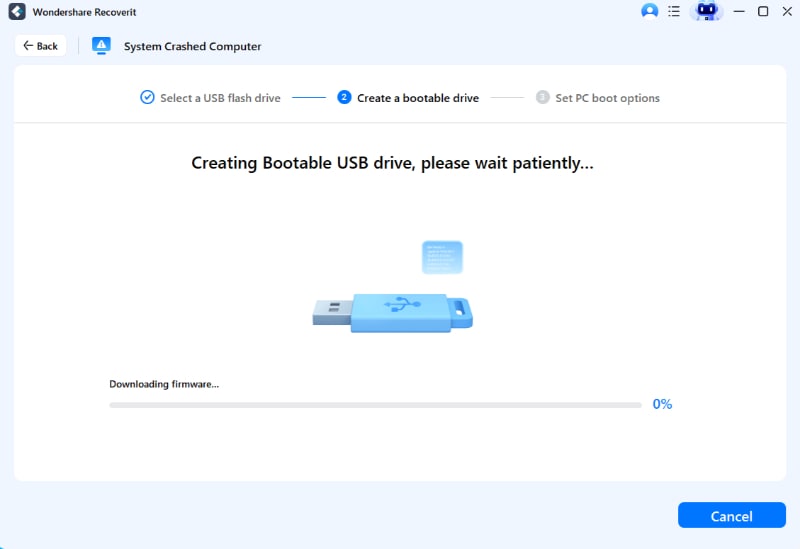
Step 4 - Once the USB drive is successfully formatted, RecoverIt will automatically start creating a bootable version. Do not interrupt this process otherwise you'll have to start from scratch.
Step 5 - Insert the USB in an unbootable PC and make the system boot from it. Check out how to set the computer to boot from a USB drive.

Now, launch RecoverIt and recover your data on external storage easily.

Once you have successfully recovered the data, simply use the Windows Installation media to reinstall Windows.
Conclusion
So, that's how you can fix fixboot access is denied error on your system. It doesn't matter what has caused the error, the above-mentioned tricks will help you fix the error instantly. And, in case nothing works, use Wondershare RecoverIt to retrieve all your data and reinstall Windows to access your system.
Computer Troubleshooting
- Win System Crash
- Windows Tips
- Computer Problems
- Blue Screen Errors


 ChatGPT
 Perplexity
 Gemini
 Claude
 Grok
Grok


Theo Lucia
chief Editor