
 TL;DR:
You can create a Windows XP bootable USB drive using tools like Rufus, WinSetupFromUSB, WinToUSB, or WinToFlash, provided you use a USB 2.0 port and enable USB legacy support to bypass XP's lack of native USB booting.
● For Rufus, configure the USB file system to NTFS and select the MBR Partition Scheme for BIOS or UEFI-CSM.
● For WinSetupFromUSB, which supports multiple setup sources, you must first format the USB as NTFS and extract the XP ISO file using a tool like 7-Zip.
● To prevent boot errors, use at least a 1GB USB drive, plug it strictly into a USB 2.0 port, keep the system boot order at default, and manually press F12 during startup.
Ask AI for a summary
 ChatGPT
 Perplexity
 Gemini
 Claude
 Grok
Grok
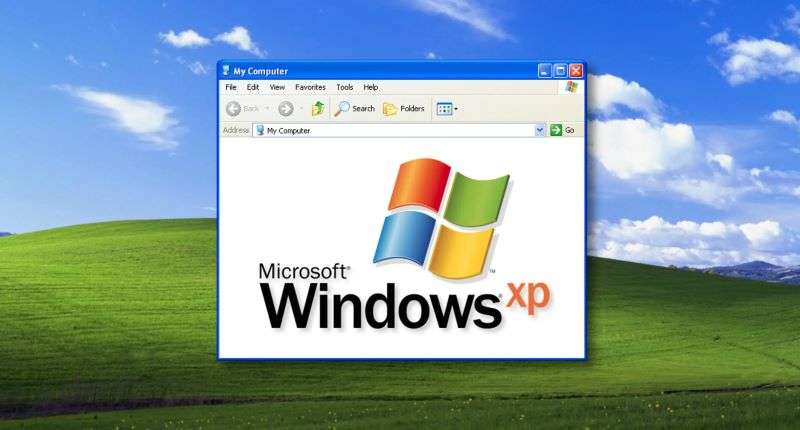
Does Windows XP still hold a special place in your heart and meet your computing needs? If your answer is yes and want to install it on your computer system using a bootable USB drive, then this guide will be very helpful for you. Now Let's walk through four easy-to-follow ways to create a Windows XP bootable USB and run this classic OS on your personal computer.
Here are some user cases related to the topic of how to create Windows XP bootable USB drive:

Why Windows XP Still Matters?
You may be wondering why the craze of Windows XP is still alive in the era of Windows 8, 10, and 11, and believe it or not, you are not alone in the club. It was released on October 25, 2001, and is still regarded as one of the most loved versions of Windows.
Here're some of the reasons to follow:
- Public sectors still use Windows XP because they often lag in technology upgrades which require complex approval processes, high costs for new licenses and extensive staff training.
- Businesses and organizations still rely on Windows XP due to compatibility issues with specific software or programs which are crucial to operations.
- Many users have grown accustomed to Windows XP after years of use. Switching to a different OS, like Linux, might require a steep learning curve, making XP the preferred choice.
4 Ways to Make a Windows XP Bootable USB
Now that you are well aware of why Windows XP is still preferred, it's high time to learn how to create a bootable media and install Windows XP from USB. Below are listed the four simple yet effective methods to get started.
Way 1: Using WinToUSB - The Simplest Method to Follow
The easiest method to create Windows Installer Media is to download WinToUSB and follow the on-screen prompts to kickstart the process. WinToUSB is a lightweight software that helps create Windows and Linux bootable USB drives.
Here's how to do so:
- Step 1. Download Tools and ISO
- Step 2. Launch WinToUSB
- Step 3. Select ISO and USB
- Step 4. Create Bootable Installer
- Download WinToUSB and a Windows XP ISO file using Archive.org. You will also get the product key there, uploaded officially by Microsoft.
- Choose Windows Setup Bootable Wizard and click the radio button in front of the I have ISO image or archive option.

- Tap Select on Windows File Path and browse the ISO file of Windows XP you've downloaded.

- Choose the USB you want to use for creating Windows XP Installer and format the drive when prompted. Wait for a couple of minutes, and the USB drive will automatically get converted into a bootable installer, and the process completes here.
Way 2: Via WinSetupFromUSB
The second best tool to create a Windows XP bootable USB is WinSetupFromUSM. With this, you can add multiple sets of Windows setup files, single WinPE1 source, and many other ISO images.
Follow the instructions to begin the process:
- Step 1. Prepare A USB
- Step 2. Extract ISO File
- Step 3. Download and Run WinSetupFromUSB
- Step 4. Configure Bootable Installer
- Step 5. Verify and Eject USB
- Insert the USB stick on a modern PC and format it as NTFS.

- Once done, extract your Windows XP ISO file to a folder using a 7-Zip tool.
- Move forward to download and extract WinSetupFromUSB and run WinSetupFromUSB_1-10_x64.exe when the extraction is completed.

- This tool will then auto-detect your USB drive. Go to the Add to USB Disk option, and locate Windows 2000/XP/2003 Setup.

- Tick the Checkbox and identify the Windows XP source folder. Accept the Microsoft EULA and tap Go to create the bootable Windows XP Installer.
- Ensure the USB stick is readable and comprises the following files.

- Eject the USB stick, and now you can begin the USB Win XP install process.
Way 3: Through Rufus – The Fastest Method to Follow
Rufus is the fastest and most convenient tool to create a bootable USB drive to install Windows XP on your computer.
Here are the stepwise instructions to follow:
- Step 1. Download and Open Rufus
- Step 2. Configure USB Settings
- Step 3. Load ISO File
- Step 4. Create Bootable USB
- Download Rufus and visit the Device menu.
- Select the appropriate device you wish to turn into a Windows XP bootable USB. Ensure the file system is NTFS and not FAT32.
- Open the Partition Scheme and Target System Type, and choose MBR Partition only.
- Click the small CD icon to the right of Create a bootable disk using: and load the Windows XP ISO file.

- Tap the Start button after perusing the File Manager for an ISO image, and the tool will automatically create a bootable Windows XP USB in seconds.
Way 4: Using WinToFlash
The next method to create a bootable Windows XP drive is using WinToFlash. This tool has a simple interface and offers multilanguage support.
Scroll down and have a look at the step-by-step guide to get started.
- Step 1. Download and Launch WinToFlash
- Step 2. Start USB Setup Wizard
- Step 3. Select ISO File
- Step 4. Confirm and Start Process
- Download WinToFlash and launch this Windows XP Installer.

- Connect your USB drive to the computer and click the green tick mark for Windows Setup Bootable USB Wizard. Select Next to Continue.

- Tap I have an ISO file, and tap Next.
- Select your ISO image for Windows File Path and choose the USB drive. Choose Next to confirm your choice and click the Continue button when a format warning pops up. It will then start the Windows boot transfer conversion.

- Click Exit.
Common Problems
Here's a quick rundown of problems you might encounter when creating a Windows XP bootable USB.
1. Unable to find the bootable USB drive
This problem may appear due to a number of reasons, including the ISO image doesn't have the boot information, or due to some security options that may prevent booting from USB devices.
Don't go crazy. Try to enable the USB legacy support and let your system detect the bootable USB drive. You also should use a USB 2.0 port, as Windows XP doesn't offer native support for USB 3.0 ports.
2. USB failed to boot
The second most frustrating problem is that the Windows XP installer starts, but your USB fails to boot. In that case, do not change the boot order and keep them in the default manner. If the boot order is untouched, your computer will then initiate the process from the HDD. Press F12 immediately and perform this task three times to avoid the USB failed-to-boot error.
3. Disk boot is unable to load the bootable USB drive
This often happens when you prepare an inappropriate bootable USB drive. Hence, it's advised to remove the latest hardware installed on your computer and check the jumpers on the hard disk.
Conclusion
That's all about it. Hope these methods will inspire you on the journey of creating a Windows XP bootable USB. Whatever method you choose, stick to the instructions and ensure to check the boot order to get effective results. If, unfortunately, you've lost any data from unbootable Windows XP, try Wondershare Recoverit to get back your lost or deleted files. This powerful data recovery tool supports 1000+ data types and formats and can bring all your data back in three simple steps.
FAQ
-
What do I need to create a bootable USB drive for Windows XP?
To create a bootable USB drive for Windows XP, you will need:
1.A USB flash drive (at least 1GB in size).
2.A Windows XP ISO file or installation CD.
3.A tool like Rufus or WinSetupFromUSB.
4.A working computer to create the bootable drive. -
Can I use Rufus to create a bootable USB for Windows XP?
Yes, you can use Rufus to create a bootable USB for Windows XP. However, ensure you select the correct settings:
1.Choose the Windows XP ISO file.
2.Set the partition scheme to MBR (for BIOS or UEFI-CSM).
3.Set the file system to NTFS. -
Why does Windows XP require additional steps to create a bootable USB?
Windows XP lacks native support for booting from USB, unlike newer Windows versions. You need a third-party tool like WinSetupFromUSB or Rufus to make the USB drive bootable and load the necessary drivers. -
How do I use WinSetupFromUSB to create a bootable USB for Windows XP?
To use WinSetupFromUSB:
1.Download and run WinSetupFromUSB.
2.Select your USB drive under the "USB disk selection" menu.
3.Check the box for Windows 2000/XP/2003 Setup.
4.Browse and select your Windows XP ISO or installation files.
5.Click GO and follow the prompts to complete the process. -
What should I do if my computer doesn’t boot from the USB drive?
If your computer doesn’t boot from the USB drive:
1.Enter the BIOS/UEFI settings (usually by pressing F2, F12, Del, or Esc during startup).
2.Ensure USB boot is enabled and set as the first boot option.
3.Save changes and restart your computer.
4.If the issue persists, recreate the bootable USB using a different tool or USB drive.


