

 TL;DR:
To recover missing files after upgrading to macOS Tahoe, quickly check native safeguards like the Relocated Items folder or Time Machine snapshots before utilizing third-party tools like Recoverit for permanent data loss.
● Look in your Mac's Shared folder for a Relocated Items directory, which macOS Tahoe automatically creates to temporarily store files that could not be seamlessly moved during the upgrade process.
● Fix update-related corruption by holding Command + Space while opening the Photos app to trigger the native repair tool, or use the Revert To option within specific applications to restore pre-upgrade local app versions.
● If local restores and iCloud syncs fail, use software like Recoverit to perform a deep scan of your storage drives, or downgrade your macOS version via the App Store as an absolute last resort.
Ask AI for a summary
 ChatGPT
 Perplexity
 Gemini
 Claude
 Grok
Grok
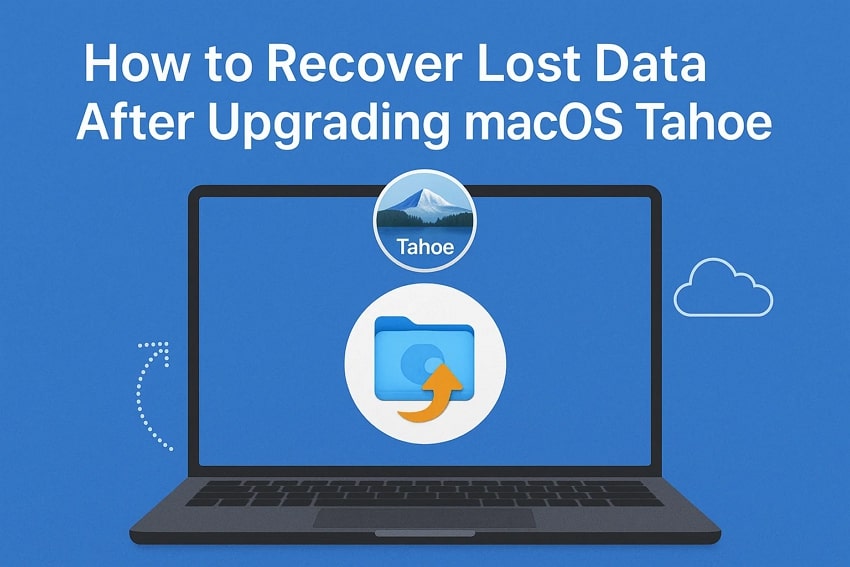
Imagine upgrading your Mac to macOS Tahoe only to discover critical files have mysteriously vanished. Data loss after a system upgrade can be both frustrating and disruptive, impacting your productivity and peace of mind. However, there are various ways to retrieve your data quickly using basic techniques. In this article, we will discuss some of the top methods for recover lost data after upgrading macos tahoe.
Try Recoverit to Perform Mac Data Recovery
 Security Verified. 3,591,664 people have downloaded it.
In this article

Part 1. Overview of macOS Tahoe as Apple’s Latest macOS Update
Apple consistently enhances its macOS to offer users improved performance and functionality. With the release of macOS Tahoe, Apple introduces a range of innovative features and design upgrades designed to enrich the user experience. The following overview highlights the most authentic and notable features of macOS Tahoe based on official Apple sources:
- The update features Apple's new Liquid Glass design, enhancing the interface with smooth, reflective visuals.
- Productivity features include a supercharged Spotlight search with contextual awareness and a customizable Control Center.
- macOS Tahoe 26 is free for eligible Mac models starting from 2020 and later.
- It offers easy, multiple-device integration by providing the entire Phone application within your Mac device.
- You get various customization options, from changing the folders’ appearance to Safari’s look.

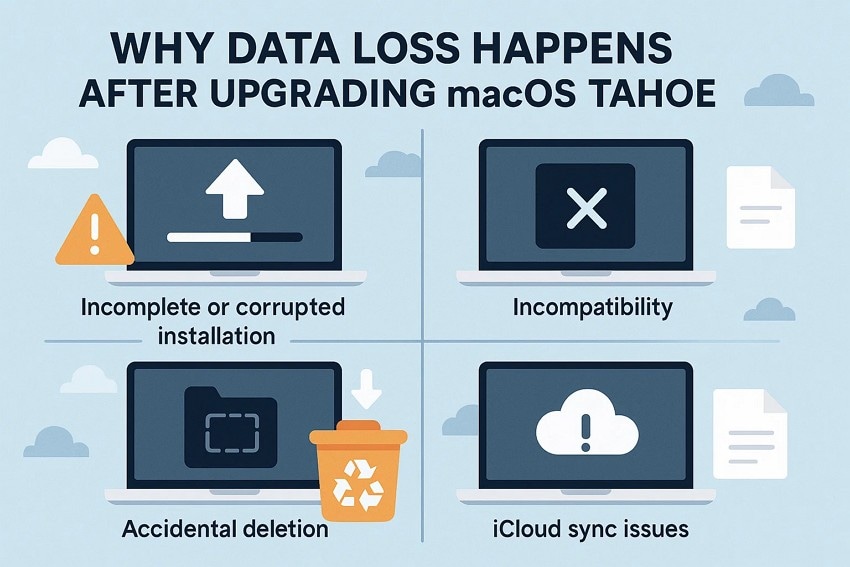
Part 2. Why Data Loss Happens After Upgrading macOS Tahoe
When upgrading to a new operating system like macOS Tahoe, users expect a seamless transition. However, data loss can sometimes occur unexpectedly due to various technical and user-related factors. Here are the primary reasons why data loss happens after upgrading to macOS Tahoe:
- Incomplete or Interrupted Installation: Power failures or unexpected system errors during the upgrade process can cause the installation to halt prematurely, leading to corrupted or missing files.
- Incompatibility Issues: Some older applications or file formats may not be fully compatible with macOS Tahoe, causing files to become inaccessible or unusable. This can cause missing files after mac update in various cases.
- Accidental Deletion During Upgrade: Files can be mistakenly deleted during the upgrade, especially if the system reorganizes or clears caches and temporary files.
- iCloud Sync Issues: Files stored in iCloud Drive may fail to synchronize correctly with the local Mac after the update. This can result in files appearing missing locally, even though they are still stored safely on the cloud.
Part 3. Recover Lost Data After Upgrading macOS Tahoe - 10 Ways
Having discussed the reason for data loss while updating your macOS, let us now have a look at the fixes that are available to resolve these issues:
1. Use Spotlight Search
Spotlight Search in macOS Tahoe has become a powerful tool for recovering lost data by providing intelligent and ranked search results based on file usage. It can quickly surface files, folders, and apps to help users locate missing or misplaced items effortlessly.
The search now includes advanced filters to narrow down results by file type or application, improving accuracy. Follow the instructions mentioned below to learn how to recover lost data after upgrading macos tahoe using the Spotlight Search:
Instructions. Simply press the “Command + Space Bar” keys on your keyboard to enable the Spotlight window. Type in the name of your file or folder, and the utility will instantly retrieve your required files as the search result. Click on your desired file and use it as per your preference.

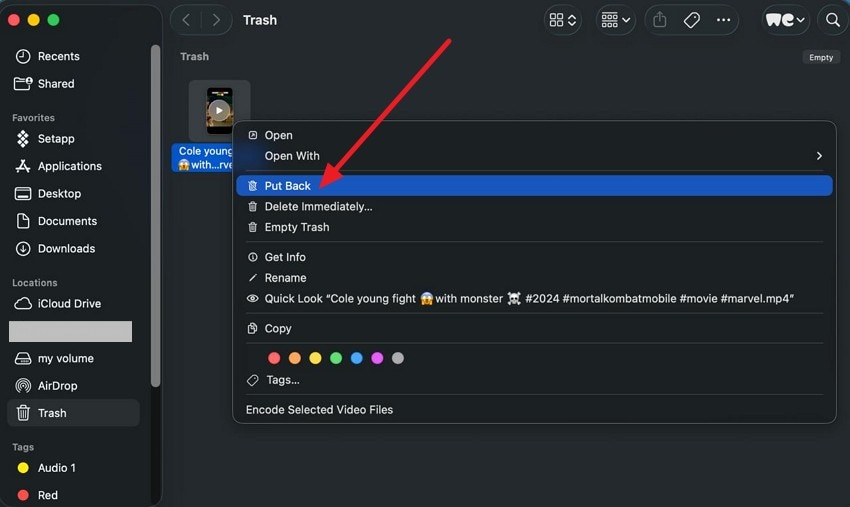
2. Check the Trash Bin
Checking the Trash Bin is one of the simplest and most effective methods to recover lost data on macOS Tahoe. When files are deleted, they are typically moved to the Trash rather than being permanently erased. This allows users to easily restore them to their original location without any extra effort. Follow the instructions mentioned below to learn how to fix the files missing after mac update issue using the Trash Bin:
Instructions. Open the Trash Bin folder and locate the file within it. Once found, right-click on it and press the “Put Back” option located on the list.
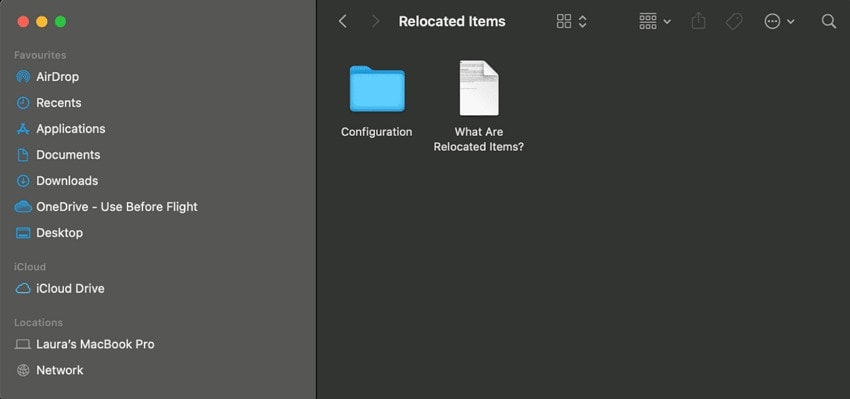
3. Find Relocated Items
The "Relocated Items" folder appears after an upgrade when some files or data cannot be moved to their new locations, or if the mac update deleted everything. This folder acts as a safeguard, temporarily storing these files to prevent data loss while ensuring the system runs smoothly. You can access the relocated folder in the “Shared” folder on your Mac device and conveniently get back the file that has been missing.
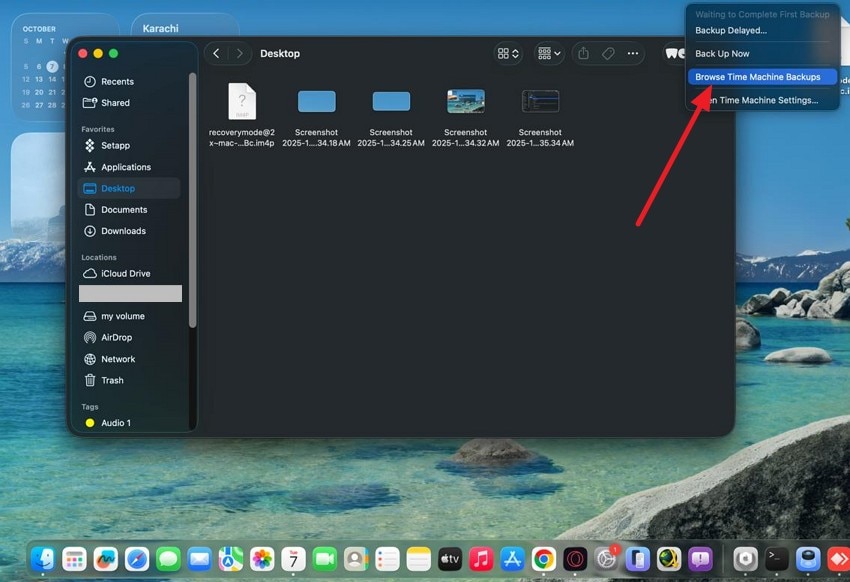
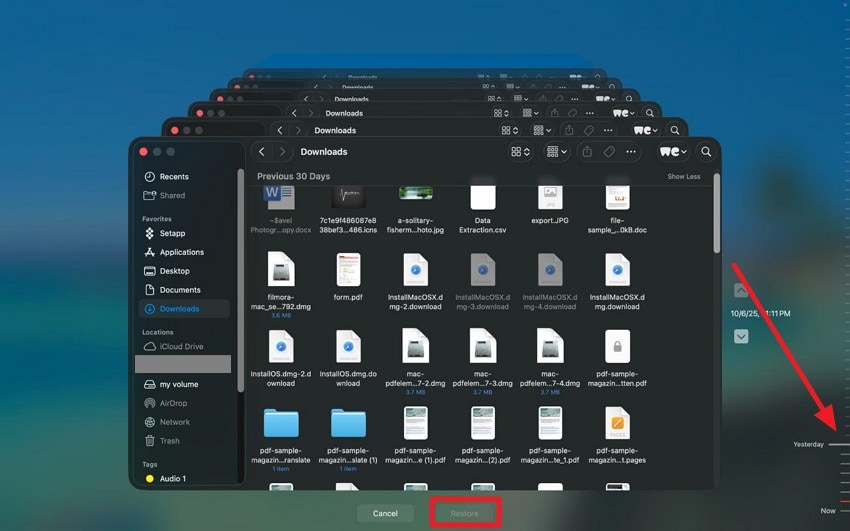
4. Restore from Time Machine Backup
Using Time Machine backup as a recovery method on macOS Tahoe is highly efficient due to its ability to maintain time-based snapshots of your data. These snapshots capture the state of your system and files at specific points to enable significant control over recovery options. Read the steps mentioned next to learn how to recover missing files after mac update using the Time-Machine Backup method:
- Head to the folder in which your files were last stored and head to the top-right corner of the screen to click on the small “Clock” icon. Next, click the “Open Time Machine” option from the expanded list.
- In the following interface, scroll through the timeline and select the date from which you want to get the backup file. Click the “Restore” button located at the bottom to successfully restore the selected version.
5. Recover from iCloud Drive
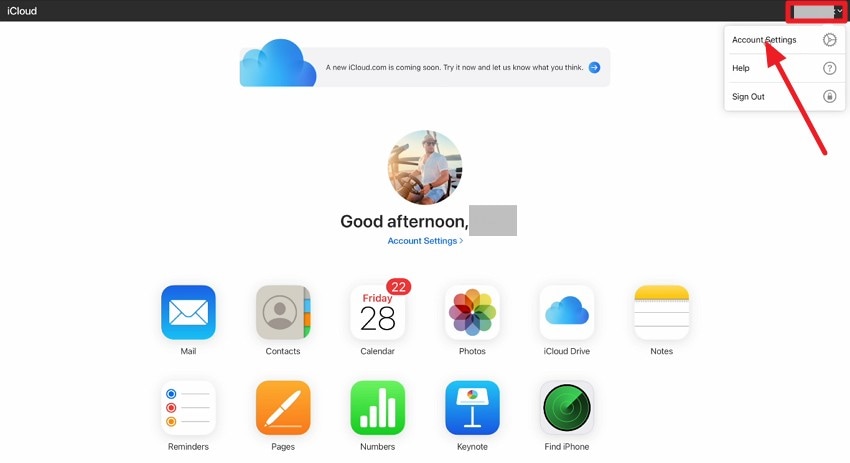
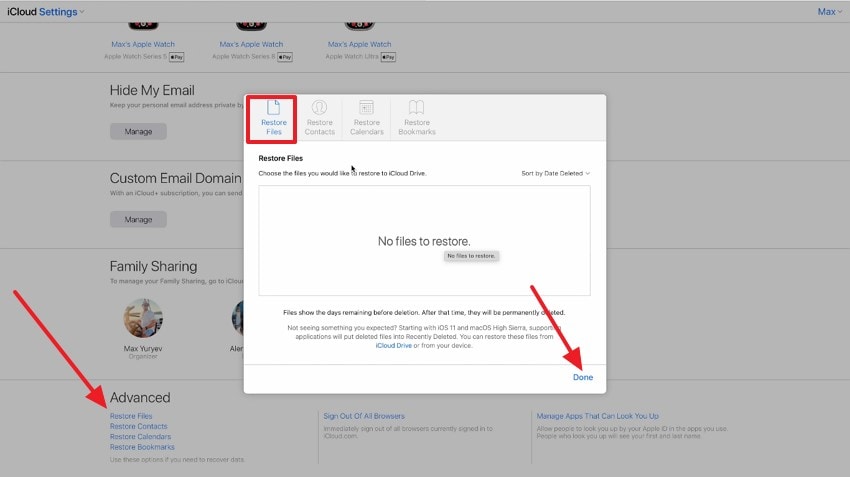
The integration of iCloud Drive in macOS Tahoe enhances data recovery reliability by syncing files across all Apple devices linked to an account. This method provides users with the ability to restore content across devices seamlessly, without needing physical backups. Follow the steps mentioned below to recover lost data after upgrading macos tahoe from iCloud Drive effortlessly:
- Begin the process by heading to the official website of iCloud and signing in to your account. Next, go to the top-right corner and expand your profile to select the “Account Settings” option.
- Scroll through the following interface and locate the “Restore Files” option at the bottom. Click on it to enable the small window from where you select your desired files and press the “Done” button to complete the restoration process.
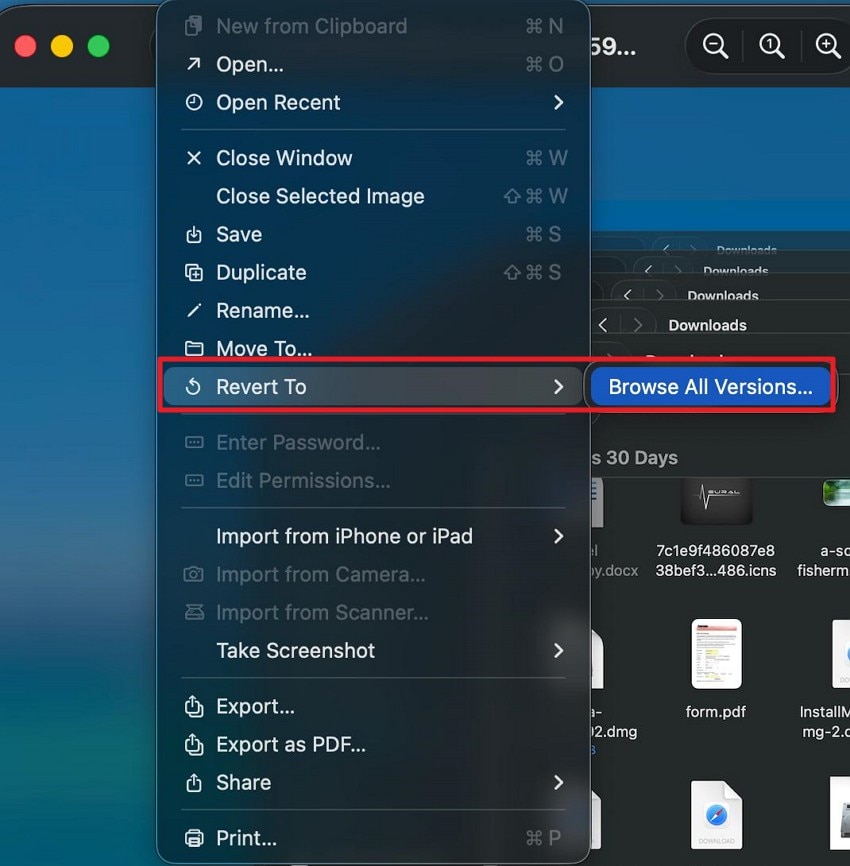
6. Restore App Versions
macOS Tahoe supports restoring previous app versions by leveraging local backups, allowing users to retrieve apps in their last known good state. Backups created before an upgrade contain app data and versions that users can selectively restore. This approach minimizes disruption when new app versions conflict with system updates. Read the steps mentioned below to learn how to use this utility for resolving files missing after mac update:
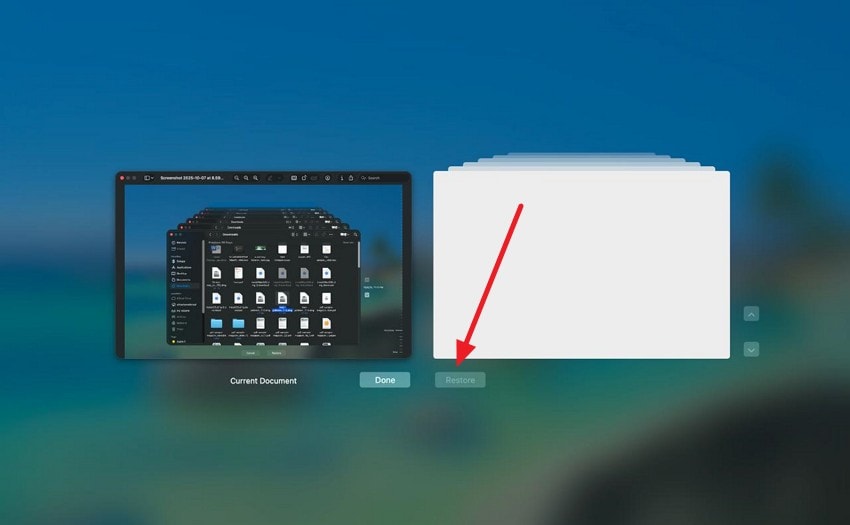
- Open the file or app on your Mac device and head to the “File” menu. Now, locate the “Revert To” option on the list and click on “Browse All Versions.”
- Now scroll through the versions in the following interface and click on the “Restore” button to successfully revert to your desired version.
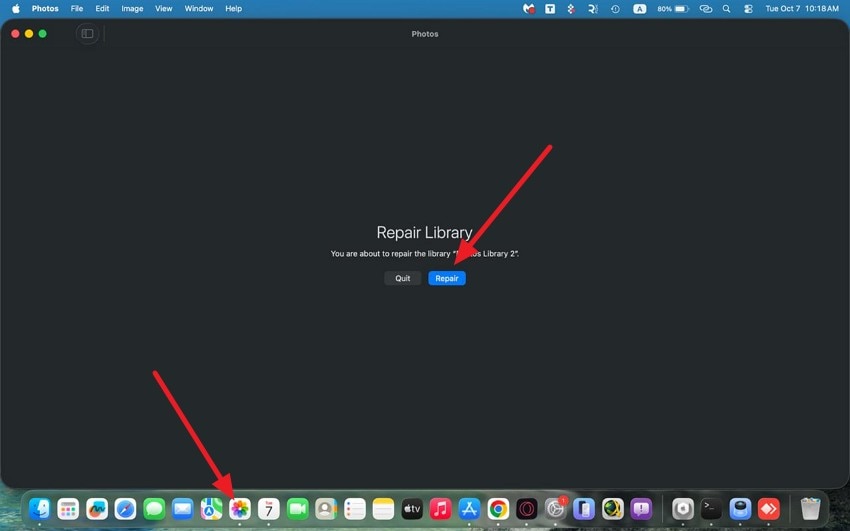
7. Repair Photo Library (Only for Photos)
The Photos Library on macOS Tahoe may face issues such as missing images or metadata loss after system upgrades. To counter this, Apple offers a repair feature that can rebuild the library’s catalog by detecting corrupted files. The following are the steps to use the photo library and recover your photos when a mac update deleted everything:
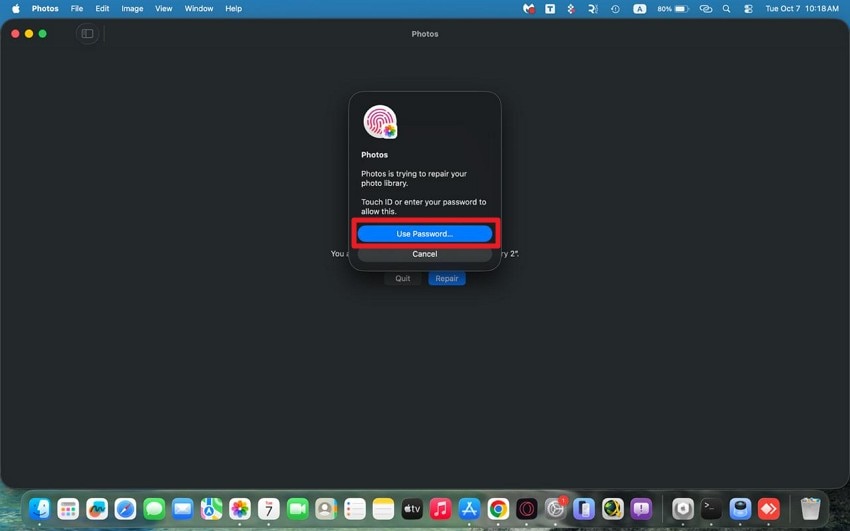
- Press and hold the “Command + Space” keys and click on the “Photo” app icon located on the dock. Now, press the “Repair” button located in the small dialogue box enabled.
- Next, press the “Use Password” button and enter your password to begin the photo repair process.
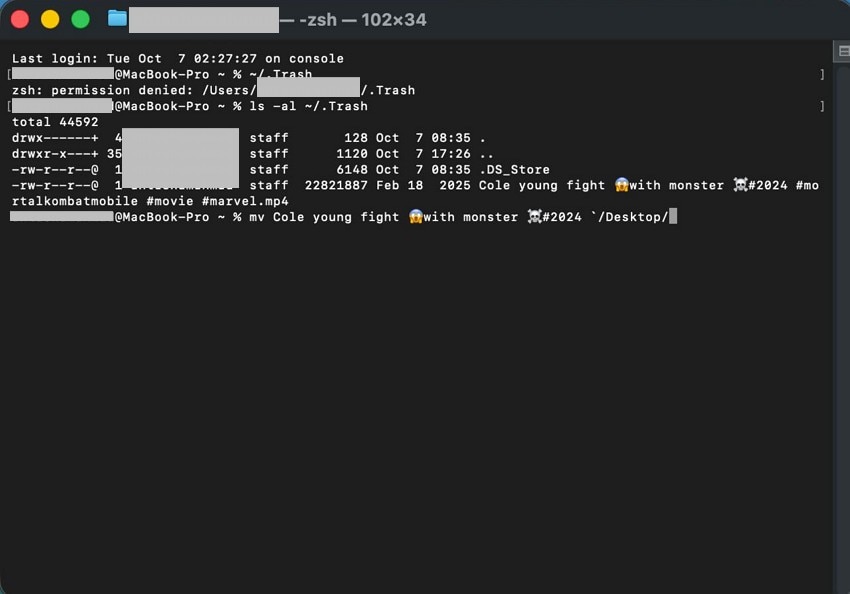
8. Use Terminal Commands
Using Terminal to recover data on a Mac is limited to specific situations: retrieving files that are still in the Trash or restoring from a Time Machine backup. Terminal commands enable you to locate and move files out of the Trash. Follow the instructions provided next to learn how to use this utility to recover lost data after upgrading macos 26:
Instructions. To recover lost data on Mac via Terminal, start by accessing the Trash folder with “cd ~/.Trash” and list its contents using “ls -al ~/.Trash”. If the file is found, use the mv command to move it back, like mv filename “~/Desktop/”.
9. Use Third-Party Data Recovery Software - Recoverit
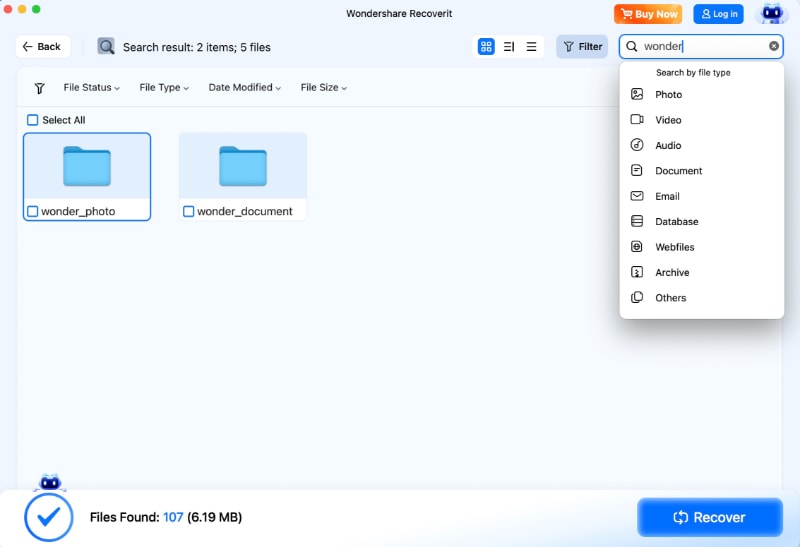
Another method for recovering data instantly is by using tools like Recoverit. Irrespective of the operating system, this efficient tool allows performing a deep scan within the storage to recover all the recoverable files. It also provides the ability to search for a specific file or document by applying filters using the dedicated search bar.
Moreover, users get the ability to recover missing files after mac update from numerous device storage, including external hard drives and SD cards. It also lets you retrieve more than one file at a time to save you the time and effort of getting back each file separately.
- Multiple Formats Support: Using this tool, you can recover files of multiple formats, including videos and documents.
- Advanced Recovery Mode: With the Advanced Recovery Mode of this tool, you can run a scan within your storage and recover severely damaged files in no time.
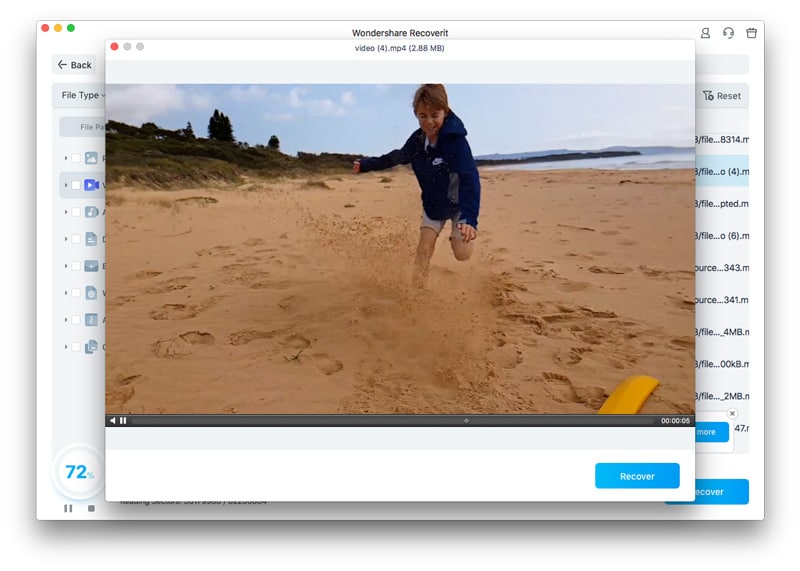
- Preview Before Save: This efficient tool also provides the utility of previewing the recoverable file within its interface and then saving it to your device.
Comprehensive Steps To Recover Files on Mac with Recoverit
Having learned about the data recovery tool in detail, let us look at the step-by-step guide on how to recover your lost Mac data using this efficient tool:
1. Start by Accessing the Location
After launching Recoverit, select the file location by clicking on the drive. This will initiate the scanning process.

2. Select Files to Recover
Once the scanning is completed, choose the files from the options and hit the “Recover” button located at the bottom.
3. Preview Results and Export
Review the recovered file in the tool’s interface and press the “Recover” button to successfully save it to your device.
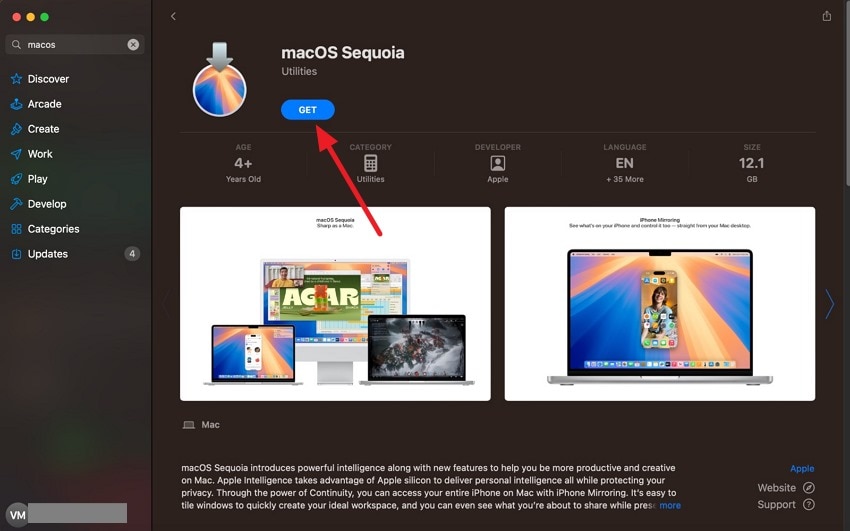
10. Reinstall or Downgrade macOS as a Last Resort
Reinstalling or downgrading macOS as a last resort is a method used when other troubleshooting steps cannot resolve system issues. It involves wiping the Mac’s drive clean and installing the older version of macOS. You can simply install an older version of an operating system from your App Store. Follow the steps provided next to learn how to recover lost data after upgrading macos 26 by downgrading the OS:
- Search for macOS on the App Store and select your desired operating system from the options by clicking on it.
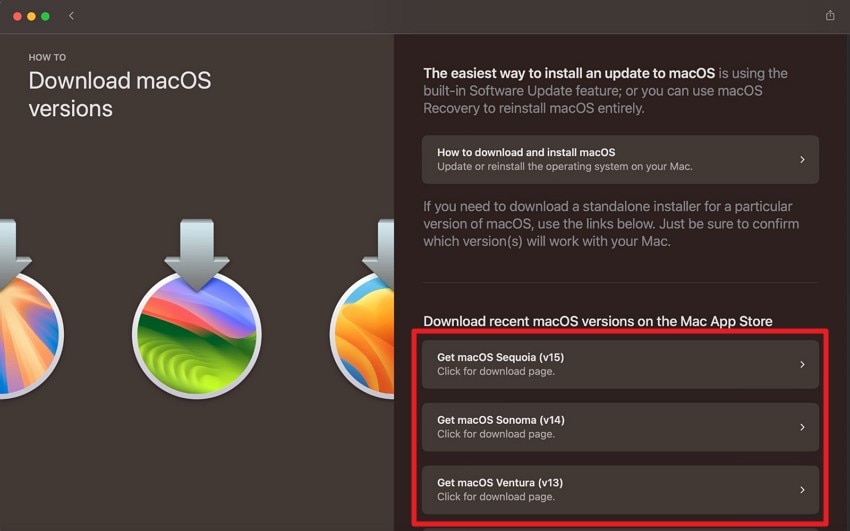
- In the following interface, click on the “Get” button to successfully install the OS version on your Mac device.
Part 4. Prevent Future Data Loss After Upgrading macOS Tahoe
When upgrading to macOS Tahoe, taking proactive steps to prevent future data loss is crucial to protect valuable information. Mentioned below are some of the preventive measures that you can take to eliminate the chances of files missing after mac update:
- Regularly Back Up Data: Consistently using Time Machine or other backup solutions creates restore points for quick recovery. Frequent backups ensure data can be restored even if files are deleted or corrupted during upgrades.
- Keep macOS Updated: Installing the latest system updates ensures security patches and bug fixes are applied promptly. Staying updated reduces vulnerability to exploits and system glitches that can lead to data loss.
- Configure macOS Firewall: Activating and properly configuring the built-in firewall blocks unauthorized network access. This prevents data leaks and enhances protection against external breaches.
- Limit Use of Admin Accounts: Using standard user accounts for daily activities minimizes the risk of accidental system changes. Admin accounts should be reserved for system management to reduce unintentional data deletion.
Conclusion
To conclude, this article discussed various useful solutions on how to recover lost data after upgrading macos tahoe. The methods suggested in the article can help you get back your missing files and other data in no time without any technical skills. However, one of the most reliable solutions that you can use to instantly recover your missing files is Recoverit.
FAQ
-
1. How to prevent data loss while updating to macOS Tahoe?
To prevent the accidental loss of your files, try to create a backup of your data using the Time Machine utility offered by your Mac. Moreover, you can also create a cloud backup with the iCloud backup feature. -
2. How to recover the lost files while updating the operating system?
You can recover the files that have gone missing during the OS update by restoring the app version on your Mac or accessing the Time Machine utility. Moreover, you can also use third-party tools like Recoverit to get back your lost data instantly with minimal effort. -
3. Can Recoverit retrieve multiple lost files at once?
Yes, with Recoverit, users get the ability to recover more than one file simultaneously. This not only speeds up the recovery process but also saves users the effort of retrieving each file separately.


