


 TL;DR:
You can safely resize Linux partitions without data loss by first creating a full backup and unmounting the target drive or booting from a live Linux environment.
● For advanced users, command-line tools like fdisk allow precise control by deleting and recreating partition tables, while resize2fs is specifically optimized for fast resizing of ext2, ext3, and ext4 file systems.
● Beginners should opt for GUI utilities like GParted or KDE Partition Manager, which utilize drag-and-drop sliders to visually adjust sizes across ext, NTFS, and FAT file systems.
● You must perform resizing operations using Linux-native tools, as Windows cannot natively recognize or resize Linux file systems like ext4.
Ask AI for a summary
 ChatGPT
 Perplexity
 Gemini
 Claude
 Grok
Grok
Ever felt like your computer's storage space is getting smaller and smaller? Maybe you downloaded too many files, installed lots of programs, or your operating system is taking up more room than before. If you use Linux, you don't have to worry! There's a neat trick that can help you get more space without erasing everything.
In Linux, your storage is divided into different sections called partitions. By resizing these partitions, you can make some sections bigger and others smaller, just like adjusting the size of your shelves.
Now, you might be thinking, "But isn't that risky? What if I mess something up?" Don't worry, we've got you covered! In this easy-to-understand guide, we'll walk you through several safe methods to resize your Linux partitions. We'll explain everything in plain language to extend Linux partition, so you don't need to be a computer expert to follow along.
Try Wondershare Recoverit to Perform Linux Partition Recovery
 Security Verified. Over 7,302,189 people have downloaded it.
In this article
Is It Safe To Resize Partition Linux?
So, thinking to extend Linux partition? Is it safe? Well, resizing partitions is a delicate process that carries inherent risks, such as data loss or system instability. However, with the proper knowledge and precautions, it is generally considered safe to resize Linux partitions.
Before proceeding, it's crucial to create a full backup of your data to mitigate potential risks. Additionally, it's recommended to perform the resizing operation from a live environment, such as a bootable Linux USB or DVD, to avoid potential conflicts with the running system.
How to Extend Linux Partition
Let’s begin our Linux change partition size guide. There are several methods and tools available for resizing Linux partitions, each with its own strengths and considerations.
In this section, we'll explore four popular approaches to resize Linux partitions.
| Method | Brief Overview | Benefits of Using the Particular Method |
| FDISK | A command-line utility for managing disk partitions, including resizing. Users interact with the tool through text-based commands. | - Powerful and flexible, allowing precise control over partition sizes. - Can resize partitions without data loss (with caution) - Suitable for advanced users comfortable with the command-line interface. |
| resize2fs | A command-line utility specifically designed for resizing ext2, ext3, and ext4 file systems. Users specify the desired new size via command-line arguments. | - Simple and straightforward command for resizing ext file systems. - Efficient and fast for resizing operations. - Can be automated or scripted for repetitive tasks. |
| GParted | A graphical user interface (GUI) tool for managing disk partitions, including resizing. Users interact with the tool through a visual interface, using menus and sliders. | - User-friendly and intuitive interface, suitable for beginners and advanced users. - Supports various file systems, including ext, NTFS, FAT, and more. - Provides a visual representation of partitions, making it easier to understand and manage. |
| KDE Partition Manager | A graphical user interface (GUI) tool for managing disk partitions, specifically designed for the KDE desktop environment. Similar to GParted, but integrated into the KDE desktop. | - Suitable for users of all skill levels. - Supports various file systems, including ext, NTFS, FAT, and more. - Integrated into the KDE desktop, providing a seamless experience for KDE users. |
With the help of the table, you can quickly grasp the essence of each method and understand the advantages they offer. This will make it easier to decide which method best suits their needs and preferences.
Method 1: Use FDISK resize partition without losing data
One of the most widely used tools for partition management in Linux is fdisk. This command-line utility allows you to perform various operations on disk partitions, including resizing.
Here are the main tasks you can perform with fdisk:
- View Partition Table: Type p at the fdisk prompt and press Enter to display detailed information about all partitions.
- Delete a Partition: Type d followed by the partition number (e.g., d 1 to delete the first partition).
- Create a New Partition: Type n at the prompt and follow the prompts to specify the partition type, starting sector, and size.
- Save Changes and Exit: Type w to write the changes to the disk and exit fdisk.
To extend a partition using fdisk without losing data, follow these steps:
Step 1: First, you need to unmount the partition you want to resize. This means separating it from your system temporarily. Type this command:
# unmount /dev/vda
Step 2: Next, you'll list all the disks and partitions on your computer using this command:
sudo fdisk -l
Your screen will show a table with your partitions. Look through this and find the number of the partition you want to make bigger or smaller.
Step 3: Enter the p command to print this partition table again. This will help you confirm which partition number you need to change.

Step 4: To delete the partition and prepare for resizing, type d and then the partition number you want to remove. For example, if it's partition 2, type d and then 2 .

Step 5: After deleting, you'll create a new partition in its place. Type n and then specify the new size you want. You can enter a number like +500M for 500 megabytes.

Step 6: Type n again to keep the swap area the same size. Now print the partition table one more time by typing p. Check that the new partition size looks right.

Step 7: If everything looks good, type w to write or save all the changes you made.

Step 8: Finally, you'll remount or reattach the resized partition using this command:
# mount /dev/vda
And that's it! You've made the partition bigger or smaller without losing any data.
Method 2: Use the "Resize2fs" Utility
The resize2fs utility is a powerful tool specifically designed for resizing ext2, ext3, and ext4 file systems. It allows you to increase or decrease the size of a mounted or unmounted partition without losing data.
Here's how to use it:
Step 1: Unmount or detach the partition from your system. This allows you to make changes to it safely. Type this command:
# unmount /dev/vda
Step 2: Now you'll delete the existing partition to make space for a new one. Use the command:
D

Step 3: Time to create the new partition with the size you want. If you want more space, make it larger. If you want less space, make it smaller. Type:
n
Then specify the new size when asked.

Step 4: Next, you'll check to make sure the partition doesn't have any errors or problems. Type:
fsck
This will analyze and inspect the partition's structure.

Step 5: Use this command to actually resize the partition to the new size you created:
resize2fs
It will ask how many blocks you want. Enter the number it shows for your new size.

Step 6: The partition is now a different size. To use it again, you'll remount or re-attach it by typing:
# mount /dev/vda
And that's it! You've made the space on that partition larger or smaller without any data going missing.
Method 3: Run the GParted resize partition Command
GParted (GNOME Partition Editor) is a popular graphical utility for managing disk partitions in Linux, including resizing partitions. It provides an intuitive user interface and a wide range of features, making it a great choice for users who prefer a visual approach to expand or shrink Linux partition.
Here are the steps for GParted resize partition process.
Step 1: First, you need to install a program called GParted on your Ubuntu system. You can get it from the Ubuntu Software Centre, or by typing this command in the terminal:
sudo apt install gparted

Step 2: Once GParted is installed, you can find it and open it by searching in the Dash (start menu).

Step 3: If your computer has more than one hard drive, you'll need to select the one you want to work on. In the main GParted window, pick the drive from the top right corner. If you only have one drive, you can skip this step.

Step 4: To make a partition bigger or smaller, right-click on it in the main window and choose "Resize/Move".

Step 5: A new window will pop up with a slider. You can drag this slider left or right to change the partition size. Or you can just type in the new size you want in the box below the slider.

Step 6: GParted won't make any changes yet. It will just show the changes you want at the bottom of the window.

Step 7: When you're ready, click the green checkmark or "Tick" button to actually apply all the size changes you made.

Step 8: A warning window will pop up letting you know the changes could cause data loss. If you have a backup of your important files, you can safely click "Apply" here to resize the partitions.

GParted provides visual feedback throughout the process, making it easy to understand and monitor the resizing operation. It's worth noting that GParted can also be used to create, delete, and format partitions, making it a versatile tool for managing your disk partitions.
Method 4: Use KDE Partition Manager Utility
KDE Partition Manager is a program that lets you resize, format, delete, and create partitions on your Linux system. It has a nice user-friendly interface similar to GParted. It works with many different file systems like NTFS, FAT, ext4, and more.
Here are the simple steps to resize a partition with KDE Partition Manager:
Step 1: First, install KDE Partition Manager by typing this command in the terminal:
sudo apt-get install partitionmanager
Then open up the program.

Step 2: In the main window, right-click on the partition you want to make bigger or smaller. From the menu, choose "Resize/Move".

Step 3: A new window will pop up with a slider bar. You can drag this slider left or right to change the partition size. Or you can just type the new size you want in the box below the slider.

Step 4: KDE Partition Manager will show all the changes you want to make in a list. When you're ready, click the "Apply" button at the top to actually make those changes happen.

Step 5: Now just wait while it resizes your partition. This may take a few minutes. When it's all done, you'll see an "OK" button. Click that to get back to the main window.

That's it! KDE Partition Manager makes it easy to visually resize your Linux partitions with just a few clicks and drags. The nice interface guides you through the whole process.
Dynamic Partition Management:How to Adjust Your Disk Layout
When your C Drive is clogged with system files and "Low Disk Space" warnings appear, UBackit allows you to intelligently borrow unused space from other partitions (like your D Drive) to balance your disk layout.
Step 1. Identify and Select Disk
Launch UBackit and navigate to the Partition Management tab. Select the physical disk you wish to modify. Double-click the disk or click the Adjust Disk Layout option from the right pane to continue.

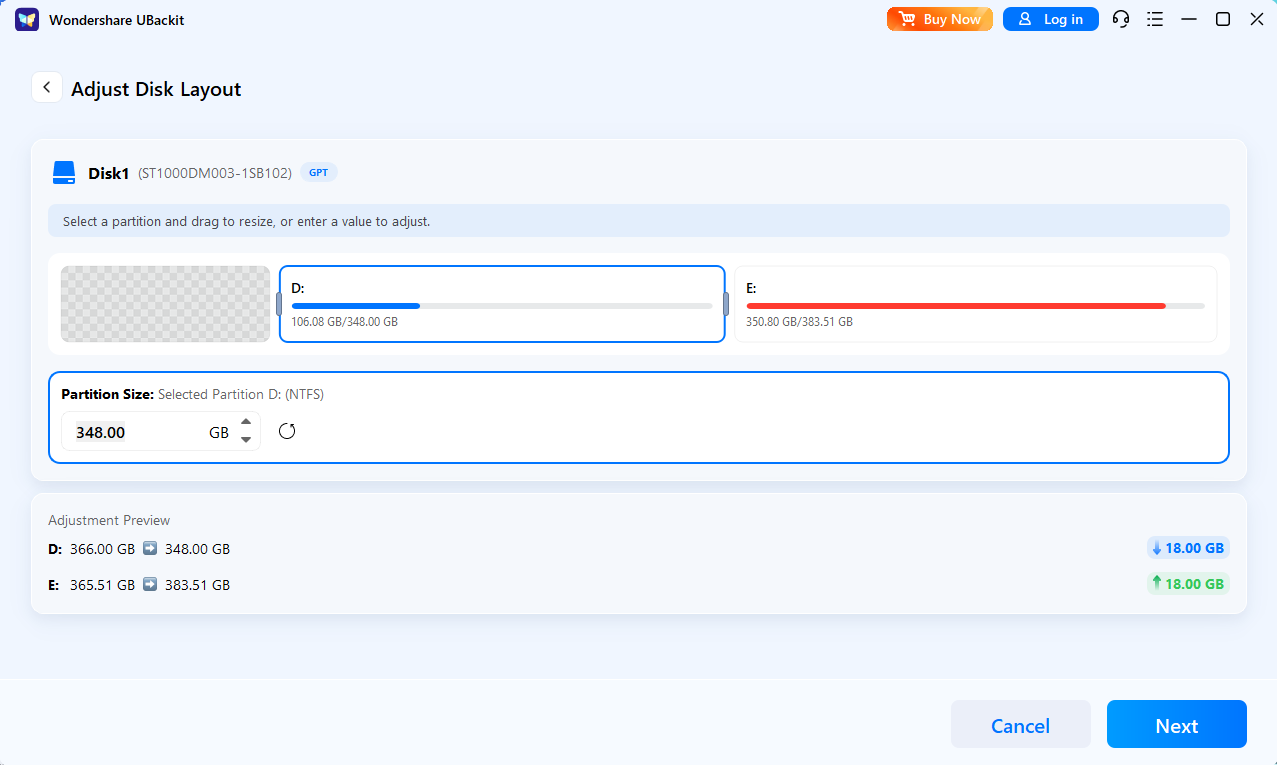
Step 2. Adjust the Disk Layout
Use the intuitive visual interface to drag the edges of your partitions. Alternatively, enter specific GB/MB values to precisely reallocate unallocated space from one volume to another.
Step 3. Initiate the Process
Review and confirm the partition layout. Once confirmed, click Next to execute the operation.
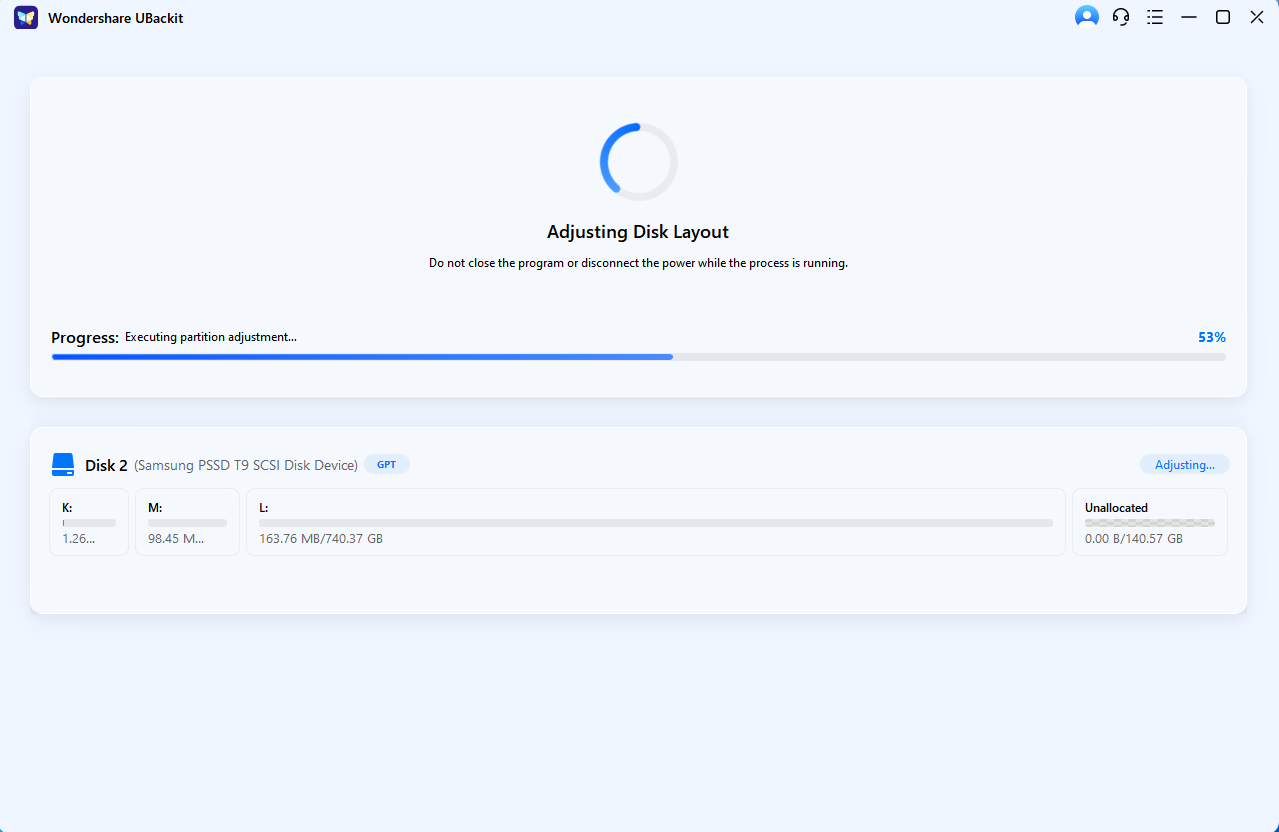
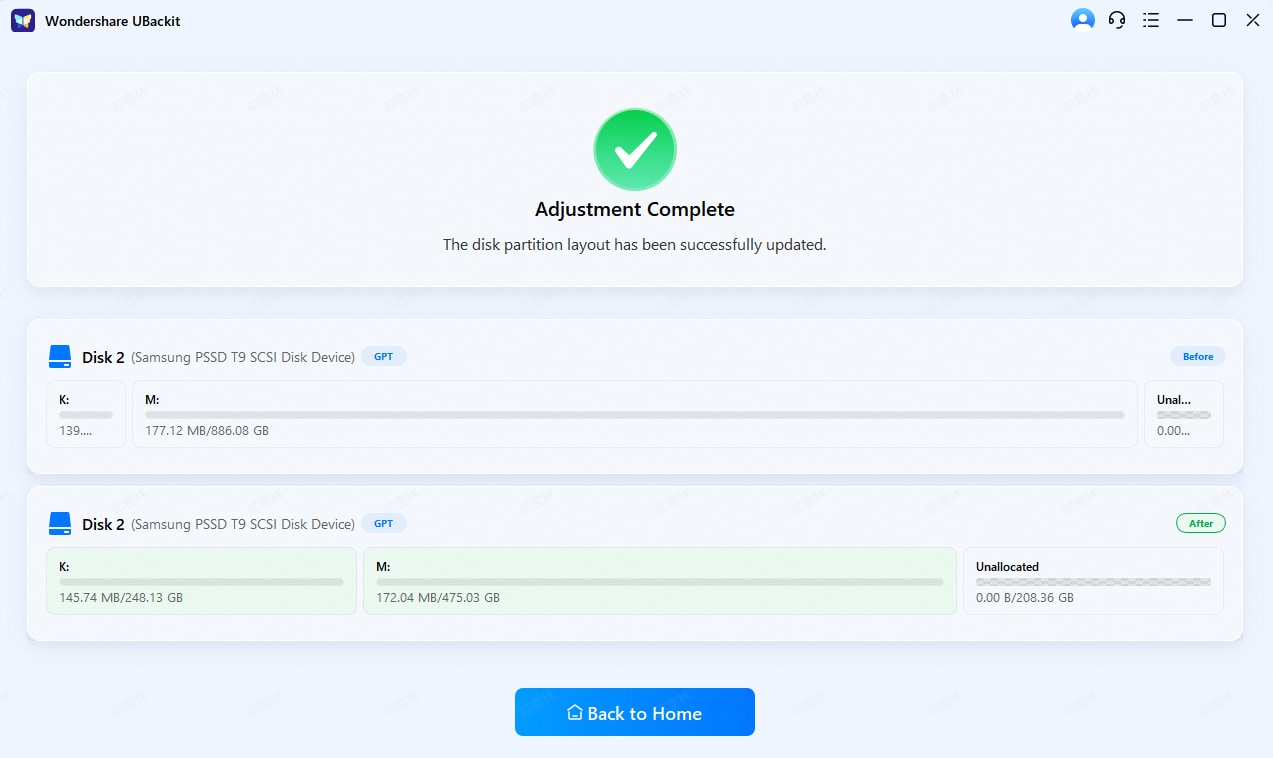
Step 4. Complete Management
Wait for the process to finish and view the updated disk layout. UBackit will safely move data blocks to accommodate the new boundaries. Once the progress bar reaches 100%, your disk will reflect the updated capacity instantly.
Tips to Create and Resize Linux Partitions
While resizing partitions is a useful skill, it's equally important to plan and manage your partitions effectively from the outset. Here are some tips to help you create and maintain partitions efficiently:
- Plan your partition layout: Before installing Linux, consider your storage requirements and create separate partitions for different purposes, such as root (/), home (/home), swap, and others.
- Allocate sufficient space: When creating partitions, allocate enough space to accommodate future growth and avoid the need for frequent resizing.
- Monitor disk usage: Regularly monitor disk usage using tools like df and du to identify potential space issues and take proactive measures.
- Leverage Logical Volume Management (LVM): LVM is a powerful disk management system that simplifies partition resizing and provides additional flexibility.
- Back up regularly: Maintain regular backups of your data to ensure you can recover in case of any unforeseen issues during the resizing process.
- Use tools like GParted or KDE Partition Manager: As discussed earlier, tools like GParted and KDE Partition Manager provide user-friendly graphical interfaces for managing partitions, making it easier to visualize and perform resizing operations.
Conclusion
Throughout this comprehensive guide, we've explored various approaches for shrinking and expanding partitions.
Be it command-line utilities like fdisk and resize2fs, as well as graphical tools like GParted and KDE Partition Manager. Each method has its own strengths and considerations, allowing you to choose the approach that best suits your preferences and requirements.
Importantly, we've emphasized the crucial step of creating backups before attempting any partition resizing operation. Data loss is a real risk when modifying partitions, and having a reliable backup like Recoverit can provide peace of mind and a safety net in case of any unforeseen issues.
FAQ
-
How do I resize a partition in CentOS?
In CentOS, you can resize partitions using various methods, including command-line utilities like fdisk and resize2fs, as well as graphical tools like GParted. Here's a brief overview:
1. With fdisk, you can delete and recreate the partition with a new size, being careful not to lose data.
2. resize2fs allows you to resize ext2, ext3, and ext4 file systems directly.
3. GParted provides a user-friendly graphical interface for resizing partitions on CentOS, supporting various file systems.
It's recommended to create a backup before resizing partitions and perform the operation from a live environment or rescue mode to avoid potential issues. -
Why would one need to extend a Linux partition?
There are several reasons why you might need to extend (increase the size of) a Linux partition:
1. Running out of disk space: As your data and application requirements grow, you may need to extend a partition to accommodate more files and data.
2. Reorganizing storage layout: If you initially allocated too little space to a particular partition, you can extend it to meet your current needs.
3. Accommodating system updates or upgrades: Major system updates or upgrades may require more disk space, necessitating the extension of a partition.
4. Consolidating free space: If you have unallocated free space on your disk, you can extend an existing partition to make use of that space.
Extending a partition can help you avoid running out of disk space and ensure smooth operation of your Linux system. -
Does resizing the partition delete data Ubuntu?
No, resizing a partition in Ubuntu does not necessarily delete data if done correctly. However, it's crucial to follow best practices and take necessary precautions to avoid data loss.
When resizing a partition, the existing data is typically moved to accommodate the new partition size. As long as the resizing operation is completed successfully and without interruptions, your data should remain intact. -
Q4. Can I resize the Ubuntu partition from Windows?
No, you cannot directly resize an Ubuntu partition from within the Windows operating system. This is because Windows does not natively support Linux file systems like ext4, which is commonly used by Ubuntu.
To resize an Ubuntu partition, you need to use tools and utilities that are designed to work with Linux file systems. These tools are typically available within the Linux environment itself or from a live Linux environment (such as a bootable USB or DVD). -
Can I resize a partition while it's mounted?
While it's possible to resize certain file systems (e.g., ext4) while mounted, it's generally recommended to unmount the partition before resizing to minimize potential issues and data corruption. -
Will resizing a partition affect my existing data?
If done correctly, resizing a partition should not affect your existing data. However, it's always a good practice to create a backup before performing any partition management operations to mitigate the risk of data loss. -
How much space should I allocate for the swap partition?
The recommended swap partition size depends on your system's RAM and usage patterns. A general rule of thumb is to allocate swap space equal to or slightly larger than your RAM if you have less than 8GB of RAM, or equal to the square root of your RAM size if you have more than 8GB.


