Are you an Ubuntu user looking to create a bootable USB? Whether you want to install a fresh copy of Ubuntu on your computer or need a portable operating system on a USB drive, this guide will walk you through the process step-by-step.
We will explore different methods to create a bootable USB on Ubuntu, using both pre-installed tools and third-party software. Additionally, we will discuss a reliable data recovery solution for unbootable Linux computers. So let's dive in and get started!
In this article
How to Create a Ubuntu Bootable USB?
There are several methods to create a bootable USB on Ubuntu, and we will explore the most popular ones. Each method has its own advantages and may be more suitable for different scenarios. Let's take a look at four ways one by one.
| Scenarios | Ubuntu Bootable USB creator |
| If you want to use Ubuntu's official tool | Try Startup Disk Creator |
| If you attach great importance to the safety of files | Try Unetbootin |
| If you are a Ubuntu beginner | Try Etcher |
| If you are an advanced Ubuntu user | Try Terminal |
Way 1: Create a Bootable USB Using Startup Disk Creator
The first method is using the official tool called Startup Disk Creator. It is included by default in all releases after Ubuntu 8.04 and can be installed on Ubuntu 8.04. This utility allows you to create a bootable USB directly from an ISO image of Ubuntu seamlessly. To use Startup Disk Creator, follow the steps below:
- Launch the application on your computer.
- Select the ISO image, choose your USB drive, and click on the Make Startup Disk button. The tool will then format the USB drive and copy the necessary files to make it bootable.
- Once the correct ISO image and your USB disk are selected, click Make startup disk to start the process. A warning will show up:
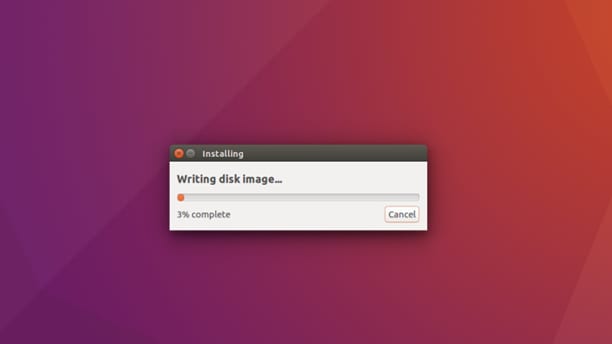
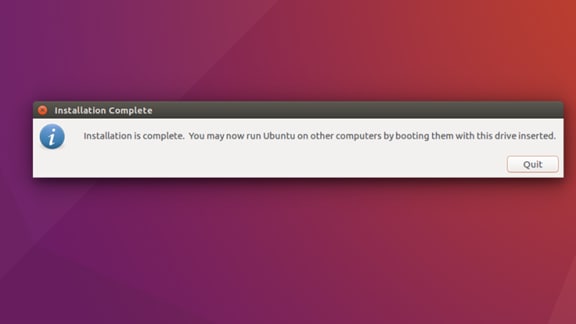
- Once the process is completed you will see this message:
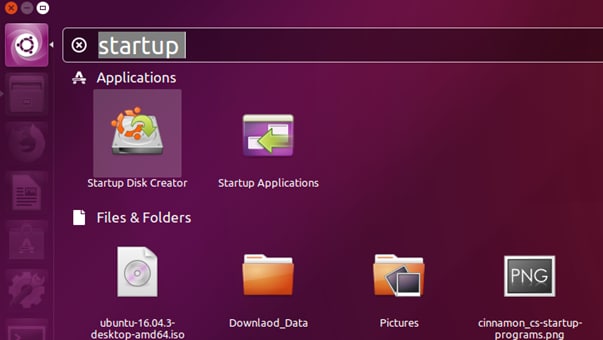
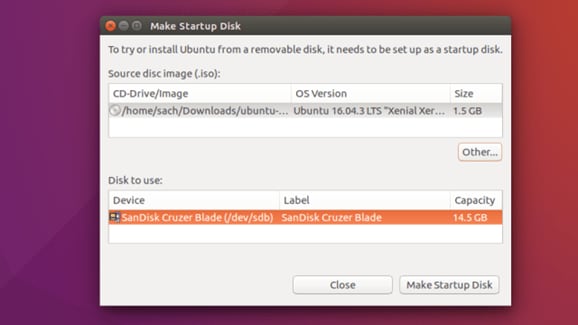
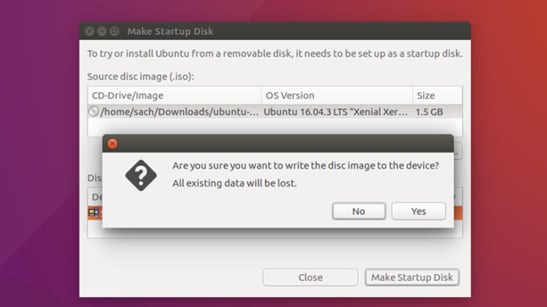
After the confirmation, the process will start.
Way 2: Create a Bootable USB on Ubuntu Using Unetbootin
Another popular tool for creating bootable USB drives is Unetbootin. It is a cross-platform utility that supports various operating systems, including Ubuntu. UNetbootin doesn’t erase any files as it doesn’t have the ability to format your USB flash drives or external hard drive devices. So, it is a great way to make a bootable USB on Ubuntu while ensuring the safety of files.
To use Unetbootin:
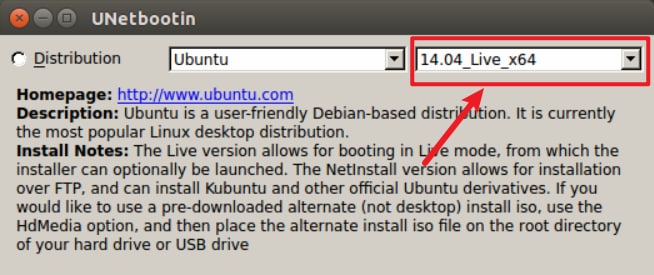
- Download and install Unetbootin on your computer.
- Select the ISO image and choose your USB drive.
- Click on the OK button. Unetbootin will then format the USB drive and copy the required files, making it ready for booting.


Way 3: Create a Bootable USB on Ubuntu Using Etcher
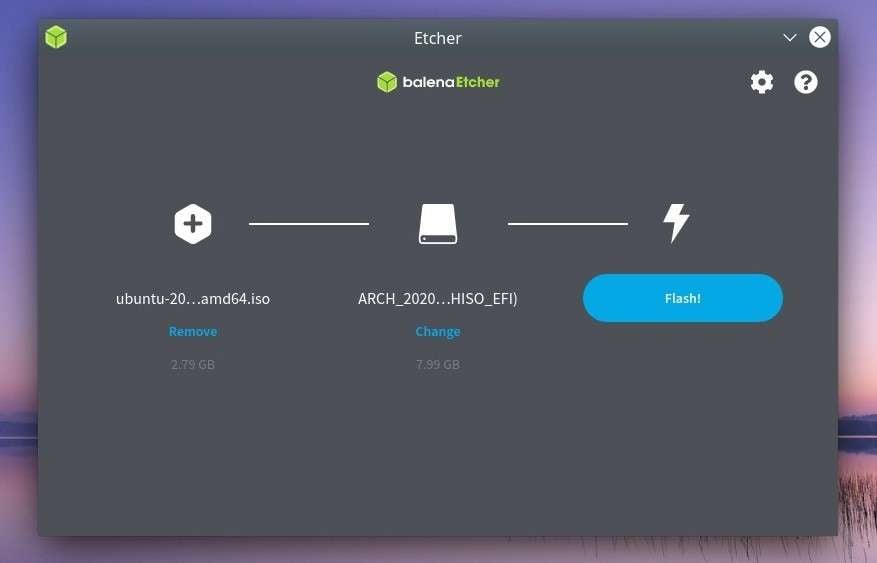
Etcher is a simple yet powerful tool for creating bootable USB drives. This tool is famous for its Flash with Ether feature, which would validate the bootable USB before the initiation process. Another remarkable feature is cross-platform which helps users to work on Windows, Linux, and Mac with no complicated install instructions. Moreover, the tool’s user-friendly interface also makes it rise above other software.
To use Etcher :
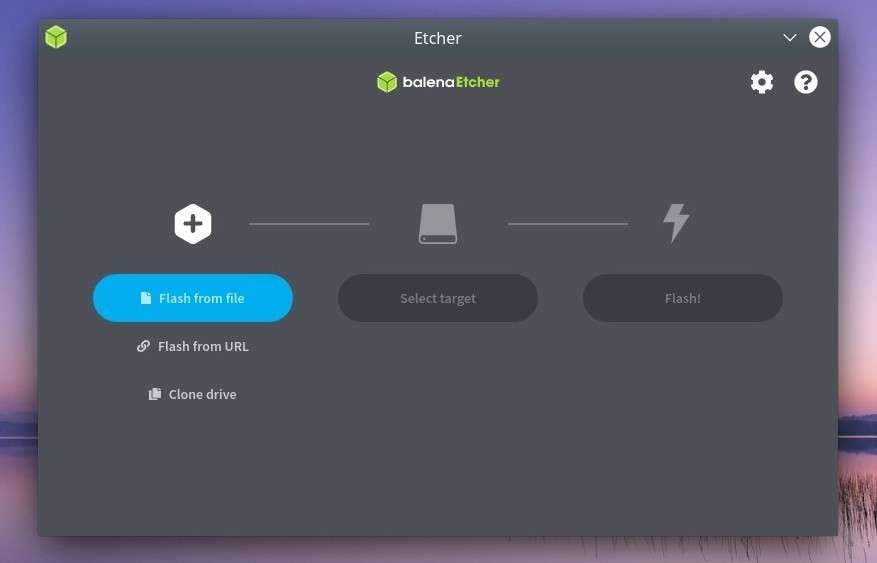
- Download and install Etcher on your computer.
- Select the ISO image by browsing its location on your computer. You can also directly import it from the Internet via the URL option.
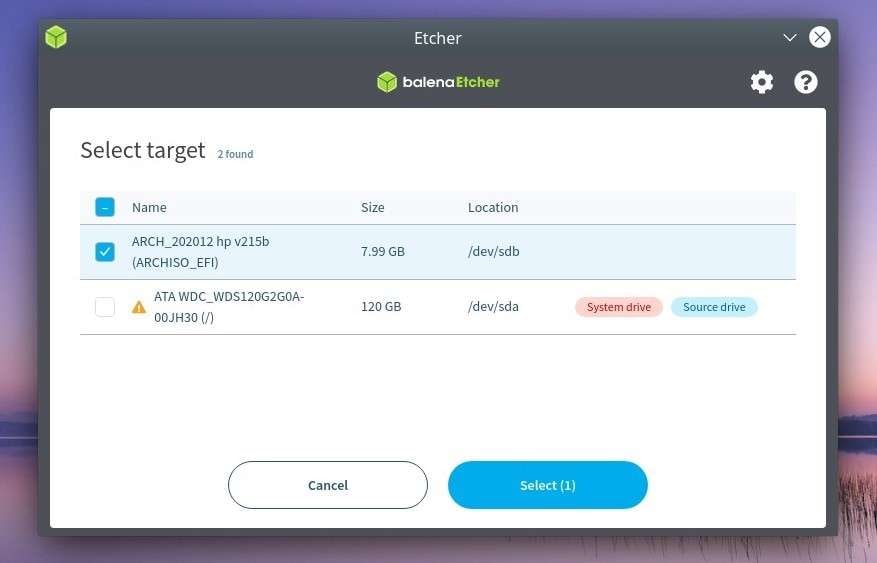
- Now, you will select the target device which is your USB Drive.
- Click on Flash. Etcher will then take care of formatting the USB drive and copying the necessary files to make it bootable.
Way 4: Create a Bootable USB on Ubuntu Using Terminal
For advanced users who prefer the command line interface, creating a bootable USB using the Terminal is a viable option. This method allows you to have more control over the process and is particularly useful if you encounter any issues with the graphical tools.
To use Terminal, follow the steps below:
- Insert your USB drive into your Ubuntu computer.
- Open your terminal by searching it via the application menu, or by pressing: Ctrl + Alt + T.
- Run the command lsblk on your terminal to identify your USB drive. Make sure to choose the correct device.
- Now, we need to unmount any partition on the selected USB drive. Run the following command: /dev/sdX. Replace sdX by the actual name of your USB device.
- Write the ISO to the USB drive by using the following command. Replace iso file-_location with the actual path to ISO image.
- Once the dd command completes, the process will make a bootable USB drive ready to use.
It should look like this:


How to Recover Your Data From Unbootable Linux Computer: Recoverit
Now that we have explored different methods to create a bootable USB on Ubuntu, let's discuss a solution for recovering data from an unbootable Linux computer. Although tools like Startup Disk Creator, Unetbootin, Etcher, and Terminal are remarkable for creating bootable USBs, what if all these methods fail and you're left with an unbootable computer containing vital data? This is where Recoverit comes to the rescue.
Recoverit is a reliable data recovery software that specializes in recovering lost or deleted files from various storage devices, including unbootable Linux computers. With its user-friendly interface and powerful scanning algorithms, Recoverit can help you retrieve your precious data in just a few simple steps.
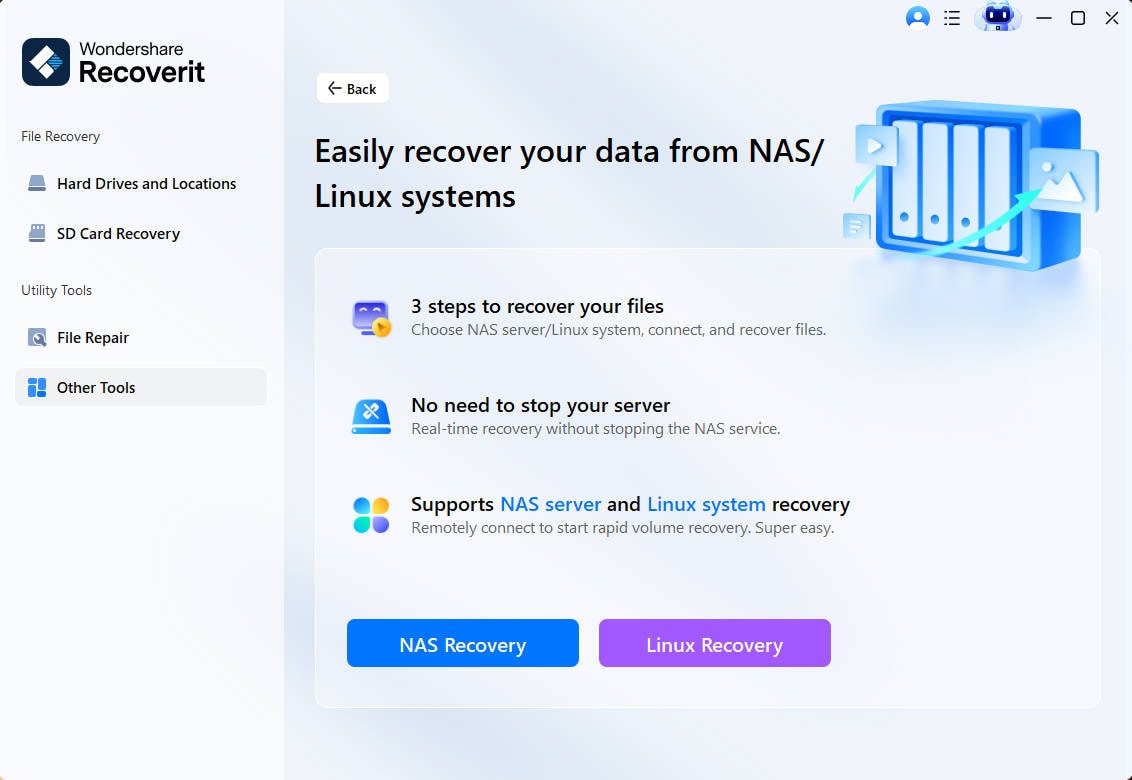
- Download Recoverit. Once the download is complete, install it on your computer.
- Choose the Linux data recovery. Click Linux Recovery under the NAS and Linux tab.
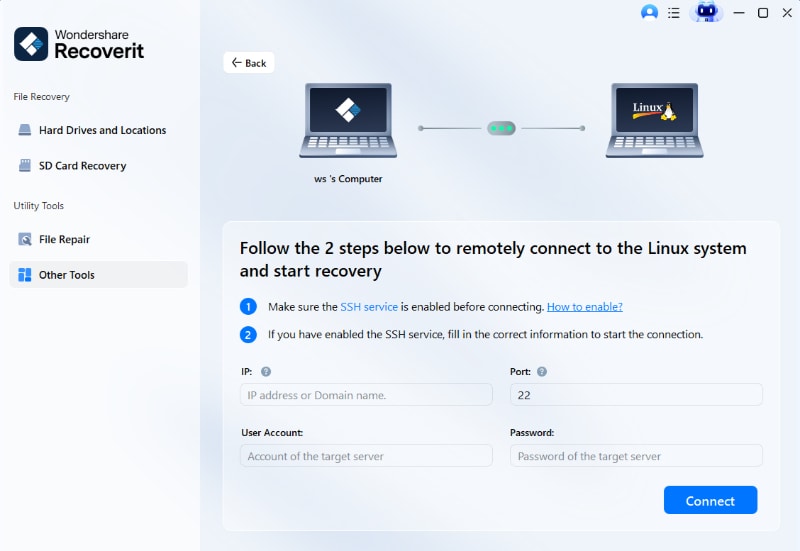
- Connect the Linux file recovery tool to your system by entering the IP, port, username, and password.
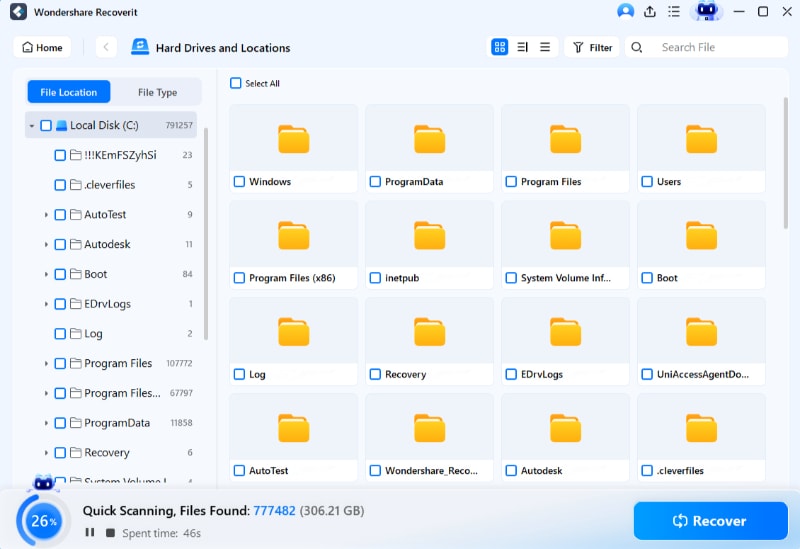
- Once connected, Recoverit will start scanning for lost files in your Linux system. Click Recover to restore the deleted files.
Conclusion
Creating a bootable USB on Ubuntu is an essential skill for every Ubuntu user. Whether you're installing a fresh copy of Ubuntu or need a portable operating system, the methods discussed in this guide will help you achieve your goal. From the pre-installed Startup Disk Creator to third-party tools like Unetbootin and Etcher, you have a range of options to choose from. And in case you encounter an unbootable Linux computer with important data, Recoverit is there to recover your files. So go ahead, download Recoverit, and safeguard your data today!


 ChatGPT
 Perplexity
 Google AI Mode
 Grok
Grok


