Whether your system crashed or you wish to upgrade your operating system to Windows 10 or 11, you can download an installation file for an HP boot to a USB device and install your OS from the flash drive. Learn why and how to boot HP from a USB, what to do if your USB drive doesn’t appear in the boot menu, and how to recover data afterward.
Try Recoverit to Recover & Repair Video/Photo/Docs etc.
Security Verified. Over 7,302,189 people have downloaded it.
In this article
Why Should You Choose a USB to Boot HP?
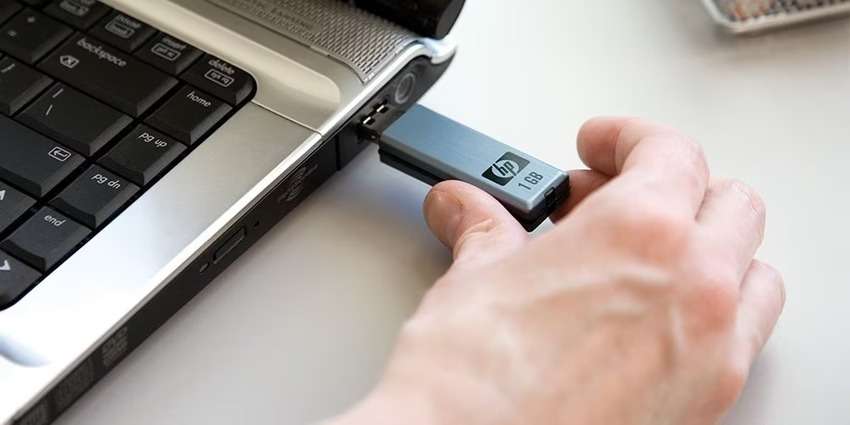
Creating a bootable USB to install a new OS on your HP computer is more convenient than the traditional method, which requires burning a Windows ISO file to a CD before booting your HP.
Besides convenience, your bootable USB drive is smaller than old alternatives and won’t malfunction if you scratch it.
Moreover, a bootable USB is your only option if you have a newer HP or another computer. Old media like CD/DVD drives haven’t been part of new-generation models for years.
Here’s what you should know before booting your HP from a USB.
What You Should Know to Boot HP From a USB
Before booting your HP from a USB drive, consider the following requirements:
- ⌚Time: 10–20 minutes (approximately ten minutes for the actual boot)
- 💻System: Windows 10 or 11
- 🔧Tools: an HP computer, a blank USB with at least 8 GB of space, and a Windows ISO file for a 32-bit or 64-bit processor (Windows 11 supports only 64-bit CPUs)
Now that you know what you need, it’s time to create a bootable USB for Windows 10 or 11.
Create a Bootable USB for Windows 10 & 11
Microsoft’s Media Creation Tool lets you create a bootable USB flash drive in minutes. Once you download it, you can turn your USB into an installation medium and perform an HP boot from the USB with Windows 10 or 11.
Here’s how to create a bootable USB drive for Windows 10:
- Connect your USB drive to a working computer.
- Visit Microsoft’s Windows 10 Software Download page to download the Media Creation Tool for an HP boot to the USB.
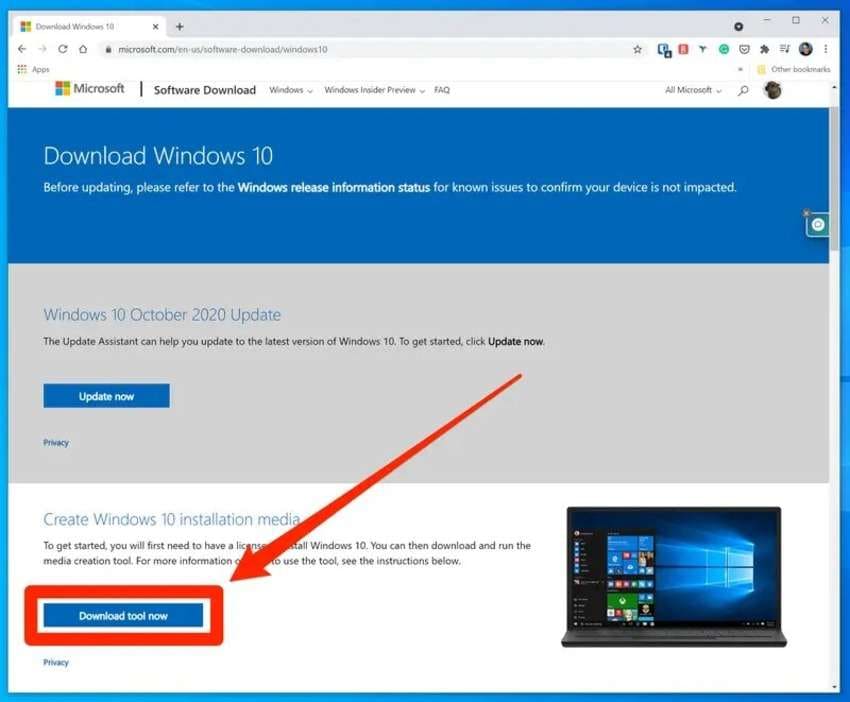
- Run the installation file and accept the terms and conditions.
- Click Create installation media for another PC and hit Next.

- Select the language, Windows edition, and 34-bit or 64-bit architecture. The checkbox below can choose the settings for you. Click Next.

- Select the USB flash drive as your installation medium and hit Next.

- Choose your USB and click Next.

The tool will create your bootable USB within minutes.
What about an HP boot from a USB with Windows 11? The steps are identical, but download the Media Creation Tool from Microsoft’s Windows 11 Software Download page.
Download it from the Create Windows 11 Installation Media section and create a Windows 11 bootable USB following the steps above. You won’t see the Architecture drop-down list in Step 5 because 64-bit processors are the only option on Windows 11.
Boot HP from a USB With Windows 10 & 11
Entering the BIOS is the only way to perform an HP laptop boot from a USB or another medium. However, you can access the BIOS in two ways:
- Using a specific key to access the Boot Menu
- Using a BIOS key to launch the BIOS setup utility and change the system configuration
Here’s a step-by-step guide for each.
Boot HP From a USB via a Boot Menu Key
The process of using an HP Boot Menu key to boot from a USB is the following:
- Insert your bootable USB into your HP computer.
- Turn on or restart your computer and repeatedly press the HP Boot Menu key. It’s ESC on most HP computers, but you can also use F9 for desktop HP Pavilion booting from a USB.
- Once you see the Startup Menu screen, press F9 to specify your boot device. Note that the Boot Device Options utility on some models is Boot Menu. You’ll see the latter during an HP EliteBook, HP ZBook, HP ProDesk, and HP ProBook boot from a USB.

- Use the ➜ key to switch from the Main to the Boot tab.

- Press + or - to move the Removable Devices option to the top (it might be HDD Group on older computers), expand it with Ctrl + Enter, select your bootable USB with the Enter key, and press F10 to save the changes.

- Press Enter to confirm your choice.

Your Windows 10 or 11 will automatically install from your bootable USB. Once the system boots, it will ask for a valid Windows product key to activate your OS. However, you can postpone it if you haven’t purchased the key, but you’ll have limited functionality after 30 days.
Boot HP From a USB via the BIOS
The method above is more straightforward, primarily if you don’t want to change the system configuration. Otherwise, you must perform an HP BIOS boot from a USB.
However, you’ll see one BIOS interface for an HP Envy or HP Pavilion boot from a USB, while HP Omen is slightly different. An HP ProBook, HP EliteBook, and HP ZBook boot from a USB will have another UI, which most desktop models share (e.g. an HP ProDesk boot from a USB will be identical).
Here’s how to boot HP from a USB via the BIOS:
- Turn on or restart your computer and watch for the BIOS key (ESC or F10, depending on the model). You’ll see it briefly on the screen, so press it immediately (and repeatedly) to enter the BIOS setup utility.
- If you miss that short window but can access your system (if it hasn’t crashed), go to Settings > Update & security > Recovery > Advanced startup > Restart now. Another method is clicking Start > Power and holding the Shift key while clicking Restart.

- Click Troubleshoot and select Advanced options.

- Click UEFI Firmware Settings and hit Restart.

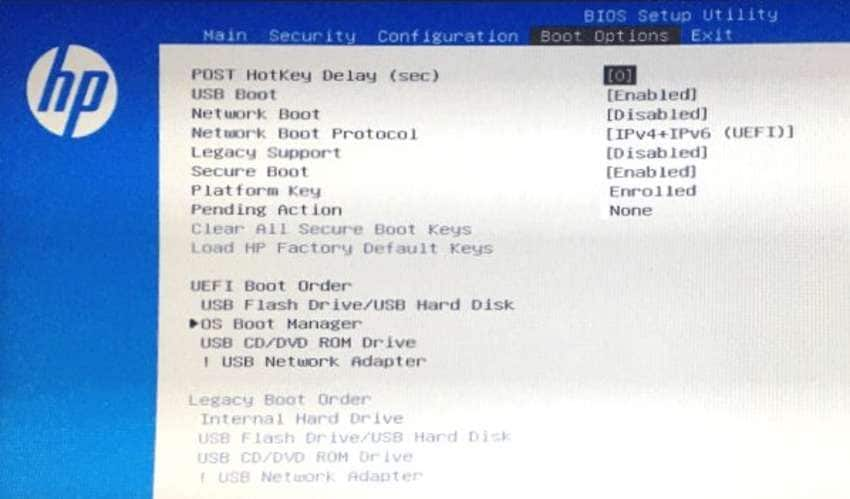
- You’ll see the following interface for an HP Pavilion or HP Envy boot from a USB. Navigate to the System Configuration tab with the ➜ key and Boot Options with the ↓ key. Press Enter.

- If your HP computer has Legacy Support (newer models with Intel 10th generation CPUs don’t), navigate to it, press Enter, select Enabled, and confirm with Enter.

- Navigate to Secure Boot and set it to Disabled. That way, you can boot from a USB.

- Navigate to UEFI Boot Order, move your boot device (USB) up or down with F5 or F6 (place it at the top), press F10 to save the changes, and hit Enter to confirm.
- Type the provided code and press Enter.

- Turn your computer off and on, press the HP Boot Menu key repeatedly (ESC or F9), and access Boot Device Options with F9.
- Follow Steps 4–6 from the “Boot HP From a USB via a Boot Menu Key” section above.
Since the BIOS interface is different for an HP ZBook, HP ProDesk, HP ProBook, and HP EliteBook boot from a USB (among other commercial notebooks and workstations), follow these steps after accessing the BIOS setup utility:
- Go to Advanced > Boot Options (the BIOS for these HP models has a GUI, meaning you can use your computer mouse instead of the keyboard).

- Uncheck Secure Boot and enable USB Device Boot.
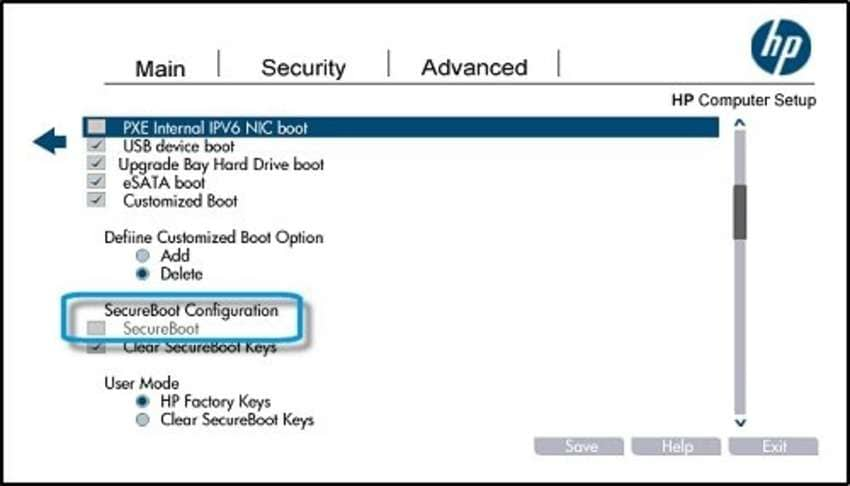
- Find Legacy Boot Order on the list and uncheck the box.
- Enable UEFI Boot Order, select your bootable USB, and click Save > Yes > Exit.
The BIOS interface for an HP Omen boot from a USB is nearly identical to the HP Pavilion and HP Envy UI. However, it features a dedicated option for USB flash drives under UEFI Boot Order, so you don’t have to jump through hoops to find it. You can also enable a USB Boot, like in the UI above.
More Related: How to Fix a Slow HP Laptop?
[Bonus] “USB Not Showing in My HP Laptop Boot Menu” Fixed
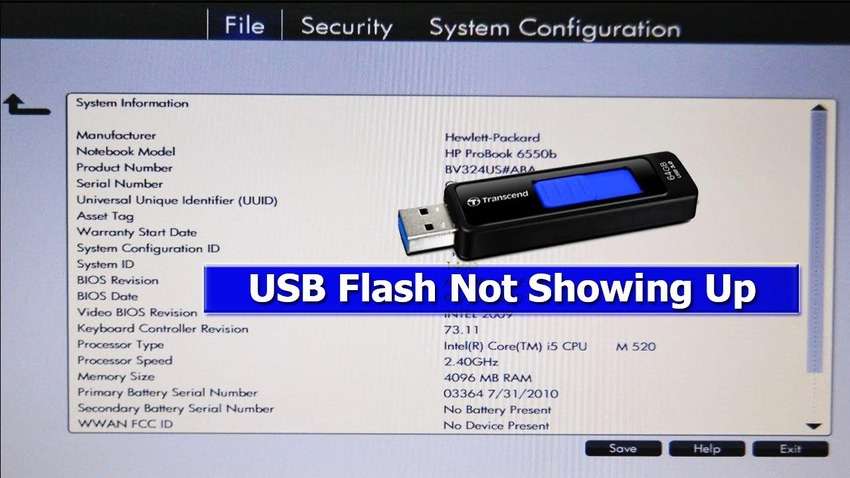
Older HP computers from two decades ago don’t have the Removable Devices (or External Devices) option in the Boot Menu. Instead, you might find your USB drive in an HDD Group.
However, other problems might be at play, even when using HP Omen’s BIOS version with a dedicated USB Boot option.
Here are the typical causes and proven solutions for your HP boot from a USB not showing a USB flash drive:
| 🔒Causes | 🔑Solutions |
| USB connection problems | Disconnect and reconnect the USB |
| USB driver issues | Change the USB 3.0 configuration |
| Incorrect boot order | Configure or reset the boot order |
| Outdated BIOS | Update the BIOS |
Solution 1: Disconnect and Reconnect the USB
Disconnecting and reconnecting your bootable USB might resolve the issue if you didn’t plug it in correctly.
Solution 2: Change the USB 3.0 Configuration
The problem could lie in the USB configuration. Namely, most BIOS versions don’t have native support for USB 3.0 ports. They have USB 2.0 drivers, while their 3.0 counterparts become available after installing Windows.
Here’s how to change your USB 3.0 configuration:
- Enter the BIOS setup utility following the steps above and switch to the System Configurationtab.
- Navigate to USB 3.0 Configuration in Pre-OS, press Enter, choose Auto, and hit Enter.

- Save the changes with F10.
Your computer will boot using USB 2.0 and load 3.0 drivers upon installation. However, since the BIOS interface differs among HP models, you might need to dig deeper to find the settings, but they’ll be under System Configuration.
Solution 3: Configure or Reset the Boot Order
Check the Boot Menu to ensure you’ve placed your boot device on top. Also, ensure you’ve configured the BIOS to prioritize the USB port when booting your computer.
We’ve covered the steps above: your bootable USB should be in the selected option in System Configuration > Boot Options > UEFI Boot Order.
Solution 4: Update the BIOS
If the fixes above don’t work, you might need to update the BIOS. HP has detailed documentation for HP BIOS updates on the official website, so find a suitable guide for your computer and follow the steps.
How to Recover Your Data After Booting HP With a USB
Whether your HP computer crashed or you reinstalled Windows to eliminate malware or another problem, your data may not be gone after booting your HP from your USB drive. You can use data recovery software like Wondershare Recoverit to retrieve lost data, including images, videos, documents, and other files.
Here’s how:
- Download and install Wondershare Recoverit on your HP computer.
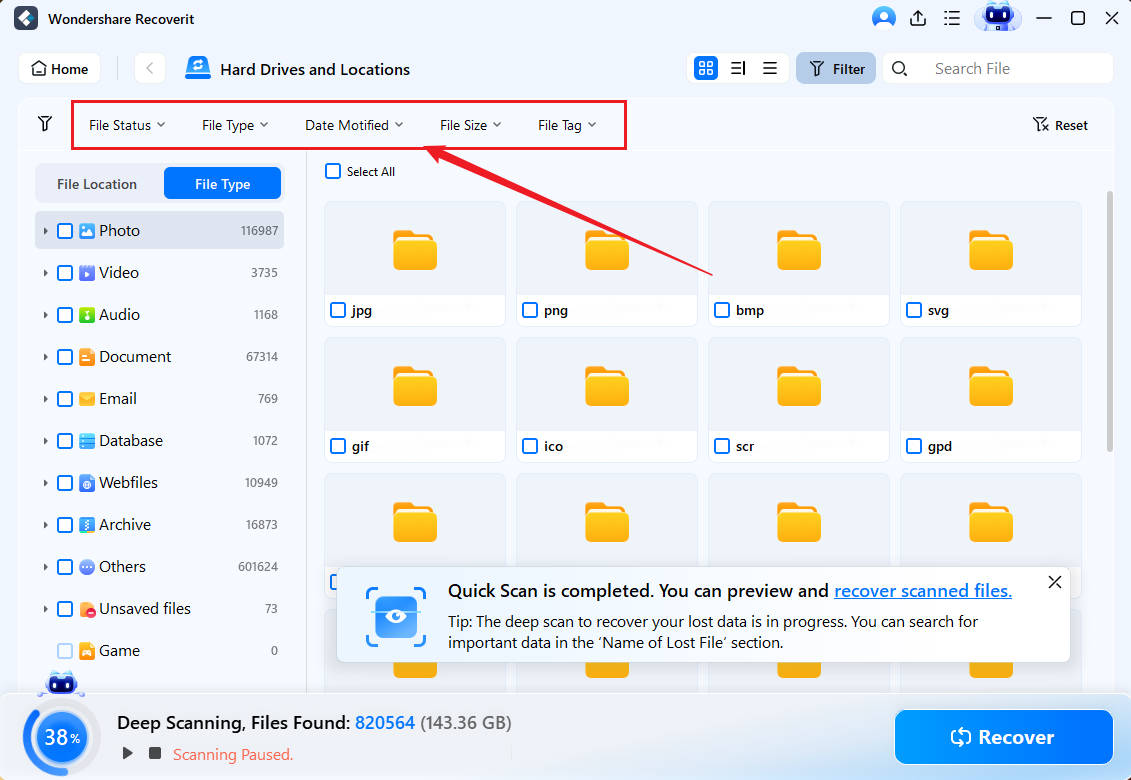
- Choose the desired disk under Hard Drives and Locations and click Start to initiate scanning.

- You can pause or stop the scan once you see the files you wish to retrieve (unless you want to save everything).

- Use search filters to accelerate the process if you have extensive data on the chosen drive.
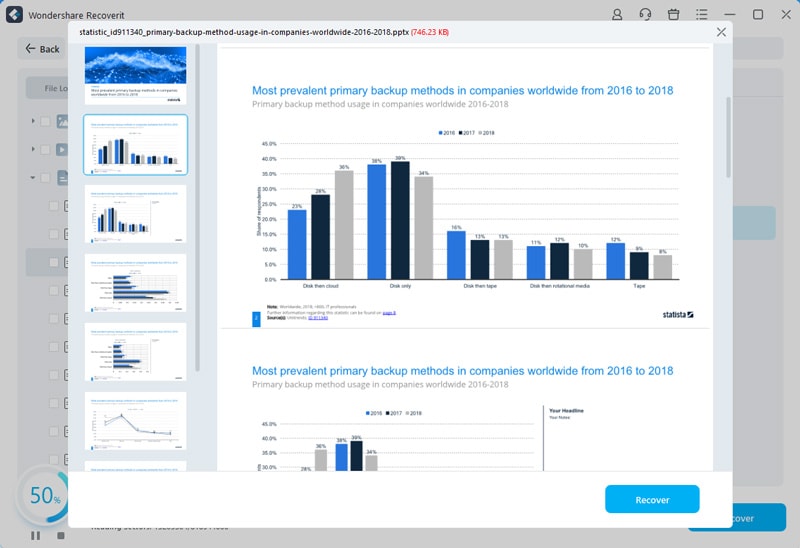
- Preview the files you wish to salvage, tick their corresponding boxes to select them, and click Recover.
- Choose the destination (preferably an external device) and hit Recover.
It might take a while (depending on the file size), but you’ll have all your data on your new Windows 10 or 11.
Conclusion
Booting HP from a USB may seem complex, but don’t let that discourage you from trying. This comprehensive guide is everything you need to install Windows 10 or 11 from a USB drive on any HP computer – you won’t encounter problems if you follow all the steps.
Remember to create a data backup before booting the system. However, you can recover files with tools like Wondershare Recoverit if backing up isn’t an option due to a system crash or another unexpected issue.


 ChatGPT
 Perplexity
 Google AI Mode
 Grok
Grok


