

 TL;DR:
MSI Burnrecovery is a free utility that allows MSI users to generate system recovery media directly from their computer's recovery partition to restore the Windows operating system during severe malfunctions.
● Creating physical backup media requires either a USB flash drive with a minimum capacity of 32GB or multiple writable DVDs to accommodate the 30GB recovery file.
● Initiating a system restore requires pressing the F11 key during the MSI boot screen, which will permanently erase all current files and settings on the destination disks.
● Because the restoration completely wipes the drive, users should secure their existing files to an external device beforehand, utilizing data recovery software like Wondershare Recoverit if files are lost or the system is already corrupted.
Ask AI for a summary
 ChatGPT
 Perplexity
 Gemini
 Claude
 Grok
Grok
Are you the type of person who likes to be prepared for unpredictable PC scenarios, such as system issues and malfunctions?
If yes, then you'll likely want to install a system recovery tool that can help you back up your operating system, letting you restore it to its original glory when things start going south.
That's where MSI Burnrecovery comes in. By downloading MSI Burnrecovery, you can rest assured that you can restore your operating system at any given time from different system recovery media.
Sounds good? Let's dive deeper and see what MSI Burnrecovery is all about!
In this article
What is MSI Burnrecovery
MSI Burnrecovery is a recovery tool developed by Micro-Star International Co., Ltd, which allows users to create recovery storage devices (or recovery media) using information and files from the system recovery partition.
The recovery partition represents a part of a PC's hard drive that stores crucial data needed to fix various system-related issues and restore the system to its default state.
By creating system backups using Burnrecovery, users can ensure their systems are safe and recoverable.
This kind of recovery is beneficial in cases of system malfunctions, system corruption, system errors, and malware attacks, all of which induce system issues in one form or another.
How to Download and Install MSI Burnrecovery
Downloading Msi Burnrecovery is quick and accessible because it is a free tool available for all MSI users. You can access the MSI Burnrecovery download on MSI's official website.
When the file is finished downloading, install Burnrecovery. You can do so in a few easy steps:
- Open the downloaded zip file and click on the setup.exe file to install MSI Burnrecovery, which will launch the InstallShield Wizard.
- You'll see an installation window pop up. Click on Next to continue. All configurations will be done automatically.

- When the InstallShield Wizard has successfully installed Burnrecovery, click on Finish.

Very straightforward, wouldn't you agree?
How to Create a Recovery Media With MSI Burnrecovery
MSI Burnrecovery allows users to recover their systems by creating media such as ISO files and USB and DVD recovery drives.
1.Creating an ISO File With MSI Burnrecovery
MSI Burnrecovery lets users create an ISO file with recovery media, which they can later burn to a disc using a burning software of their choice. Just creating an ISO file with recovery media doesn't require any external devices and is a very quick way to create a system backup.
To create an ISO file with MSI Burnrecovery, simply:
- Launch the program, select ISO, and click Next.

- Choose a location where you want your ISO file to be saved and click on Next.

- Wait for Burnrecovery to create the recovery file.

- Select Remove temporary file and click on Finish.
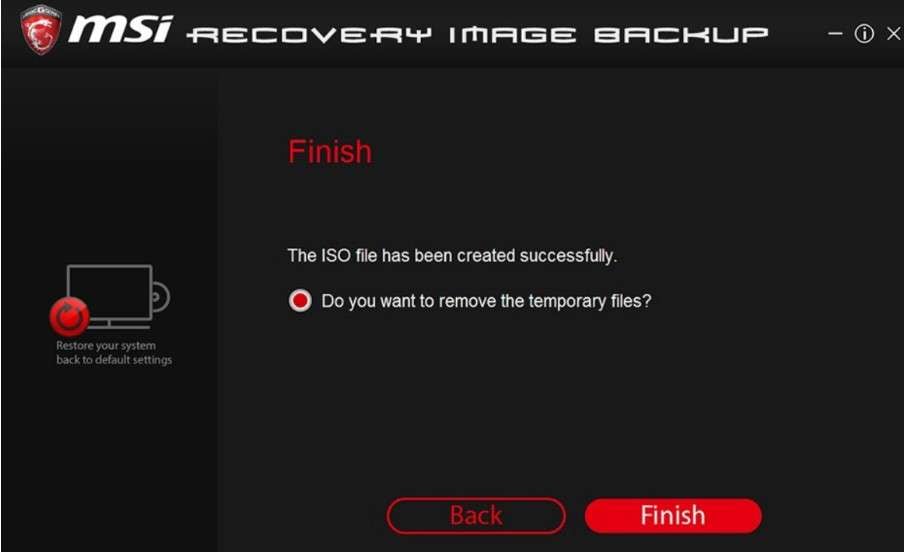
Once the process is complete, you are free to burn the ISO file on a DVD if you wish to do so.
2.Creating a USB Recovery Drive With MSI Burnrecovery
Setting up a USB recovery with MSI Burnrecovery is quick and easy if you have a USB device with at least 32GB storage.
To create a USB recovery drive with MSI Burnrecovery, you just need to:
- Launch the program, choose USB, and click Next.

- Plug in your USB device.

- Select your USB device and click on Next. Ensure there aren't any files on your USB since they'll be wiped.

- Wait for Burnrecovery to create recovery media.

- Select Remove temporary files and click Finish.

The recovery media will be burned on your USB drive.
3.Creating a DVD Recovery With MSI Burnrecovery
Similarly to the previous methods, creating a DVD is relatively simple. All you'll need is a few writable DVDs, as the recovery media takes up 30GB.
To create a DVD with MSI Burnrecovery, you must:
- Launch the program and click on the Recovery disc. Click Next to continue.

- Wait for Burnrecovery to create a recovery file.

- When the file is ready, Burnrecovery will show how many DVDs you need. Pay careful attention to the disc capacities presented, as they might vary.

- Insert the first DVD and click on Burn. When it's done, click on Close.

- Repeat the same procedure until all of the discs have been burned. Then click on Next.

- Select Remove temporary file and click on Finish.

It's as easy as that.
How to Restore Your System With Recovery Media
Now that you have set up your recovery media, it's time to look at how to restore your system. All you'll need is your PC and the recovery media you've created (USB/DVD). You'll have to:
- Press the power button to start your PC.
- When the MSI logo screen appears, keep pressing the F11 key on your keyboard to open the boot menu.
- Select your USB flash drive or DVD, and press Enter to boot. If you are using DVDs, you'll have to repeat this process until all of them are restored.
- Choose Hard Disk Recovery.

- Select two different destination disks where your recovery partition and Windows OS will be restored to. Click on Ok.

- The recovery system will warn you that restoring your system will erase all files and settings currently on your computer. Click Yes to continue.

- Follow the on-screen instructions by clicking Next and wait until the restoration process is done.

- Press OK and restart your system.

Your Windows OS should be up and running.
Tip: Make Sure to Recover Your Data Before Restoring
As you may have noticed, restoring your system with MSI Burnrecovery permanently wipes all data and files on your previous system. So before clicking on that Yes button, you ought to ensure that all your files and data are recovered and stored on an external device, such as a USB drive.
This way, you can retrieve your data to your newly recovered Windows OS, but what is the optimal way to do so?
Since you're likely restoring your system due to system malfunctions, system corruption, system errors, malware attacks, and so on, there's a high chance that your data and files have been lost or compromised.
Before getting your hands on the Burnrecovery MSI download file, you should first attempt to recover any lost or deleted files. A great way to do this is to implement a data recovery tool like Wondershare Recoverit.
Wondershare Recoverit is a recovery software that allows you to recover your deleted files regardless of the data loss scenario. This recovery tool supports the recovery of countless file types and formats and allows users to retrieve their files from various storage devices.
It offers both free and paid versions and has a user-friendly interface. If you need to recover your lost data, look no further.
To recover lost data using Wondershare Recoverit, simply:
- Connect the USB where you want to store your recovered files. Ensure you have enough storage space for your recovery needs.
- Launch Wondershare Recoverit.
- In the main interface, select the partition where the data loss occurred and click on Start to begin scanning it.

- Wait for the app to complete the scan. The real-time scanning results will be visible in the interface.

- Once the scan is complete, preview and select the files you wish to recover.
- When you've selected them, click on Recover.
- You will be asked to select a path to which you want your files to be saved. Navigate to your USB drive, select it, and click on Recover.

That's all there is to it.
Conclusion
Overall, MSI Burnrecovery is a handy solution for all MSI users looking to recover their Windows OS when faced with various system issues. Because it's free and easy to install and use, MSI users can download MSI Burnrecovery to begin their system recovery in no time.
By creating recovery media (ISO file, DVD, or USB drive) using information and files from the system recovery partition, Burnrecovery allows users to create backup devices with their systems intact.
Since MSI Burnrecovery deals specifically with system recovery, you'll also need to resort to data recovery software like Wondershare Recoverit to recover and save the precious data and files that would otherwise be wiped during the system restoration process.
With this in mind, downloading both MSI Burnrecovery and Wondershare Recoverit gives you all the necessary knowledge and tools to recover your system and data.
FAQ
What does MSI Burn Recovery do?
MSI Burn Recovery lets you create system backups by burning data crucial for system functioning from your recovery partition to different media, such as DVDs, USB flash drives, and ISO files.How do I download the MSI recovery image?
You can download MSI Recovery Image / MSI Burnrecovery directly from MSI Recovery Image Backup Tool or by manually searching for it on their official website.


