
Quick Fix: DISM Error 50 (Windows PE Servicing)
The Cause: This error occurs when you run DISM /Online inside the Windows Recovery Environment (WinRE/WinPE). The /Online flag tells the tool to service the actively running OS, but inside WinPE, it mistakes the temporary recovery environment for a live Windows installation.
Fastest Fix (Target Offline Image): Stop using /Online. You must identify your actual Windows partition letter (e.g., D:\) and target it explicitly using the offline switch:dism.exe /Image:D:\ /Cleanup-Image /RestoreHealth
The Registry Bypass: If the error persists, it is caused by a misplaced registry key tracking flag. Open the Command Prompt in the recovery environment, type regedit, navigate to HKLM\SYSTEM\CurrentControlSet\Control, and delete the temporary MiniNT folder key.
Data Recovery Option: If DISM continues to fail and your system is completely unbootable, use Wondershare Recoverit on a working computer to create an independent bootable crash-rescue USB drive to salvage files before wiping the partition.
If you've ever encountered the Error 50 message on Windows when trying to run the command in a recovery environment: dism.exe /image:C: /cleanup-image /revertpendingactions. This error can be frustrating, but there are a few things you can do to fix it.
Deployment Image Servicing and Management or DISM tool allows you to manage Windows images, including cleaning up and reverting pending actions. The Error50 message occurs when the DISM tool thinks you are running it on Windows PE instead of the operating system.
In this article, we'll discuss why you are encountering the DISM does not support servicing Windows PE with the /online option error and how you can fix it.
Part 1. How to Fix Error 50 – Proving 5 Solutions
Below are five different step-by-step solutions to help you resolve the error50 or DISM does not support servicing Windows PE with the /online option.
Method 1. Use Command Prompt
To resolve Error 50 of Windows, you can execute some commands in the Command Prompt in the following way:
Step 1: Boot your PC from the Win 10 installation media and press the Shift + F10 keys when the first installation screen appears. This will open the Command Prompt.
Step 2: Now, you need to get the list of available system partitions. For this, type the following command in the Window RE Command Prompt.
wmic logicaldisk
Step 3: To find the system partition with the Windows folder, type the following command:
dir drive-letter
Make sure to replace drive-letter with your system drive letter, i.e., C:, D:, or E:.
Step 4: Next, copy and paste the following command to repair the Windows image:
dism.exe /Image: D:\ /Cleanup-Image /Restorehealth
Step 5: If you encounter the "Error 0x800f081f" message during the above step, you have to do a repair upgrade. If you do not get the error message, skip step 7.
Step 6: Boot your PC from the Windows installation disk, and in the Windows installation wizard, click Next. Afterward, follow the on-screen instructions to perform the repair upgrade. Once the repair and upgrade process is complete, restart your PC in Safe mode.
Launch the Command Prompt and copy and paste the following command:
DISM /Online /Cleanup-Image /RestoreHealth
Step 7: Use the following command to complete the Error 50 repair process.
SFC /SCANNOW /OFFBOOTDIR=D:\ /OFFWINDIR=D:\Windows
Replace D with the name of the system partition in which the Windows folder is present.
Method 2. Refresh The DISM Software
Sometimes a simple software refresh can resolve any glitches it is facing. Therefore, try refreshing the DISM tool by following the instructions below:
Step 1: First, open the Run dialog by pressing the Win and R keys. Type cmd in the bar next to Open and press Ctrl+ Shift+ Enter keys. This will run the Command Prompt as an administrator.
Step 2: Paste the following command in the Command Prompt and press "Enter."
dism.exe /image:C: /cleanup-image /revertpendingactions
Step 3: Open the Run dialog again, type MSConfig and press the Enter key to initiate System Configuration. Next, go to the Boot tab and check the "Safe Boot" option. Choose "Minimal" and click "OK" to save your settings. Afterward, restart your PC, and it will boot into Safe Mode.

Step 4: Afterward, run the Command Prompt as administrator and type the following command:
sfc /scannow
Press "Enter" and the DISM tool will be refreshed.
Pro Tip 2026: WinPE Scratch Space Limitations
When running offline DISM repair cycles inside a temporary recovery terminal, Windows assigns a default volatile RAM allotment known as Scratch Space (typically restricted to $32\text{ MB}$ or $64\text{ MB}$). If your Windows image component store is severely broken, DISM execution will throw an Error 50 due to buffer overflow limitations inside the WinPE RAM disk allocation. To eliminate this issue, always allocate an explicit workspace directory on your local solid-state drive by appending the scratch directory flag to your execution line: /ScratchDir:D:\Scratch (ensure you create the folder beforehand via the mkdir command).
Method 3. Delete The Associated Registry Key
The DISM does not support servicing Windows PE with the /online option error can also occur due to the misplacement of the Registry Key. To resolve the issue, simply delete the associated key by following the instructions below step-by-step:
Step 1: Open the Run dialog, type regedit, and hit the Enter key to launch the Registry Editor. Now, go to the following path:
HKEY_LOCAL_MACHINE\SYSTEM\CurrentControlSet\Control
Find the MiniNT folder and right-click on it. From the drop-down menu, click "Permission."

Step 2: Under the Group/user names list, click your User Name, and next to the Full Control option, check the Allow box. Click OK, delete the MiniNT folder and restart your PC. Finally, rerun the DISM command, and your issue should be resolved.

Method 4. Reset BIOS
To fix Error 50 of Windows, you can also reset the BIOS to reboot the output/input system to the last saved configuration in the following way.
Step 1: Depending on your PC motherboard manufacturer, use the key to boot into your computer/laptop BIOS. The key can be F1, F2, F10, F12, or DEL.
Step 2: Head to the Exit tab, click Load Optimized Defaults and save your settings to start the reset process. Once the reset process is done, restart your PC, and check if you are still getting the error.

Method 5. Create Another User Account
Often Error 50 of Windows can also happen due to a problem with a certain user account. However, you can avoid the issue by creating a new user account on your PC. To do so, follow the below instructions in sequence.
Step 1: Click the search box in the taskbar, type User Account and click "Open" to launch the required settings in the Control Panel.
Step 2: Now, click "Manage another account" and select "Add a new user in PC settings."
Step 3: Under the Other User header, click "Add someone else to this PC." Next, click "Users" and choose the account categorized as a User account managed by the system. Click “More Actions” > “New User.”
Step 4: Now, in the pop-up window, type the username and password. Confirm the password and click Create to finish the account creation process. Finally, log in to your system using the new account and check if the error persists.

DISM Command Syntax Rules: Online vs. Offline State
To prevent Error 50, ensure your execution environment matches the correct command syntax layout below:
Running Environment |
State of Target Windows OS |
Required DISM Syntax Format |
Avoid This Flag |
| Inside Live Desktop | Fully Booted & Functional | DISM /Online /Cleanup-Image /RestoreHealth | /Image:C:\ |
| Windows RE (Shift+Restart) | Offline / Damaged Partition | DISM /Image:D:\ /Cleanup-Image /RestoreHealth | /Online |
| Installation USB (WinPE) | Crashing / Infinite Loop Boot | DISM /Image:D:\ /Cleanup-Image /RevertPendingActions | /Online |
Part 2. How To Repair Crashed System - AOMEI Backupper Standard
What if the above solutions failed? Don't worry; you can use the AOMEI Backupper Standard software to back up the system and repair your crashed PC.
AOMEI Backupper Standard is a free backup, restore and repair software for Windows 10, 8.1, 8, 7, Vista, and XP. The software can help you create a Win PE bootable Disk to diagnose your crashed PC.
Step 1: To restore the system on Win PE, ensure you have a Win PE bootable disk, system backup, 16-32GB USB, and AOMEI Backupper Standard software installed on your working PC system.
Step 2: Plug the USB into your working Windows PC and launch the software. Go to the Tools tab, and click "Create Bootable Media." Next, select the type of the Bootable drive, choose Windows PE, and click "Next."
Step 3: Specify the storage media type, i.e., CD, DVD, USB, or ISO Image, and click Next to create Win PE bootable media.
Step 4: Plug the bootable media USB into the USB port of your crashed PC and boot from it. Once the system boots successfully, the AOMEI Backupper will run automatically.
Step 5: Now, go to the "Restore" tab and click "Select Task." Find the system backup you've created. Choose "Restore this system backup" and click the "Next" option.
Step 6: Confirm your action and click "Start Restore." The restore process will take some time. Once done, eject the bootable USB and restart your PC.

Part 3. Another Option To Rescue Your Data Quickly: Recoverit
If the above solutions don't work for you, you can use the Recoverit software to recover the data on your crashed Windows PC.
Before recovering your data using the software, you'll need a blank 16-32 GB USB, another working PC, and Recoverit installed on your working computer/laptop.
For Windows XP/Vista/7/8/10/11
For macOS X 10.10 or later
Data Rescue Priority Matrix: Repair vs. Recovery
When an image servicing tool flags structural boot blocks, choose your troubleshooting track based on the following diagnostic conditions:
System Status Indicator |
Recommended Action Track |
Safety Vector Using Recoverit |
| 01. Registry hive or MiniNT key is locked. | Apply Method 3 (Delete Registry Key) | Low structural threat; data safe. |
| 02. SFC Scan returns "Resource Protection Error". | Apply Method 1 (Offline Media Directives) | medium risk; prepare backup options. |
| 03. Hard Drive drops to RAW format status. | Deploy Recoverit System Crash Rescue | High Risk. Pull files before partitions dissolve. |
| 04. DISM logs indicate hardware failure. | Deploy Recoverit Bootable Drive Clone | Critical Threat. Safely reads blocks around failing sectors. |
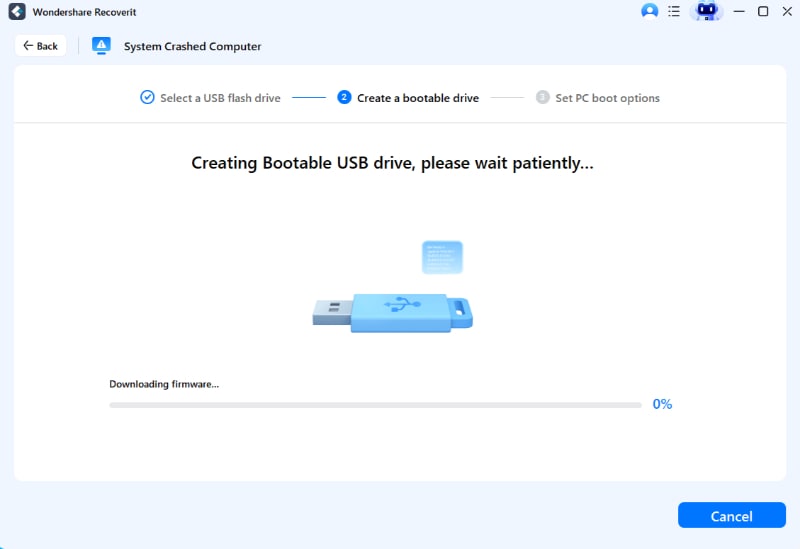
Step 1: Plug the blank 16-32 GB USB into your working PC's USB port and launch the Recoverit software. From the left-hand side menu, head to System Crashed Computer and click "Start."
Step 2: From the drop-down menu, choose your USB drive and click "Create/Start." Now, you will be asked to format the USB drive. Click "Format," and Recoverit will create your bootable USB.
Step 3: Remove the bootable USB from your working system and plug it into the crashed Windows 10 PC. Next, restart your computer/laptop, and when the first screen appears, press the BIOS entry key.
Step 4: Next, set the bootable USB drive as your primary source for booting the crashed computer to make it bootable.
Step 5: You’ll see two options on the screen: Hard Disk Copy or Data Recovery.

If you choose Hard Disk Copy, select Copy Directory. Next, plug an external hard drive into your crashed PC and click "Copy" to start copying your data to the external hard disk.
If you choose Data Recovery, plug an external hard disk into your crashed PC, and choose a disk to start scanning. Once the process is complete, choose the external disk as the location to save your data and click "Recover" to begin retrieving your data.
Video Tutorial – Fix Error 50
For Windows XP/Vista/7/8/10/11
For macOS X 10.10 or later
Conclusion
In this detailed guide, we've discussed five step-by-step solutions to help you fix the DISM does not support servicing Windows PE with the /online option error. We also explored how to repair your crashed PC system using the AOMEI Backupper Standard software. Furthermore, we have provided instructions to help you recover your data using the Recoverit software.
We hope you've found this article helpful, and you can now easily fix Windows Error 50.
Final Summary Checklist: Clearing DISM Error 50 Blocks
- Verify True Drive Letters: Never assume the system volume is C:\ inside a recovery layout. Always execute wmic logicaldisk get caption or use the dir checking sequence to locate your genuine primary Windows system root directory.
- Strip Temporary Environment Keys: If the deployment tool insists you are in a live WinPE state despite configuring an offline path loop, purge the active MiniNT node key out of your system Registry setup entirely.
- Check Storage Connection Types: Ensure your WinPE repair media matches your storage controller profile settings (such as AHCI vs. NVMe RAID configurations) inside your BIOS firmware structure.
- Maintain Constant Power Infrastructure: Never terminate or disrupt a component clean or revert procedure midway through an execution stage, as this can break the operating system layer irrevocably.
- Deploy Isolated Rescue Options: If the Windows system loop persists across all servicing options, prioritize your personal data folders first by launching Wondershare Recoverit via a bootable hardware token.


