Have you been stuck in a loop of BitLocker asking for your recovery key whenever you turn on your computer? You could be having some problems with your BitLocker. Don’t worry; Our guide will help you understand this problem and its causes. Moreover, you’ll learn how to bypass the BitLocker recovery screen.
Even if you forget or lose your recovery key, this guide can also help you bypass the BitLocker recovery without the key.
In this article
What Is a BitLocker Recovery Screen?
BitLocker is a Windows encryption feature that allows users to encrypt their volumes and safeguard their data. It helps you protect data from unauthorized access. When you encrypt it, you need a recovery key to unlock and access it.
So, what is a BitLocker recovery screen? If you can’t access your data as usual, BitLocker enters recovery mode, allowing your regular access to encrypted drive.
Therefore, providing the recovery key is the most straightforward way to enter your encrypted volume from the BitLocker recovery screen. However, it can be a bit tricky if you lose the key.
Can BitLocker Be Bypassed?

BitLocker recovery requires the recovery key, but you may lose that key. Fortunately, you can get rid of the BitLocker recovery without the recovery key. How you go about it depends on the cause of the BitLocker recovery screen.
Causes of the BitLocker Recovery Screen
Constantly entering the 48-digit numerical password when you turn your computer on can be annoying. That is, of course, if you remember the recovery key. If not, it prevents you from properly using your computer.
So, what causes the BitLocker recovery screen? Here are some reasons:
- Wrong BitLocker password – If you’ve typed in the wrong password too many times, it could cause the BitLocker recovery screen.
- New boot menu issues – Windows 10 has a new boot menu that can cause the BitLocker recovery screen. Switching back to the Legacy Boot can fix the problem.
- Auto-unlock option – Auto-unlock can sometimes cause the BitLocker recovery screen when it’s turned on. Thus, you can fix the issue by turning it off.
- Outdated BIOS – BIOS can malfunction when outdated and cause several problems, including the BitLocker recovery screen.
- Secure Boot issues – Secure Boot protects your PC from malware. If you’re having problems with the BitLocker recovery screen, try turning it on or off.
- Software issues – Software issues can cause multiple problems to your computer. Cleaning your computer from any software issues can fix the BitLocker recovery screen.
Seven Methods to Bypass the BitLocker Recovery Screen
There are numerous reasons for the BitLocker recovery screen to appear. However, the following are the top seven ways to get around the BitLocker recovery screen. Give them a try and fix the problem with your BitLocker.
| Causes | Methods |
| Wrong BitLocker password | Request a BitLocker recovery key |
| New boot menu issues | Turn on legacy boot |
| Auto-unlock option | Turn off auto-unlock |
| Outdated BIOS | Update the BIOS |
| Secure boot issues | Turn secure boot on or off |
| Software issues | Format the drive and reinstall windows |
Request and Find a BitLocker Recovery Key
You could get stuck in the BitLocker recovery screen if you’ve entered the wrong BitLocker password too many times. Thus, you’ll need your BitLocker recovery key to exit it. So, what happens if you can’t remember your recovery key ID?
Don’t worry; there’s a way around it. Follow these steps to find your BitLocker recovery key:
- Press Esc when you’re on the BitLocker recovery screen.

- A recovery key ID will be displayed on the screen. Make sure to note it down or take a picture, as it will disappear after a few minutes.

- Provide your system administrator with the recovery key ID.
- Wait for your system administrator to find your recovery key in the Active Directory (AD) based on the recovery key ID you provided.
Turn off the BitLocker Feature Using the Command Prompt
If you fail to find the Recovery key, try CMD to get out of the recovery loop directly. The process of turning off BitLocker is simple; just follow these steps carefully:
- Hit the Esc key when on the recovery screen for more options.
- Click Skip this drive.

- Select the Advanced option on the troubleshooting screen.
- Launch the Command Prompt.

- Run this command: manage-bde-unlock X: -rp recovery key (replace X with your encrypted drive letter).
- Type manage-bde-protectors-disable X (again, replace X with your encrypted drive letter) and hit Enter.
- Exit the program and restart your computer.
Turn On Legacy Boot
Windows 10 has a new graphical boot menu that sometimes triggers the BitLocker recovery screen and stops it from working correctly. Thus, switching to the Legacy Boot menu can solve the problem.
Follow these steps to turn on the Legacy Boot:
- Type cmd into the search bar.
- Right-click the Command Prompt and select Run as administrator.

- Type the following command: bcdedit /set {default} bootmenupolicy legacy. Press Enter.

Turn off Auto-Unlock
Your Windows OS has a pre-enabled Auto-unlock option, which can cause the BitLocker recovery screen to reappear. Thus, you can turn off the Auto-unlock option and fix the reappearing BitLocker recovery screen.
Follow these steps to turn off the Auto-unlock feature:
- Open the Control Panel on your computer.
- Go to System and Security and select BitLocker Drive Encryption.

- Click Turn off auto-unlock.

Update the BIOS
If your BIOS (Basic Input/Output System) is outdated, you may experience problems with the BitLocker and get the reappearing BitLocker recovery screen. Thus, updating your BIOS can solve the problem.
Follow these steps to find the BIOS update file and update it on your computer:
- Go to the manufacturer’s downloads page and look for BIOS & Firmware.

- Download the latest BIOS version.
- Once it’s downloaded, unzip the file.
- Now, you can update your BIOS using BIOS flashback. Get a USB flash drive that’s been formatted as FAT32.
- Copy the BIOS update file to the USB flash drive.
- Turn off your computer, but ensure the power cable is plugged in.
- Find the BIOS USB port in the back of your computer and insert the USB drive.

- Press and hold the BIOS Flashback button until the light blinks.

- Wait for the light to turn off, and your BIOS will be done updating.
Turn Secure Boot on or Off
Secure Boot is Microsoft’s feature that protects your computer from malicious software when booting. Some users have reported fixing their BitLocker recovery screen issue by turning Secure Boot on or off. Overall, it’s worth a shot.
Follow these steps to turn Secure Boot on or off on your computer:
- When you’re on the BitLocker recovery screen, press Esc to open advanced options.
- Click Skip this drive.
- Go to Troubleshoot > Advanced Options > UEFI Firmware Settings.

- Click Restart and wait for your computer to boot to UEFI.

- Go to the Security section.
- Set the Secure Boot to Enabled or Disabled. Then, press F10 to save the changes.

Format the Drive and Reinstall Windows
If your computer still displays the BitLocker recovery screen, you might be experiencing some software issues. Thus, the last resort is to format your encrypted drive and reinstall the operating system.
Follow these steps to do so:
- Press Esc on the BitLocker recovery screen and click Skip this drive.
- Select Troubleshoot, then Advanced options, and open the Command Prompt.
- Type list disk and press Enter.

- Find the drive letter for the disk you wish to format and remember it. We’ll mark it as X. Type the select disk X command and hit Enter.

- Then, run the list volume command.

- Run this command: select volume X (replace X with your OS drive volume number).

- Run the following command: format fs=ntfs label=volume label quick. That will format your drive.
- You can now reinstall your Windows OS from a USB drive or an external installer.
However, formatting your drive will delete all your data. Use a data recovery tool like Wondershare Recoverit to recover your data after formatting. Recoverit can be your choice to prevent data loss and retrieve your files in just a few clicks.
Follow these steps to recover your files using Wondershare Recoverit:
- Install and open Wondershare Recoverit on your computer.
- Select your encrypted hard drive in Hard Drives and Locations.

- That will automatically start the scan of your hard drive.

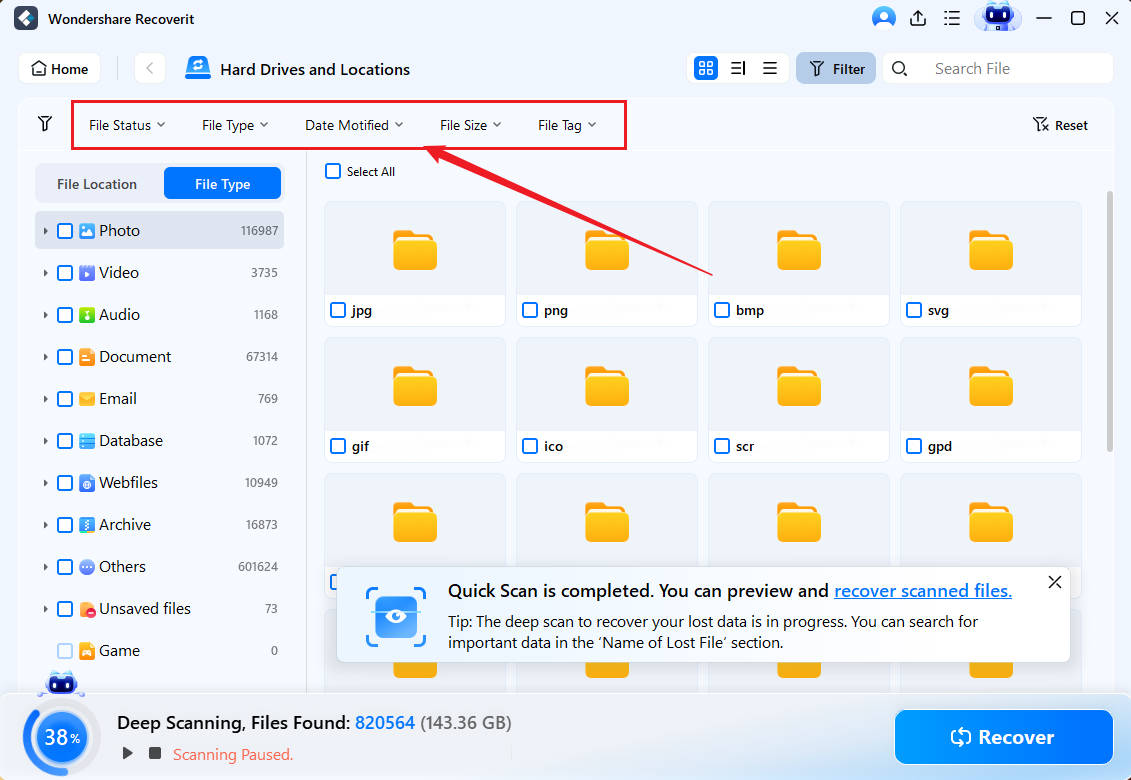
- You can filter the recovered files using the filters at the top of the screen or searching for them.

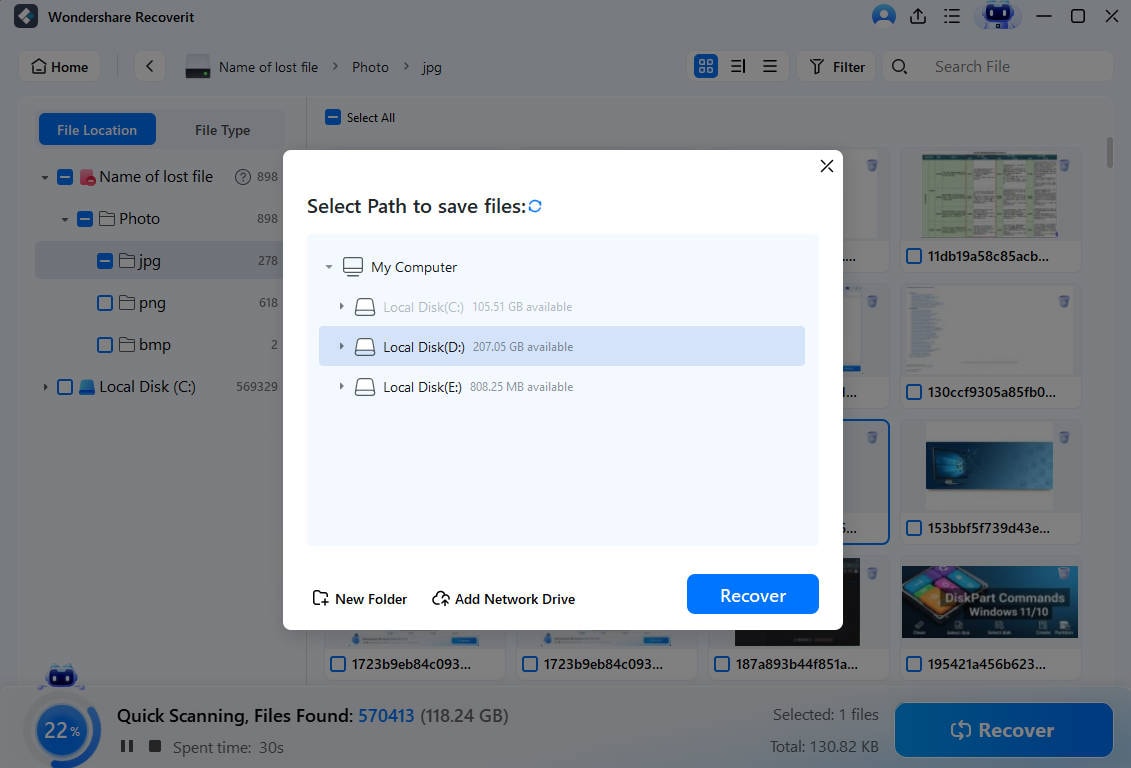
- You can preview the recovered files once the scan is complete. Click Recover.

- Set a different, safe location for your recovered files and click Recover.

Conclusion
You don’t need to worry if the BitLocker recovery screen keeps reappearing on your computer. You can bypass the BitLocker recovery screen in various ways depending on the cause.
You can turn off the BitLocker recovery screen in the Command Prompt, reset your password, turn on Legacy Boot, turn Secure Boot on or off, or turn off the Auto-unlock option. You can also update the BIOS or format your drive and reinstall Windows. Remember to use Wondershare Recoverit to get your vital data back after formatting your drive.
FAQ
-
Can I bypass the BitLocker recovery screen?
Yes, you can bypass the BitLocker recovery screen. However, the methods to do so differ depending on the cause of the BitLocker recovery screen. -
How to bypass BitLocker on startup?
To bypass BitLocker on startup, you need to disable the startup options. These include turning off the auto-unlock option and disabling or enabling Secure Boot. -
How do I get out of the BitLocker recovery screen directly?
If your computer constantly displays the BitLocker recovery screen, the best solution is to disable the BitLocker service in the Command Prompt.

![How to Bypass the BitLocker Recovery Screen [Fixed]](https://images.wondershare.com/recoverit/article/bitlocker-recoveery-key-bypass-1.jpg)

 ChatGPT
 Perplexity
 Google AI Mode
 Grok
Grok


