It can be annoying whether you have accidentally deleted the virtual disk image or it has become corrupted. This becomes even more frustrating when you want to recover the data. Now that virtualization software has become so common; you can adopt any of the methods that can be helpful in virtual disk data recovery.
Using a virtual machine is crucial for testing and software development. However, you must recognize and understand the process through which you can fix this. Irrespective of the causes and reasons for data loss, go through the methods mentioned below to recover data from the virtual disk.
Try Wondershare Recoverit to Perform Data Recovery

In this article
Is it Possible to Recover Deleted Files from the Virtual Disk?
Yes, you can recover deleted files from the virtual disk. You may use data recovery software to recover the deleted files from it. Using data recovery software that provides a high success rate is advisable, especially in data recovery. Furthermore, these tools can quickly help fix severely damaged and corrupted data files.
Common Data Loss Situations in Virtual Systems
Data loss can happen because of a lot of situations. Some of the common data loss situations that you can experience with virtual systems are as follows:
- Hardware failure: Virtual machines rely on physical hardware, which is prone to many failures. Therefore, these storage devices and physical servers can be problematic which can be problematic for virtual systems.
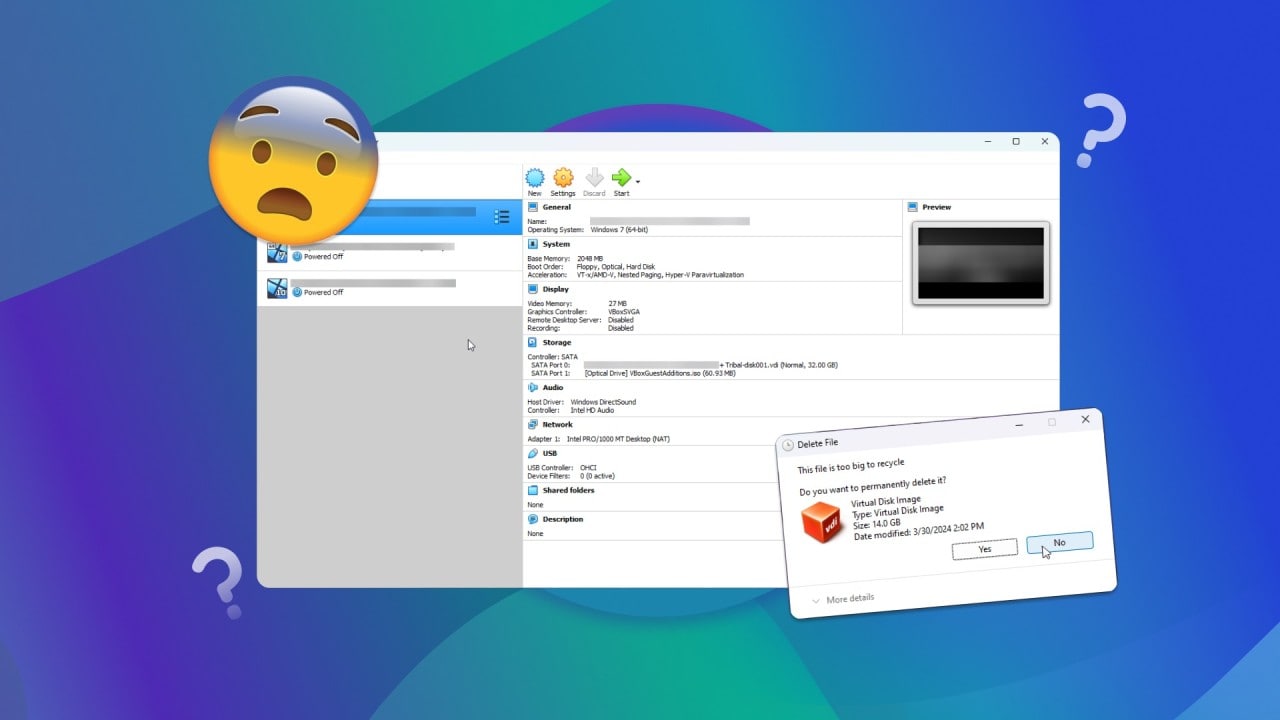
- Human error: Human error is one of the most common causes of data loss, especially for virtual systems. Accidental deletion can happen for reasons such as incorrect configurations and mismanagement of resources, leading to data loss. This can affect the virtual machine data.
- Security breaches and malware: Virtual systems are prone to security breaches because of unauthorized access, malware, and ransomware infection. The attackers can exploit these vulnerabilities, leading to theft, corruption, and data loss.
Explore the guide.

5 Best Methods to Recover Data from a Virtual Machine Disk
You can adopt different methods for recovering data from the virtual machine disk. The VHD data recovery tools through which you can recover the data. Some of the essential methods through this are as follows:
Method 1: Check Your Backups
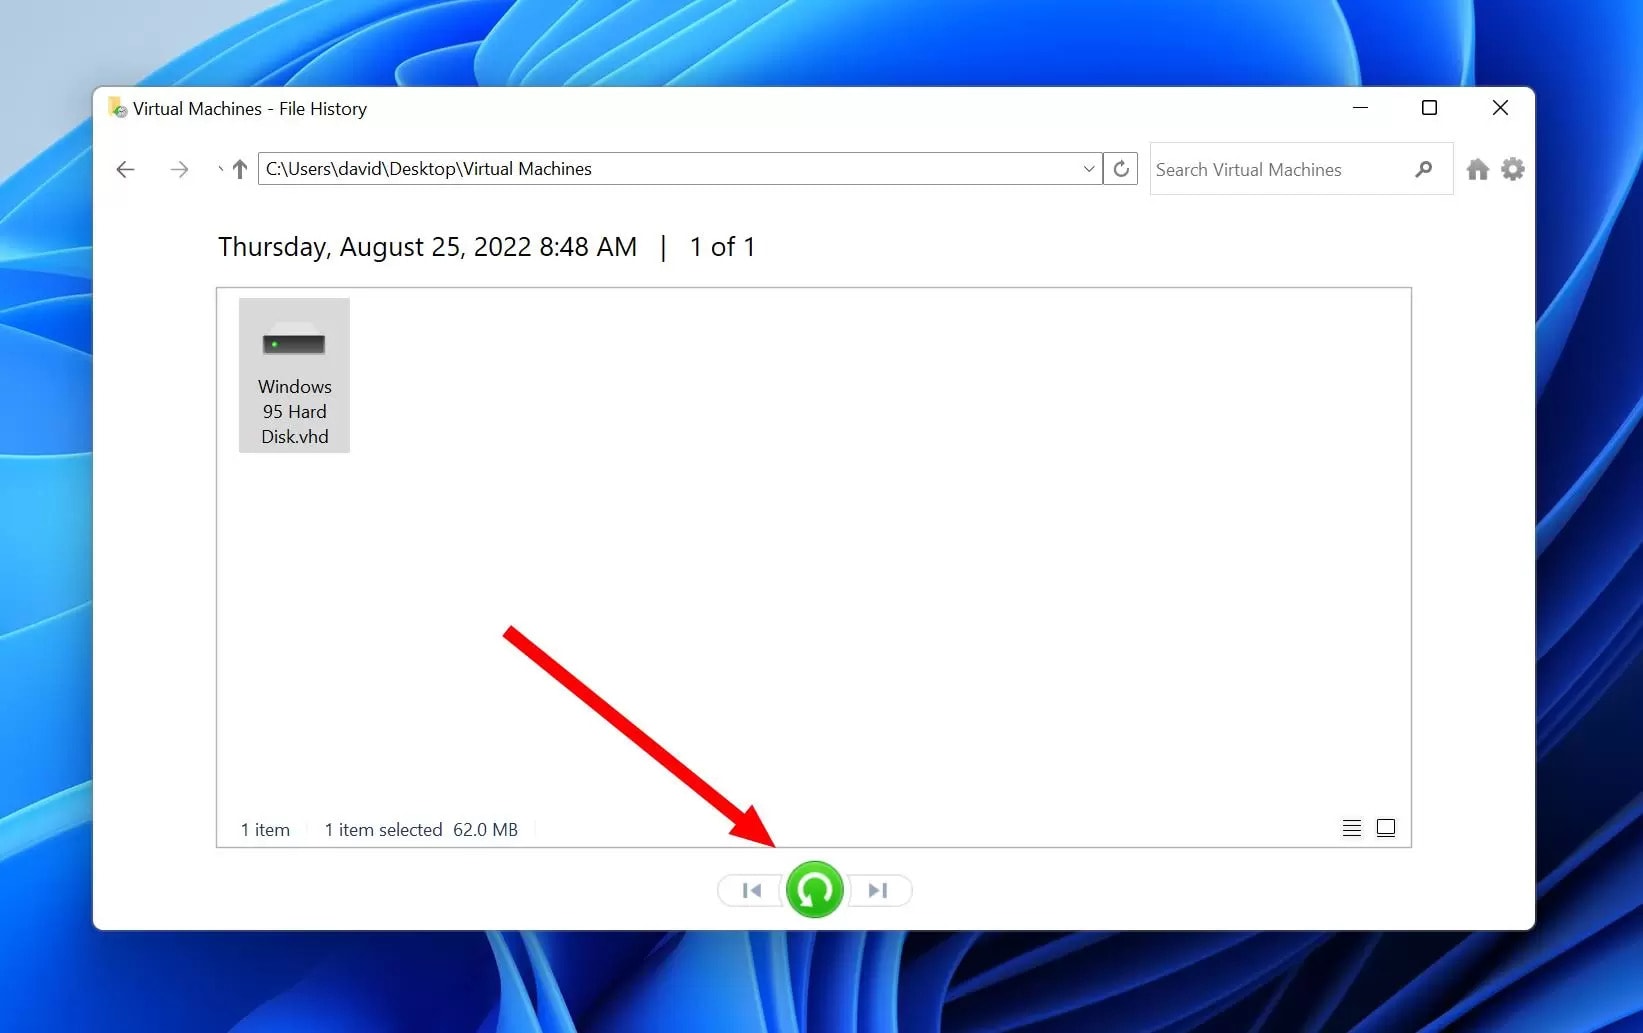
Virtual machines are very easy to deal with. However, there’s a considerable risk of the data being lost or damaged. Therefore, it is essential to back up the virtual disk regularly. The virtual disk image can be stored in the File History backup location, allowing the file to be restored. Therefore, you will be able to recover the files following the steps given below:
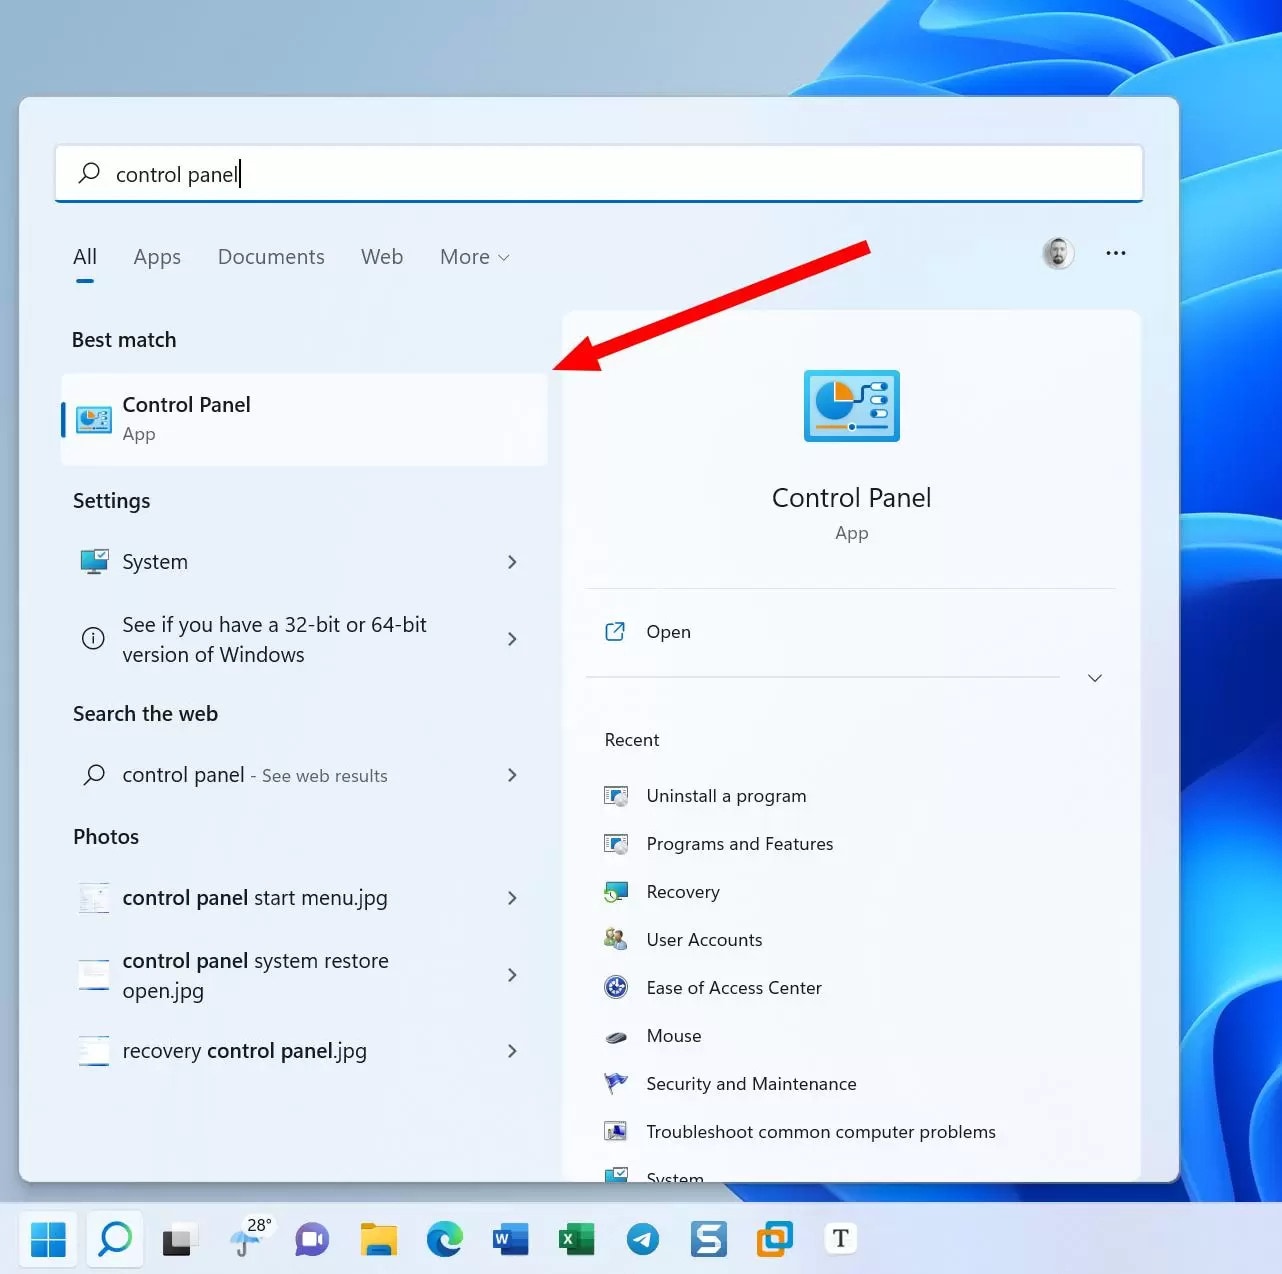
Step 1: On the Start menu, type Control Panel. Click on the Best Match option.
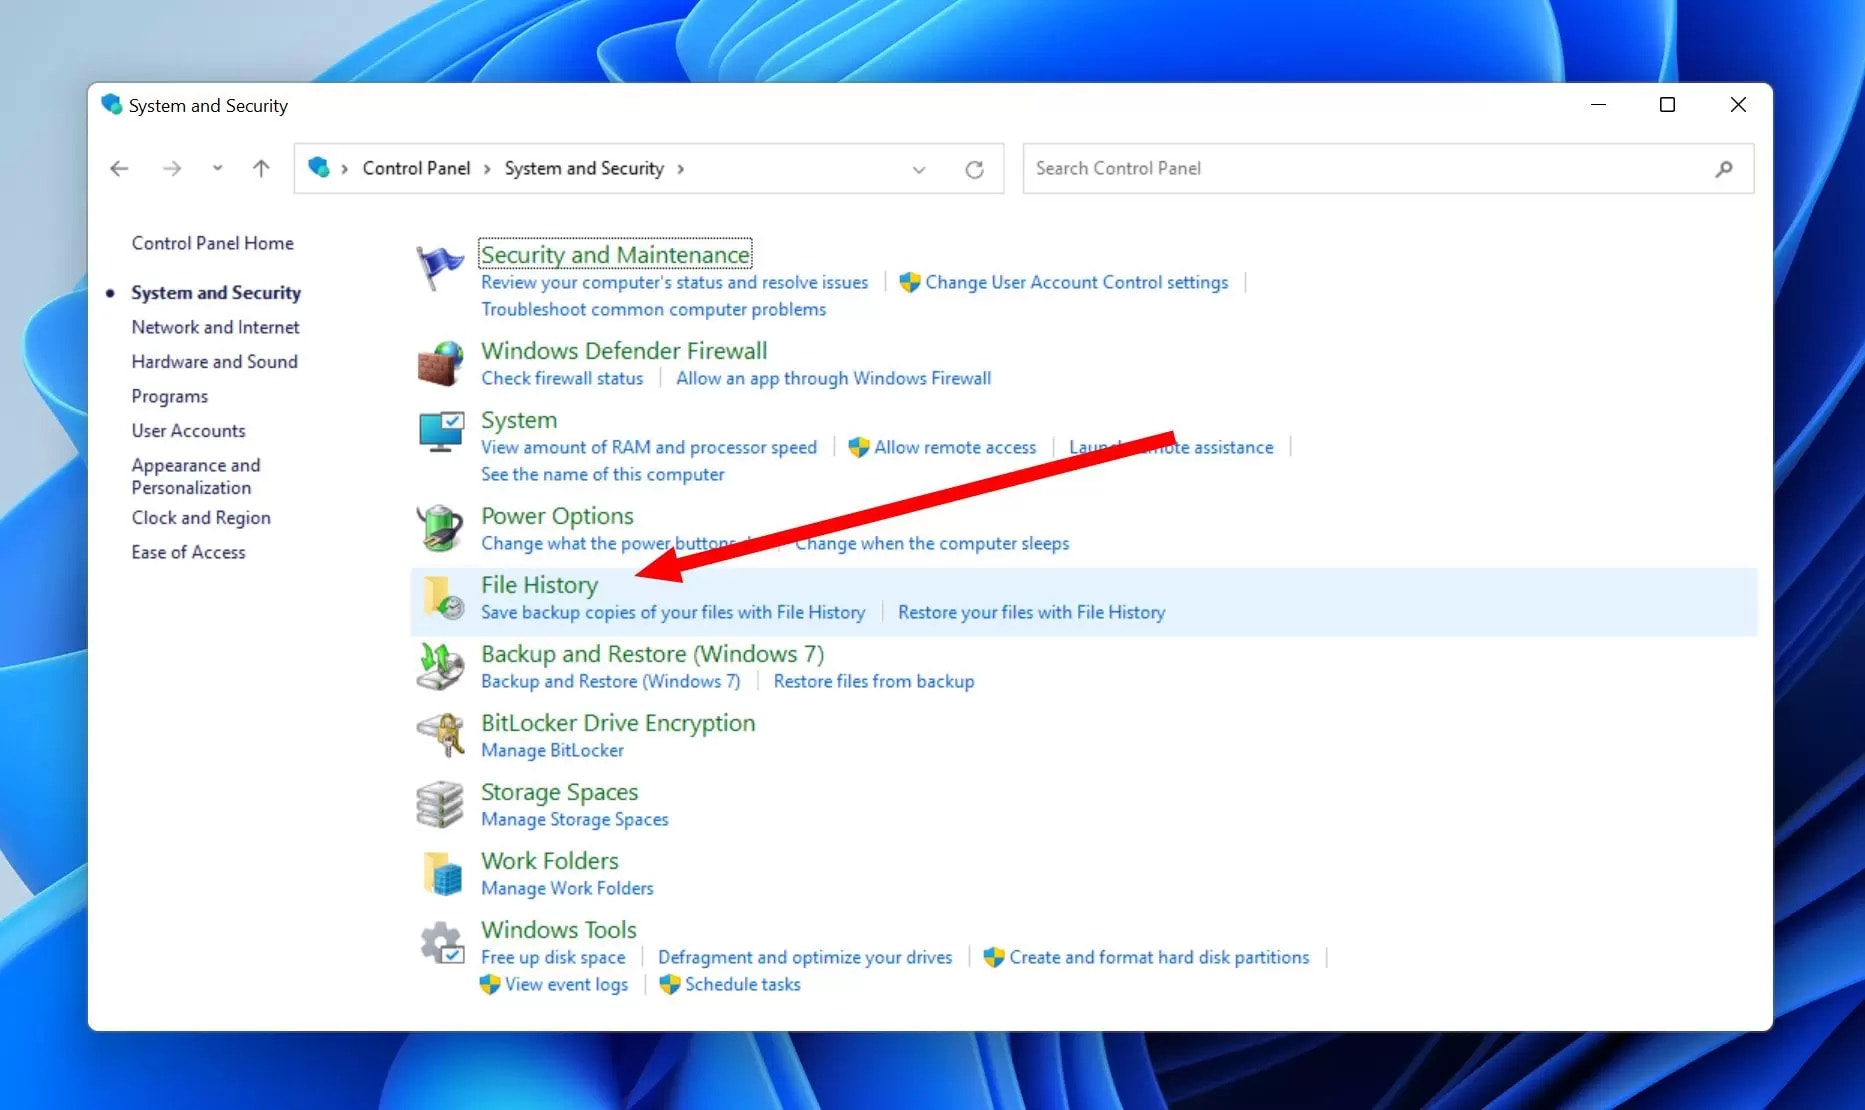
Step 2: Visit the System & Security option. Now click on the File History option.
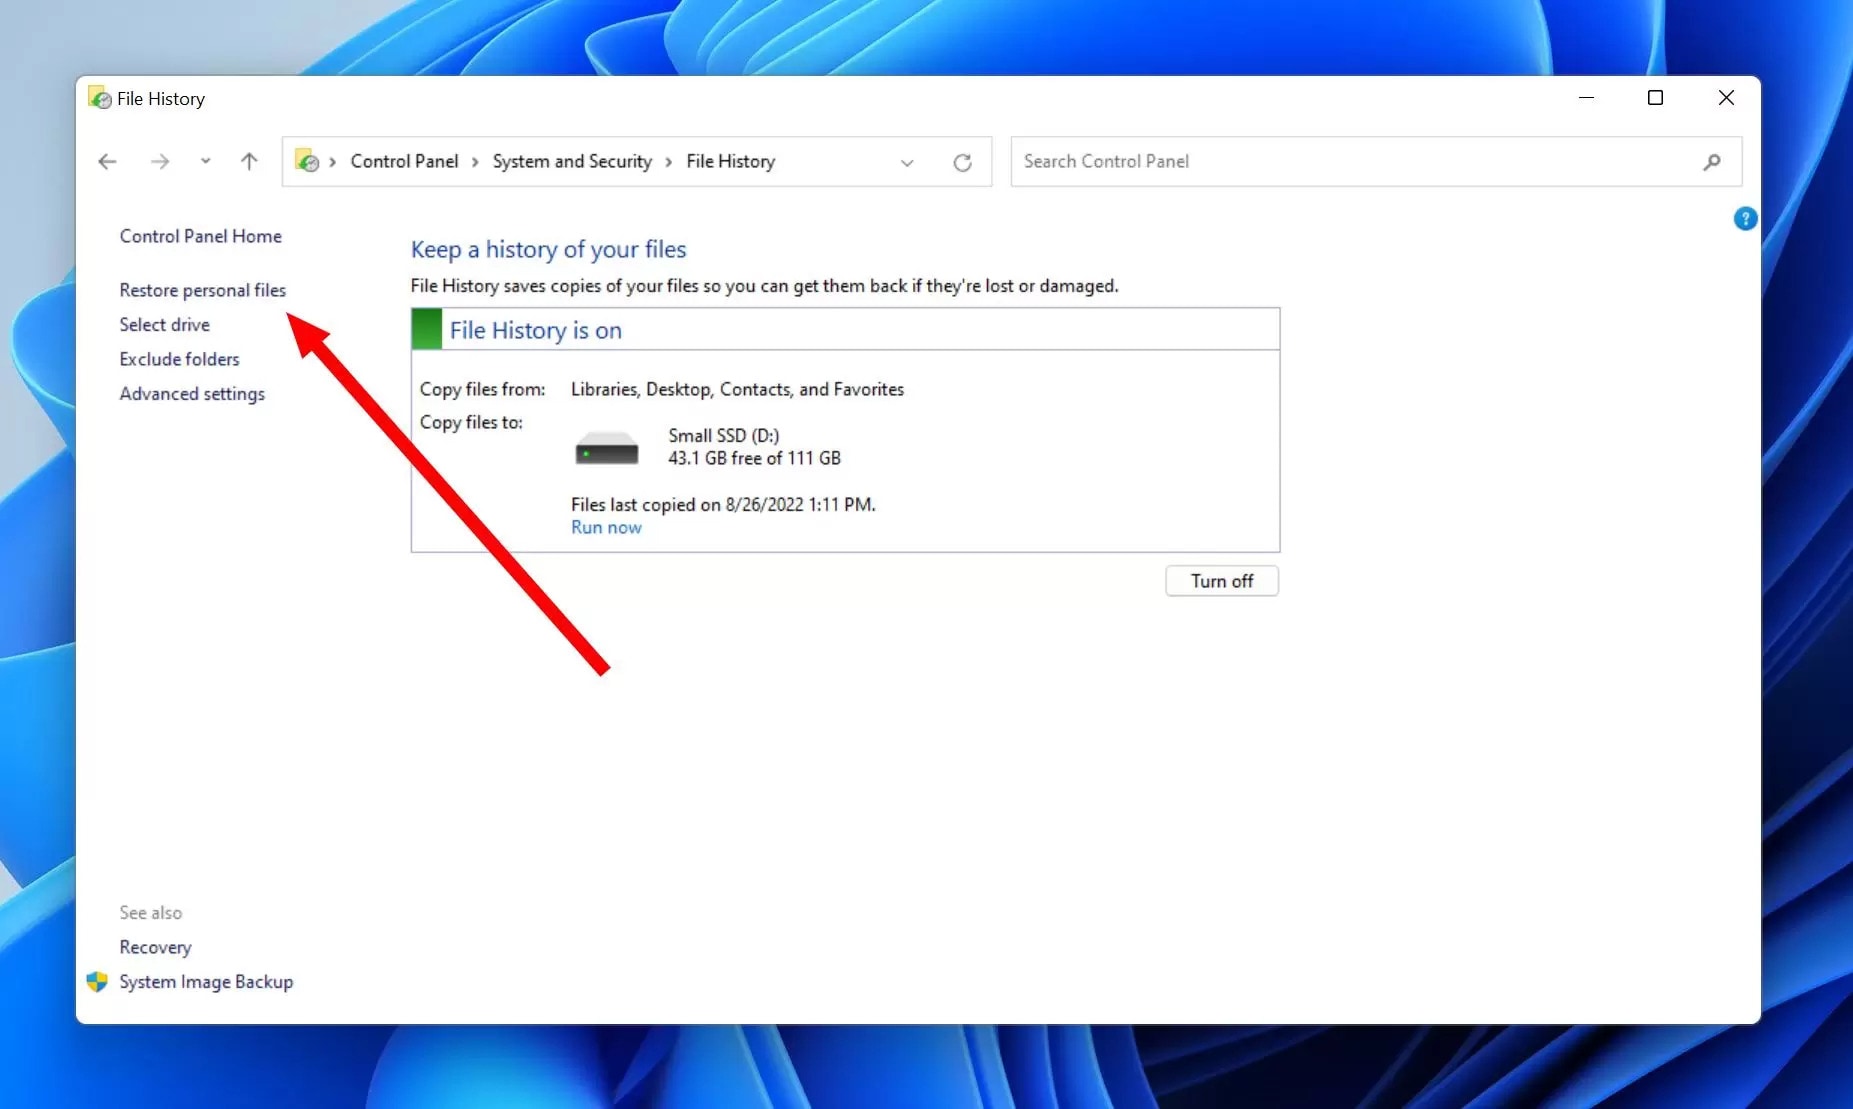
Step 3: Now, click on Restore personal files.
Step 4: Check the folder where the virtual machine disk image was stored.
Step 5: Choose the previous version that you want to restore. Click on the Restore button.
Method 2: Scan Your File Storage for a Lost Virtual Disk Image
The Disk Drill Data Recovery software is a highly effective tool that can help with VHD, VMDK, and other types of file recovery. If you want to recover any virtual drive file format, you can do so easily using Disk Drill Data Recovery software.
The Disk Drill software can play an essential role in recovering the data in just a few steps. The free version will allow you to restore around 500 MB of data. You must follow the steps below for scanning file storage from any lost virtual disk image.
Step 1: Visit the official website of Disk Drill and download the same in your system.
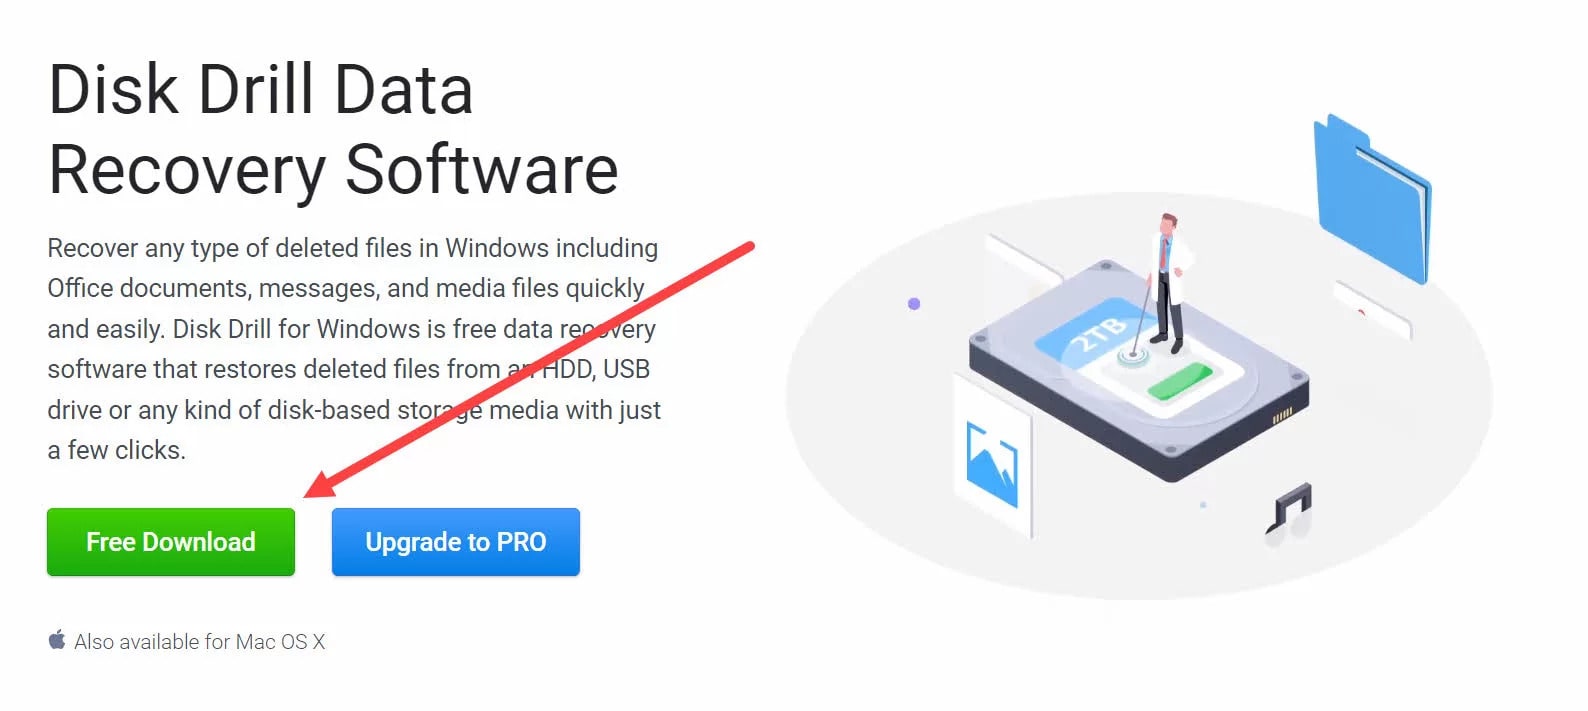
Step 2: Install the software in your system and then launch it.
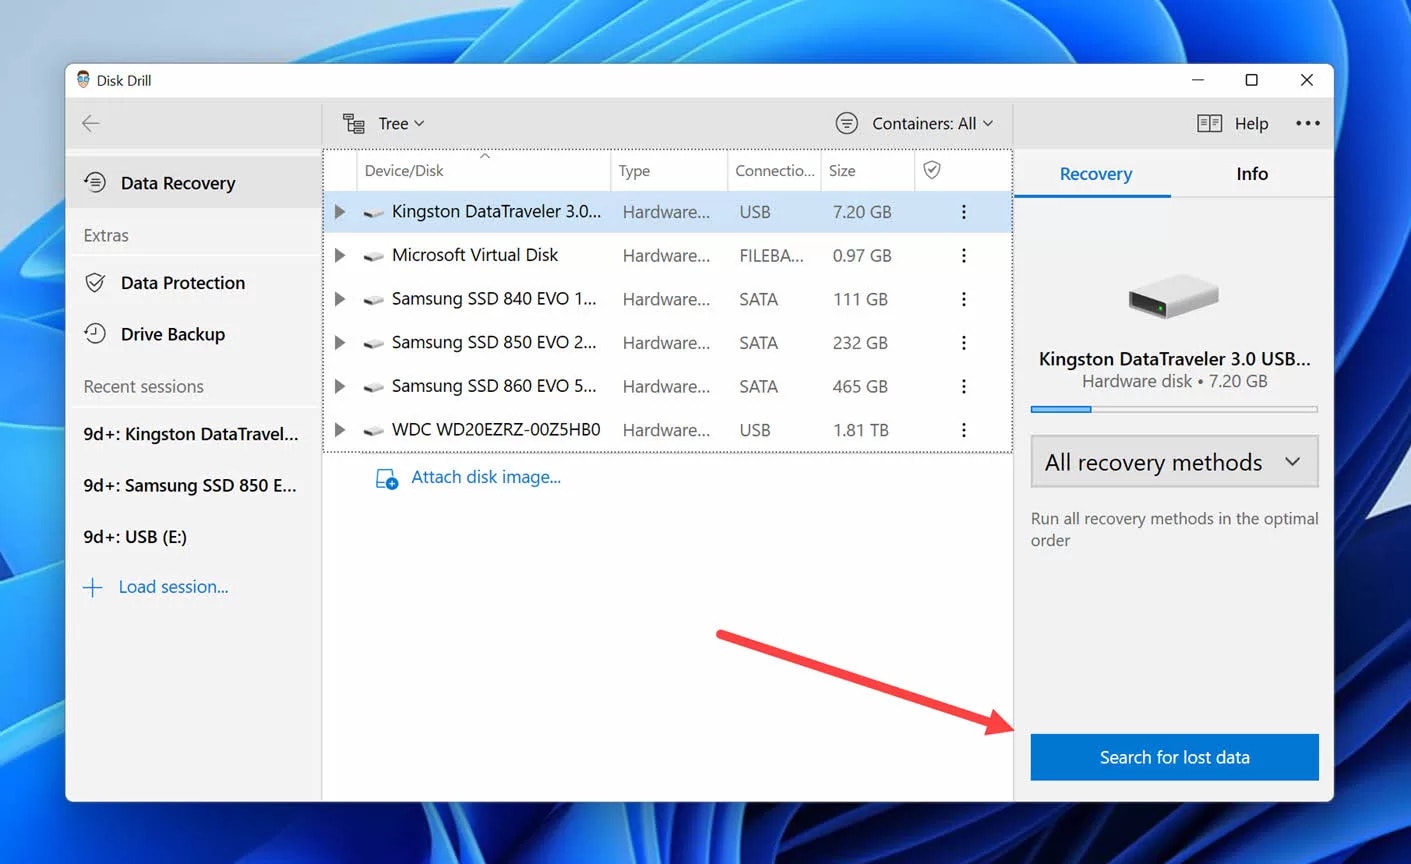
Step 3: Select the storage device from where you want to recover the virtual disk image. Click on the Search for lost data button available on the right side of the software. This will begin the scanning process.
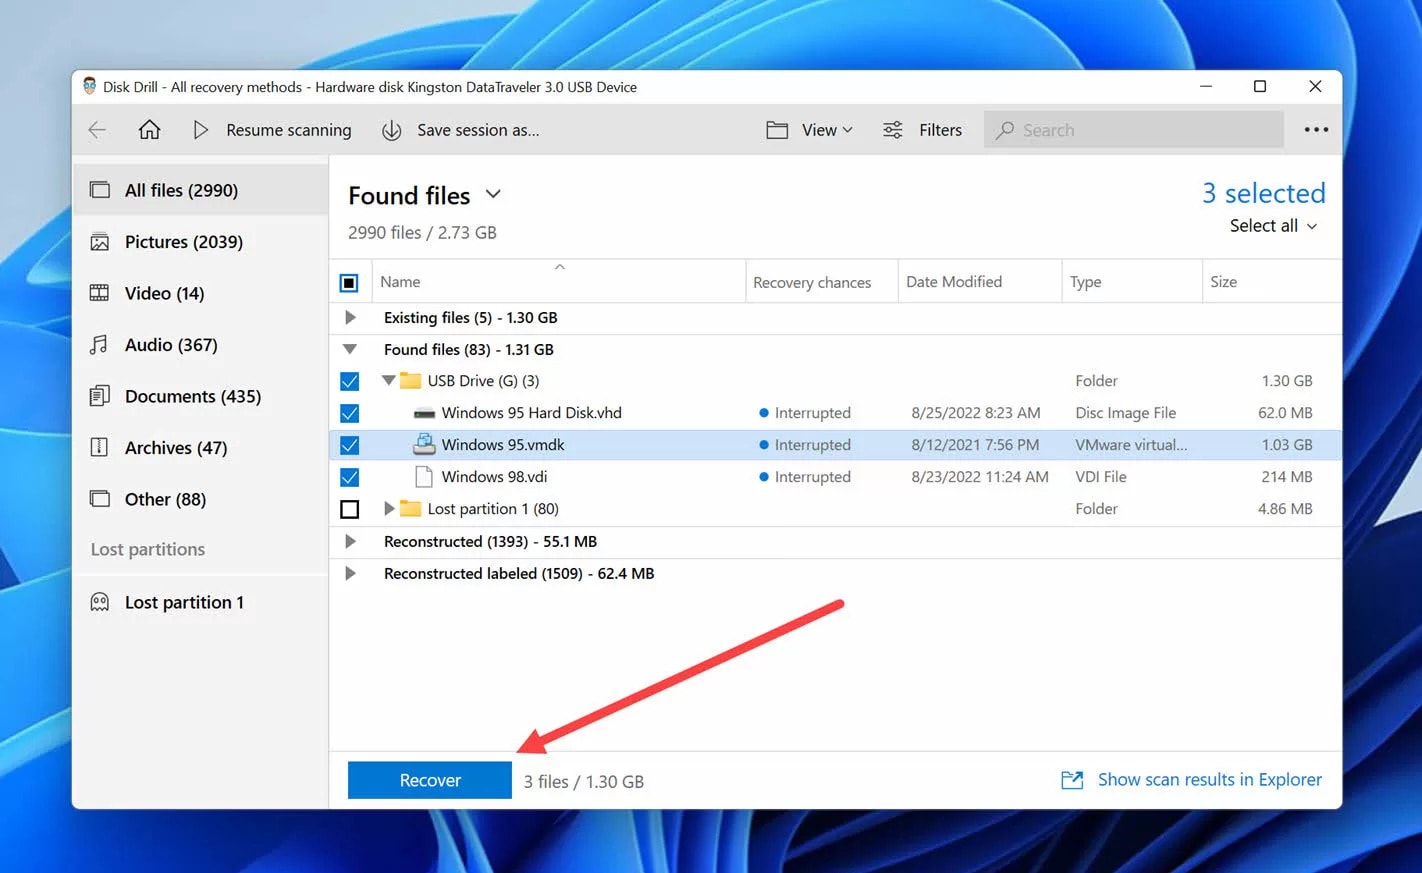
Step 4: The scan result will provide the result for the missing virtual disk images.
Step 5: Select the image you want to recover, preview it, and click the Recover button.
Step 6: Select the location where you want to recover the files and click the OK button.
Method 3: Mount and Scan Your Disk Image Using Specialized Software
To recover a virtual disk image, you will need reliable virtualization software. Therefore, you will have to scan the images properly so that you don't face any problems. Consequently, you must use virtual hard disk recovery software that supports the VHD and VMDK format.
Option A: Mount Your Virtual Disk Image in Windows Disk Management & Then Scan It (VHD)
If the disk images in Windows virtual machine risk format are available, they can be mounted with the help of a Windows Disk Management tool. However, it must be available in the recent versions of Windows. Disk Drill allows you to scan all the files while you're trying to recover them from the formatted hard drive or the partition.
You can follow the steps given below for mounting the virtual disk image in the Windows Disk Management:
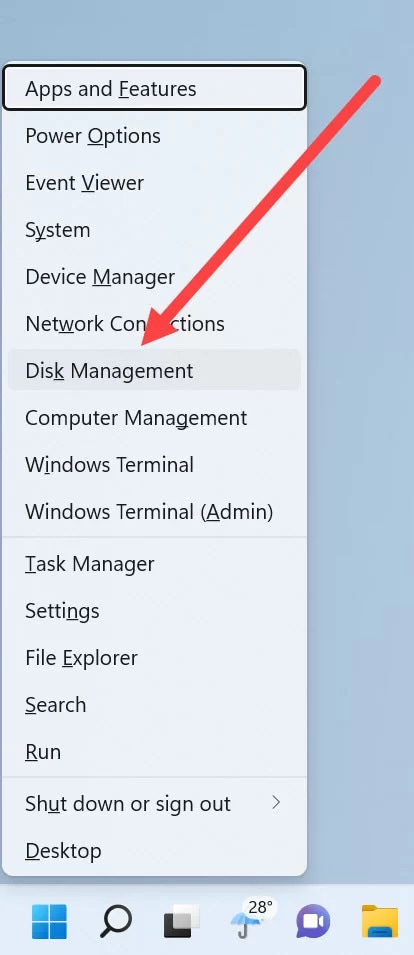
Step 1: Open Windows Disk Management in your system by pressing Windows + X keys together.
Step 2: Once the Disk Management window opens, click on the Action menu. From the drop-down menu, choose the Attach VHD option.
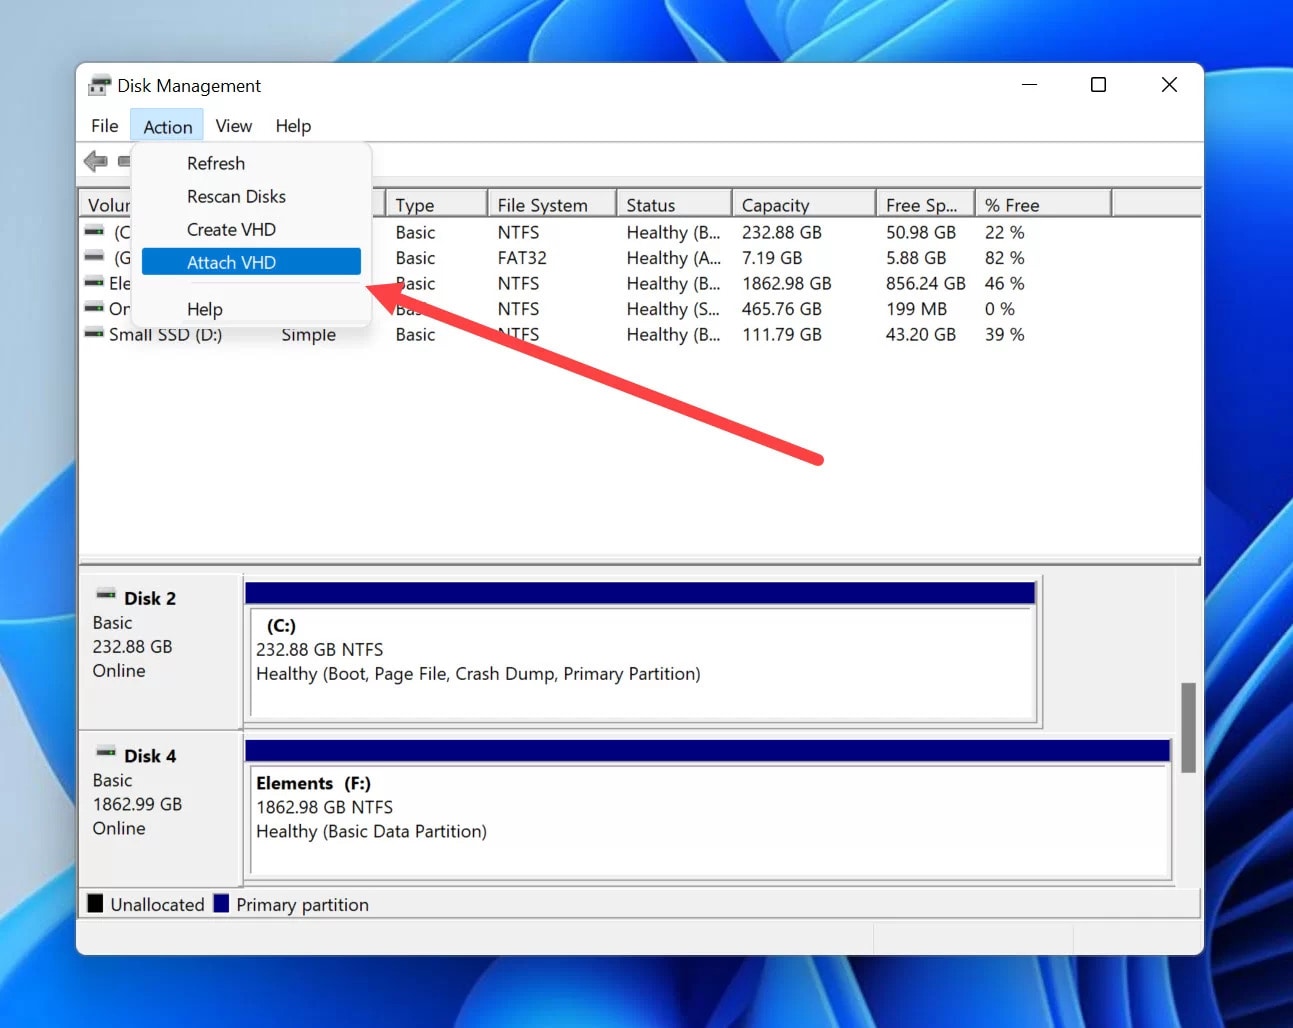
Step 3: Choose the virtual disk image file.
The Windows Disk Management will allow you to mount the selected image file and will automatically assign the drive letter to it. Now, you may open the software and scan all the newly available storage devices.
Option B: Scan Your Disk Image with R-Studio
Apart from using the Disk Drill method, you may also adopt R–R-Studio. This is one of the most efficient tools with a wide range of features that can significantly affect data recovery. You must know that this is not a complex process.
R-Studio will allow you to recover files from the virtual machine images which Disk Drill does not support. You may follow the steps given below for scanning the disk image with R-Studio:
Step 1: Visit the official website of R-Studio and download the software on your device for the compatible operating system.
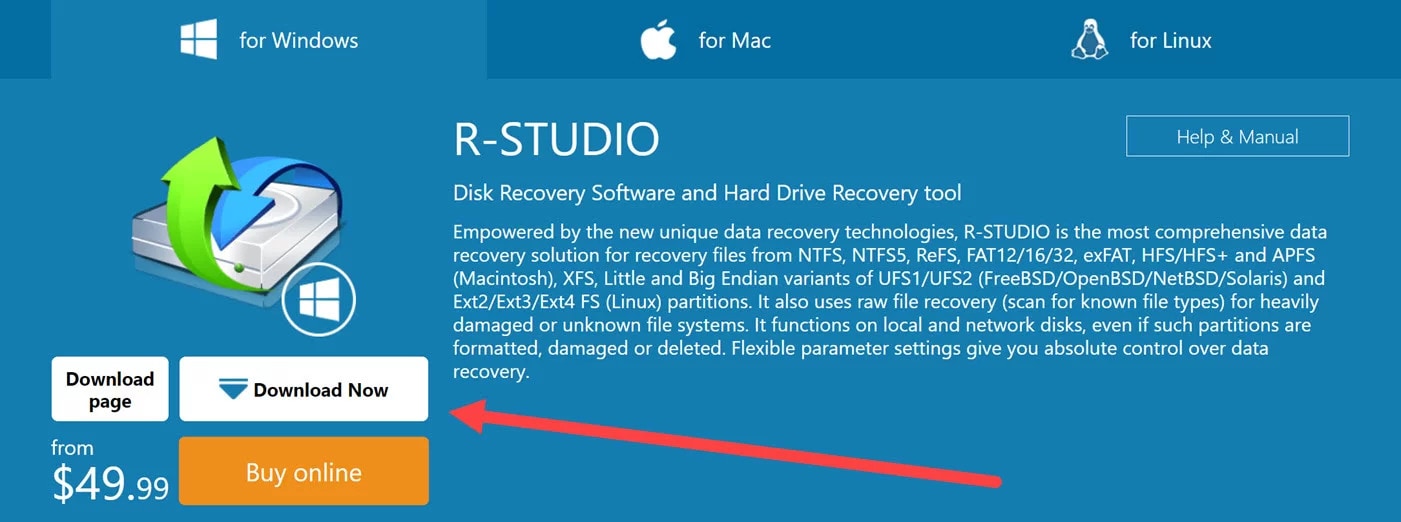
Step 2: Install and launch the software in your system.
Step 3: Now, open the Drive Menu from the taskbar and click the Open Image option.
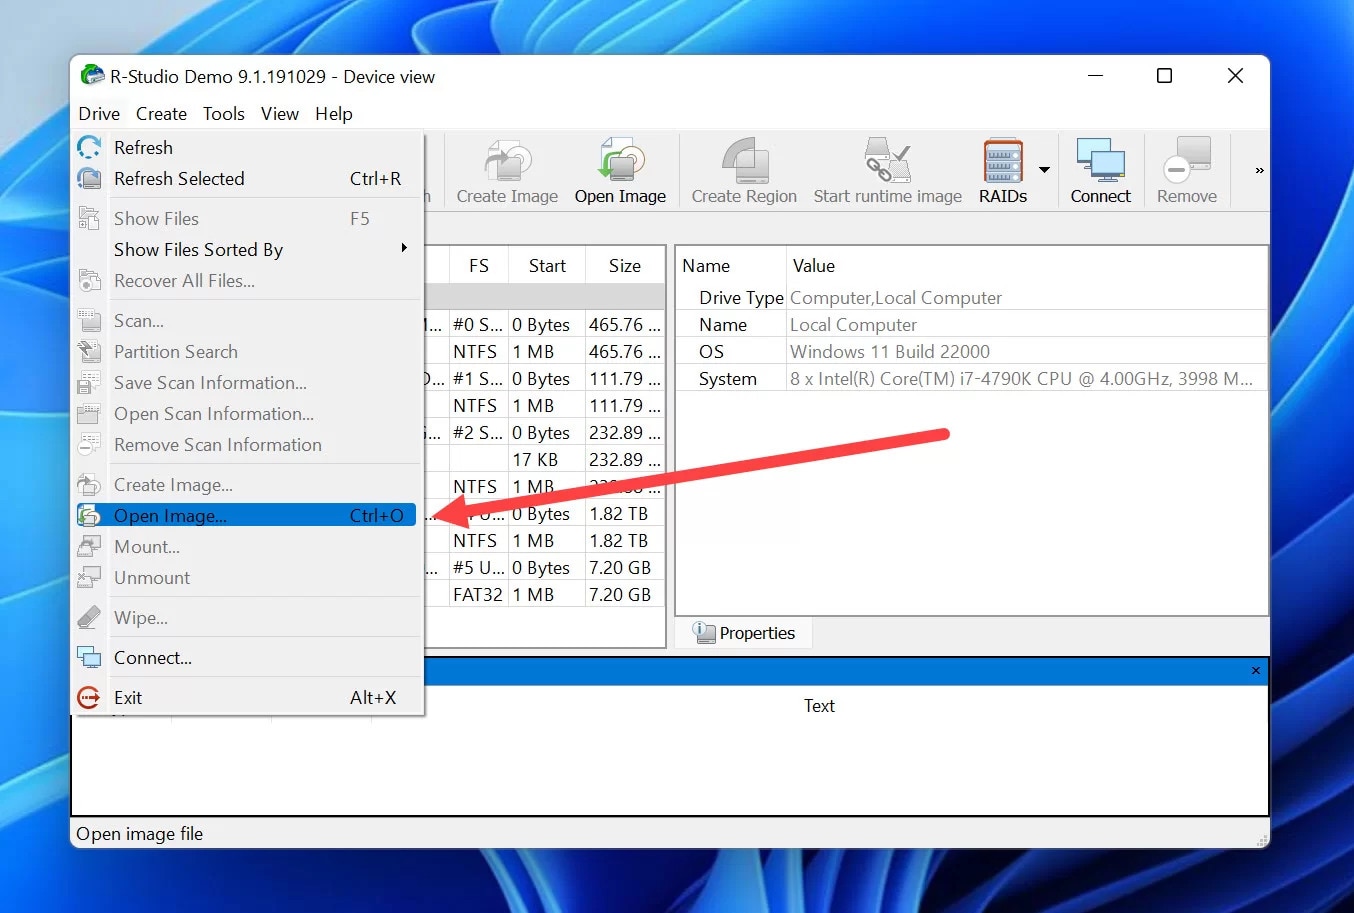
Step 4: Choose the virtual disk image file you want to open.
Step 5: The newly opened image file will be highlighted. Click on the Scan option.
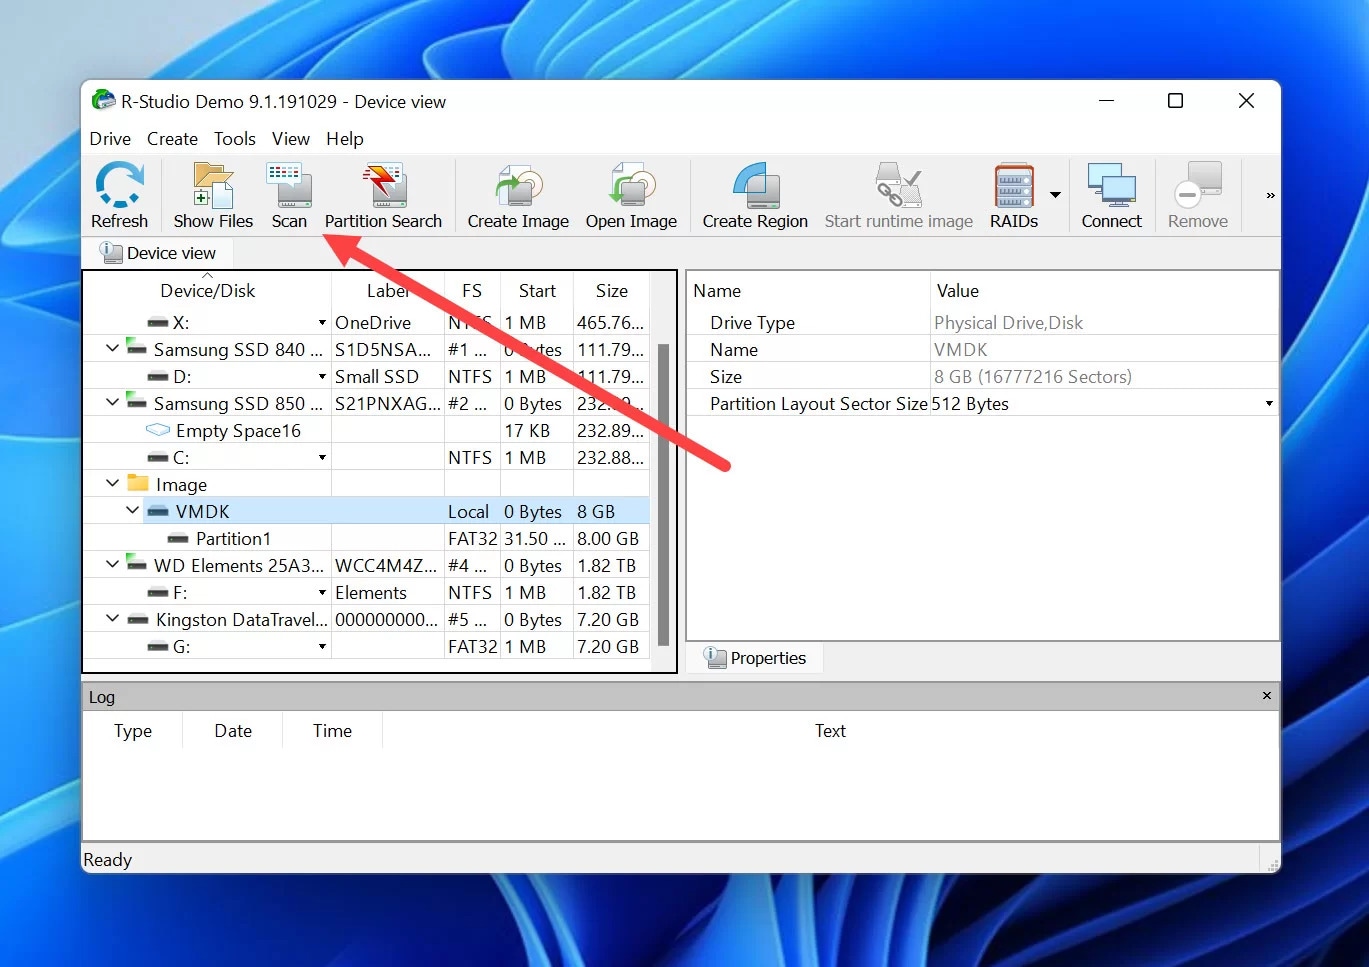
Step 6: A new dialog box will be open where you can customize the scanning options. After that, click on the Scan Again option to proceed forward.
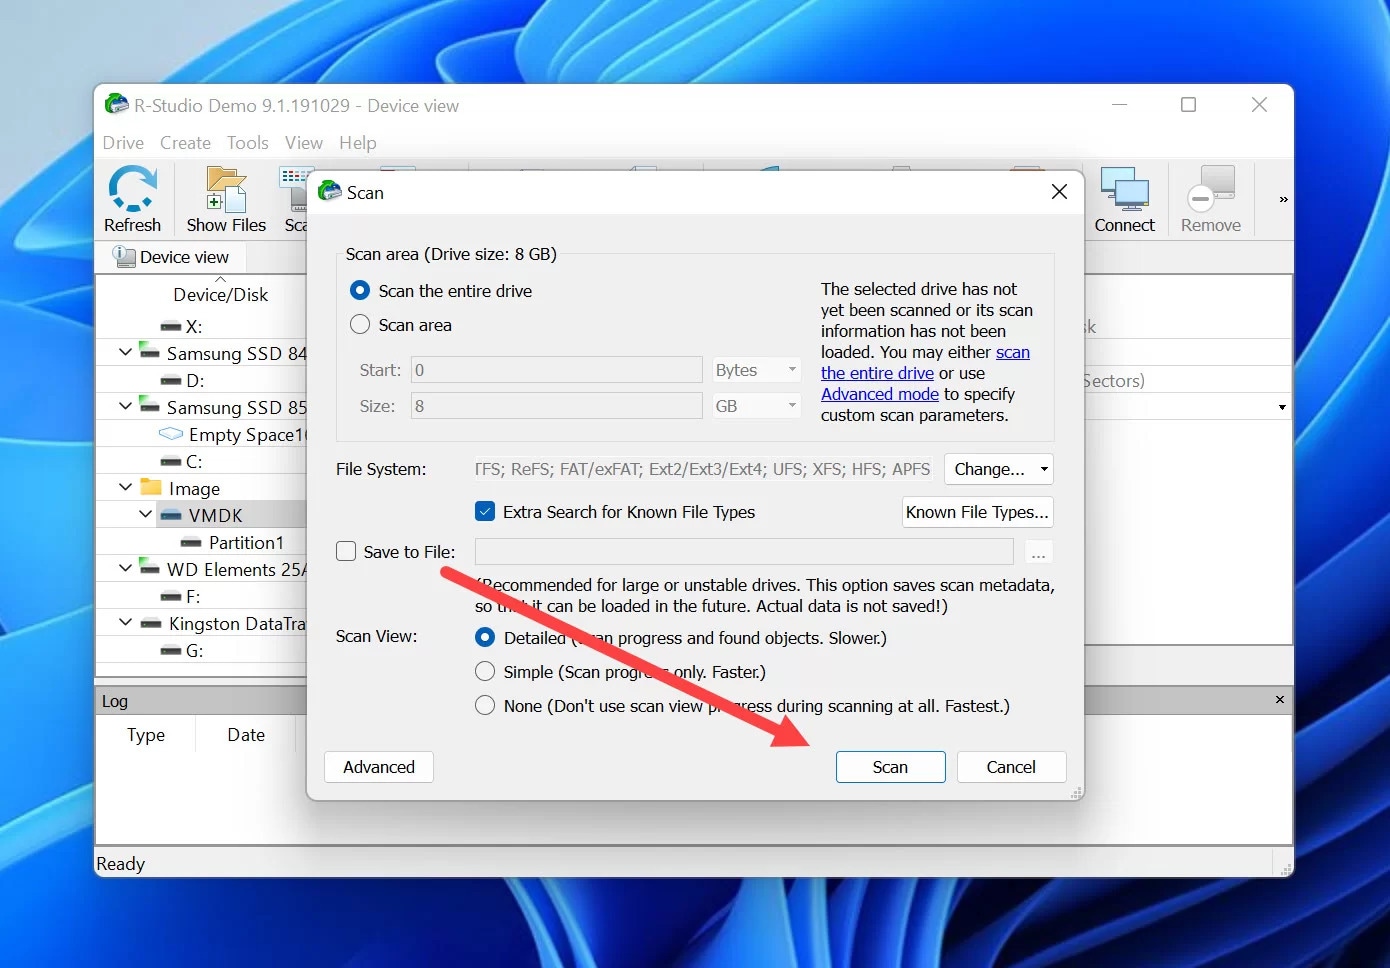
Step 7: The R-Studio will begin scanning. Wait for some time.
Step 8: Open the recovered files in the file browser of R-Studio. Select all the files that are worth recovering from the image file.
Step 9: Click on the Recovered Marked option. Now specify the folder in which you want to save the data.
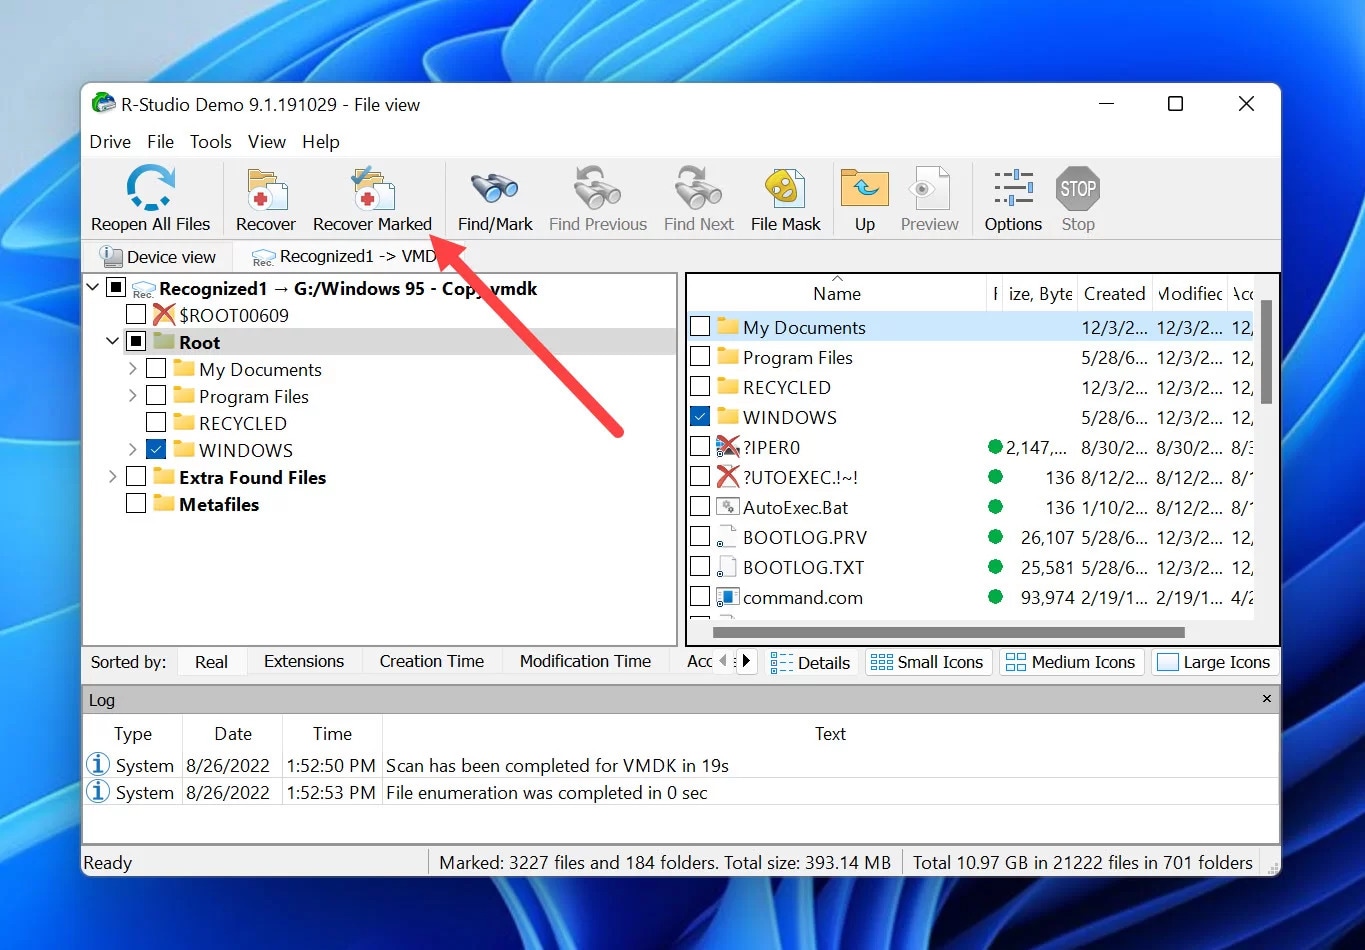
Step 10: Click on OK and confirm the process.
Method 4: Install the Data Recovery Software Inside the Guest Operating System
Virtual drive images seem like libraries. Therefore, when you are inside the library and look from the outside, it may appear as if you are inside the library. Therefore, if the windows become completely opaque, it becomes difficult to find the books from the outside. As a result, you will face some problems when you try to recover any encrypted image.
One of the potential solutions would be to get recovery software. This should be done from a guest operating system so that you don’t face any challenges with the images. When you are trying to fix any virtual hard disk, you can follow the steps given below:
Step 1: Open the guest operating system on your PC.
Step 2: Press the Windows + X key on your keyboard. This will open the Windows Terminal in your PC for Admin.
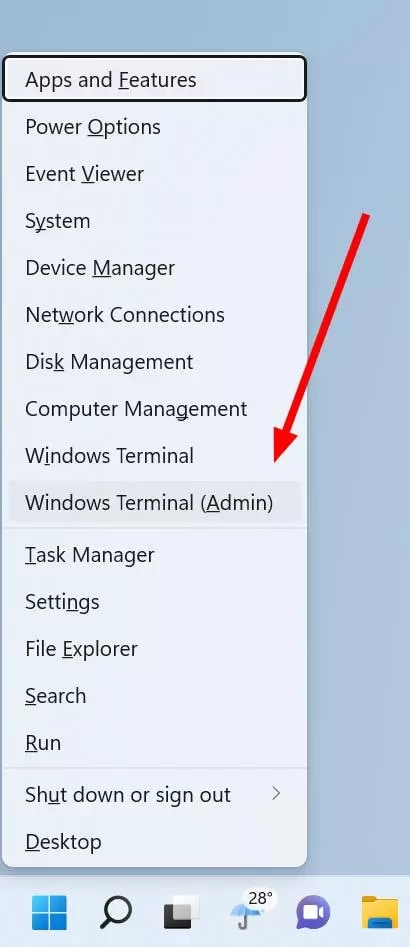
Step 3: Once the Windows Terminal (Admin) screen opens, you will have to enter the following command for scanning and fixing the system drive: chkdsk /f /r /x
Step 4: Here, you will get a chance to schedule the scan for the next time. However, for this, the system will restart. You must press the Y key to confirm the procedure for this to happen.
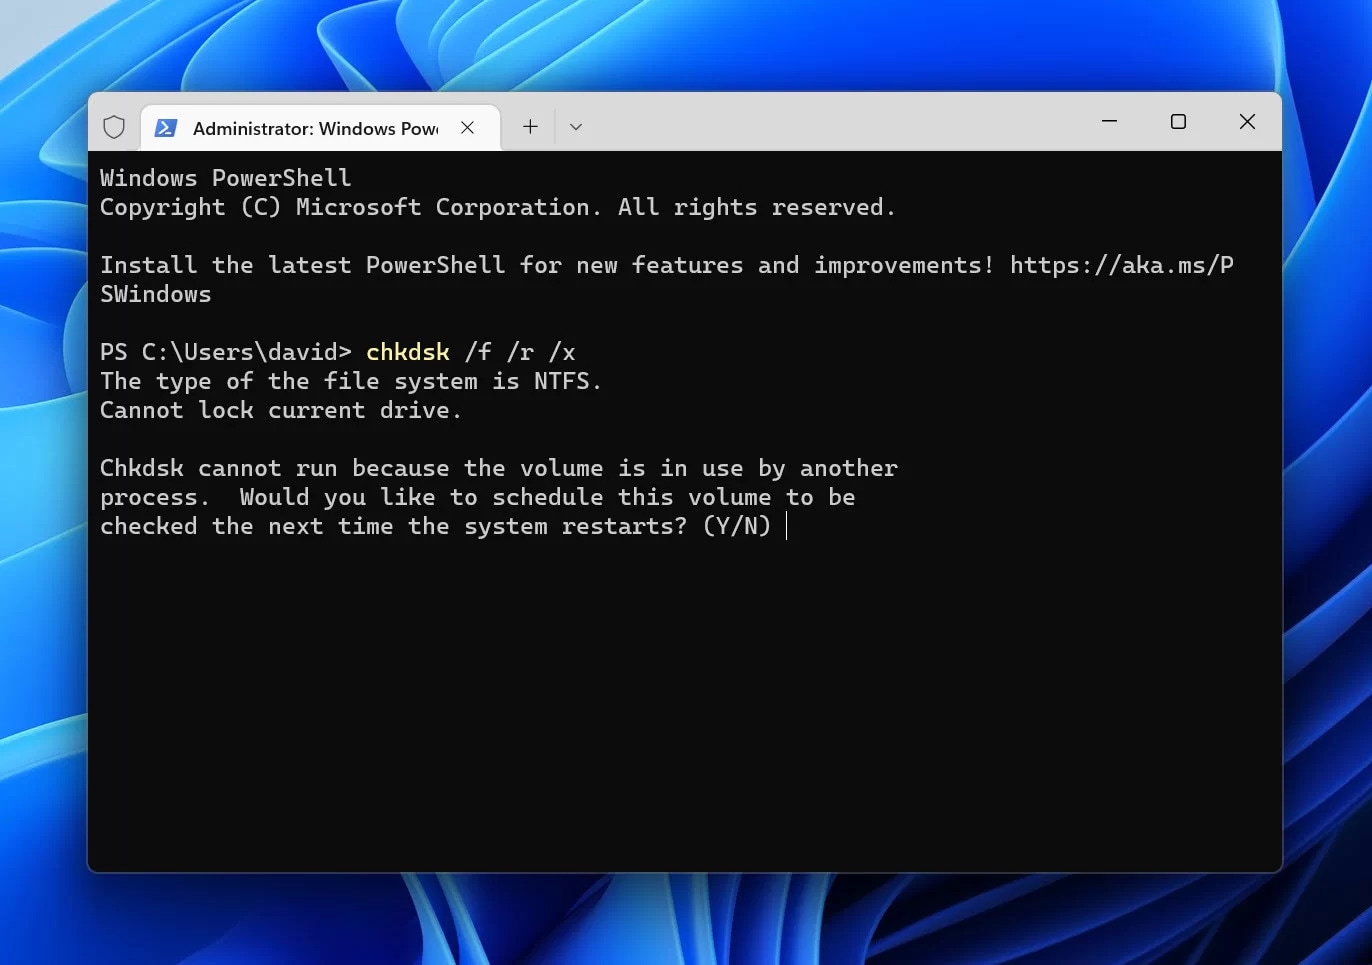
Step 5: Restart the guest operating system. Wait for a while for the CHKDSK command to finish.
You can launch the virtual data recovery software within the guest operating system. This will allow the system to scan for potentially recoverable files.
Method 5: Contact Your Local Data Recovery Service Center
Data losses in the case of virtual disks are widespread. Sometimes, these cases cannot be solved at home. Therefore, reaching out to a data recovery service center is advisable. Various local data recovery service centers are available around, which can help recover the data.
You can check out the local data recovery service center near your area. These data recovery service centers will play an essential role in recovering data even from a dead hard drive that was damaged due to physical harm where any operating system cannot recognize it.
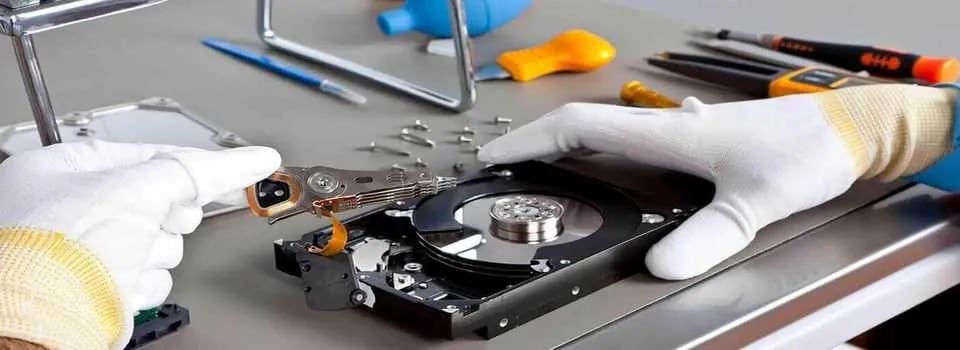
The data recovery service centers are aware of the challenges you are likely to face regarding data recovery. Therefore, they will play an essential role in helping you recover those. Rather than an inexperienced human recovery service, these data recovery centers have the necessary tools to help recover the data.
Once you have found the local data recovery service center, you can connect with them and discuss the process and prices for the recovery. Usually, you will have to ship the virtual hard disk to the data recovery service center. Give them the time to recover the data. On average, it takes up to seven days to recover the data. After the data is recovered, they will transfer it into a new storage device and ship it back to you.
How to Recover a Deleted VHD File Using Recoverit Data Recovery?
Have you accidentally deleted a VHD file? In that case, you will have to use a data recovery tool. Wondershare Recoverit is one of the potential data recovery software through which you can recover the data. Wondershare Recoverit is available for free for Mac OS and Windows OS.
VHD files can be prone to data corruption, eventually leading to data loss. Therefore, you can use a data recovery tool such as Wondersjare Recoverit to recover the data. Wondershare Recoverit can help in a lot of data recovery, which is why it helps with VHD file recovery.
You may follow the steps given below to recover the deleted VHD file using Wondershare Recoverit:
Step 1: Open Wondershare Recoverit
Download and install Wondershare Recoverit on your system. Once done, you can launch the app on your system. Before beginning the file scanning process, you will have to check all the potential hard drives and determine if it has been recovered.

Step 2: Scan the Files
Select the Hard Drive you want to recover under the Hard Drives and Location option. Click on the scan button to begin the scanning process for the hard drive. It will take some time, depending on the size of the file. You can either pause or scan the recovery process depending on the convenience.

Step 3: Preview and Save the Files
Preview all the files that have been checked which were deleted. Now, you can preview these files and then try to save the files. If the files are good, you can click on the Recover option. Now, you can select the location to save the files. Then, the files will be saved in the selected location.

Conclusion
Now that you know the process of virtual disk data recovery, you should do it correctly. You can recover VHD and prevent significant data loss through different methods. However, make sure that you are recovering the files correctly. Then, you must save it in the right location to prevent the risk of further loss.
FAQs
-
1. Can virtual machine data be recovered?
Yes, virtual disk data recovery is possible. Using different methods, you can recover complex and sensitive data using the VM server. -
2. How do I restore a virtual drive?
You can restore virtual data using VHD recovery software. You must look into the different methods and can restore the virtual drive. -
3. How do I fix a corrupted virtual hard disk?
You can use a virtual complex disk data recovery tool to fix the corrupted data. You may also connect with a data recovery service center that can help fix the hard disk. -
4. How do I recover VHD files?
Yes, you can recover the VHD files. There are different tools through which you can recover the files. You can contact a data recovery service center to recover the VHD files if none of the tools work.


 ChatGPT
 Perplexity
 Google AI Mode
 Grok
Grok


