


 TL;DR:
To securely erase an SSD without causing premature hardware wear from traditional HDD overwriting tools, use the ATA Secure Erase command via your SSD manufacturer's native management software to safely reset available memory blocks.
● If a native utility is unavailable, you can use Parted Magic, a $15 bootable Linux environment run from a USB drive, to execute the NVMe or ATA Secure Erase command directly.
● Windows 10/11 users lacking ATA support can alternatively use the Secure Erase tool within their motherboard's BIOS/UEFI settings, or use Disk Management to delete all volumes and perform a full exFAT format by unticking the quick format option.
● Because Mac Disk Utility lacks native SSD secure erase options, Mac users must utilize the Terminal application and execute the command diskutil secureErase freespace VALUE /Volumes/DRIVE, replacing VALUE with a number between 0 and 4 to specify the overwrite pass sequence.
Ask AI for a summary
 ChatGPT
 Perplexity
 Gemini
 Claude
 Grok
Grok
Has the time come to bid farewell to your old SSD? It feels good, right? Don't rush it. Before you move out of your old SSD and decide to sell it, give it away, or throw it out, you must get rid of your SSD data - for good. If you don't do this, your files could end up in the wrong hands.
How do you completely wipe an SSD and avoid data theft? Sending all your files to the Recycle Bin will take forever and won't erase them. Will reformatting a drive destroy it all? Again, there could be no guarantees. There are other ways of erasing an SSD that are far more reliable.
Table of Content
Differences Between Erasing an SSD and HDD
To understand how erasing an SSD works, we must first talk about its write process. Unlike an HDD, which uses a mechanical "head" to write zeros and ones to a physical location on the disk, an SSD distributes data across its memory blocks in a process called wear leveling.
Wear leveling is an algorithm that ensures even data distribution across the SSD memory and even usage of memory blocks. The purpose of this is to prolong the SSD's lifespan.

Because of this, SSDs cannot be safely wiped using secure erase tools like HDDs. These tools erase the disk by writing and overwriting data multiple times. That can trigger wear leveling in an SSD, resulting in excessive writes to the drive and potentially causing premature wear.
That's actually not the only reason. SSDs have another auto-regulation feature called the TRIM command, which helps SSDs collect garbage. TRIM notifies the SSD when a memory block is free and can be erased. Using a secure erase would confuse TRIM, rendering it ineffective.
The ultimate difference between erasing an SSD and an HDD is that you cannot wipe the SSD's contents completely using a safe erase tool. While these tools may appear to overwrite data, remnants of the original data may still remain in SSD memory, making it potentially recoverable.
How To Clear an SSD Drive With Minimum Wear

You're probably wondering, "How to clean my SSD drive if I can't use a secure erase tool?" All of these things considered, the trick is to cause as little memory wear as possible.
That can be done using the ATA Secure Erase command, which is suitable for how SSDs write and erase data. Unlike traditional secure erase tools for HDDs, ATA Secure Erase doesn't write anything to the SSD but resets available memory blocks instead.
There are two ways to perform ATA Secure Erase - using your SSD's own erase tool and with software called Parted Magic. We'll provide detailed instructions for both methods below.
The trouble is that not all SSDs include this function or support the ATA Secure Erase command. In this case, there's nothing left for you to do but use the old secure erase from BIOS or Disk Management. Read on, and you will find step-by-step instructions for these two methods as well.
Back Up Your Data Before Erasing Your SSD Drive
As you're starting to realize, moving your data out of an old SSD and into a brand-new one is no small thing. Right now, you must take a moment to prepare for every eventuality.
You need to back up your data ASAP if you haven't done that already. Our goal for today is to delete your SSD files beyond the point of recovery. If there's still something in there that you would like to keep, now is the time to save it to another disk or storage device.
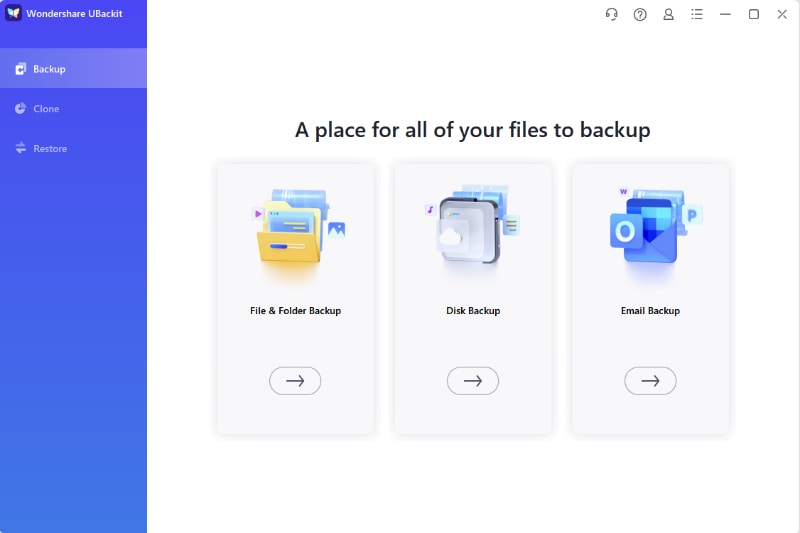
You can do this quickly using Wondershare UBackit. It's an excellent tool for all backup scenarios, and you can use it in the future. Right now, it can help you back up individual files in bulk, do a partition backup, or back up an entire disk before you erase its contents.
How To Erase an SSD Drive Securely on Windows 11/10
Now that you know the basics behind the SSD deletion methods and have everything ready, let's get down to business. Here's how to completely wipe an SSD on Windows 10/11 and make it unrecoverable.
Method 1. Wipe an SSD Drive Using Its Native Tool

Your SSD should have arrived with software packed with useful apps and utilities for managing the drive. Among other things, this software should give you the tools to update your drive, clone it, and perform the ATA secure erase. You might be able to find it on this list:
- SanDisk SSD Dashboard
- Samsung Magician SSD Tool
- Toshiba OCZ SSD Utility
- Intel Solid-State Drive Toolbox
- Western Digital SSD Dashboard
- Crucial SSD Storage Executive
- Corsair SSD Toolbox
No luck finding the native tool? If you cannot find the manufacturer's ATA secure erase tool for your SSD on this list or elsewhere on the internet, move on the method below.
Method 2. Wipe an SSD Drive Using Parted Magic
Parted Magic is a bootable Linux environment with disk partitioning, data recovery, secure erase, and similar tools. You can purchase Parted Magic for $15 and use it indefinitely.
In order to use Parted Magic, you need to install it to a bootable USB drive and run it from there. For this, we recommend a utility like Rufus. After you do that, follow these steps:
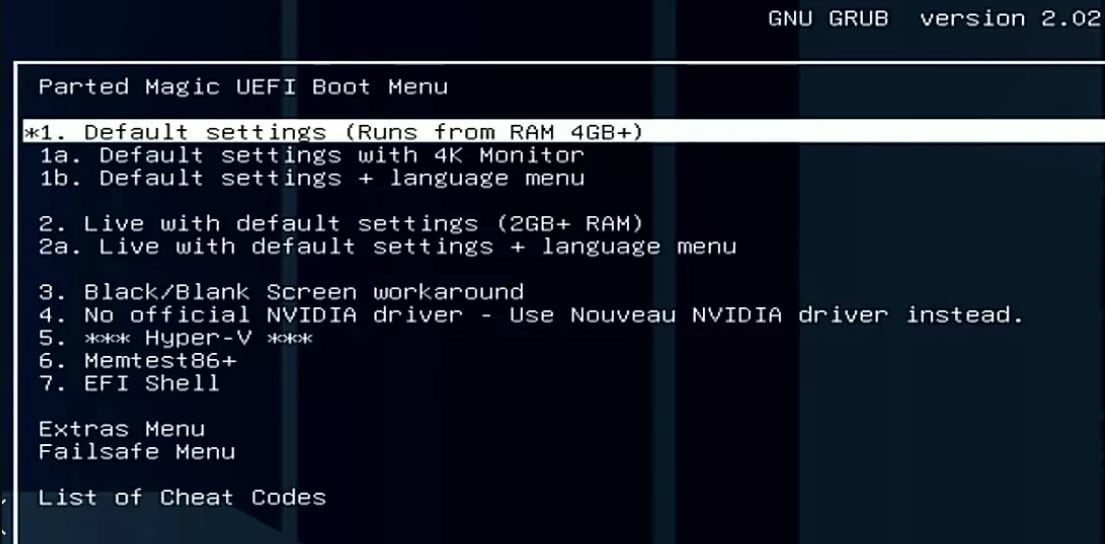
- After you boot the drive on your PC, select the Default Settings option.
- You'll see a Linux desktop environment with different tools on your screen.

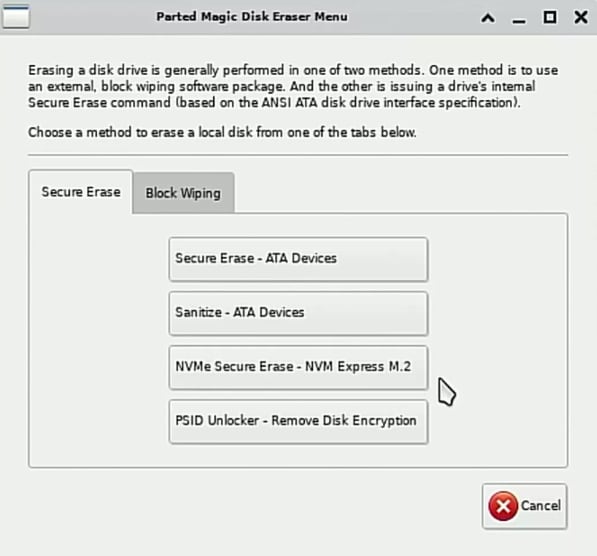
- Click on the Erase Disk icon and choose Secure Erase - ATA Devices. If you have an NVMe SSD, select NVMe Secure Erase.
- Select your SSD from the list of available disks. If it says Frozen next to it, and you can't select it, click the Sleep button below and wait a few seconds.
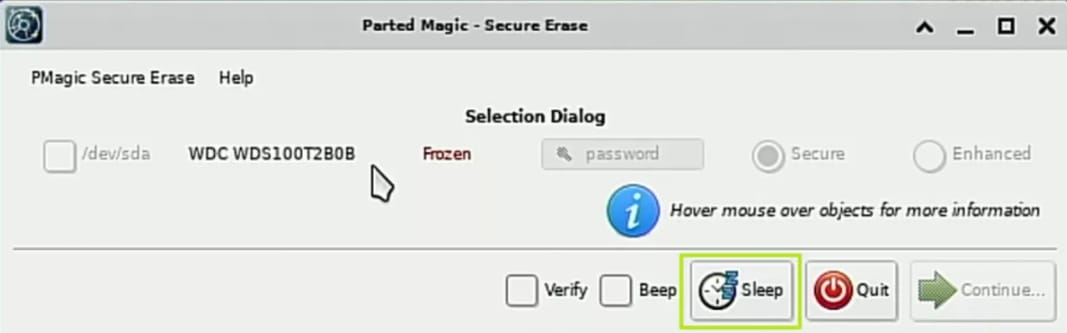
- After that, you should be able to select your SSD. Do just that and click Continue.

- Tick the box where it says I allow this utility to erase the listed device(s) and click Start Erase.
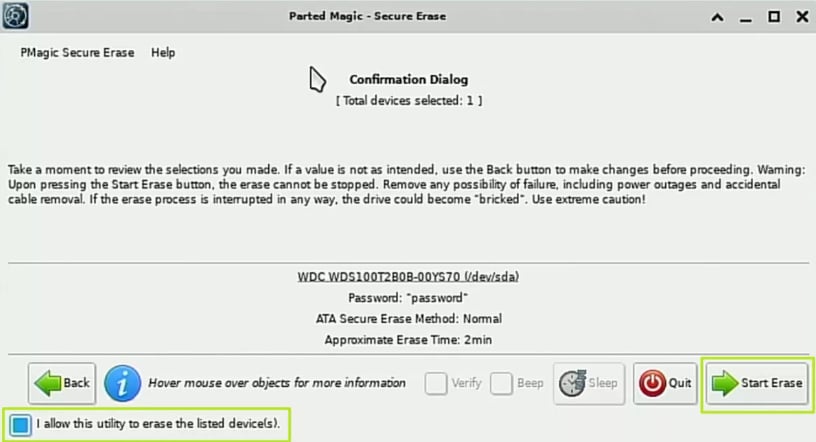
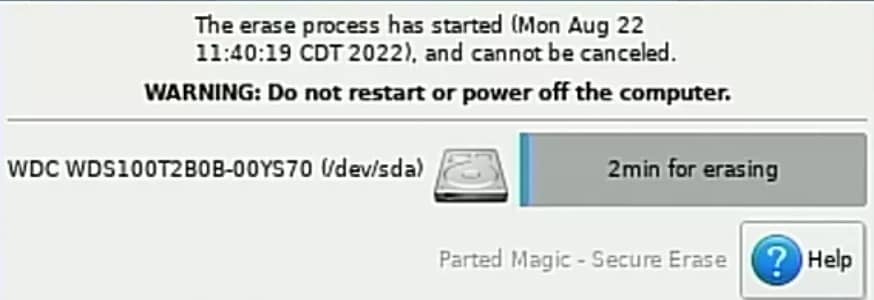
- Track the progress on the screen and wait until Parted Magic is done erasing your SSD.
Method 3. Wipe an SSD Drive Using BIOS/UEFI
BIOS works as a mediator between your computer's microprocessor, hardware operations, and the operating system. Naturally, it can also help you wipe out your SSD. Here's how:
- Restart your computer.
- Access BIOS using a short key for your device. Most computers use DEL, F2, and F10. If you don't know the BIOS access key for your device, you can find it online.
- Select the Security tab.
- Go to the Hard Drive Utilities or Hard Drive Tools, depending on the device.

- Choose the Secure Erase tool.

- Select the drive you want to delete and click Continue.

While using BIOS to erase your SSD is effective, it can be risky unless you're a confident computer user. If you don't like the idea of using the motherboard, use Disk Management.
Method 4. Wipe an SSD Drive Using Disk Management
Disk Management is a PC utility that gives you the details about each drive on your computer. You can see different statistics for all partitions, such as the amount of space used.
- Go to Start and search for Disk Management.

- You'll see an overview of your disks and partitions. To wipe clean an entire SSD drive, right-click each partition and click Delete Volume… from the drop-down menu.
- Now, select your SSD drive. Right-click and select Format.

- Choose a desired File System. If you plan to sell or give away the SSD, opt for exFAT. That will make SSD usable on both Windows and Mac OS devices.

- For Allocation unit size, we recommend you choose Default.

- Untick the Perform a quick format box to perform a full format and click OK > OK.

How To Erase an SSD Securely on Mac
For those of you who are thinking, "What about me? How do I wipe my SSD on a Mac?", we get your point. If the manufacturer provides no secure erase tool for your SDD, the alternatives are pretty scarce. In case you were wondering, there is no Parted Magic for Mac.
Also, there are no Secure Options available for SSDs in Disk Utility for Macs.
What, then? Should you just format the disk and get on with it? Actually, there is a better way. You can delete all data from an SSD on a Mac from your computer's Terminal app:
- Go to Finder and select Utilities. You can access the Terminal from there.

- To erase an SSD, you need to type in the command below, but not before you've customized the VALUE and DRIVE parts of the command:
diskutil secureErase freespace VALUE /Volumes/DRIVE - Instead of
VALUE, you need to type in a number between 0 and 4 (0 for a single-pass run of zeros, 1 for a single-pass run of random numbers, 2 for a seven-pass erase, 3 for a 35-pass erase, and 4 for a three-pass erase with random fills plus a final zero fill. In place ofDRIVE, type in the name of your SSD. - So, for example, if you want to run a 35-pass erase on an SSD drive called TheDragonLair, your command will look like this:
diskutil secureErase freespace 3 /Volumes/TheDragonLair
Try Wondershare Recoverit to Recover Lost Data from SSD
 Security Verified. Over 7,302,189 people have downloaded it.
Conclusion
Presuming you've taken good care of it, your SSD has a few good years left. If you can sell it or pass it along, you should do that. Before you move on, make sure your personal data is wiped clean of anything that someone can misuse, sell, or hold against you in any way.
The best way to erase data from a used SSD is using a manufacturer's own secure erase tool or a Linux distribution called Parted Magic. Alternatively, you can delete your SSD from your computer's BIOS or Disk Management. Don't forget to back up your data with Ubackit first.


