

 TL;DR:
If your Mac detects but cannot access a storage drive, you can restore your data by repairing logical errors via native macOS tools, force-mounting through the command line, or extracting files with specialized software like Recoverit.
● Native Disk Utility can resolve minor internal structure issues via the First Aid tool or manual Mount button, while advanced users can bypass Finder limitations by executing sudo diskutil mount /dev/disk[identifier] in Terminal.
● For drives stuck in an unmountable state due to severe corruption or unsupported file systems like NTFS and XFS, use third-party data recovery software such as Recoverit to scan and retrieve files directly from the inaccessible container.
● Stop using the unmounted drive immediately to prevent data overwriting, and exclusively utilize professional clean-room data recovery services if the device has sustained physical hardware damage that software cannot fix.
Ask AI for a summary
 ChatGPT
 Perplexity
 Gemini
 Claude
 Grok
Grok
If your Mac fails to mount a hard drive, it can be an unsettling experience. It may seem like your valuable data has vanished—but there’s hope. With the right techniques, you can retrieve files from an unmountable drive safely and easily.
When your Mac displays a “hard disk not mounted” alert, it’s natural to feel overwhelmed. This issue prevents access to important files, and unfortunately, it’s a common scenario among Mac users. The upside? Your data likely still exists—it’s just temporarily out of reach. You need a strategic approach to regain access and restore your files.
While macOS is known for its stability, hardware malfunctions, software errors, and corrupted file systems can sometimes render drives unreadable. When that happens, your system can no longer mount the disk.
Fortunately, this guide offers tried-and-tested solutions to help you recover data from an unmountable Mac drive.
In this article
Understanding Unmountable Drives on Mac
What is Unmountable Drive on Mac?
An unmountable drive refers to a storage device that macOS can detect but cannot access. Even though the system recognizes the drive and it appears in Disk Utility, it fails to read the data stored on it. As a result, the drive doesn't show up on your desktop, and you won’t be able to view or open it through Finder.
Mounting problems aren't limited to just one type of storage—both internal and external drives can experience them. It’s quite common for external hard drives to fail to mount on a Mac, and USB flash drives are no exception.
Even SSDs and traditional hard disks can become unmountable due to various reasons. When your Mac encounters this issue, acting quickly is essential. Delays can make data recovery more complicated, so it’s important to address the problem as soon as possible.
Common Causes of Unmountable Drive Issues
Several factors can cause your drive to become unmountable. Understanding these causes helps you prevent future problems and choose the right method to recover unmounted hard drive on Mac.
- Hardware Failures: Physical damage to drive components makes them unmountable
- File System Corruption: Damaged file system prevents Mac from reading the drive
- Connection Problems: Faulty cables or ports stop proper communication
- Power Issues: Insufficient power supply affects drive mounting
- Virus Attacks: Malware can corrupt drive structure and files
- Improper Ejection: Removing drives without proper ejection damages file system
- Age-Related Wear: Old drives develop bad sectors and mechanical problems
- Bad Sectors: Damaged areas on drive prevent normal operation
Quick Fixes for a Hard Disk Not Mounted on a Mac
Here are some quick solutions for dealing with an unmounted hard disk, before delving into elaborate ways to recover data:
1. Check the External Hard Drive Cable
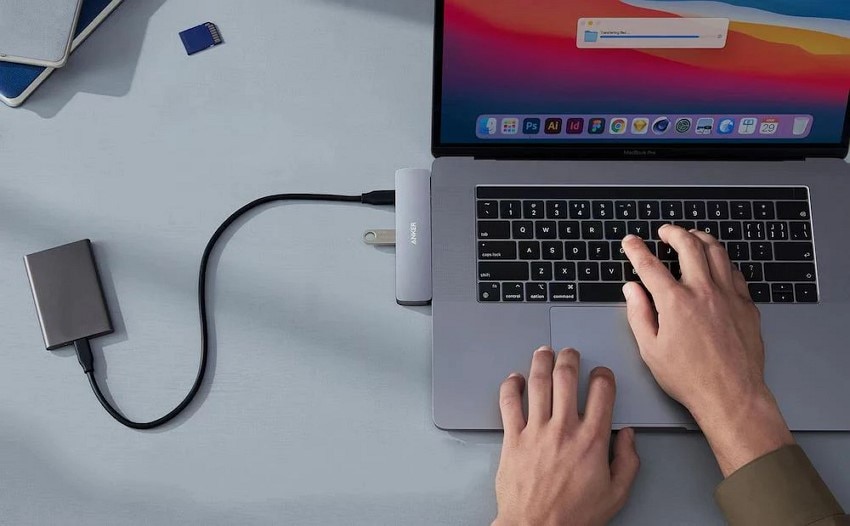
First of all, check the cable of your external hard drive to identify any damage to it, like fraying or some kinks. Replace the cable if it is found damaged with another Thunderbolt or USB cable. Also, check the cable on another system to make sure it's working. This will allow it to get enough power to your disk for it to be recognized by the system.
2. Check the USB Port of the Mac
You can also try using another USB port on your Mac to plug in the hard drive. Alternatively, bypass the USB and directly plug into your Mac to make the disk readable again. Plugging your drive into a functional port will ensure smooth communication of the drive with the Mac device. This, in turn, will solve the issue of the hard drive not mounting on the Mac.
3. Verify Disk File System for Mounting on Mac
Verifying the file system compatibility for mounting a Mac is also a foundational step towards fixing this issue. Mac supports a limited set of file systems, and systems like NTFS and XFS are not supported fully by Mac. However, tools and software can be installed for the system to mount the drive. Identifying incompatible file systems and installing additional support software will enable Mac to recognize the hard drive.
4. Verify on Disk Utility
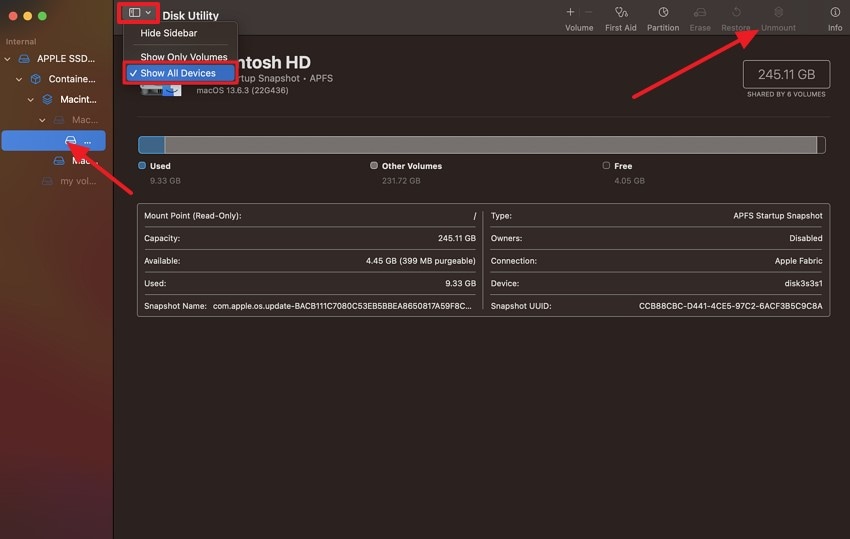
Disk utility verification detects the drive and indicates its health, telling the user if it is still mountable. This feature looks into the integrity of data stored on the drive and identifies software issues efficiently. By verifying the disk utility and fixing the file system errors, the user can restore the hard disk not mounted on the Mac. You can verify the disk utility by following the basic steps given:
Instructions. Launch the Disk Utility in Applications and go into the "View" option and select "View all Devices" from the menu. When you’re on the left side panel, you will find your external device and choose the container you want verified. If the unmount option is available, it means the device is already mounted.
How to Recover Data From an Unmountable Drive on Mac
When your external hard drive not mounting on Mac occurs, don't panic. Start with the easiest solutions first. Move to advanced methods if needed.
The key to successful recovery is acting quickly. Don't use the drive for new data. This prevents overwriting your lost files. Choose the method that matches your situation. Some fixes work for minor issues. Others handle severe corruption. Professional help may be needed for physical damage.
Fix 1: Use Recoverit Data Recovery Tool
Recoverit is a reliable tool for Mac data recovery. It works well when your hard disk not mounted Mac creates problems. This software can scan unmountable drives. Even if your Mac can’t access the drive, powerful recovery software can still identify and retrieve lost files. These tools offer broad compatibility with various formats and file types, helping you recover everything from media to essential documents.
This method helps in several ways. The software is designed to recover data even from heavily damaged drives, offering compatibility across various file systems. It also includes a preview feature that lets users view files before initiating the recovery process. With its intuitive interface, the tool is accessible enough for beginners to use confidently and effectively.
Step 1. Download and install Recoverit on your Mac. Launch the application. Connect your unmounted drive to Mac. The software will detect the unmountable drive.

Step 2. Select the unmountable drive from the list. Click "Start" to begin scanning. Wait for the scan to complete.

Step 3. Preview the found files. Select the files you want to recover. Choose a safe location to save them.
Related Video >>: How to Recover Files From Mac Computer?
Fix 2: Mount Drive Manually
Disk Utility is macOS’s native tool for managing drives, and it can occasionally succeed in mounting external hard drives that fail to appear in Finder. This approach tends to be effective when the issue is minor—such as the system not automatically recognizing the drive.
In these cases, Disk Utility may detect and display the drive even when the Mac desktop doesn't.
This approach offers several benefits. It's free and built into Mac. The tool is safe to use. It won't damage your data. Disk Utility can mount drives with minor corruption. It works for both internal and external drives.
Step 1. To begin, launch Disk Utility by navigating to Applications > Utilities. In the left sidebar, scan for your external drive. If it appears there but remains inaccessible, it means the system has detected the drive, though it hasn’t mounted it yet.
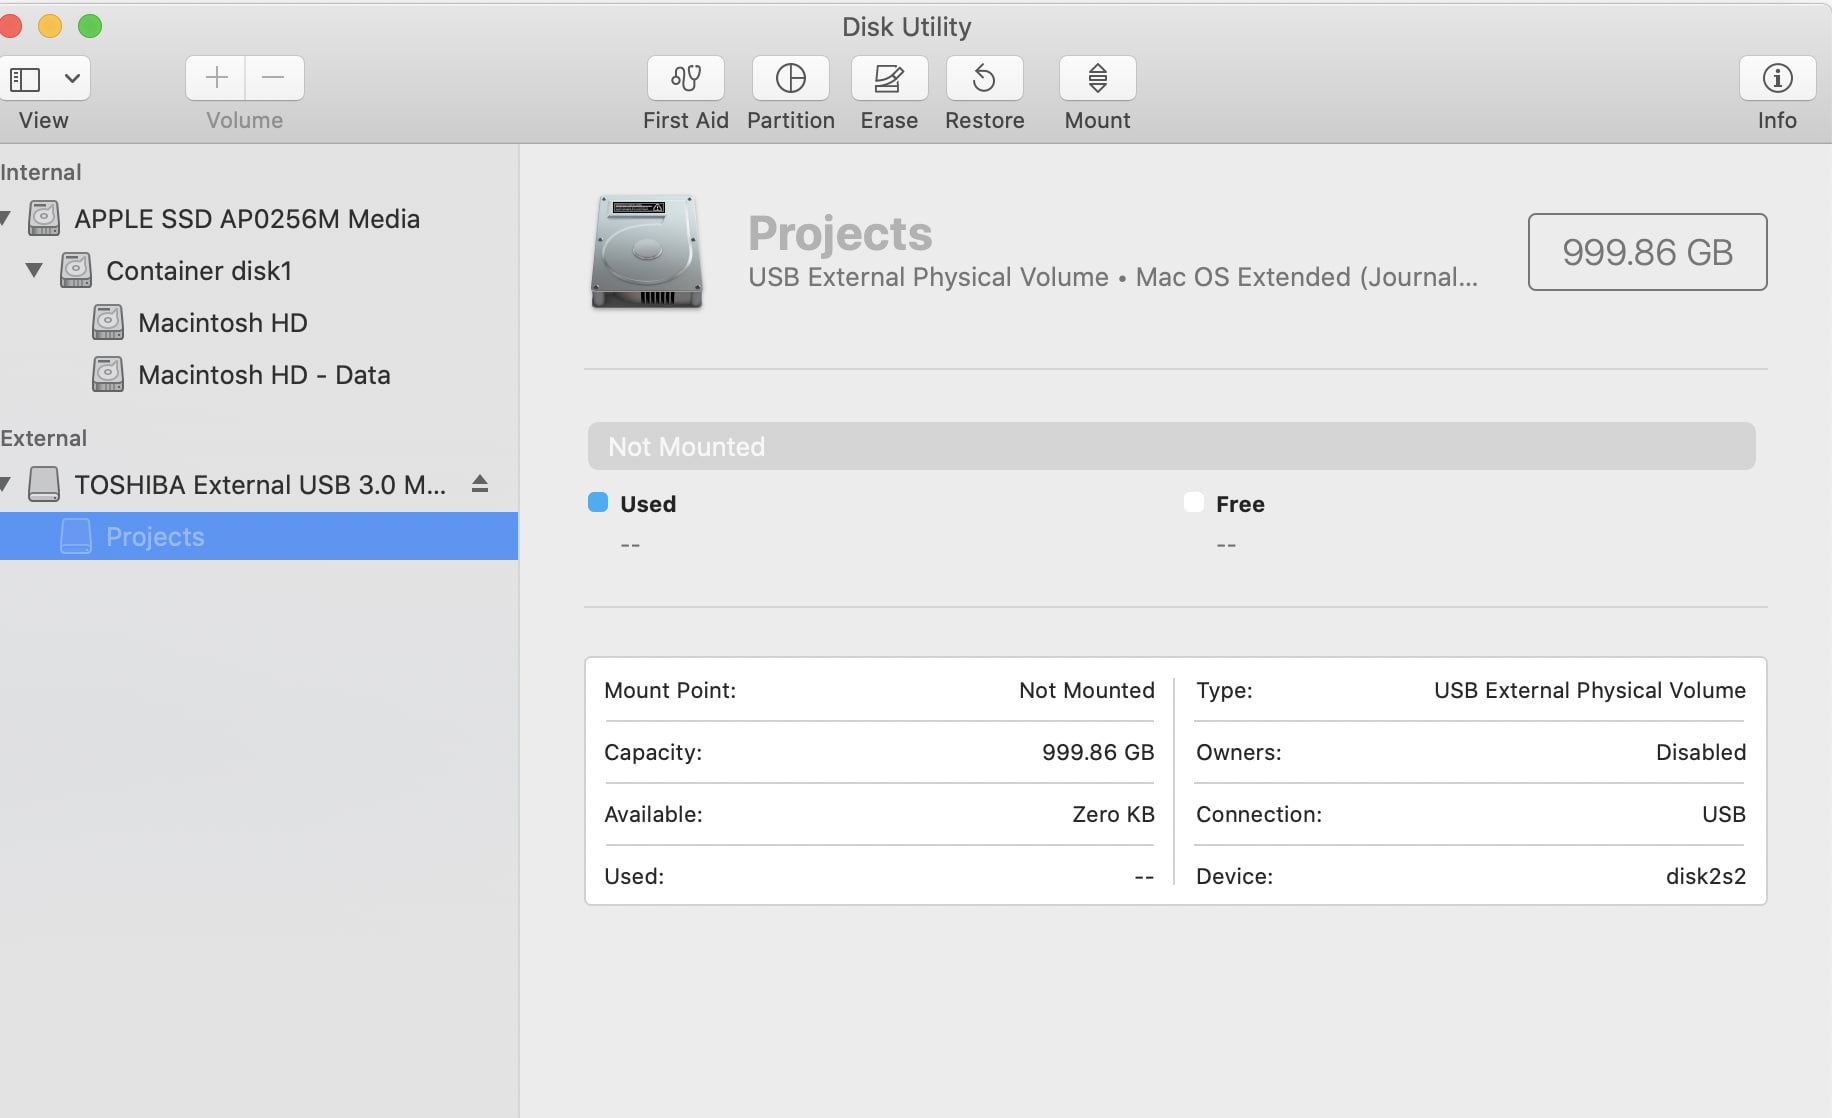
Step 2. Choose the external drive that isn’t mounting. Then, click the “Mount” option in the toolbar. If it works, the drive will show up on your desktop, allowing you to access your files as usual.
Fix 3: Run First Aid in Disk Utility
First Aid in Disk Utility helps fix problems that stop a drive from showing up. It works well if the issue is with the drive’s internal structure, and it can repair small errors to make the drive accessible again.
The benefits of this method are clear. It's built into Mac system. First Aid is safe for your data. It can fix many common drive problems. The tool works automatically. You don't need technical knowledge to use it.
Step 1. Open Disk Utility and locate your unmountable drive. Select the drive from the sidebar. Click the "First Aid" button at the top of the window.
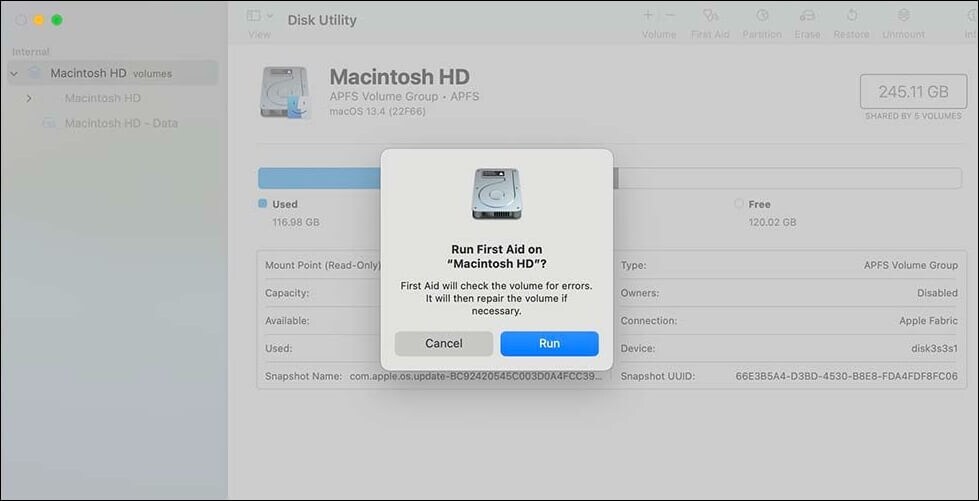
Step 2. Click "Run" when prompted. First Aid will scan and repair the drive. Wait for the process to complete. If repairs are successful, try mounting the drive again.
Fix 4: Use Terminal to Access the Drive
Terminal provides command-line access to Mac functions. Advanced users can use it to mount unmountable drives. This method bypasses Finder limitations. Terminal commands can force mount drives that won't mount normally.
Terminal offers powerful advantages. It can access drives that GUI tools can't. Command-line tools work with severely damaged drives. Terminal provides detailed error information. You can force operations that normal tools won't allow.
Step 1. Open Terminal from Applications > Utilities. Type "diskutil list" to see all connected drives. Find your unmountable drive in the list. Note its identifier (like disk2s1).

Step 2. Type "sudo diskutil mount /dev/disk2s1" (replace with your drive identifier). Press Enter and provide your admin password. If successful, the drive will mount and appear on the desktop.
Fix 5: Restore from Time Machine Backup
Time Machine creates automatic backups of your Mac. If you have backups, you can restore lost data. This method works when your unmounted hard drive on Mac contains system files. Time Machine can restore files from before the drive became unmountable.
Time Machine restoration has key benefits. It provides complete file recovery. Your files maintain their original structure. The process is automated and safe. Time Machine includes multiple backup versions.
Step 1. Connect your Time Machine backup drive. Open Time Machine from System Preferences. Click "Browse Time Machine Backups" or use the Time Machine icon in the menu bar.
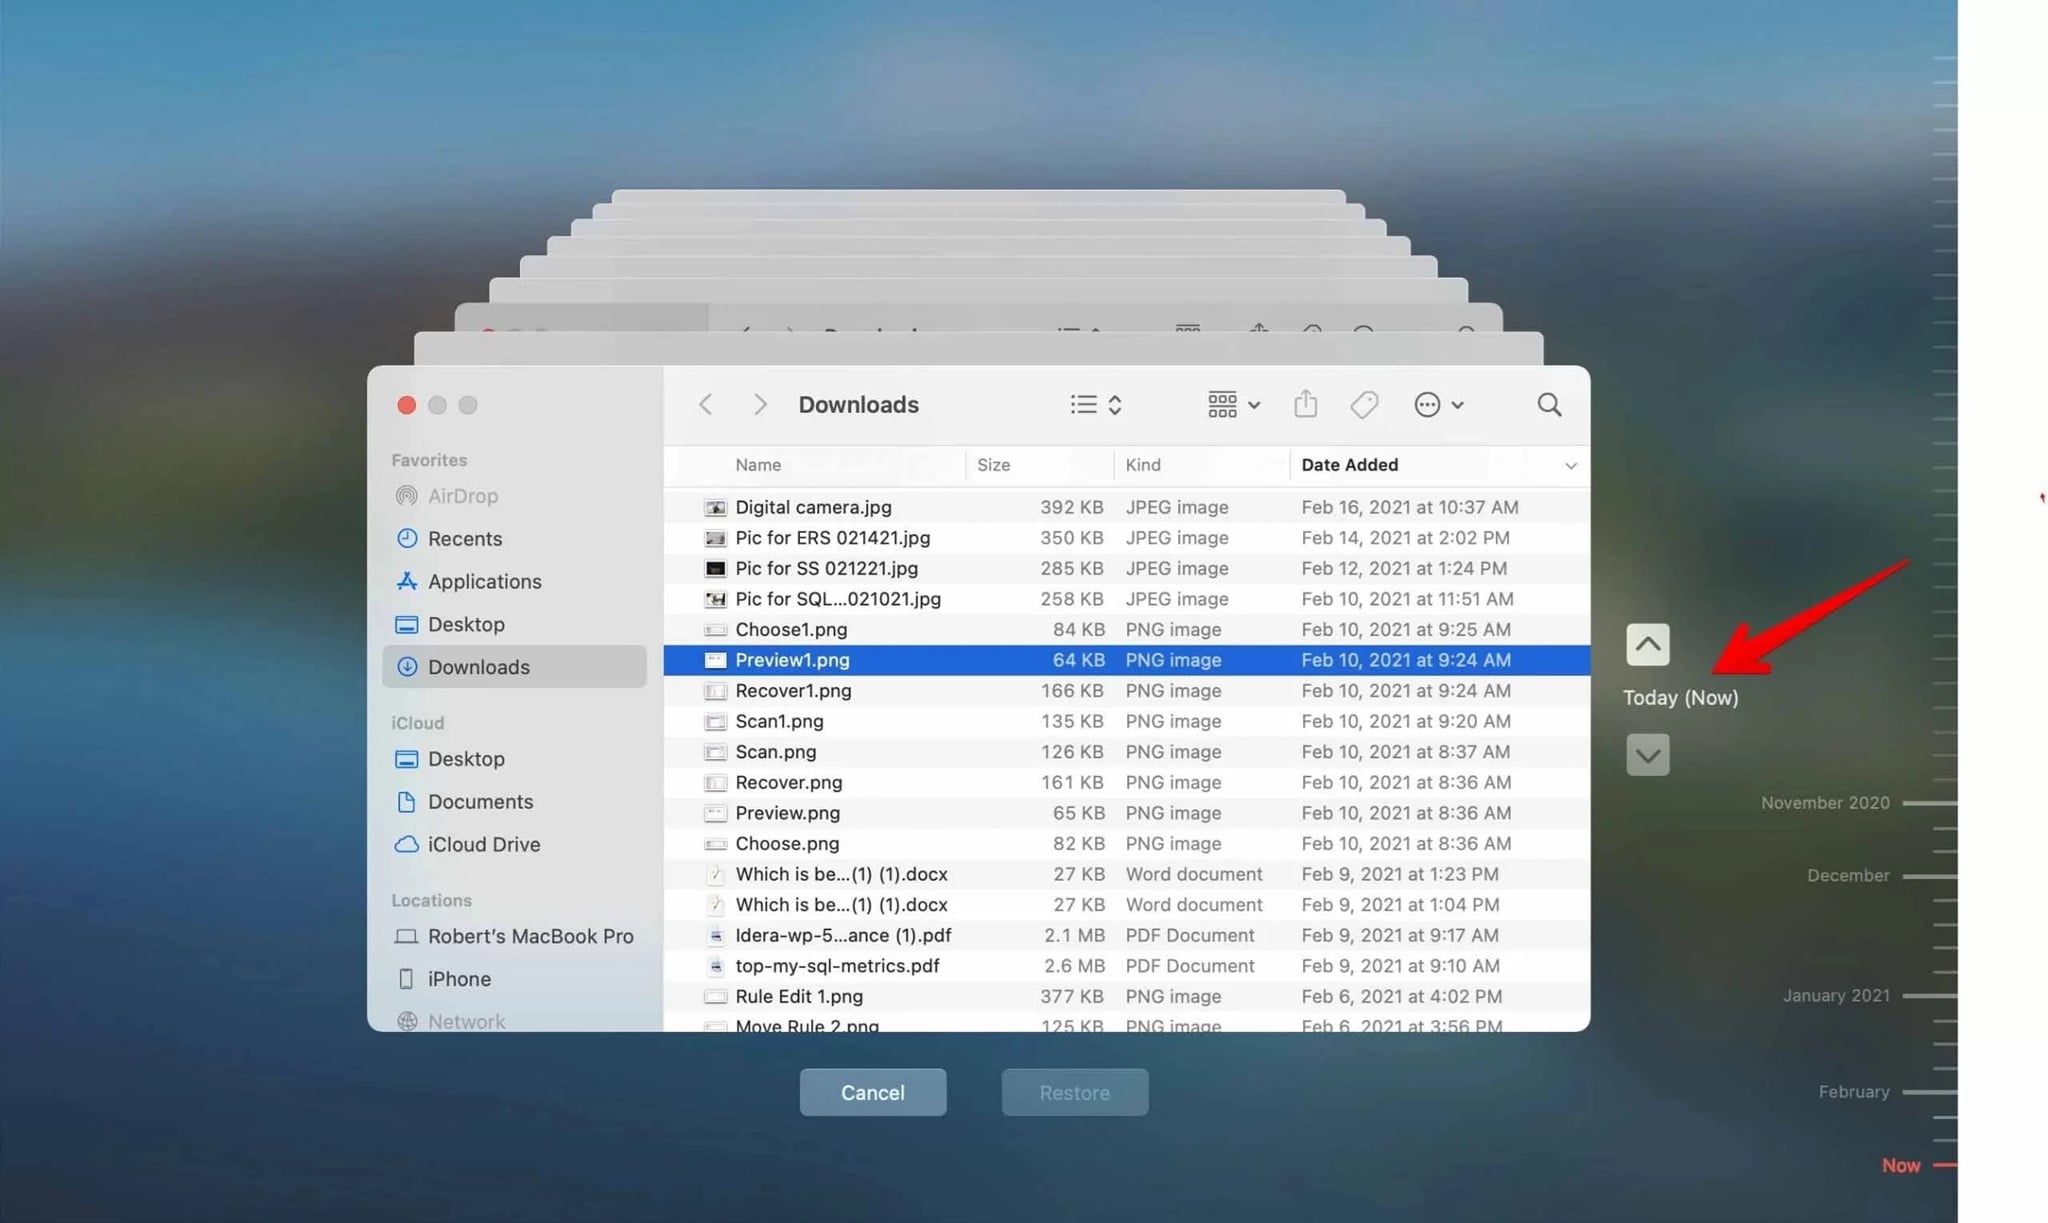
Step 2. Navigate to the location where your lost files were stored. Use the timeline to go back to before the drive became unmountable. Select the files you want to restore. Click "Restore" to recover them.
Fix 6: Seek Help from Professional Data Recovery Services
Professional services handle severe drive damage. When your external hard drive is not mounting on Mac and has physical problems, experts can help. These services have specialized tools and clean room facilities. They can recover data from drives that software can't fix.
Professional recovery offers unique advantages. Experts handle physically damaged drives. They have specialized hardware and software. Clean room environments prevent further damage. Success rates are higher for severe cases.
Step 1. Research reputable data recovery companies in your area. Contact them for evaluation. Explain your unmountable drive problem. Ask about their success rates and pricing.

Step 2. Package your drive carefully for shipping or drop-off. Follow their instructions exactly. Wait for evaluation results. Approve the recovery if you agree with the quote and timeline.
Tips to Prevent Unmountable Drive Issues
Taking simple steps can prevent your drive from becoming unmountable. These tips will help you avoid the stress of trying to recover an unmounted hard drive on Mac. Regular maintenance keeps your drives healthy and accessible.
- Regular Backups: Create frequent backups of important data to prevent total loss
- Proper Ejection: Always eject drives properly before disconnecting them from the Mac
- Drive Maintenance: Run disk utility checks monthly to catch problems early
- Temperature Control: Keep drives in cool, dry environments to prevent overheating
- Virus Protection: Use antivirus software to prevent malware damage to drives
- Quality Cables: Use good-quality USB and connection cables for reliable data transfer
- Surge Protection: Protect your Mac and drives from power surges with quality surge protectors
- Regular Updates: Keep Mac OS updated for better drive compatibility and security
Conclusion
Dealing with an unmounted hard drive on Mac can be stressful. But recovery is often possible. This guide showed you how to recover data from unmountable drive on Mac using six different methods. Start with simple solutions like Disk Utility. Move to advanced methods if needed. Professional help is available for severe cases.
Prevention remains the best strategy. Regular backups protect your data. Proper drive maintenance prevents problems. When your external hard drive not mounting on Mac occurs, act quickly. The sooner you start recovery, the better your chances of success.
Remember that your hard disk not mounted Mac situation doesn't always mean permanent data loss. With the right approach, you can recover unmounted hard drive on Mac and get your files back.
FAQs
-
Q1: Can I recover data from a completely dead unmountable drive on Mac?
Yes, you can often recover data even from drives that appear completely dead. When your external hard drive not mounting on Mac seems hopeless, but professional data recovery services can help. They have specialized tools to read damaged drives. Clean room facilities prevent further damage during recovery. Even drives with physical damage often contain recoverable data. However, success depends on the extent of damage. Logical corruption is easier to fix than physical damage. Act quickly and avoid using the drive to prevent overwriting data. -
Q2: Why does my external hard drive keep becoming unmountable on Mac?
Several factors cause repeated unmountable drive issues. Poor-quality USB cables create connection problems. Power supply issues affect drive stability. File system corruption from improper ejection damages drives. Age-related wear causes mechanical failures. Virus infections corrupt the drive structure. Temperature fluctuations damage internal components. Bad sectors develop over time and prevent mounting. To prevent recurring problems, use quality cables, eject drives properly, maintain stable power, and run regular disk checks. -
Q3: Is it safe to use third-party software to recover data from unmountable drive on Mac?
Reputable third-party recovery software is generally safe when used correctly. Tools like Recoverit have good track records for Mac data recovery. However, avoid unknown or suspicious software that might contain malware. Always download from official websites. Read user reviews before choosing software. Make sure the tool supports your drive type and Mac version. Free trials let you test before purchasing. Professional software often provides better results than free alternatives. When your hard disk not mounted Mac creates problems, quality recovery software can be your best option.


