

 TL;DR:
To stop Windows freezing caused by 100% disk utilization, users must eliminate storage bottlenecks by disabling aggressive background caching services, updating storage controllers, and repairing corrupted hard drive sectors.
● Open services.msc to halt and set the Startup type to "Disabled" for SysMain and Windows Search, preventing them from trapping traditional HDDs in continuous data read loops.
● Switch the Windows Power Option to "High Performance" to prevent PCIe link power throttling, and execute "chkdsk /f /r C:" in an administrator Command Prompt to repair bad storage sectors.
● A clean Windows 10 reinstallation acts as the final fix for unresolvable OS errors, but strictly requires a prior drive backup via Wondershare UBackit or necessitates Wondershare Recoverit V14 to salvage accidentally wiped files.
Ask AI for a summary
 ChatGPT
 Perplexity
 Gemini
 Claude
 Grok
Grok
If your computer is running slow and unresponsive, 100% disk usage on Windows could be the culprit. Even simple tasks become incredibly slow when your hard drive is constantly at capacity. It could be caused by malware, apps running in the background, or problems with the system. Thankfully, there are effective ways to fix it and get your PC's performance back.
With easy, step-by-step instructions, this guide will show you the best ways to fix 100% disc usage on Windows. These techniques will help free up disc space and increase system speed, whether they involve disabling services, updating drivers, or tweaking system settings. Follow these steps to make your computer run better and stop this problem from happening again.
Try Recoverit to Perform Data Recovery
 Security Verified. 3,591,664 people have downloaded it.
In this article
-
- Fix 1: Restart your device
- Fix 2: Update Windows 10
- Fix 3: Check for Malware
- Fix 4: Disable Windows Search
- Fix 5: Change energy options from Balanced to High Performance
- Fix 6: Check for disk errors
- Fix 7: Disable Superfetch
- Fix 8: Uninstall Flash Player
- Fix 9: Change Settings in Google Chrome and Skype
- Fix 10: Wipe SSD and Reinstall Windows 10

What is disk usage?
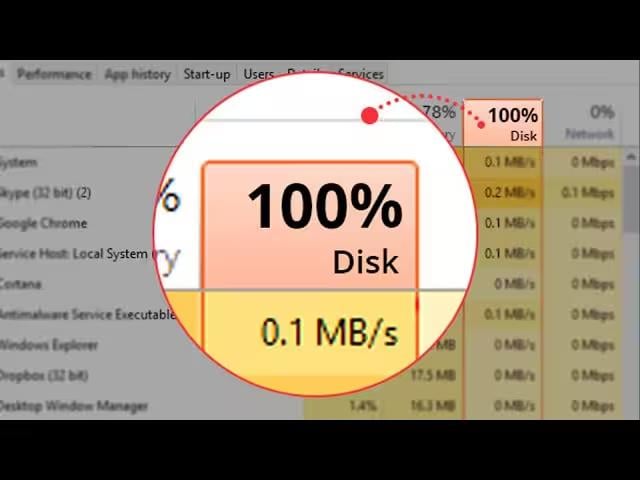
Disk usage represents the percentage of your hard drive or SSD active time spent processing read and write requests. When Windows executes applications, loads files, or runs background processes, it continuously accesses storage. Under normal operating conditions, disk usage should sit below 10% or spike only briefly during heavy operations.
When disk usage locks at 100%, the storage sub-system becomes a bottleneck. The operating system cannot handle incoming input/output operations per second (IOPS), causing the entire interface to stutter, freeze, or fail to respond.
Common Causes of 100% Disk Usage
Identifying why your storage drive is operating at maximum capacity is essential for choosing the correct fix. Below are the most frequent structural and software culprits behind the 100% disk utilization issue on Windows.
| Core Culprit | How It Triggers 100% Disk Usage | Impact Level |
| Windows Search Indexing | Loops continuously while scanning files, trapping conventional HDDs in an endless read cycle. | Medium |
| SysMain (Superfetch) | Over-aggressively preloads application data into RAM, flooding disk queues. | High |
| Outdated Storage Drivers | SATA AHCI or NVMe controller driver mismatches cause severe I/O request bottlenecks. | High |
| File System Errors / Bad Sectors | The operating system gets stuck trying to read corrupted storage sectors over and over. | Critical |
| Chrome / Browser Background Processes | Modern browsers can over-utilize disk cache during heavy page preloading. | Medium |
| Malware or Cryptojackers | Hidden malicious background scripts silently read/write mass data or mine crypto. | Critical |
How to Fix the "Disk 100% Used" Issue?
Having slow performance because of disk usage Problems with Windows? Your system becomes unresponsive when the hard drive is at 100 percent. This problem might be brought on by processes running in the background, system updates, or malware. There are a few good ways to fix it, though. Follow these 10 effective solutions to reduce disk usage and improve your computer's speed.
Fix 1: Restart your device
A simple system restart flushes the system RAM, terminates stuck background processes, clears temporary caches, and resets system runtime errors that trigger high disk utilization.
- Save all open work and close active applications to prevent data loss.
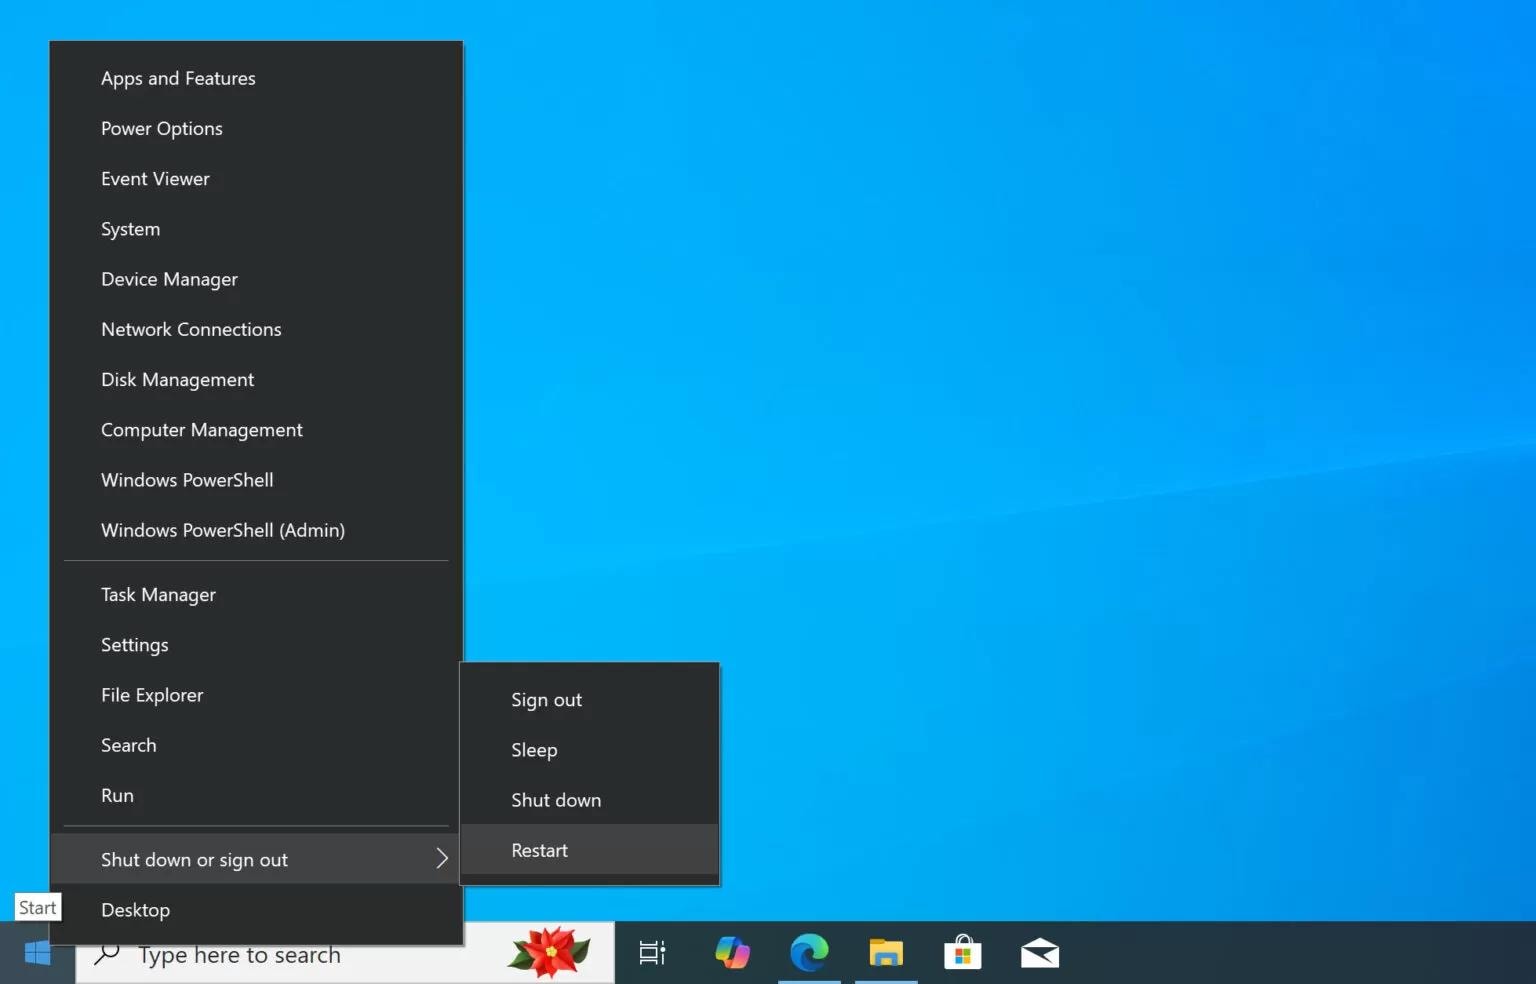
- Open the Start menu, click the Power icon, and select Restart.
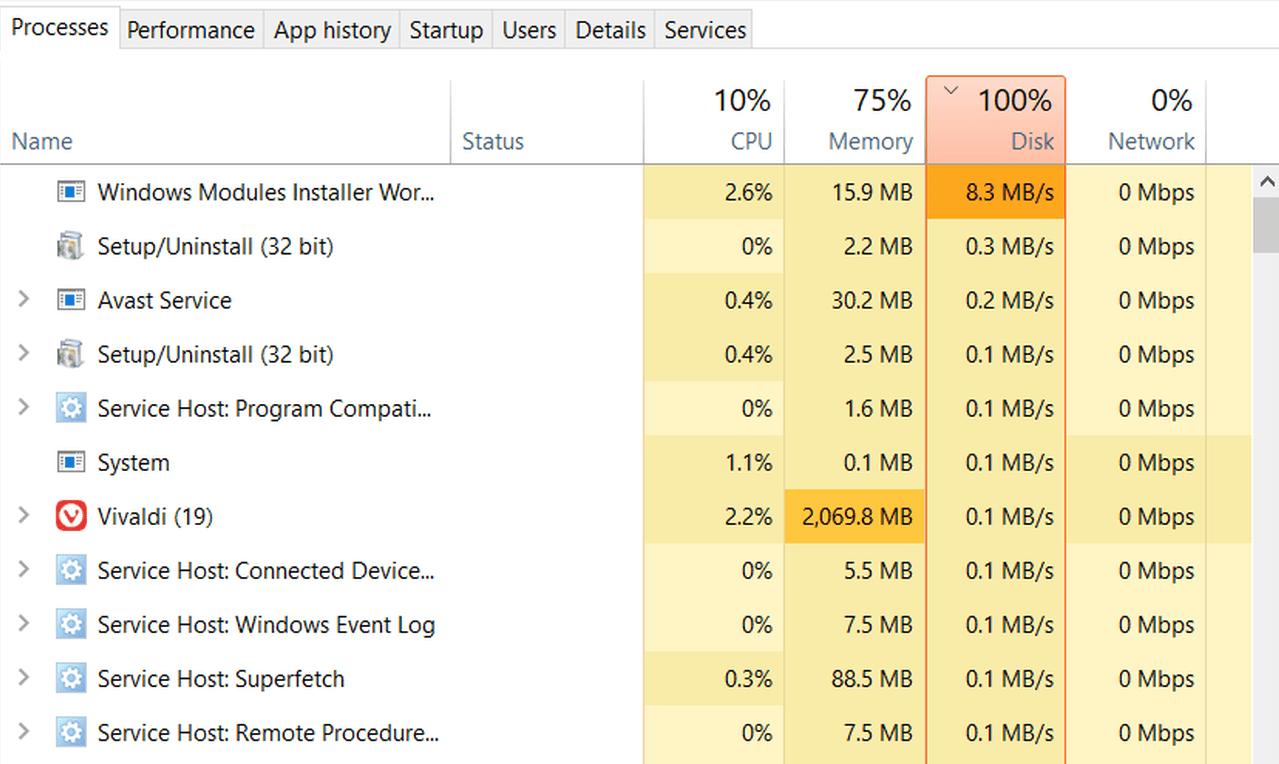
- Once Windows boots completely, press Ctrl + Shift + Esc to open Task Manager and monitor if the disk usage percentage drops to normal levels.
Fix 2: Run a Comprehensive System Update
Pending Windows updates or broken installation files running in the background can cause persistent 100% disk usage. Installing the latest patches ensures system stability and resolves optimization bugs.
- Open the Start menu and select Settings (or press Windows Key + I).
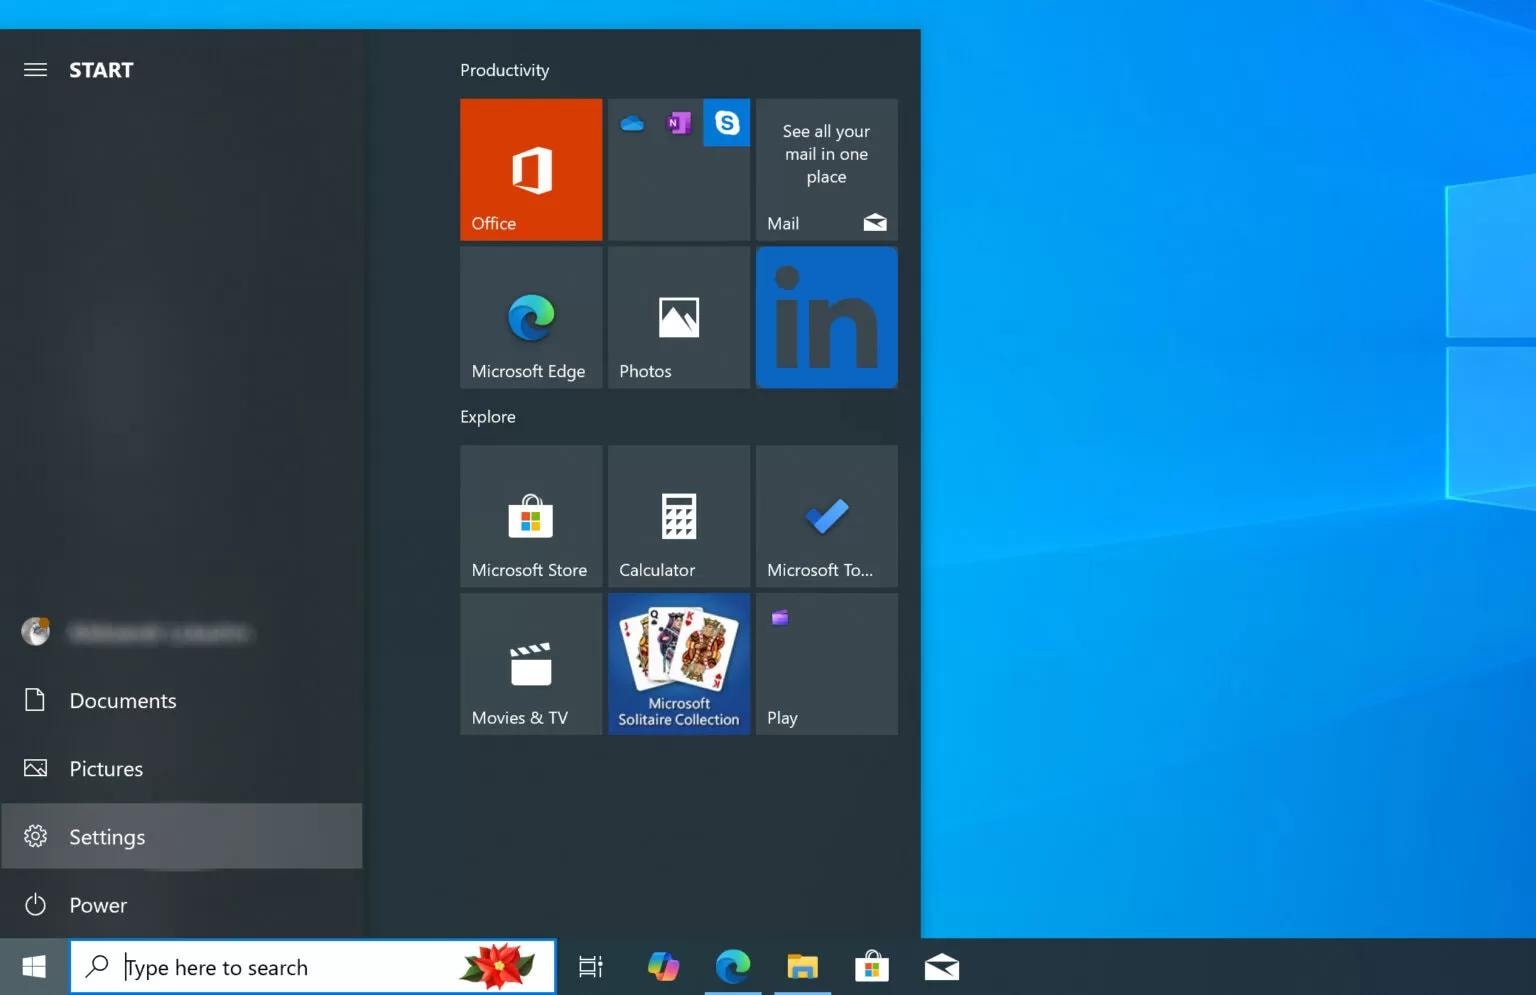
- Go to Update & Security > Windows Update.
- Click Check for updates. If patches are available, download and install them.
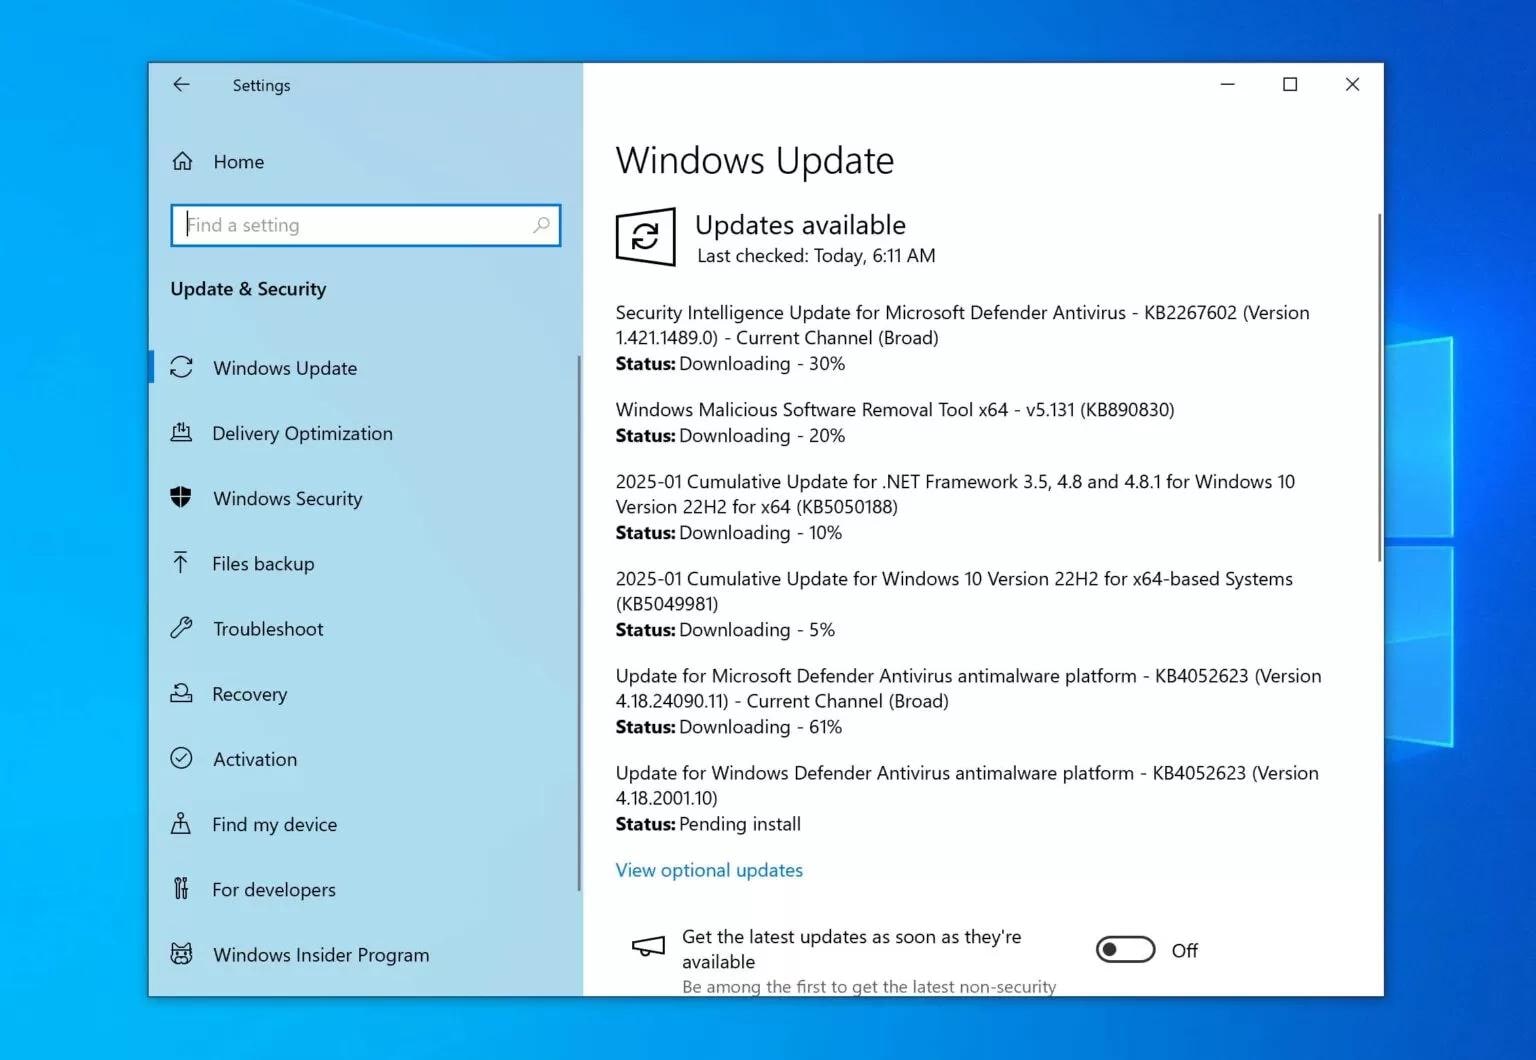
- Restart your PC to apply the updates and check the Task Manager performance tab.
Updating Windows can reduce disk usage and enhance overall system performance.
Fix 3: Scan for Malware and Viruses
Malware, spyware, and unauthorized background miners can consume massive storage bandwidth, locking your disk at 100% utilization.
Steps:
- Type Windows Security into the Windows search bar and open the app.
- Select Virus & threat protection.
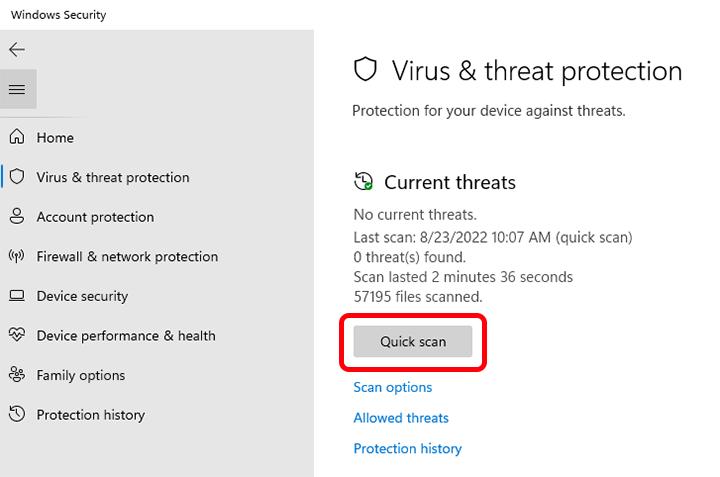
- Click Scan options, select Full scan for a thorough system check, and click Scan now.
- If threats are isolated, follow the on-screen prompts to remove or quarantine them, then restart your machine.
Regular scans help keep your system secure and prevent future performance issues.
Fix 4: Disable Windows Search Indexing
A known system conflict can cause the Windows Search service to enter a continuous processing loop, severely overloading storage performance.
Steps:
- Press Windows Key + R, type
services.mscinto the dialog box, and press Enter. - Scroll down to locate the Windows Search service and double-click it.
- Change the Startup type dropdown menu to Disabled.
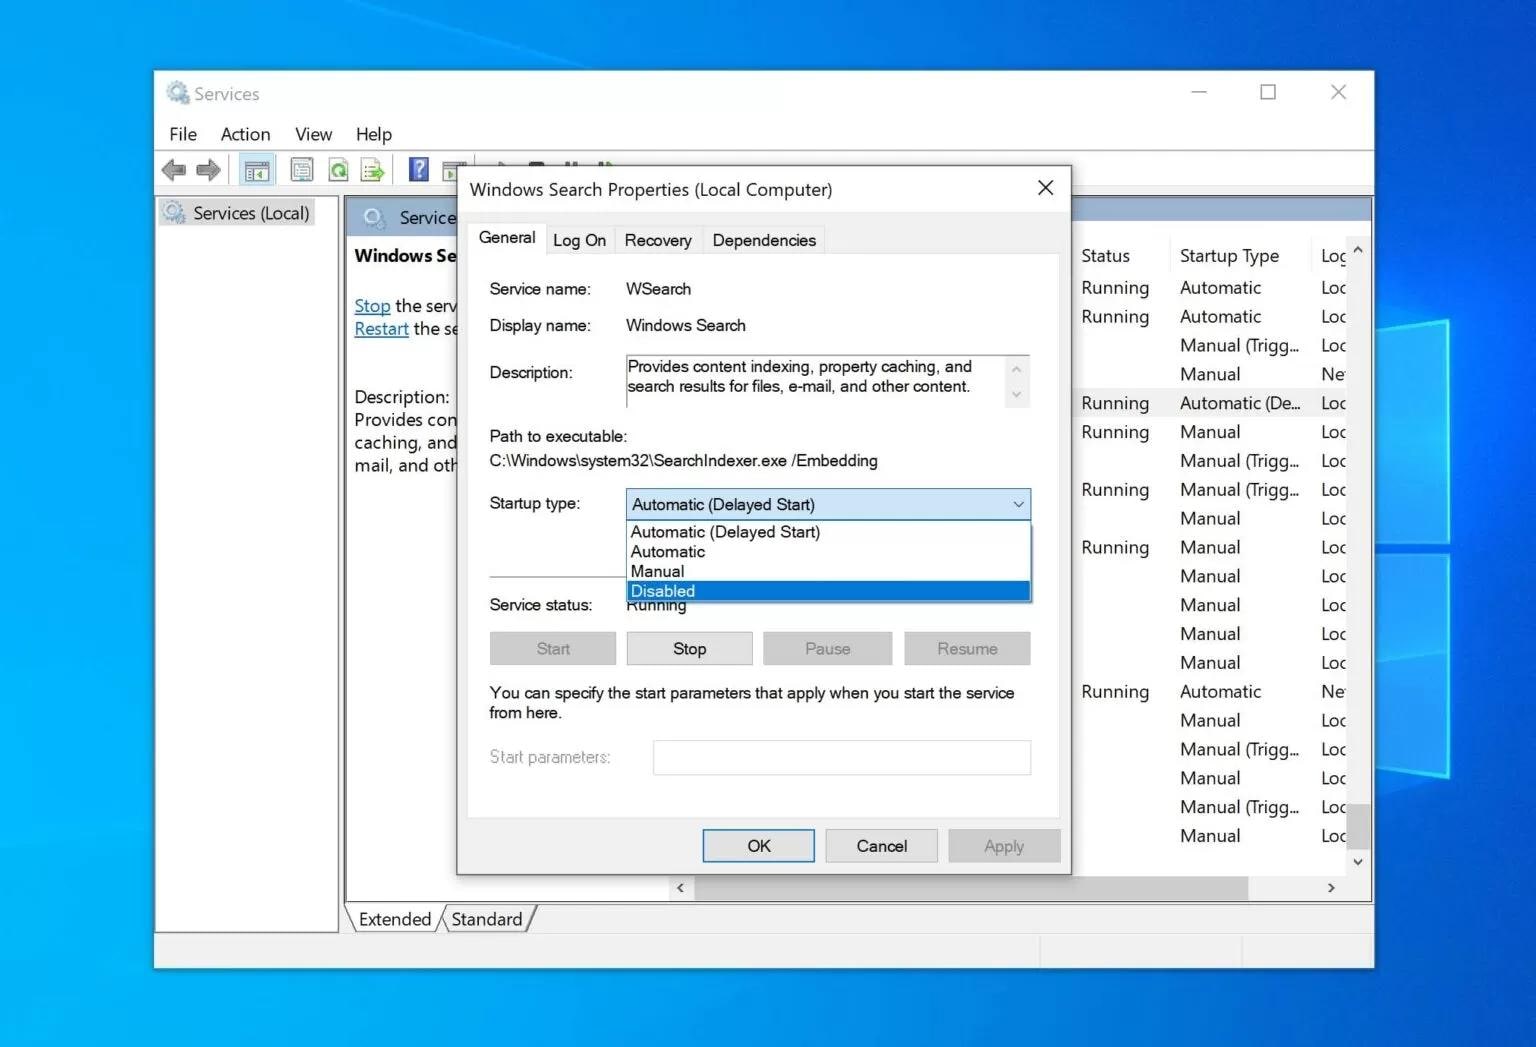
- Click Stop under the service status, click Apply, and press OK.
Disabling Windows Search can reduce background processes and improve system performance significantly.
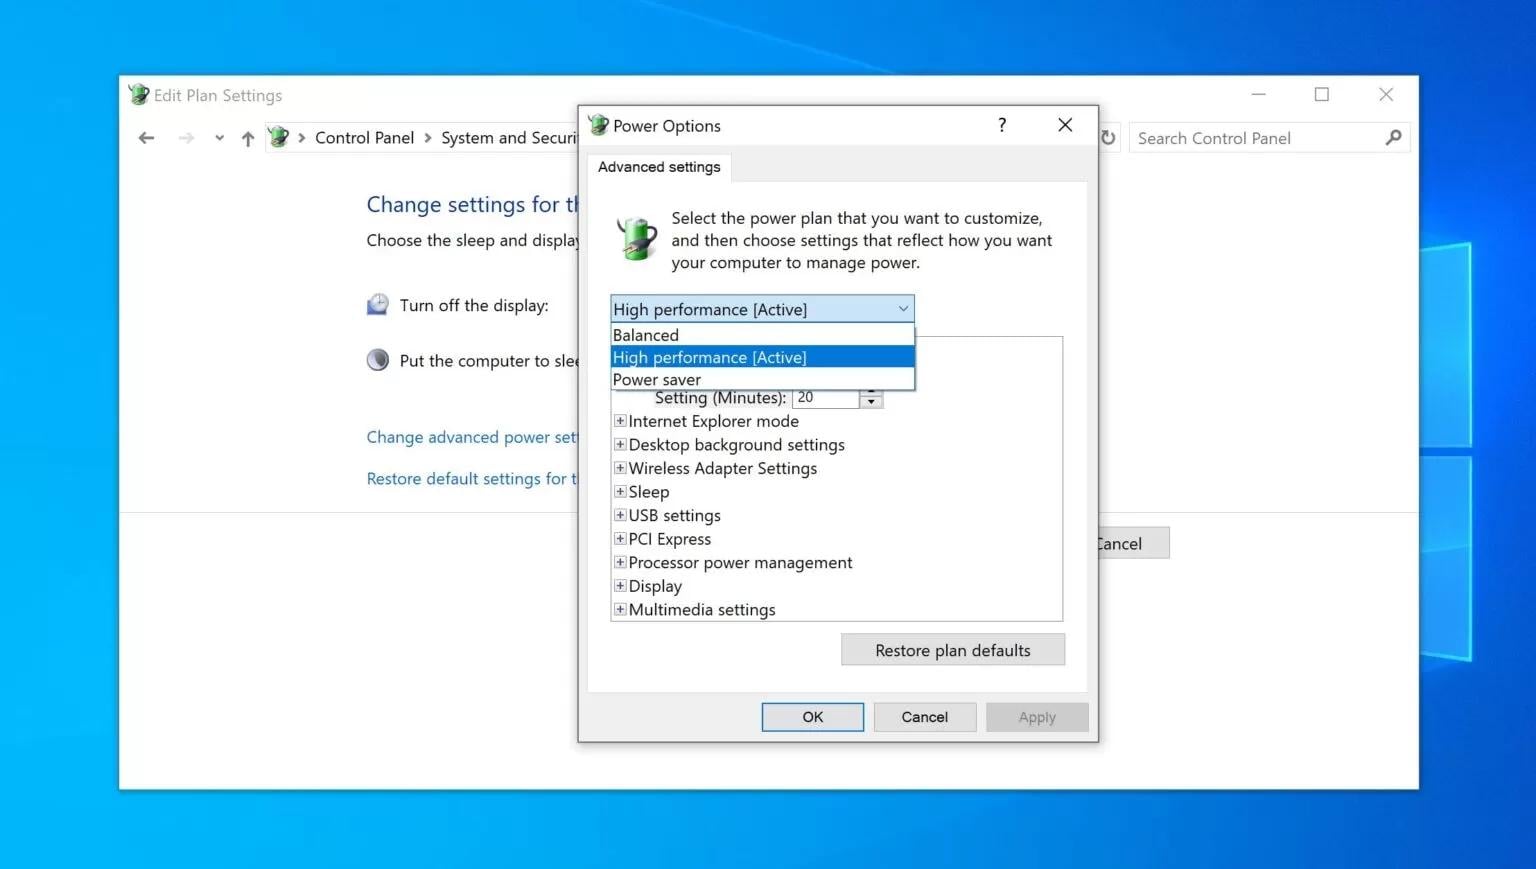
Fix 5: Change Power Options to High Performance
Windows power-saving plans (like Balanced mode) sometimes dynamically throttle storage link power states (PCIe Link State Power Management), causing severe I/O lag on high-throughput drives.
Steps:
- Press Windows Key + R, type
controlto open the classic Control Panel, and navigate to Power Options.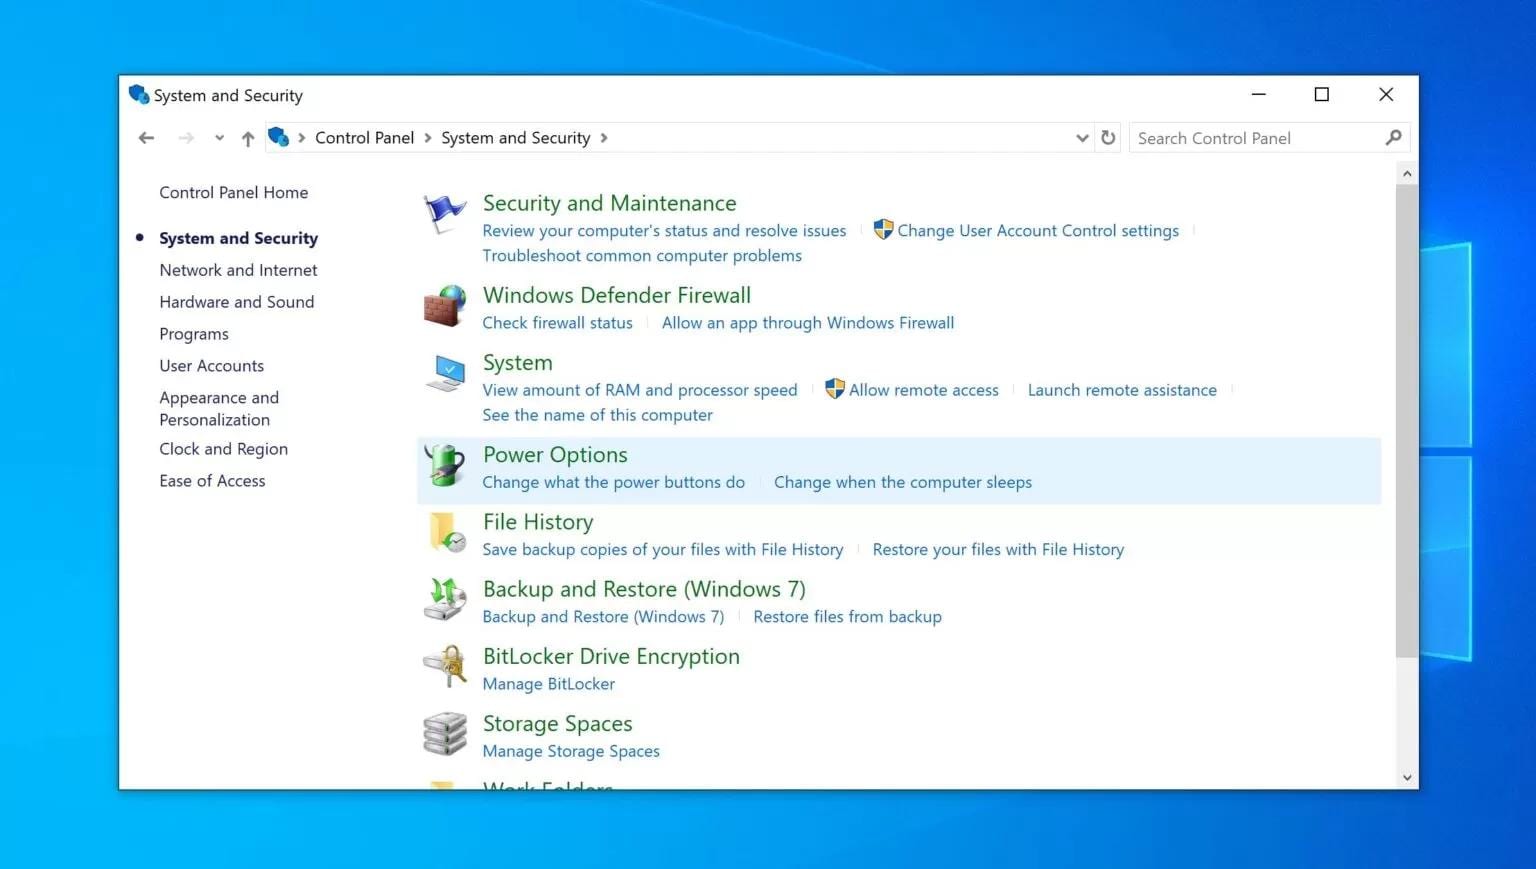
- Select the High Performance power plan toggle.
- (Optional) If it is hidden, click Show additional plans to reveal it. This forces the system to supply steady power to your storage controllers.
This simple tweak can improve your system's speed and reduce high disk usage.
Fix 6: Check for Hard Drive and SSD Errors (CHKDSK)
File system corruptions and bad storage sectors can completely freeze Windows I/O operations, forcing the operating system into a continuous read retry loop.
Steps:
- Type
cmdin the Windows search bar, right-click Command Prompt, and select Run as administrator. - Type the following command and press Enter:
chkdsk /f /r C: - When prompted to schedule the volume scan for the next restart, type Y and hit Enter.
- Restart your computer. Windows will run a deep hardware scan and automatically repair file system anomalies during the boot sequence.
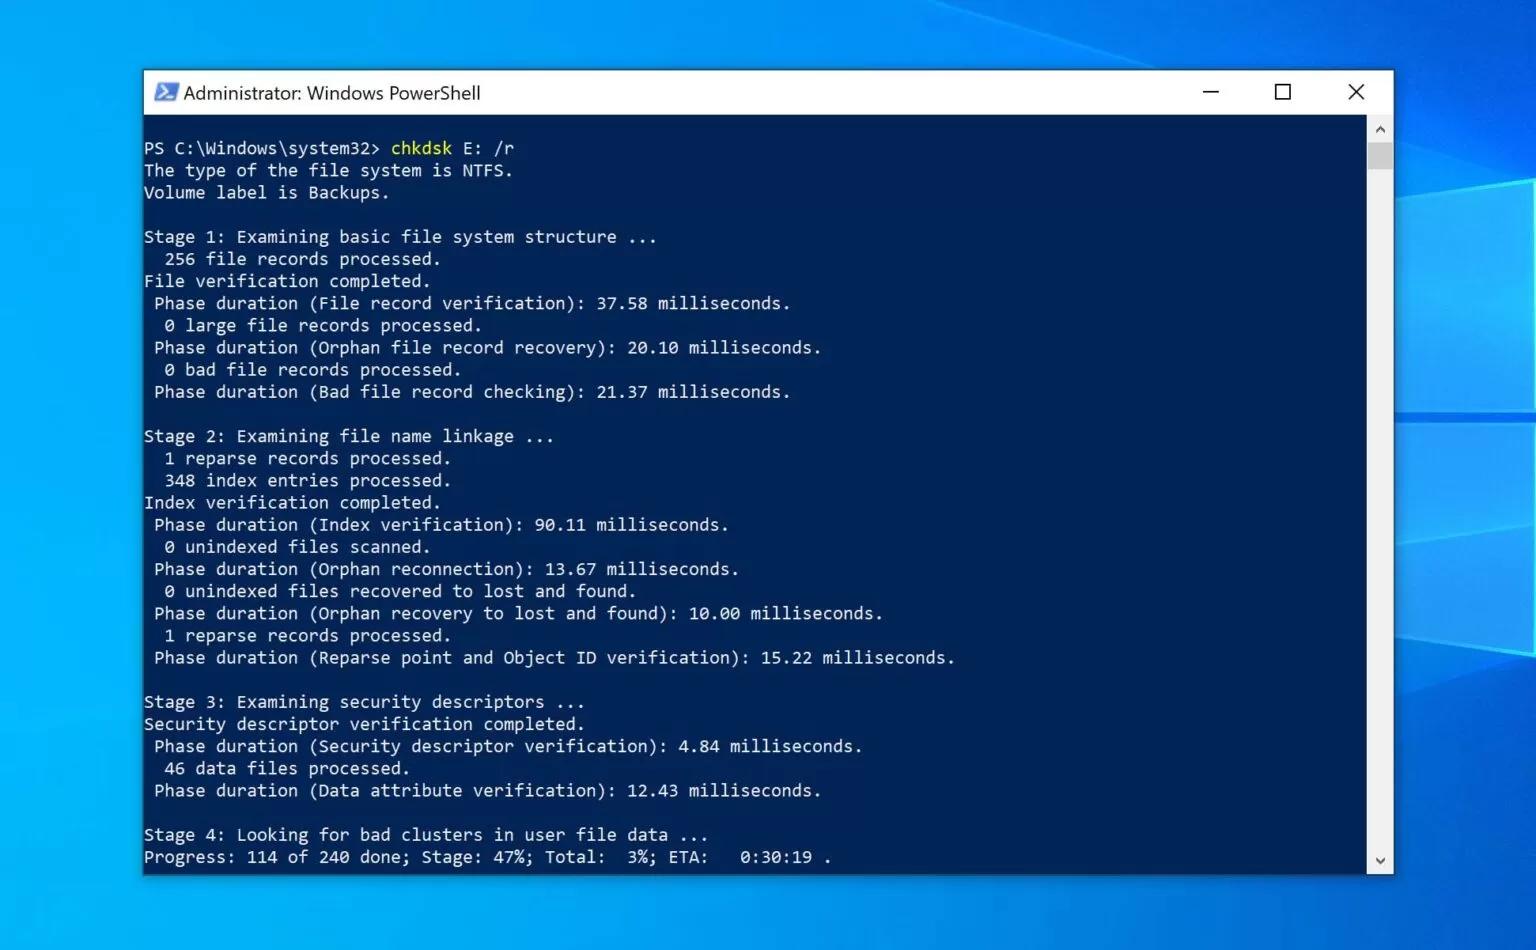
Regular disk checks help prevent future slowdowns and improve system stability.
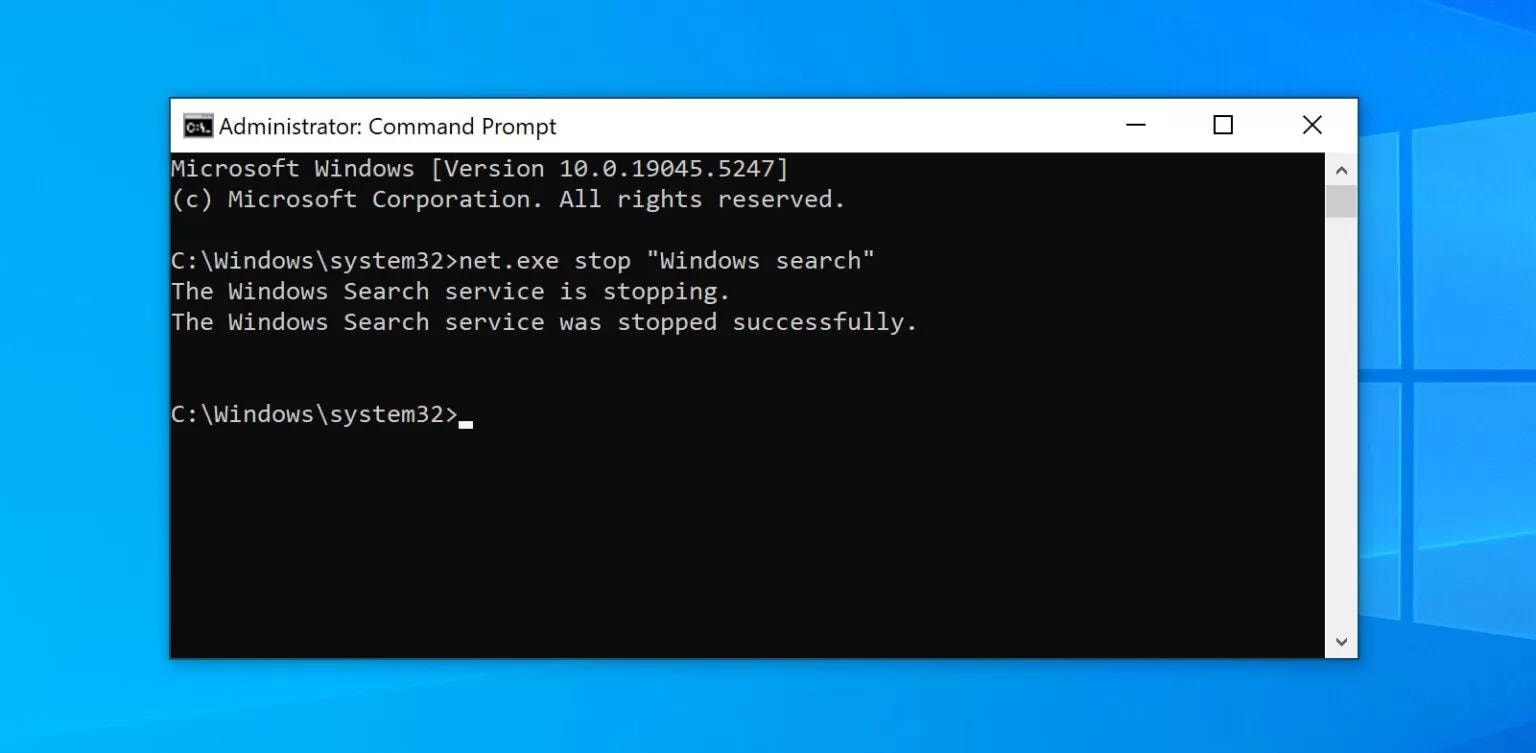
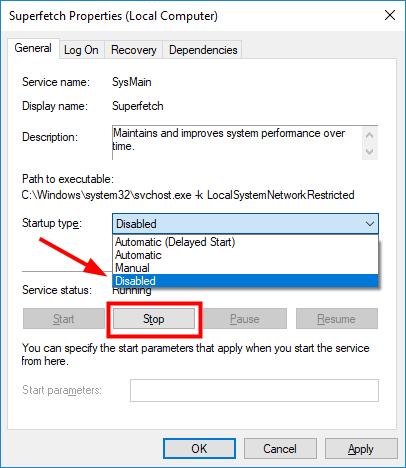
Fix 7: Disable the SysMain (Superfetch) Service
The SysMain service preloads frequently used applications into your system memory. However, it is notorious for causing prolonged 100% disk usage on traditional mechanical hard drives and older SSDs.
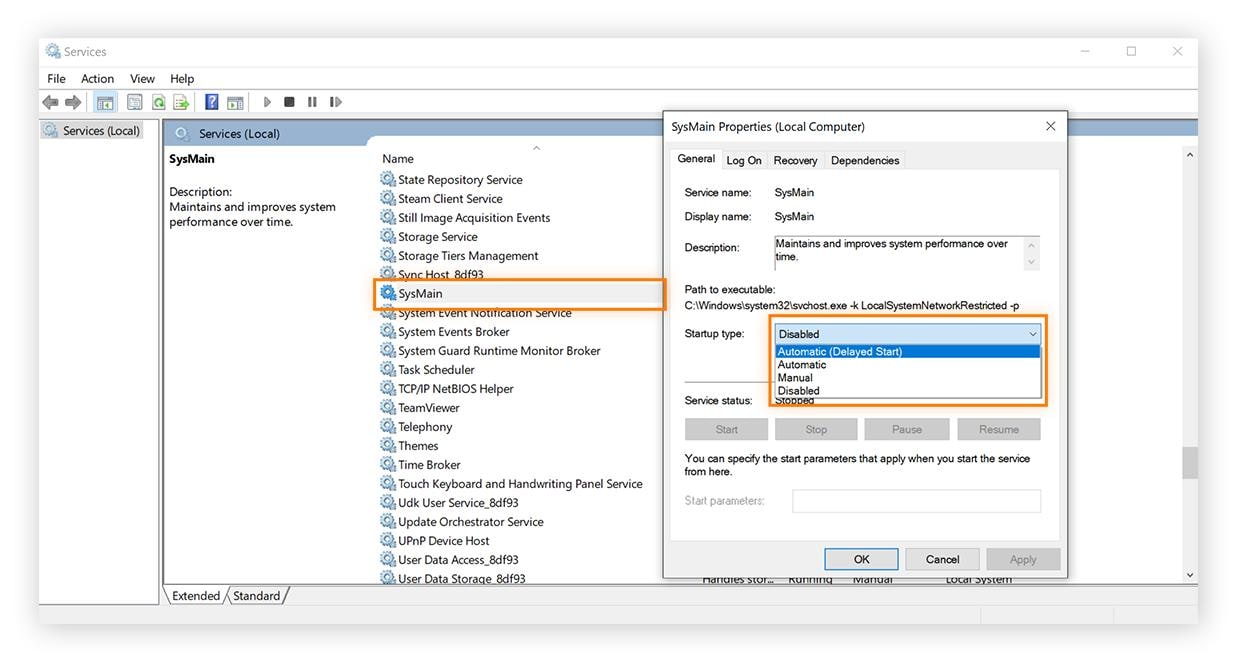
- Press Windows Key + R, type
services.msc, and press Enter. - Find SysMain (previously known as Superfetch) in the list and double-click it.
- Set the Startup type to Disabled.
- Click the Stop button to immediately halt the service, then click Apply and OK.
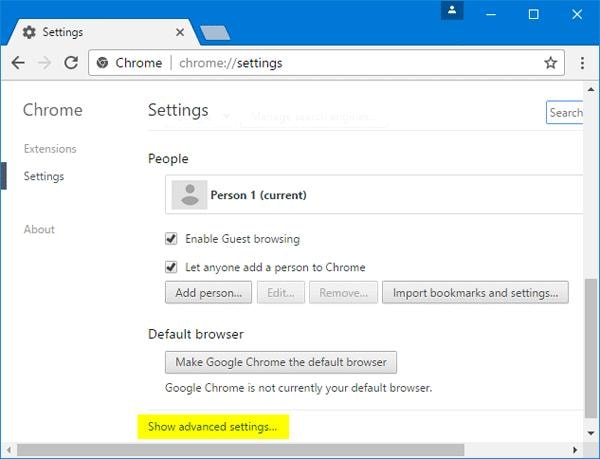
Fix 8: Optimize Google Chrome Storage Settings
Modern web browsers use intensive background caching. Tweaking Chrome's advanced performance features can immediately lower disk usage spikes.
Steps:
- Launch Google Chrome, click the three vertical dots in the top-right corner, and select Settings.
- Select Performance from the left-hand navigation sidebar.
- Locate Memory Saver and toggle it On (or turn off Preload pages under the Performance/Privacy menu) to stop the browser from aggressively reading and writing predictive data to your drive cache.
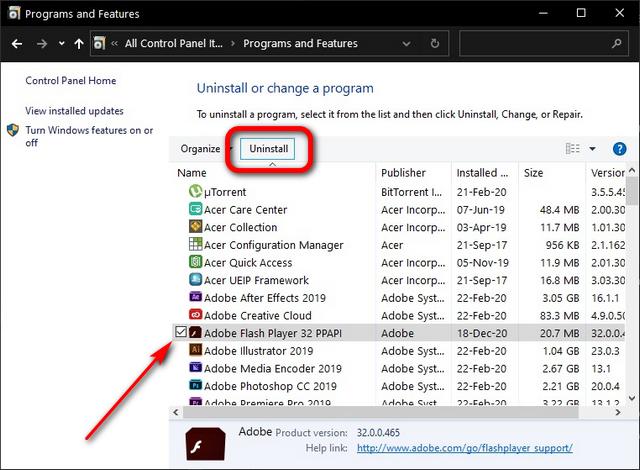
Removing Flash Player eliminates a potential resource drain and enhances system security and performance.
Fix 9: Update Storage Controller Drivers
Mismatched or outdated SATA AHCI / NVMe storage controllers can drop communication signals with Windows, causing the system to constantly read at max capacity.
Steps for Google Chrome:
- Right-click the Start button and select Device Manager.
- Expand the Storage controllers section (or IDE ATA/ATAPI controllers).
- Right-click your primary storage controller driver and choose Update driver.
- Select Search automatically for drivers and follow the prompts. If an updated proprietary driver exists, install it and restart your device.
Steps for Skype:
- Close Skype and ensure it's not running in the background.
- Navigate to C:\Program Files (x86)\Skype\Phone and right-click Skype.exe.
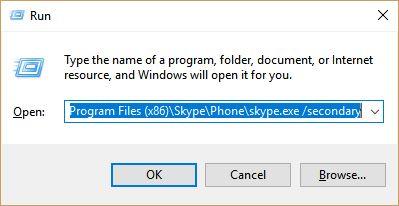
- Select Properties, go to Security, then click Edit.
- Set "ALL APPLICATION PACKAGES" to Write - Allow, then click Apply and OK.
Restart your PC and check Task Manager to see if disk usage has improved.
Fix 10: Wipe Your Drive and Perform a Clean Windows Reinstallation
If deep software troubleshooting fails, systemic registry corruption or an unresolvable OS error is likely forcing the 100% disk loop. A clean installation completely resets your system environment.
Step 1. Securely Back Up Your Storage Drive Using Wondershare UBackit
Creating a backup of your SSD is essential to protect your important files from accidental loss or system crashes. Wondershare UBackit provides a fast, secure, and efficient way to back up and restore data. With its user-friendly interface, you can easily back up files, partitions, or the entire drive. It also allows you to schedule automatic backups daily, weekly, or monthly for hassle-free data protection.
- Download, install, and open Wondershare UBackit on your PC.
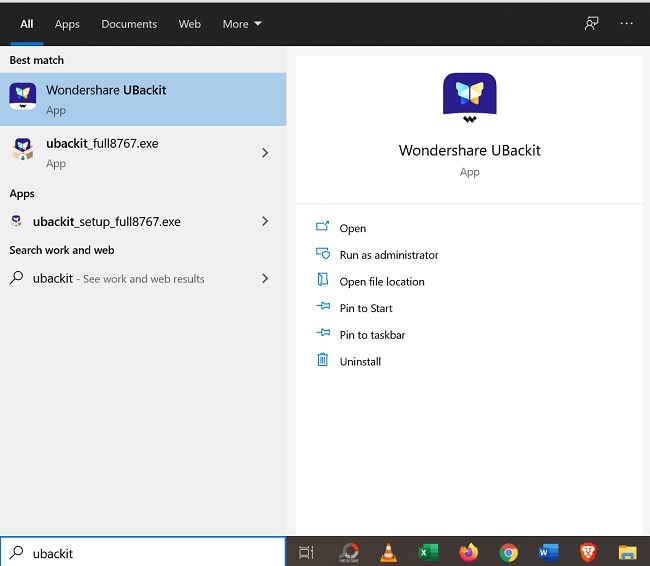
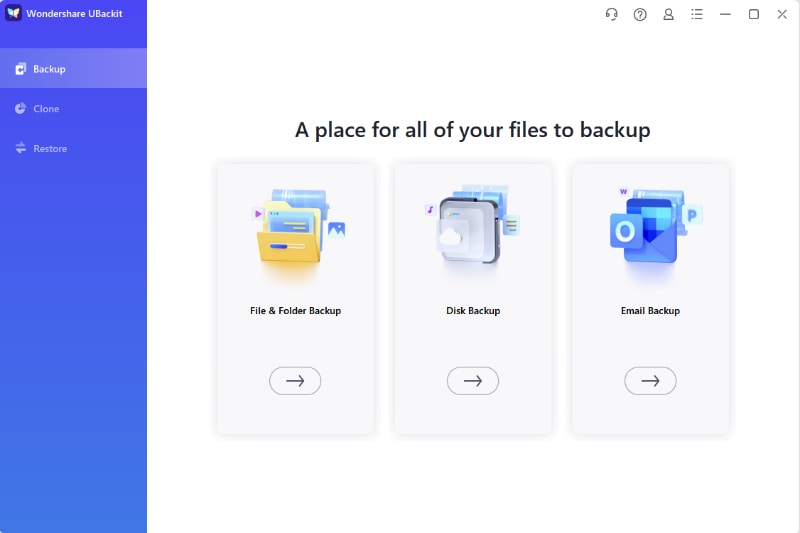
- Select Backup from the sidebar menu, then choose Disk Backup or File Backup.
- Select your primary system drive (C:) as the backup source, and choose an external hard drive or USB drive as your target destination.
- Click Backup to initiate the secure, automated data duplication process.
Step 2. Reinstall a Clean Copy of Windows
If you're still experiencing 100 disk in Windows 10 issues, reinstalling Windows can be the final solution. A fresh installation removes corrupted files, unnecessary programs, and potential malware, improving system performance. Ensure you back up essential data before proceeding.
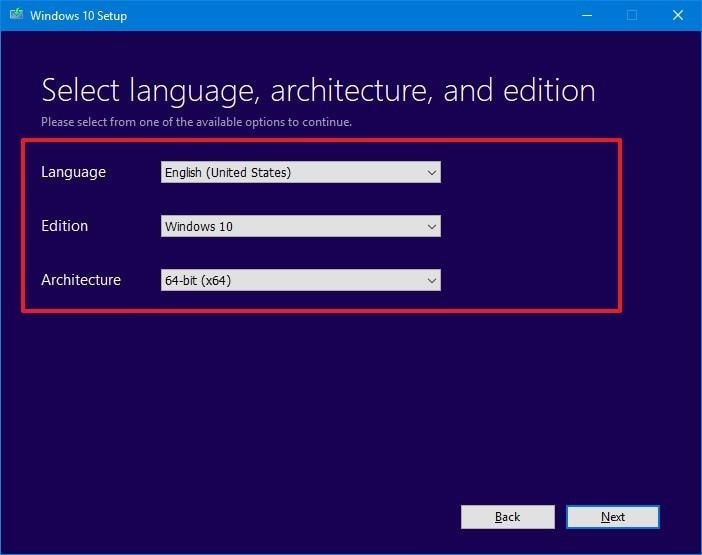
- Download the official Microsoft Media Creation Tool on an unimpacted computer to format and build a bootable USB installation drive.
- Insert the bootable USB into your target computer, restart the system, and enter the system BIOS/UEFI setup (typically by tapping F2, F12, or Del during boot). Set the USB drive as the primary boot override.
- Follow the clean installation configuration wizard, format your target internal drive partition, and install a fresh copy of the operating system.
After installation, update drivers and check disk usage in Task Manager.
Bonus Part: Recover Your Lost Files with Wondershare Recoverit
Deep system crashes, running advanced drive check utilities like chkdsk, or executing clean installations can sometimes result in accidental data loss or partition deletion.
If you lose critical photos, videos, or documents while resolving disk errors, Wondershare Recoverit provides an advanced data recovery solution. Equipped with built-in AI algorithms, Recoverit V14 scans deep within fragmented storage sectors, maximizing data recovery performance even on corrupted or unreadable file systems (NTFS, FAT32, exFAT, APFS).
- Select the Target Storage Location: Download and open Wondershare Recoverit. In the primary interface, choose the specific hard drive, SD card, or corrupted partition where your files were lost, then click Start.

- Deep Automated Scan: Recoverit will instantly deploy its deep scanning algorithms to analyze the drive's underlying raw sector data. You can watch the real-time scan progress or pause the process if your target files appear early.

- Preview and Recover Data: Use the filter sidebar to quickly locate specific missing files by type, format, or date. Double-click to preview the file contents to verify its integrity, select the target items, and click Recover to save them to a secure external storage location.

Recoverit provides an efficient way to recover lost data, ensuring you don't lose critical files while troubleshooting disk issues.
Conclusion
Resolving 100% disk usage on Windows requires a systematic approach, ranging from simple software adjustments like stopping the SysMain and Windows Search services to running CHKDSK repair routines. If your system requires a clean operating system reinstall, prioritizing a complete data backup is crucial.
Always keep an optimized toolkit ready—use Wondershare UBackit for routine data backups and deploy Wondershare Recoverit's advanced AI recovery engine to instantly pull back lost files if an unexpected storage failure strikes.
FAQ
-
1. How to fix 100% disk usage?
You can fix 100% disk usage by turning off unnecessary services, updating Windows, checking for malware, adjusting power settings, or reinstalling Windows to improve system performance. -
2. Does 100% disk usage slow down a PC?
Yes, 100% disk usage significantly slows down a PC, causing lag, freezing, and unresponsiveness since the hard drive is overloaded with read/write operations, affecting overall system speed. -
3. Is it 100% safe to delete temp files?
Yes, deleting temporary files is safe and helps free up storage. However, avoid removing system-related files when they are in use, as they may cause minor issues when running applications.


