Deleted or lost files from the SSD can have a significant impact on your data storage. If you are using a TRIM-enabled SSD card, it is completely bad news for you. For example, you accidentally hit the delete key and all your saved data will be lost. That is one dangerous thing to happen. But is there any way to recover deleted files from SSD TRIM?
Yes, you can. You will have to use a professional recovery tool and adopt proper methods through which you can recover the data. Adopting the right techniques and disabling TRIM can be extremely helpful. However, you don't want to affect the performance of your system. In this case, this blog will help you explore all the top ways to recover deleted files from SSD drive without affecting the performance of your system.
Try Recoverit to Perform SSD Data Recovery

In this article
Part 1: Understanding the TRIM Command
The TRIM command, when given, tells the SSD that any particular area containing it will no longer be used. Therefore, from the user's perspective, it signifies that the specific data from the document has been permanently deleted. However, the solid-state drive reads and writes information, which is why the data will not be deleted via the user command. The TRIM command plays an important role in efficiently ensuring better storage space use. It also optimizes the write performance of the SSD as when it is notified about data deletion, those particular blocks will be marked to be free for new data. Therefore, new information will be written at a better and improved speed.
Some of the key benefits of SSD trim recovery are as follows:
- TRIM command reduces the need for garbage collection as it notifies the particular SSD card about unused blocks. As a result, it plays an important role in ensuring faster write speed.
- TRIM does not initiate a frequent read-erase cycle. This plays an important role in maintaining space as some of the used blocks are freed up.
Part 2: Can You Retrieve Files from An Enabled SSD TRIM?
If TRIM is enabled, it will not be able to recover deleted files from USB. However, in order to improve the performance of the computer, consider using a TRIM-enabled SSD card. In this case, if you delete any data from the TRIM-enabled SSD card, the drive will immediately clear the sections.
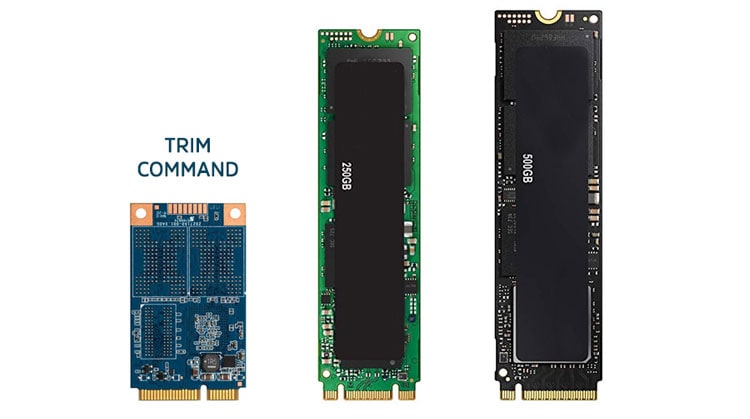
While it was earlier not possible to perform SSD TRIM recovery, it is now possible. Since the new generation SSDs have TRIM enabled, before you initiate any data deletion, you should disable it. Therefore, you will have the flexibility to restore the files if you accidentally delete any file from the SSD card.
Part 3: How to Check the SSD TRIM Status Before Recovering Deleted Files from SSD Trim?
The process to check SSD Drive TRIM status is different for different devices. Below are the steps on how you can check the SSD Drive TRIM for other devices.
Windows users:
Windows users can use the Command Prompt section to check the status of the TRIM command on their device. Below are the steps on how to do it the right way:
Step 1: Launch Command Prompt in your system and enter the command: fsutil behavior query disabledeletenotify. Press the Enter key on your keyboard.
The following results will be displayed and their meaning is as follows:
DisableDeleteNotify = 0; this means that the SSD drive TRIM is enabled.
DisableDeleteNotify = 1; this means that the SSD drive TRIM is disabled.
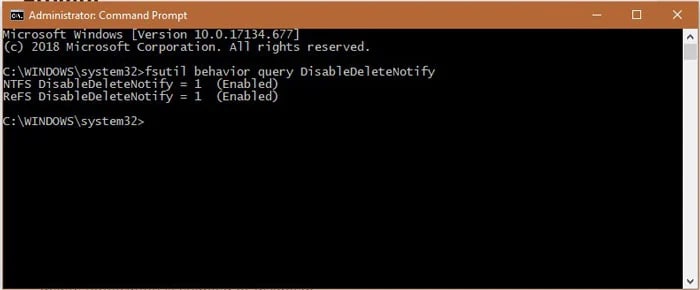
Step 2: If you find that TRIM is enabled in your device, type the command: fsutil behavior query disabledeletenotify 1 and disable TRIM in your system.

Mac Users:
Mac users can use the Terminal to check the TRIM status. Terminal works the same as Command Prompt in Windows systems. Follow the steps given below to check SSD Drive TRIM status using Terminal"
Step 1: Go to the Apple logo on your system and select About This Mac.
Step 2: From all the available options, choose System Report.
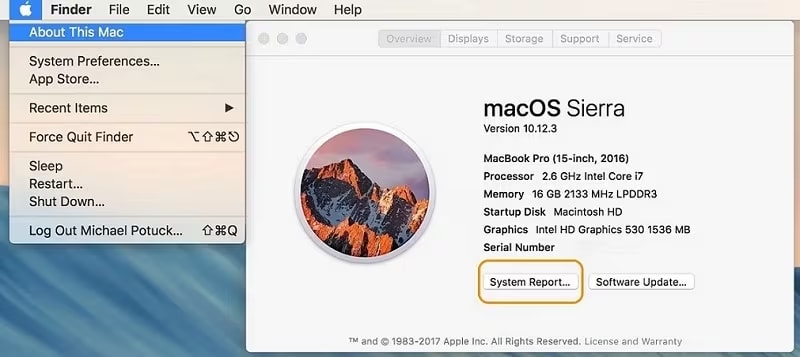
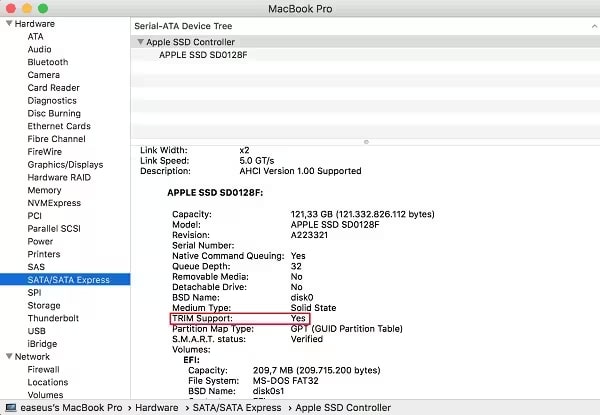
Step 3: Move to the Hardware section and then select SATA/SATA Express. Now, choose TRIM Support.
If the answer is Yes, it means that the TRIM is enabled.
If Mac users want to disable TRIM on their device, follow the steps given below:
Step 4: Launch Terminal in your device from the Utilities option under Applications.
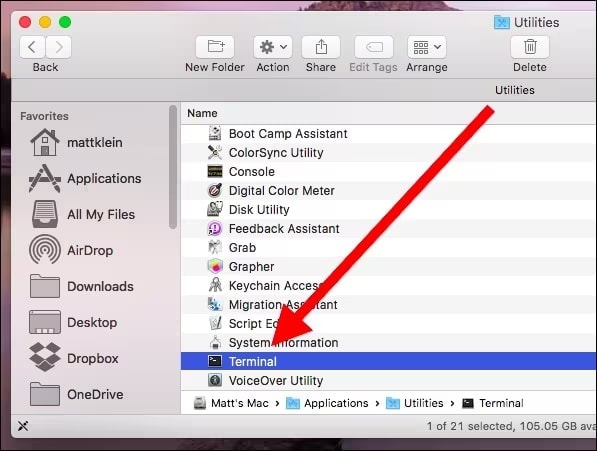
Step 5: Enter the following command: sudo TRIMforce disable.
A notice will appear; read it and press the 'Y' button on your keyboard if you want to proceed.
Part 4: How to Recover Your Deleted Data from a TRIM-Enabled SSD?
If TRIM is enabled on your SSD card, the data will be lost forever. Below are the steps you'll have to follow to recover deleted files from SSD:
Method 1: Restore Lost Files Using Wondershare Recoverit
A data recovery tool such as Wondershare Recoverit is a great option for SSD restore deleted files if that has happened due to TRIM Command. Since a lot of data is stored in your SSD card, you definitely wouldn't want it to go to waste by being lost completely. Therefore, using a reliable tool such as Wondershare Recoverit can be extremely helpful.
Wondershare Recoverit is available for free for Windows and Mac users. This software is compatible with all devices, ensuring that you can seamlessly recover deleted files from SSD. Wondershare Recoverit uses advanced algorithms to recover the data.
Below are the steps you must follow to recover deleted files from SSD drive using Wondershare Recoverit:
Step 1: Launch Recoverit in your System
Install and launch Wondershare Recoverit in your system. From the software dashboard, choose the location from where you want to recover lost data. Click on Start to begin scanning the area.

Step 2: Scan the Location
The tool will begin scanning the location. It will take some time depending on the drive size. The timing can range between a few minutes to a few hours. You have the flexibility to pause or stop the scan process. If you are not happy with the initial results, opt for the Enhanced Recovery option. This will help in large-sized video recovery.

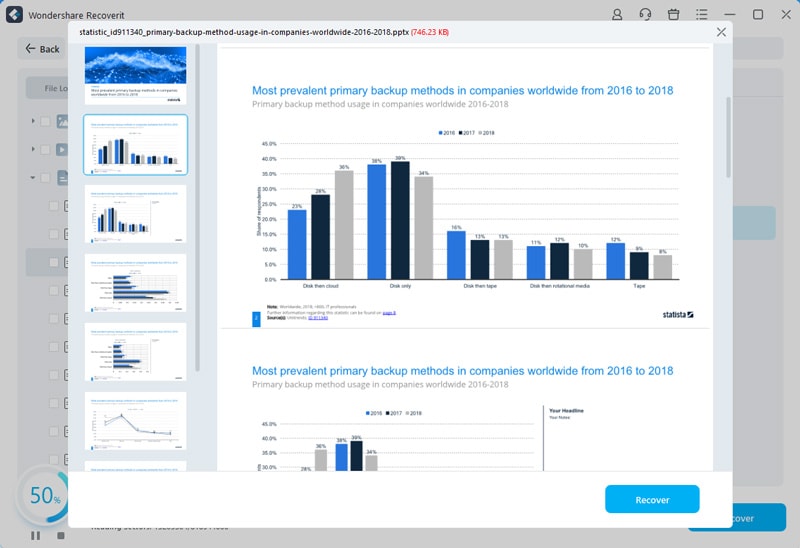
Step 3: Preview and Save the Files
As soon as the scan is complete, Recoverit will allow you to preview the files. Preview all the files and select the ones that you want to recover. Hit on the Recover button, choose a location where recovered videos are to be saved and confirm the process.
Method 2: Check if TRIM is Actually Enabled for Your SSD
The TRIM-enabled SSD may function in your device even when it has been manually disabled, or vice versa. Therefore, it is advisable that before you initiate the SSD TRIM recovery deleted files using data recovery software, you must check if it is enabled or disabled.
Beloe are the steps you'll have to check whether TRIM is enabled or disabled in your device:
Step 1: Launch the Command Prompt in your system.
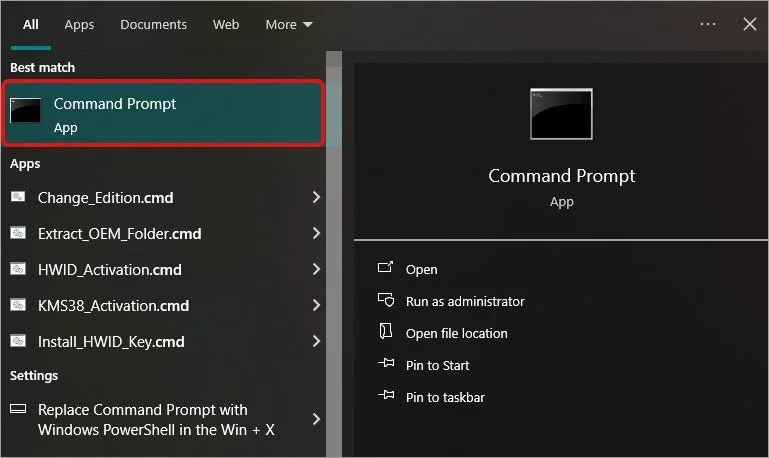
Step 2: Once the Command Prompt opens, type the command: fsutil behavior query disabledeletenotify. Hit the Enter button on your keyboard.
Step 3: If the DisableDeleteNotify result appears DisableDeleteNotify=1, it means TRIM is disabled. If DisableDeleteNotify=0 appears on your screen, it means TRIM is enabled.
Method 3: If TRIM is Enabled, Disconnect Your PC and Contact Data Recovery Services
If the TRIM command is enabled in your system, this is a huge risk and you must try to get rid of it immediately. When the TRIM command is enabled, it only means that more data will be erased from your system. Furthermore, if TRIM is enabled for your system, it will be more difficult for SSD TRIM recover deleted files.
Timing is one of the most important factors to consider as it can lead to significant data loss from your system if you are not mindful about it. You will have to disconnect your PC and reach out to a professional data recovery service so that you can avail the benefits. You must follow the steps below to recover deleted files from SSD due to TRIM from a data recovery service:
- You need to disconnect your system from the power source. This is to ensure that the TRIM command does not delete any more data from your system.
- You should connect with a professional data recovery service around you. These professionals use advanced tools and technology that help in recovering data loss due to TRIM-enabled SSDs.
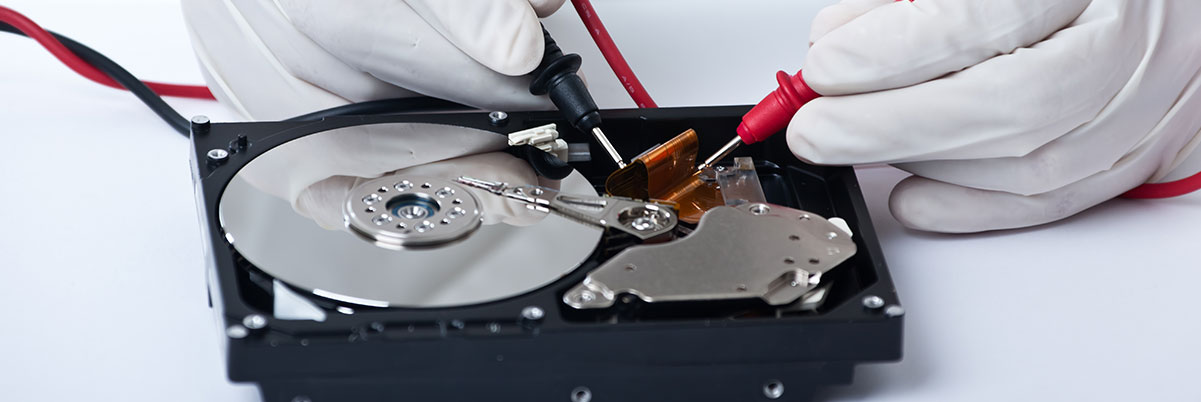
If there is no data recovery service around you, then you will have to connect with the best ones near your city. In this case, you will not have to visit them in person, but only ship the SSD to them. You can explain your problem and discuss what type of data you want to recover. After that, they will check the SSD and provide you with a quote. Then, you can ship the SSD; the professional data recovery service will help to recover deleted files from SSD drive within the specified timeline and then ship the newly recovered files from SSD TRIM recover in a new device. You should maintain complete security of the data while shipping the SSD to prevent it from any major damage.
Part 5: How to Disable TRIM for Better Recovery Chances?
If you are to disable the TRIM command, it will start affecting the performance of the SSD card. Therefore, once you disable the command, it will stop working. Disabling TRIM will also play an important role to recover deleted files from SSD.
You need to follow the steps given below to SSD Drive TRIM disable:
Step 1: Type cmd in the search bar.
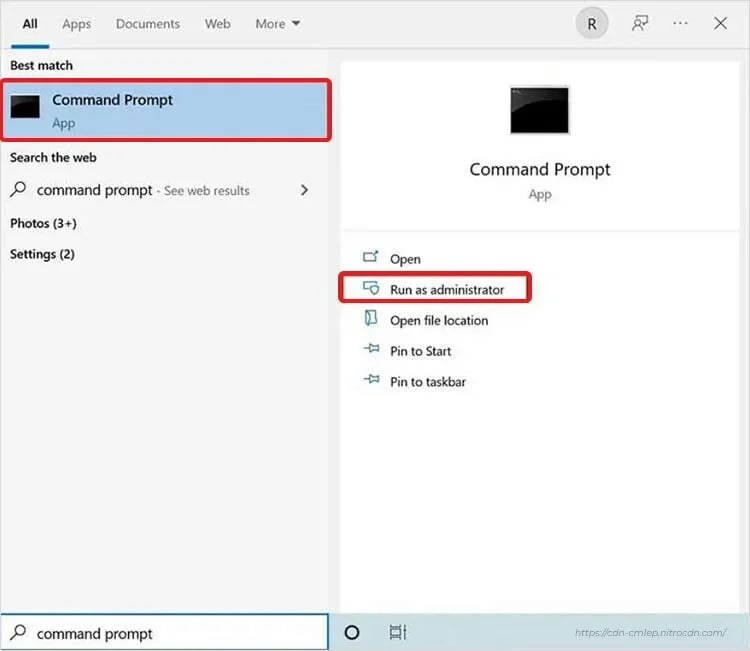
Step 2: Right-click on Command Prompt.
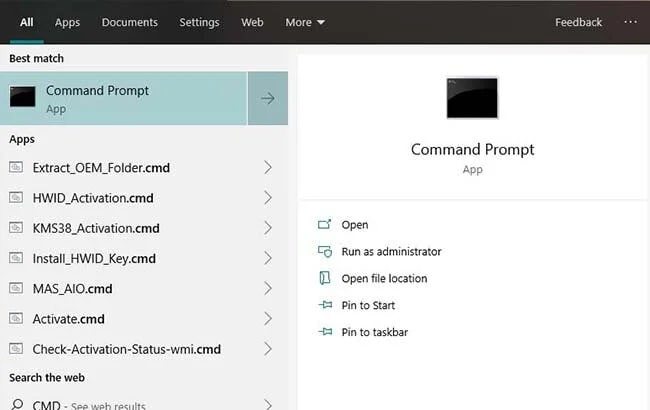
Step 3: Select Run as Administrator to open the command prompt section on your device.
Step 4: Once the command prompt box opens, type fsutil behaviour set DisableDeleteNotify 1 and press the Enter button.
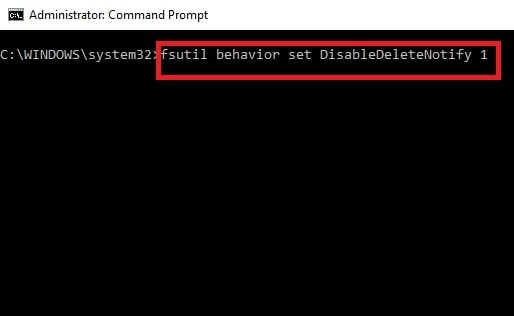
Step 5: Now, type fsutil behavior query DisableDeleteNotify. Hit the Enter button on your keyboard. This will allow you to check if TRIM is enabled or disabled.
If the result appears as DisableDeleteNotify = 1, it means that the TRIM is disabled in your system.
Conclusion
Your system's SSD is a great tool for not only improving the performance but also storing the data. However, if TRIM is enabled in your system, it can lead to significant data loss. In such a situation, you will have to use a professional data recovery tool such as Wondershare Recoverit to initiate the recover deleted files from SSD. Make sure you have disabled TRIM in your system before you begin the data recovery process using Wondershare Recoverit.
FAQ
1. Does Disabling TRIM Affect the Performance of My SSD?
Yes, disabling TRIM can affect the performance of your SSD card but in a slightly bad way. When large amounts of data are being written, and TRIM is not enabled, it will slow down the performance of the SSD card. This is because the SSD card will have to spend more time performing garbage collection before the old data is replaced with the new one.2. Can I Re-enable TRIM After Recovering My Data?
Yes, you can re-enable TRIM after SSD restore deleted files. Thus, you will be able to enjoy the benefits of TRIM in regards to improved performance.3. Can Data Recovery Software Bypass TRIM to Recover Deleted Files?
The data recovery software often cannot bypass the impact of the TRIM command. Thus, if particular data blocks are marked to be free, SSD will remove the data. In this case, you will have to reach out to a reliable and professional data recovery service that uses advanced tools and techniques to recover deleted files from SSD.


 ChatGPT
 Perplexity
 Google AI Mode
 Grok
Grok


