


 TL;DR:
To successfully create a Windows 11 bootable USB on a Mac, you need an 8GB or larger drive formatted to ExFAT with a Master Boot Record (MBR) scheme and a creation method suited to your specific macOS version and hardware.
● Use Boot Camp Assistant for an automated process only if you are running macOS Catalina or older on an Intel Mac and your Windows 11 ISO file size is strictly under 4.5 GB.
● Execute Terminal commands (`diskutil` and `rsync`) if you need a free, native method on newer Macs, which requires manually mounting the ISO and transferring files without a graphical interface.
● Opt for the paid UUByte ISO Editor application to bypass manual command lines and use a graphical interface that is universally compatible across all Mac devices and macOS versions.
Ask AI for a summary
 ChatGPT
 Perplexity
 Gemini
 Claude
 Grok
Grok
Want to run Microsoft's latest OS but only have a Mac? It might seem tricky, but it's entirely possible to create a Windows 11 bootable USB on a Mac. This installation media is your key to installing Windows 11 on a compatible PC or using it for repair purposes, and your Mac has all the tools you need to get it done.
While macOS doesn't offer a one-click solution like Boot Camp Assistant for this specific task, the process is straightforward with the right guidance. This guide will walk you through several proven methods, ensuring you can successfully create a Windows 11 bootable USB on your Mac, regardless of your technical comfort level.
In this article
Preparations for Creating a Windows 11 Bootable USB on Mac
Before you jump into the creation process, you will need a couple of additional tools to reach your goal. Here’s a list of everything you need:
- 💡A USB with more than 8 GB of memory that you can format.
- 💻A Mac device (make sure it is plugged in so you don’t lose power mid-process).
- 🌐A stable, strong internet connection.
How To Make a Windows 11 Bootable USB on a Mac?
You can create a Windows 11 bootable USB on a Mac in several ways. We have prepared the 3 most reliable options, and you can choose the one that best fits your preferences and needs.
| If you… | You can choose… |
| 😊 seek the easiest way | Solution 1: Boot Camp Assistant |
| 💪 are an advanced terminal user | Solution 2: Terminal Commands |
| 💯prefer feature-packed utility | Solution 3: UUByte ISO Editor |
Solution 1: Use Built-In Software: Boot Camp Assistant
If your Windows ISO file is less than 4.5 GB, Boot Camp Assistant is your ideal choice for making a bootable USB. It is a default tool to help you reach your goal within minutes. However, this feature is only available for Intel Macs with Catalina or older versions.
If you have such a device, here’s how to make a bootable USB on Mac:
- Open Boot Camp Assistant.
- Select Create a Windows 11 or Later Install Disk to initiate the process.

- Import the Windows 11 ISO into the app and choose a USB where you want to store the operating system.
- Click Continue to finish the process.

This solution may be the easiest one, but it has its pros and cons, as you will see below.
Solution 2: Using Terminal Commands
Terminal is also a built-in tool where you can input commands and tell your device what to do. However, this is the most complex option for creating a bootable USB. You may want to opt for another solution if you have no experience with commands or the Terminal feature.
If, on the other hand, you want to enjoy a fully customizable experience, here’s what you should do:
- Open the Terminal app and input the diskutil list external command.

- Detect your USB and remember the name.
- The next step is to format the USB using the following command: diskutil eraseDisk MS-DOS WIN11 disk3. Make sure to change the disk name to fit your USB.

- Now, you need to mount the operating system on a Mac to copy files. Input this command hdiutil mount ~/Desktop/Windows_11_DEV_EN.iso and change the path and name accordingly.
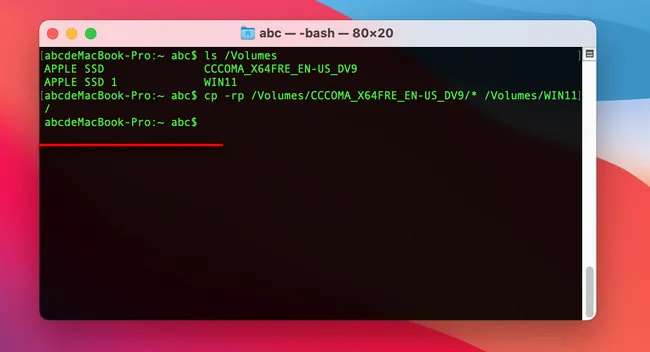
- Find the volume of your USB and Windows by inputting the Is/Volumes/ command.

- In this case, WIN 11 is the name of the USB, and CCCOMA_X64FRE_EN-US_DV9 is the mounted Windows 11 ISO.
- The last step is to copy the files and transfer them to your USB. You can do it by inputting the following command: rsync -avh — progress /Volumes/CCCOMA_X64FRE_EN-US_DV9/* /Volumes/WIN11/.
Although Terminal is one of the most efficient tools, it’s not really user-friendly. Let’s check out some of the pros and cons.
Solution 3: Use the Third-Party App: UUByte ISO Editor
If you don’t want to use integrated applications and solutions and want to rely on feature-packed third-party solutions, you can use UUByte ISO Editor. It’s one of the most reliable and easy solutions on the market, perfect for anyone without experience in the field.
It’s compatible with all Mac devices and operating systems. Here’s how to use UUByte ISO Editor:
- Download UUByte ISO Editor and run the program.
- Select the Burn option.

- In the next window, add your Windows 11 ISO and choose your USB from the drop-down menu.

- Click the Burn button.
In just a few minutes, you will have your bootable USB. However, some cons may be deal-breakers, as you will see below.
Video Tutorial on How to Download and Install Windows 11
Bonus: How To Save Your Crashed Data When Your Windows 11 Fails To Reboot?
Sometimes, things may not turn out the way you want. You may have done everything perfectly, and your Windows 11 still failed to boot. In this case, losing your data may be devastating and stressful, but you shouldn’t worry because there is a solution to this problem.
You will need a third-party software solution, such as Recoverit, to get your data back unharmed. It’s crucial to act fast and download Recoverit as soon as possible for the best experience.
Once you download the program, follow the guide below to recover your data:
- Open the program and choose System Crashed Computer from the available options.

- Select a mode for your bootable drive (either USB or CD/DVD) and click the Create button to start.
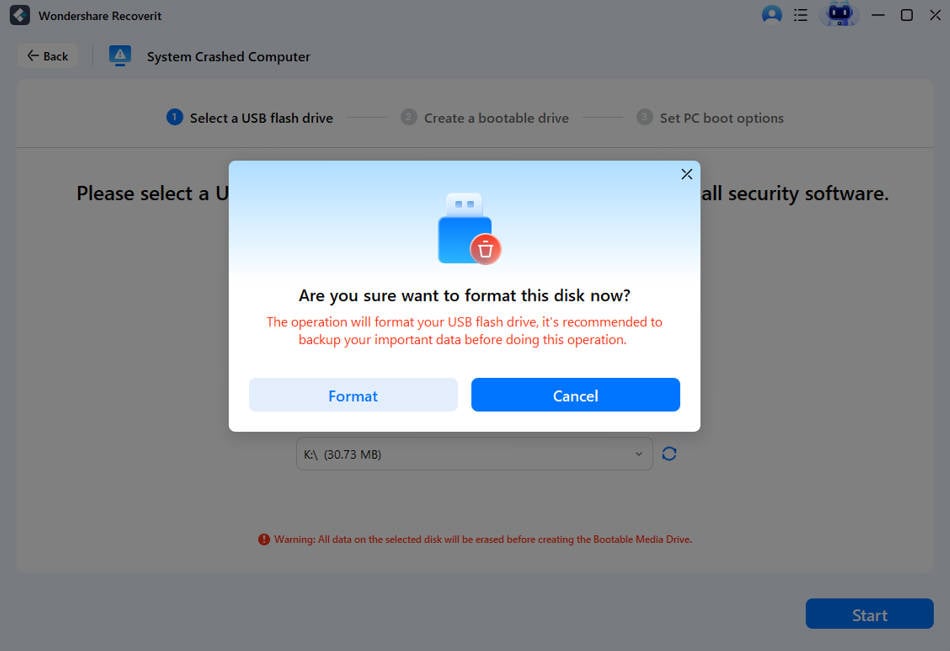
- You need to format your device, so click the Format button to complete this process.
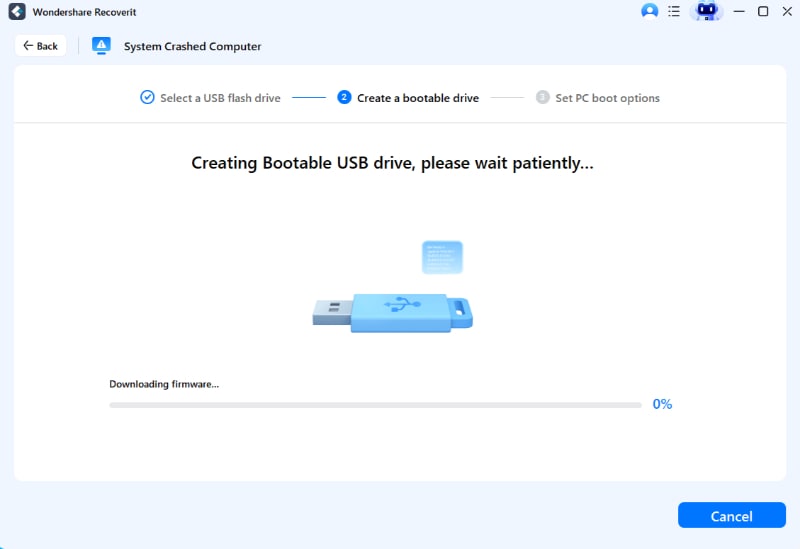
- The program will start creating a bootable drive, so keep it plugged in.
- Follow the onscreen guide to recover data.
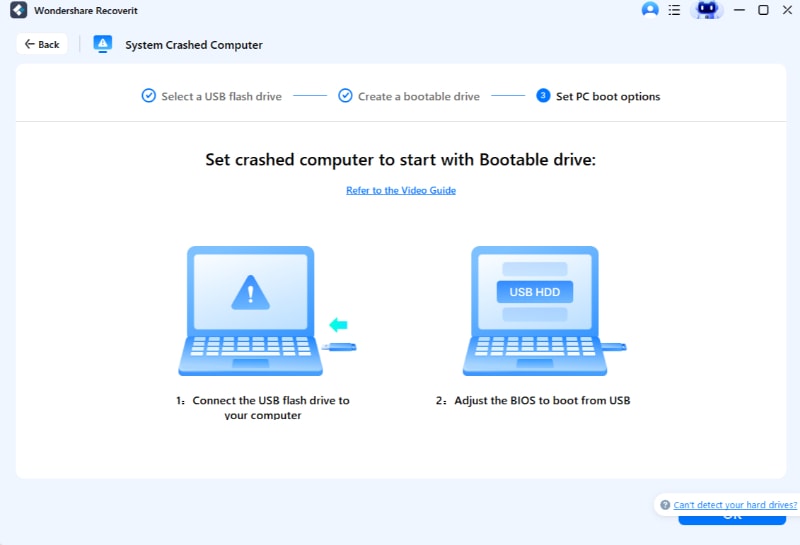
After creating a bootable drive, you should restart your computer and enter BIOS by clicking the F12 key. Launch Recoverit with WindowsPE and start copying your data.
Conclusion
Creating a bootable Windows 11 USB via a Mac device may seem challenging. However, with the help of our guide, you can reach your goal quickly. We have presented the best ways to create a bootable USB. Don’t forget to have a backup plan if you lose your data or your Windows fails to reboot.
People Also Ask
- Why do I get a "not enough free space" error on my USB drive when there clearly is?
This often happens due to incorrect formatting or hidden partitions. First, reformat the USB drive to ExFAT with a Master Boot Record (MBR) scheme using Disk Utility on your Mac. This ensures compatibility and removes any residual data, which should resolve the space issue for your computer installation USB.
- Can I create a bootable Windows 11 USB on a Mac without using Terminal?
Absolutely. While Terminal is a powerful native tool, several reliable third-party applications can simplify the process. These apps often provide a graphical user interface, guiding you through selecting the ISO file and the USB drive, making the USB installation media creation process more intuitive.
- What is the correct format for a Windows 11 bootable USB on a Mac?
For maximum compatibility, you should format your USB drive as ExFAT. This file system is readable and writable by both macOS and Windows. When formatting in Disk Utility, ensure the scheme or partition map is set to Master Boot Record (MBR) before you start creating the bootable drive.
- My Mac isn't recognizing the Windows 11 ISO file. What should I do?
Ensure your Windows 11 ISO file is not corrupted by verifying its checksum (if available from Microsoft) or by re-downloading it from the official Microsoft website. Also, check that the file has a .iso extension and is located in a simple directory path (e.g., your Downloads folder) to avoid permission issues.


