


 TL;DR:
To boot a Lenovo computer from a USB on Windows 10 or 11, create an installation drive using the Microsoft Media Creation Tool, disable Secure Boot in the BIOS, and select the USB via the F12 Boot Menu.
● Requires a FAT32-formatted USB drive containing at least 16GB of available storage alongside the relevant Windows 10 or 11 ISO file.
● If the device refuses to boot from the USB, press F1 or F2 during startup to access the BIOS and disable the Lenovo Service Engine located under the Security tab.
● For crashed systems incapable of standard booting, Wondershare Recoverit can be utilized on a separate functioning computer to create a secondary bootable drive for file extraction.
Ask AI for a summary
 ChatGPT
 Perplexity
 Gemini
 Claude
 Grok
Grok
If you’re a proud owner of a Lenovo laptop, you probably want to install Windows 10 or 11 on it. You’ll be happy to know that this is a simple process anyone can do – we’ve created a step-by-step guide to help you do this quickly. If your current OS malfunctions, you must boot from USB to reinstall Windows.
A USB boot is a technique used for installing a Windows operating system on a computer or laptop. Instead of using a drive or a disc, you can boot from a USB because it’s convenient and quick.
Here’s what you need to know to boot Lenovo from USB.
| Scenario | Solution |
| Steps to Boot Lenovo From USB on Windows 10 & 11 | Step 1. Create a bootable USB (Using the Media Creation Tool) |
| Step 2. Boot Lenovo With USB via BIOS | |
| Can't Boot Lenovo From Windows 10 & 11 USB Drive | Tip 1. Check Lenovo Service Engine |
| Tip 2. Check Settings When Creating Bootable Media |
Preparations for Booting Lenovo With USB on Windows 10 & 11
- ⏰Time required: 5-10 minutes
- 💻OS installed: Windows 10/11
- 🔧Required tools: USB drive, Lenovo desktop or laptop
- ⭐Required software: Windows 10/11 ISO installation, Microsoft Media Creation Tool
Before you can boot your Lenovo device from a USB, download a Windows ISO file, Microsoft Media Creation Tool, and prepare a USB drive with at least 16GB of storage formatted to the FAT32 file system. The process is entirely free, and it doesn’t require a lot of time. Anyone with basic computer skills can successfully boot Lenovo from USB.
Steps to Boot Lenovo From USB on Windows 10 & 11
Before starting:
- Download and install the Microsoft Media Creation Tool;
- Download Windows ISO: Windows 10 or Windows 11;
- Format your USB drive;
- Plug your USB drive into the device.
Step 1. Create a bootable USB (Using the Media Creation Tool)
- Open Media Creation Tool.
- Select Create installation media and click Next.

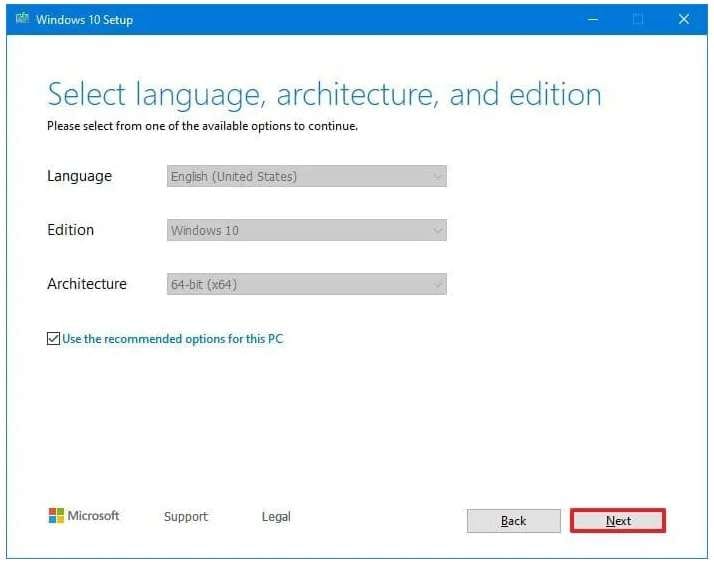
- Adjust Language, Edition, and Architecture (select Windows 10 editor for Windows 10 ISO and Windows 11 edition for Windows 11 ISO). If you’re unsure about the settings, check Use the recommended options for this PC and click Next.
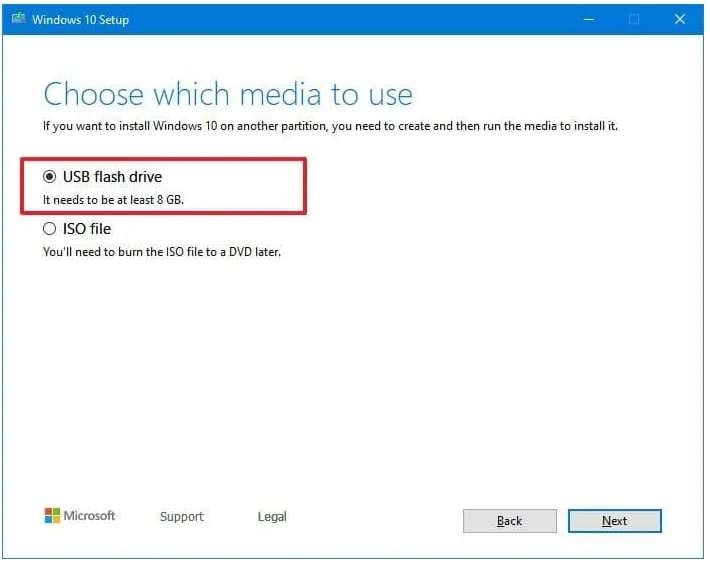
- Select the USB flash drive option, click Next, and click Finish to complete the process.
Step 2. Boot Lenovo With USB via BIOS
After creating a bootable USB, you must first change the boot order. The first step is to disable Secure Boot:
- Restart your device and repeatedly press F1 or F2 (depending on the device) to enter BIOS.

- Navigate to Security and then Secure Boot.
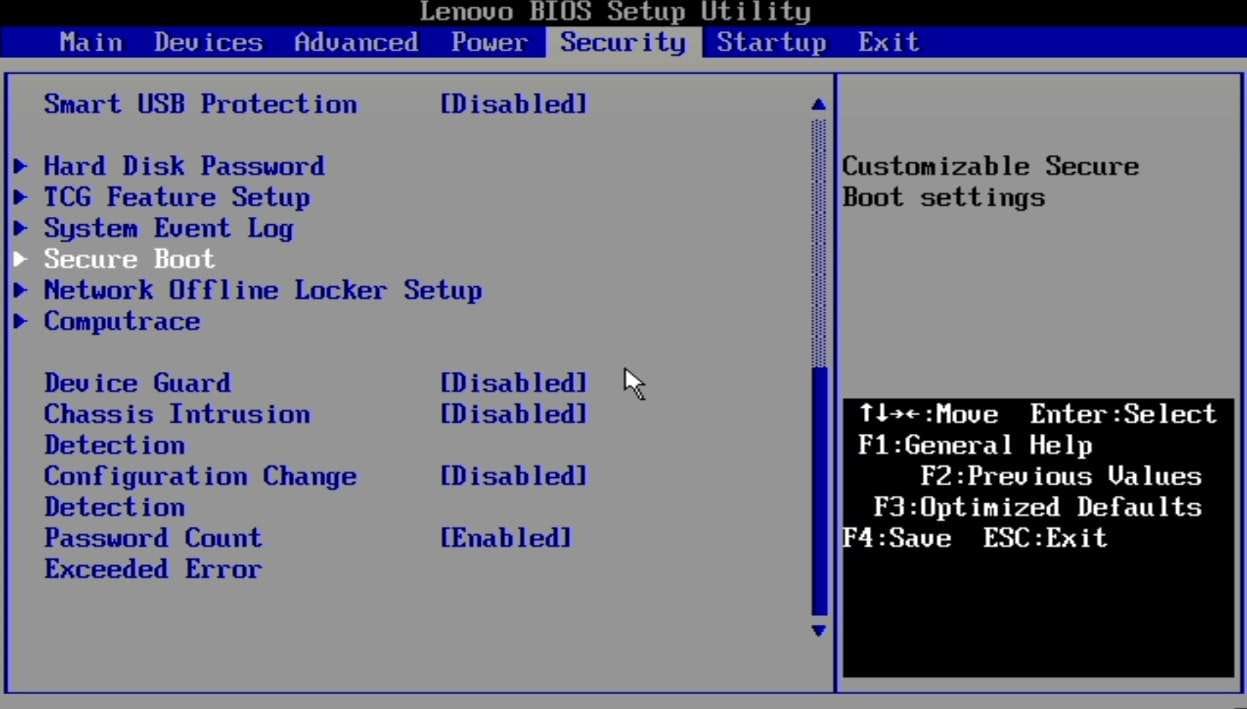
- Go to Secure Boot and press enter to disable. (If Secure Boot is already disabled, skip this step).

- Exit BIOS & save changes.
Then you can boot Lenovo from USB:
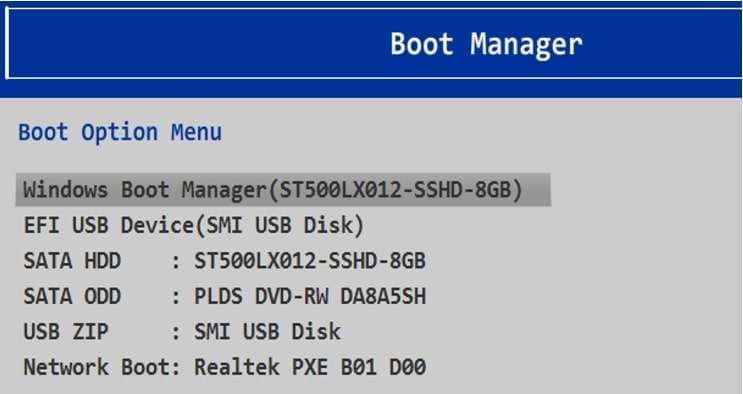
- Restart your device and repeatedly press F12 to enter the Boot Menu.

- Use the arrow keys to navigate to your bootable USB and press enter to select.
Troubleshooting: Can't Boot Lenovo From Windows 10 & 11 USB Drive?
There are two main reasons why Lenovo should avoid booting Windows installation from USB. Here’s how you can deal with them:
Check Lenovo Service Engine
- Press F1 or F2 while booting to enter BIOS.
- Go to the Security tab and disable the Lenovo Service Engine option by pressing enter.
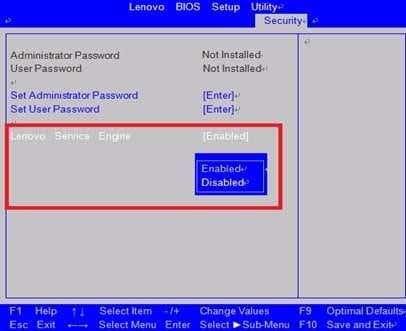
- Save and exit BIOS.
Check Settings When Creating Bootable Media
Users usually incorrectly create bootable media, and this creates issues later. First, check if the USB drive is in proper format (FAT32 or exFAT), see if you have enough space, and ensure the drive is not corrupted. Ensure you’ve selected the right language, OS edition, and architecture.
How to Recover Your Vital Files From Unbootable Lenovo on Windows 10 & 11?
If your Lenovo computer has crashed and you cannot create a bootable USB or boot from USB using BIOS, you can use Wondershare Recoverit to create a bootable drive on another computer.
Before doing anything, connect a blank USB to a working device and launch Wondershare Recoverit.
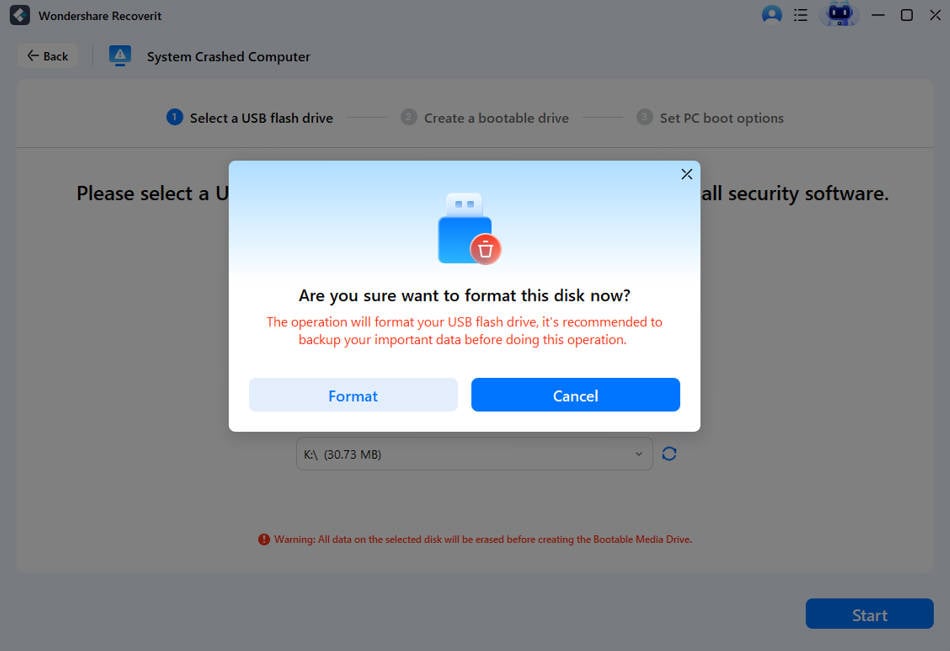
- Select System Crashed Computer on the left and click Start.

- Select your blank USB drive in the next window and click Start.

- Click Format in the next window and wait until the process is complete.
- Connect the bootable USB to the crashed device, turn it on, and repeatedly press F12 to enter the Boot Menu.
- Use the arrow keys to navigate to your bootable USB, press enter to select, and restart the device.
- In the next window, select Data Recovery (make sure you have a working hard drive connected to the computer).

- When scanning is complete, select the hard drive to recover data and click Recover.
Use this video guide to follow the steps carefully:
Conclusion
Lenovo computers and laptops are great and make our lives convenient and easier, but if you want to reinstall your OS or cannot boot your laptop normally, you should use the tips we mentioned today.
Boot your Lenovo from a USB to reinstall your windows, or use Wondershare Recoverit if your device has crashed and doesn’t work. Furthermore, you can also use it to salvage your data from your malfunctioning hard drive. Follow these steps closely, and we guarantee 100% success!
FAQ
-
What is the BIOS key for Lenovo laptops/computers?
It all depends on the device model. In most cases, you must press F1 or F2 to enter BIOS. Make sure to press the button several times repeatedly to access the BIOS. If you have Novo on your device, you can also use it to enter BIOS. Devices that have a Boot Menu can be accessed using F12. -
Can you boot a Lenovo laptop from BIOS?
Yes, of course. You can boot Lenovo from Bios, but you must create a bootable USB before you do that and change the boot priority. Once you’ve done that, restart your device, and it will boot automatically from your USB. -
What is BIOS on Lenovo?
BIOS is short for Basic Input Output System, and this small code is located on your board chip. When you start your device, this is the first software to turn on and identify hardware, configure its parameters, test all systems, and connect the operating system to the hardware.


