First things first – don't panic. We promise your data will be safe. There are a couple of things that you'll have to do, though. In this article, you'll read everything you need to know about a RAW SSD, how to fix a RAW SSD drive, and how to save your data.
In this article
What Is a RAW File System?
When a file system is marked as RAW, your operating system cannot see or recognize it. You or your OS cannot access a drive with a RAW file system. Such a disk also becomes RAW, so you're dealing with a RAW drive or RAW partition.
Reasons Why Your SSD Is RAW

As you know, your SSD is also a drive. It's a solid-state drive that performs the same basic function as a traditional HDD – it allows you to store data. Like any other type of storage with a file system on it, SSD can get RAW, too. Even the best ones do.
How does that happen? Why is your SSD RAW? There are a few reasons:
- Missing file system – If your computer shows a RAW SSD, it means the SSD contains a file system that is unrecognizable or unreadable by your OS.
- File system corruption – Corruption is one of the top reasons a file system turns RAW. It can happen due to accidental deletion, formatting, or viruses.
- Poor maintenance – Physically damaged solid-state drive can show RAW errors, too. If you don't take proper care of your SSD, it can become RAW.
- Malware infection – File systems can become RAW due to a virus infection or some other type of malware attack. The infection can spread to the entire SSD.
- Bad SSD sectors – A bad sector is a memory unit on your SSD that cannot be read and accessed because of physical damage or logical error.
Now that you know what can cause RAW file systems, you should be able to pinpoint what's wrong with your SSD. In any case, the following sections will show you what to do next.
Recover Data From Your RAW SSD

So, your SSD is RAW – that much is clear. What now? There is good and bad news. First, you'll be glad to hear you can fix a RAW file system in several ways. Unfortunately, many of these solutions will result in permanent data loss, with all your SSD files erased.
Besides going back in time and backing up everything you've got on your SSD, there's nothing you can do to prevent this data loss. However, you can recover or unerase RAW files.
You will need a capable data recovery tool such as Wondershare Recoverit to do that. This tool must be able to perform RAW data recovery or reverse data loss after formatting. Wondershare Recoverit can do both, regardless of the file type or the SSD device you're using.
With Wondershare Recoverit, you get a powerful tool with many useful features:
- Support for NTFS, FAT, HFS+, APFS, and many other file systems.
- Data recovery algorithm that recognizes virtually all SSD devices.
- Support for photos, music, videos, Word files, PDFs, and more.
- Recovery success rate of 98% in over 500 data loss scenarios.
- Easy-to-use interface with straightforward steps for data recovery.
If you want to recover data from a RAW SSD with the app, follow these steps:
- Download Wondershare Recoverit for your OS from the official website.
- The setup takes a few minutes, after which you can launch Wondershare Recoverit.
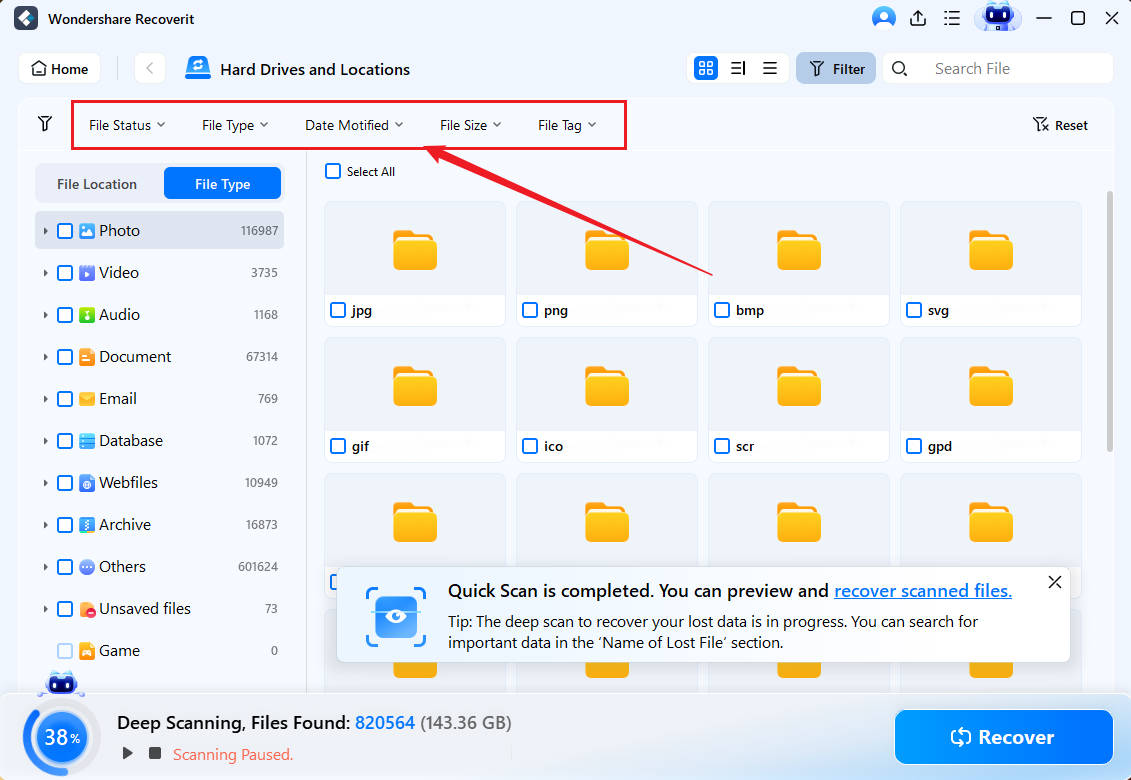
- Select your SSD storage device from the Hard Drives and Locations panel.

- This will trigger a deep scan of your RAW SSD, looking for recoverable files.
- During the scan, you can see all the files it digs up from your SSD.

- When the scan is finished, you can use filters to search for specific files.

- Wondershare Recoverit also allows you to preview recoverable files before you save them.

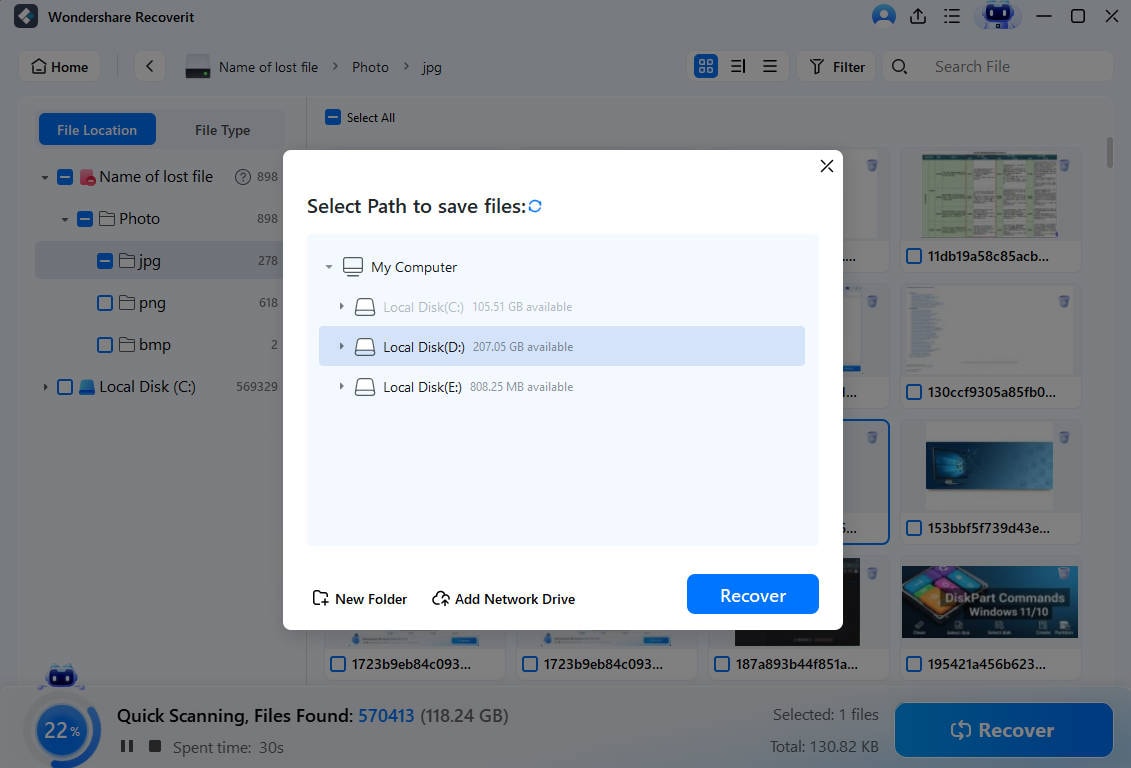
- Select the files you want to save from your SSD and click the Recover button.
- As a last step, choose a safe storage location and click Save to recover files.

Methods for Fixing a RAW SSD
It's good knowing that your files are safe, isn't that? With data catastrophe out of the way, we can focus on the topic at hand – getting your RAW SSD back to its normal state. The following methods have repeatedly proved effective in repairing RAW partitions on an SSD.
Use Chkdsk to Fix a RAW SSD
You may not be aware of this, but your PC has several utilities that can help you check your SSD for errors and fix them. One is Chkdsk, a utility that can be accessed and used only through Command Prompt. If you're new to writing commands, follow our steps.
- Go to Start and type in Command Prompt. Select Run as administrator.

- To run the Chkdsk utility, type in this command and press Enter:
chkdsk /r /X:. The letterXstands for the name of your RAW SSD, so don't forget to change it when writing the command.
In most cases, Chkdsk will check the file system and its metadata on the RAW partition and repair all logical and physical errors. However, you should know that Chkdsk is not always successful in SSD RAW partition repair. In that case, move on to the next method.
Use Disk Check to Fix the Issues
Microsoft's Check Disk tool is another utility that scans disks for potential issues and fixes the system errors it discovers. Unlike Chkdsk, it doesn't require you to manually type in commands. You can run Disk Check from your File Explorer. Here's where to find it and how to use it:
- Open File Explorer and locate the RAW SSD.
- Right-click on your SSD and pick Properties.

- Select the Tools tab and click on Check > OK.

- Next, choose Repair drive or Scan drive.

- Carefully follow Disk Check instructions.
After you restart your computer, try to access your RAW SSD again. If nothing happens, it means that Disk Check couldn't fix the RAW partition. Don't lose hope. You can try two more things, but both will format your SSD, erasing all your data in the process.
Format the RAW Partition Using DiskPart
There are two tested and tried ways to format the RAW partition on a Windows computer – using a utility called DiskPart and Disk Management. Like the previous two methods, they take opposite approaches. DiskPart is Chkdsk's equal in that it runs in the command prompt.
- To access this utility, go to Start and type in Diskpart. Select Run as administrator.

- You will see a command prompt. Type in the following command:
list disk. You are supposed to press Enter after each command in Diskpart. - Type in this command when you find your RAW SSD on the list:
select disk 1. The number1stands in place of the SSD you want to format. When you're typing the command, replace it with the name of your RAW SSD. - Now, you need to find the RAW partition. Type in this command:
list volume. Hit Enter. - When you find the RAW partition on the list, type in this and press Enter:
select partition 1. Like before, you need to replace the letter1with the name of your RAW partition. - Here's what you need to type in to format the RAW partition:
format fs=ntfs quick. Don't forget to press Enter.
DiskPart gives you hands-on access to disk, volume, and partition management. If you follow these steps carefully, it will successfully format your RAW SSD. However, running command lines isn't for everyone. If DiskPart makes you nervous, there's a way to avoid it.
Format the RAW SSD Drive Using Disk Management
Disk Management is a Windows utility that allows you to change drive letters, manage disk space, merge partitions, etc. While it is generally less powerful than DiskPart, it is much more convenient. In this specific case, it can help you achieve the same effect as DiskPart.
This method's biggest advantage is that you don't have to execute any commands:
- Right-click on the Start button and select Disk Management.

- In Disk Management, locate the SSD with the RAW partition.

- Right-click on the RAW partition and pick the Format option.

- Next to the File system, select NTFS from the drop-down list.
- Check the Perform a quick format box and hit the OK button.

How to Prevent Your SSD from Becoming RAW

While there's a relatively easy way to fix a RAW SSD and rescue data from its RAW file system, there's also a certain amount of risk that your SSD will stay unusable. As always, prevention is the best cure. Why worry when there are things you can do to prevent your SSD from turning RAW?
- Don't interrupt SSD processes – Logical errors and file system corruption are frequently caused by sudden interruptions. It happens when you forcefully stop a formatting process or eject your SSD while the system is still writing on it.
- Use antivirus and avoid malware – Another common reason for SSD corruption is malware infection. Although antivirus can catch malware in the act, it's also your responsibility to avoid unsafe download Image names and suspicious email attachments.
- Take good care of your SSD – Excessive heat, liquid spoilage, voltage fluctuation, and general mishandling can physically damage your SSD or shorten its life cycle. It leads to bad sector formation, which can cause RAW partitions and file systems.
Just in case something happens to your SSD that is out of your control, remember to back up all SSD data to a safe location. The most foolproof backup system is a combination of external devices and cloud storage. One Drive, Google Drive, and iDrive are a few of the many options.
Conclusion
When your computer marks your SSD as RAW and can't read files you have stored on it, you can do a couple of things. First, you should try repairing your RAW SSD without formatting it. Chkdsk and Check Disk can help you with this, but they're not always effective.
The second option is to format your RAW SSD using DiskPart or Disk Management. Unfortunately, formatting will wipe your SSD clean, but this doesn't have to be permanent. You can recover lost data if you use a powerful data recovery tool like Wondershare Recoverit.
FAQ
-
How do I delete a RAW partition on my SSD?
If you want to delete an entire SSD partition because it has become RAW, you can do that using a command line utility called DiskPart. Follow these steps:1. Open DiskPart from Windows Start.
2. Type
select disk Xand press Enter.3. Type
list partitionand press Enter.4. Type
select partition Xand hit Enter.5. Type
delete partitionand hit Enter.The letter
Xstands instead of the name of your disk and partition. Don't forget to change it while typing in commands in DiskPart. How do I change my SSD from RAW to NTFS in Command Prompt?
When your SSD becomes RAW, you can repair and change it back to NTFS using Command Prompt. Do as follows:1. Find Command Prompt in Start and click Run as administrator.
2. Type
convert X: /fs:ntfsand press Enter. Don't forget to replace the letterXwith the name of your drive.How do I fix Chkdsk not available for RAW SSD?
When the Command Prompt says that Chkdsk is not available for RAW SSD, your system cannot access it. The only solution is to change the RAW SSD back to normal by formatting it. You can format a RAW SSD using DiskPart and Disk Management.


 ChatGPT
 Perplexity
 Google AI Mode
 Grok
Grok


