
![External Hard Drive Not Showing Up on Mac? 9 Proven Fixes [2026]](https://images.wondershare.com/recoverit/article/how-to-fix-external-hard-drive-not-showing-up-mac-1.jpg)

 TL;DR:
If your external hard drive is not showing up on your Mac, the problem is usually a hidden Finder setting, an incompatible file system, or a physical connection issue that can be resolved using built-in macOS utilities.
● Verify your display settings by going to Finder Preferences and checking the External disks boxes under both the General and Sidebar tabs, then test a different USB cable or port to rule out an insufficient power supply.
● Open Applications > Utilities > Disk Utility and run the native First Aid diagnostic tool on the external drive to repair minor file system errors and mount the device without destroying your data.
● If the drive was formatted for a Windows or Linux PC, you must use Disk Utility to erase and reformat the drive to ExFAT, though this will wipe all existing files and require data recovery software like Wondershare Recoverit if you did not create a backup.
Ask AI for a summary
 ChatGPT
 Perplexity
 Gemini
 Claude
 Grok
Grok
It's a common and frustrating problem: you plug your external hard drive into your Mac, hear it whir, but it’s nowhere to be found on your desktop or in Finder. When your external hard drive not showing up on Mac, your first thought might be data loss, but don't panic. This issue is often caused by a simple connectivity problem, a misconfigured setting, or a minor software glitch that is easy to fix.
This comprehensive guide will walk you through the most reliable solutions to solve this issue. We will start with the simplest checks and move to more advanced troubleshooting steps within macOS, helping you diagnose the problem and regain access to your important files.
| Problem | Solution |
| Mac not showing an external hard drive on Desktop or Finder | |
| Mac not recognizing the external hard drive |
Why Is My External Hard Drive Not Showing Up on Mac
Accessing an external drive on your Mac computer is no rocket science. Most Mac users do it every day and have the routine in their fingers. You connect the external drive to your Mac through a USB port and wait for it to show on your desktop—so simple.
You probably know you can also find connected external devices in Mac's Finders folder under Locations. We assume you've checked both.
When Mac users complain about their external hard drive not showing up on Mac, it's always one of the two scenarios:
- The external drive is not recognized by Mac at all.
- The Mac recognizes the external drive but doesn't display it on the Desktop or in Finder.
Luckily, there are solutions for both of these problems. The table below showcases common causes and fixes for an external drive that isn't showing up and for a Mac that fails to recognize it.
How To Fix External Hard Drive Not Showing Up on Mac Desktop/Finder
Now that you've had your "aha" moment and identified the potential issue, it's time for brass tacks. We've researched the most effective solutions for external drive that are not showing up on Mac due to damage or corruption, and these are the best.
Fix 1: Change Visibility Settings in Finder
Let's start from where you usually look for external devices on your Mac—Finder. Since your external drive is not showing up in Finder, your Mac settings might not be set to show external devices. Here's how to change Mac's Visibility Settings under Preferences:
- Click the Finder button at the top of the screen.
- Once in Finder, go to Preferences > General.
- Check Hard disks and External disks under Show these items on the desktop.

- While still in Finder Preferences, go to the Sidebar.
- Under Locations, tick the checkboxes next to Hard Disks and External Disks.

Fix 2: Repair Your External Drive Using First Aid
If you didn't know, your Mac has a native repair tool that helps debug most file system problems. First Aid is, therefore, an effective solution for a Mac not showing an external hard drive—whether or not it fails to detect it's there as well.
Here's how to use First Aid to debug an external drive:
- Go to Applications > Utilities > Disk Utility.
- Find your hard drive under External in the left sidebar. Click it for more options.
- You'll find the First Aid option in the action pane. Click it.

- Click Run to initiate First Aid diagnostics and repair the external hard drive.

Fix 3: Reformat Your Drive
Different operating systems use different file system formats. Windows can access NTFS, FAT32, and FAT16. For Linux, you would need ext4, XFS, Btrfs, JFS, or ZFS. Primary file systems for Macs are APFS and HFS+. Macs can also read NTFS, but they can't write on it.
If your external drive is brand new or you used it on a Windows or Linux PC, chances are that its format is incompatible with your Mac. The good news is that you don't need a new drive. You only need to change the format of your existing external device.
Remember that reformatting a hard drive will wipe it clean, meaning you'll lose all data. If you have important stuff on your external hard drive, recover the files using the most reliable data recovery software for Mac external drive first. Here's how to recover data from an external hard drive on Mac using Wondershare Recoverit:
Did you move your data to a safe location? Excellent. Now, let's reformat your external hard drive. That will also eliminate any potential bugs and malware.
- Go to Applications > Utilities > Disk Utility.

- Find your external hard drive under External.
- Click your hard drive for more options and choose Erase in the action pane.

- Change the format to ExFAT and, if you want, rename your hard drive.
- Click Erase to reformat your external hard drive on a Mac.

If you happen to format your external hard drive on a Mac without creating a backup and lose important files, don't worry. You can recover data from a formatted hard drive on Mac using Wondershare Recoverit - in only a few simple steps:
Easily recover deleted or lost files from 2000+ storage devices like HDDs, SSDs, external drivs, USB drives, memory cards, and more. The software confidently retrieves all data types, regardless of how they went missing.

- Download, install, and launch Wondershare Recoverit.
- Go to Hard Drives and Locations and select the formatted external drive.

- Wondershare Recoverit will initiate a full scan of the external drive. While waiting for results, you can monitor the process on the screen and pause or stop the scan when the files that you want to recover show up.

- Preview recoverable files and click on Recover if you decide you still want them back. Save them to a safe destination.

Effortlessly retrieves all deleted Mac files!
Fix 4: Reset NVRAM
Nonvolatile random-access memory, or NVRAM for short, is a Mac's storage system that holds specific information about the state of the computer for faster boot times. It also stores settings related to Mac's peripherals, including external devices.
Resetting NVRAM can therefore help your Mac resolve potential connectivity issues and conflicts between different settings. Don't worry; this only sounds complex. In reality, resetting NVRAM is one of the easier ways to fix an invisible external drive on a Mac.
Here's what to do:
- First, turn your Mac off and on.
- Immediately after turning it on, press and hold Option, Command, P, and R.

- Wait about 20 seconds, then release the keys.
Fix 5: Repair the External Drive Using Mac Terminal
The last resort is always the Terminal when all other repair methods fail. Unless you're a programmer or know code for some different reason, the Terminal probably makes you nervous. Listen, it's the same for all of us. The Terminal could be intimidating.
Nevertheless, the Terminal is usually the most effective method for solving system-related problems, including this one. It provides a command-line interface to MacOS, which gives you hands-on access to your computer's root functions and - malfunctions.
Instructions should make using the Terminal less scary:
- Go to Applications > Utilities > Terminal to open the app.
- First, type
diskutil listand wait for the Terminal to respond. This command will open a list of available disks on your Mac. - Locate a line with physical), physical). Look for the underscore—it signifies a digit assigned to your disk's identifier.
- Now, type
diskutil info disk_. In place of the underscore, type the digit of your external drive. If the Terminal opens information about this external drive, your Mac has recognized it. - Next, type
diskutil eject disk_with your external drive's digit instead of the underscore. - Lastly, type
diskutil listagain to open the list of available drives. If your external drive is no longer there, you can safely eject it from the computer.
After these steps, connect your external drive to your Mac as usual. This time, the external drive should appear on your Mac's desktop.
How To Fix a Mac Not Recognizing Your External Drive
There's no damage or corruption to your external drive? Lucky you! That means you'll be able to fix this problem and get your Mac to recognize an external device instantly. Of all potential solutions, these six are the quickest and most effective.
Fix 1: Check Your Cable
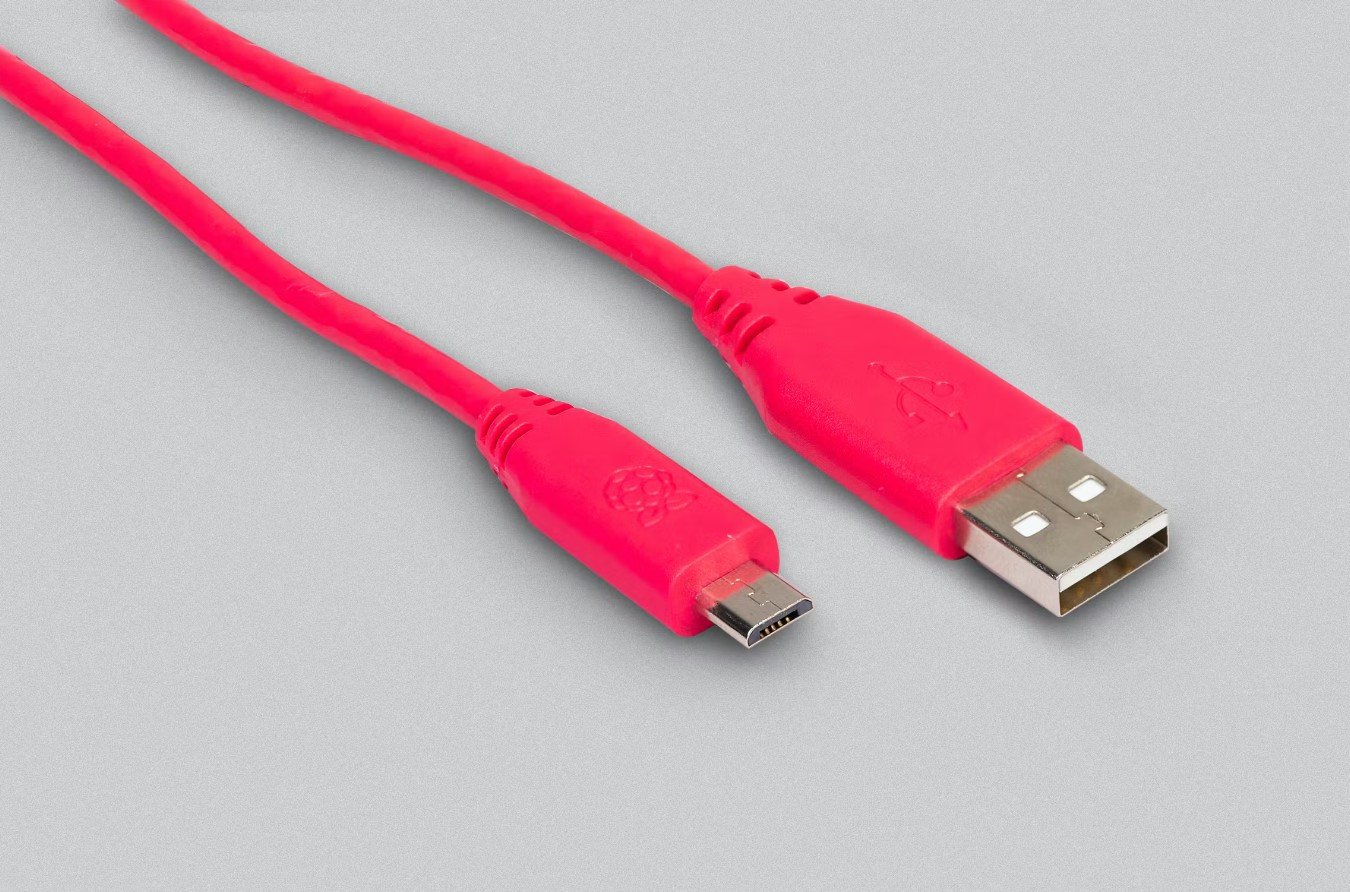
For most people, checking the USB cable when they can't find an external hard drive on a Mac is instinctual. These cables are supposed to be durable but are not always made of the same high-quality materials. You might need a new one.
The best way to test a suspicious USB cable is with devices that you know are healthy. Ideally, also use another computer or at least different ports to ensure it's not a Mac issue. There are also USB testers and cable testers you can try.
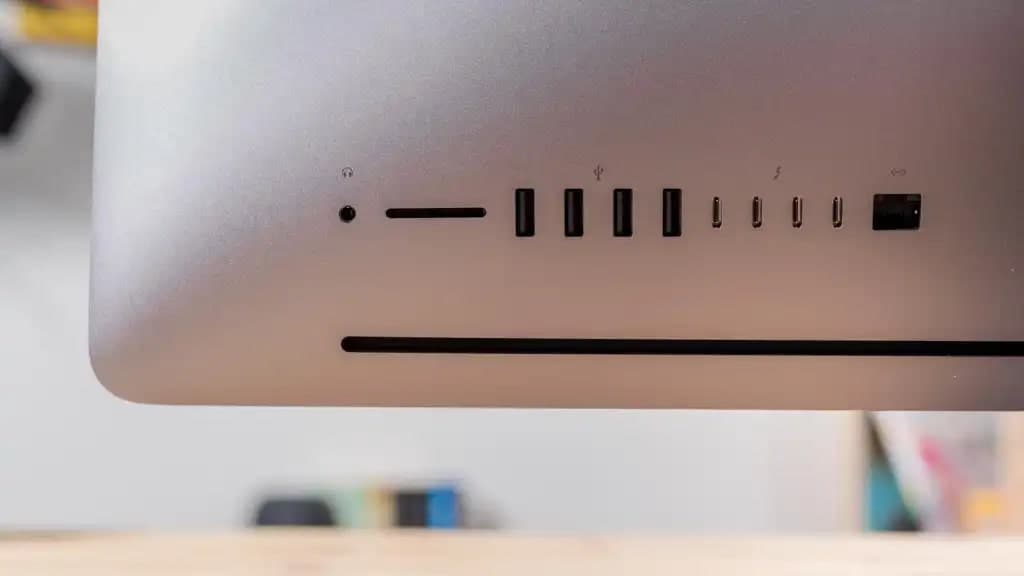
Fix 2: Try a Different USB Port
While USB ports can fail too, causing connectivity issues and stopping your Mac from recognizing an external drive, a far more common problem is insufficient power supply. Your USB port might not be strong enough to power your drive.
Regular USB 1.0 and 2.0 ports can provide enough power for most external devices. However, some external drives require more than 500 mA to work properly. Perhaps your Mac can't recognize your external drive because it needs a stronger power output.
Fix 3: Update USB Drivers
If USB ports on your Mac have gone unresponsive, updating USB drivers can help fix the issue. Follow the steps below to update USB drivers on a Mac:
- Go to Apple menu > System Preferences > Software Update.
- Click Update Now if there are any USB updates available.
- Restart your Mac computer to apply new changes.
Fix 4: Take Your Drive to a Repair Shop
Have you tried everything, but your external hard drive is still not working on Mac? Then, sending your external hard drive to a repair shop is the only option. Professional repair labs can determine and fix the issue using advanced diagnostics tools.
How To Avoid an External Hard Drive Not Showing Up on Mac
Have you found your solution? Is your external hard drive showing on Mac now? That's fantastic! Now, be honest: how often does that happen to you? Was now the first time, or did you experience the "Mac cannot read the external hard drive" problem before?
Earlier, we've mentioned that this problem tests the patience of many Mac users, but that doesn't mean it should become a frequent issue on your Mac.
Here's what to do to prevent this problem in the future.
- Clean Your USB Ports Regularly
Dirty USB ports and hubs are highly prone to breaking down. Excessive dirt buildup can kill a USB port, but at least that's easy to prevent. According to our Mac experts, you should clean your USB ports at least once a month—or more often if you have a cat. - Don't Use Force on USB Cables
Cables, on the other hand, should be more resistant to the environment. To make them last longer, you only need to worry about not pulling them too hard. Also, never pull the cable. When unplugging the USB cable, gently grab the plastic end instead. - Don't Forget to Update Your Mac
Like every other computer, your Mac becomes vulnerable to threats when you don't update it regularly. How often? As soon as the new update is available. - Safely Eject All External Devices
It's not an urban myth that you must safely eject an external device after using it—far from it. When the time comes to disconnect your external hard drive from your Mac, click Safely Eject. Otherwise, a forced interruption might damage something.
Summing Up
When a Mac does not recognize an external hard drive, that's usually due to a broken USB cable or a dirty port. However, those dealing with a more severe issue must dig deeper and solve the problem using Finder, First Aid, or Terminal.
If that is the case, remember to back up your data with Wondershare Recoverit since some of these fixes could delete all files from your external drive.
FAQs
-
Why is my external drive not showing up on Mac even when the light is on?
A light on the drive indicates it's receiving power, but not necessarily that it has a successful data connection. An external drive not showing up on Mac despite being powered on often points to a faulty USB cable, a problematic port on your Mac, or a software driver issue that's preventing communication. -
What do I do if my Mac is not detecting the external hard drive in Disk Utility?
If your Mac is not detecting the external hard drive even in Disk Utility, the problem is likely physical. Try a different cable and a different port. If possible, connect the drive to another computer. This helps determine if the issue is with the drive itself, the cable, or your Mac. -
My Mac can see the drive in Disk Utility but won't mount it. How can I fix this?
This is good news as your Mac recognizes the device. It usually means there's a minor file system error. In Disk Utility, select the grayed-out volume of your drive and click the "First Aid" button. Running this repair tool often fixes the issue of a Mac not reading an external hard drive correctly. -
Will I lose my data if I have to reformat the external hard drive?
Yes, reformatting will erase all data on the drive and should be your last resort. Most fixes, such as checking cables, changing Finder preferences, or running First Aid, are non-destructive. Always try these solutions before considering reformatting to avoid data loss.


