
 TL;DR:
Synology Drive is a self-hosted cloud storage replacement for Synology Cloud Station that requires a Synology NAS to synchronize, back up, and manage files across desktop, mobile, and remote servers.
● Synchronizing files between a computer and the NAS requires the Synology Drive Client on Windows 7+, macOS 10.13+, or Ubuntu 18.04+, providing an On-demand Sync option specifically for Windows and Mac to reduce local disk consumption.
● Creating a synchronization task between multiple remote Synology NAS servers relies on Synology Drive ShareSync and mandates forwarding connections through port 6690 on the remote router while verifying the SSL certificate.
● Backing up Synology Drive Server data to the Synology C2 Storage cloud cannot be executed natively within the Drive interface and strictly requires installing the Hyper Backup application and linking a Synology Account.
Ask AI for a summary
 ChatGPT
 Perplexity
 Gemini
 Claude
 Grok
Grok
Accidentally deleted or lost important files in Synology NAS?
No worries. Wondershare Recoverit can get back your lost NAS files within 3 steps. The ultimate and professional NAS data recovery software is totally reliable and 100% safe.
Most people know the Synology Drive Server as the successor of the Synology Cloud Server. Due to the growing popularity of cloud storage options like OneDrive and Dropbox, more people continue to entrust their vital data to enterprises. Synology Drive is an effective solution to keeping your data safe.
In this article, we’ll explain Synology Drive Server and provide a step-by-step guide on how to use it on your computer and mobile phones. Keep reading to learn all you need to know about this cloud storage solution.
In this article
Part 1. What Is Synology Drive?
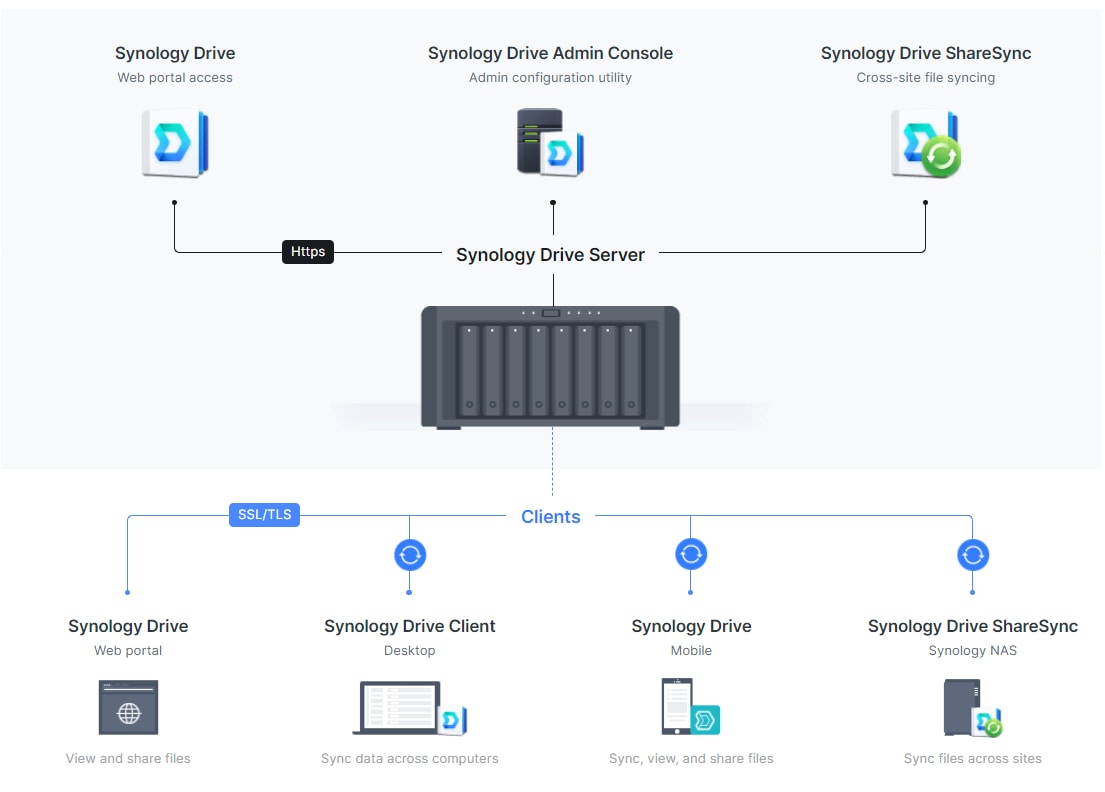
Synology Drive is a cloud storage solution for file synchronization, sharing, and management. The Synology Drive Server can be a file portal you can access via desktop applications, web servers, and mobile apps.
Unlike many other cloud storage tools, this free application allows you to store and sync your files across various devices. In addition, the Synology Drive Server is available on a Synology NAS, a network-attached storage device. This device allows you to access your data remotely as long as you have an active internet connection.
You can access your files across different computers using the drive application. It also doesn't matter which operating system you possess; this application will always sync your files to your preferred devices when you connect them. Synology drive is an excellent app for collaboration as well because it supports consistent file editing and revision by several users due to its office module. This application also supports backup capability. This ensures you don't lose your files through accidental deletion or otherwise. It also offers version histories that allow you to revert your file to a previous state or design.
You may also be interested in: How to recover deleted files from Synology NAS.
Different Versions of Synology Drive
The Synology Drive Server has different mobile, desktop, and cloud versions. To help you understand better, below is a breakdown of the three versions.
Desktop |
Cloud |
Mobile |
|
| Name | Synology Drive Client | Synology Drive | Synology Drive App |
| Download Link | Windows MSI, Windows exe, Mac, Ubuntu | Nil | iOS, Android |
| System Requirements | Windows 7 and above, macOS 10.13 and above, Ubuntu 18.04 and above. | Windows 7 and above, macOS 10.13 and above, Ubuntu 18.04. Firefox, Safari, Chrome, and Internet Explorer 10 or higher | iOS 14.0 or higher, Android 8.0 and above |
| Uses | · synchronize files and folders between the computer and the Synology drive server · Scheduled or real-time computer backup from the computer to the Synology drive server · On-demand syn to reduce computer capacity consumption · Accessing files from the file browser on the local computer through synchronization with folders on the Synology drive server |
· File management with hotkeys, stars, labels, and sorting by time, size, and title · Customize permission settings to share folders with select DSM users · Ensure team collaboration on spreadsheets, documents, and slides via Synology Office · Monitor and log users’ actions, including version rotations, file manipulations, and permission modifications |
· File management on the go · Flexible file permission settings for secure sharing · Offline access for viewing files downloaded to the local device · Keeping files updated with the sync function · Integration with iOS files and Android document provider for easy browsing and editing files across various storage apps. |
Key Features
Synology Drive is a versatile app that you can use for various purposes like collaboration, file management, and data synchronization. It has many features that make it excellent for personal and business use. Some of these features include:
- A dedicated app for sharing and syncing files via the private cloud-enabled by Synology NAS devices
- An excellent backup feature to prevent loss of data
- Version histories to allow users to revert to previous versions of saved files if they need to
- Syncing files for different users on different operating systems
- A customizable and intuitive user interface for easy file management
- Robust security features for keeping data safe from hackers and virus
- Compatibility with multiple devices, including tablets, computers, and smartphones
Synology Drive is an excellent option for storing and sharing your files. It will effectively meet your needs and expectations due to its many features.
How To Sync Data Between Different NAS Servers via Synology Drive Server
When you have several Synology NAS, you can easily access your files by setting up a connection and syncing data between different NAS servers through your Synology Drive Server. This section will explore the steps you need to follow to sync data between different NAS Servers.
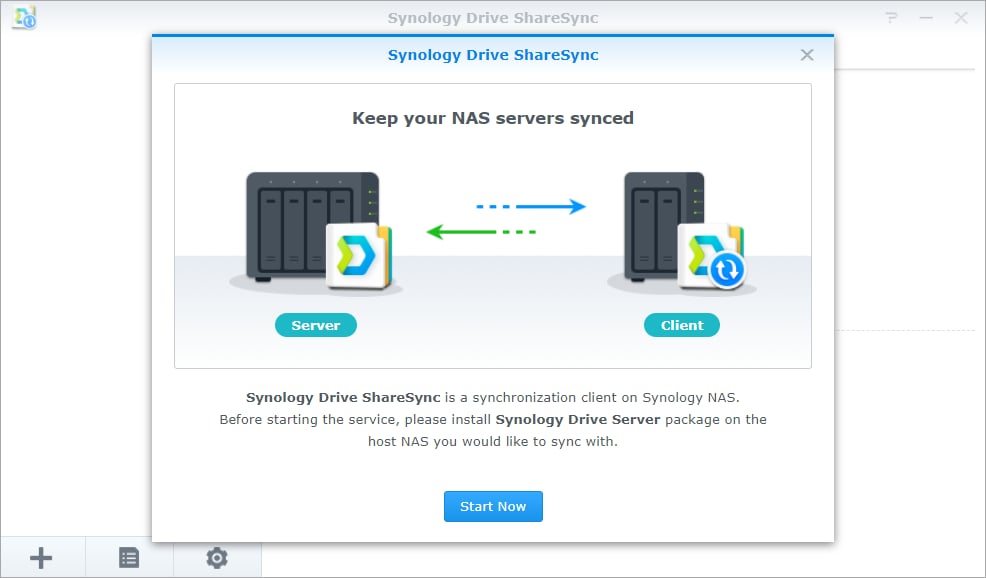
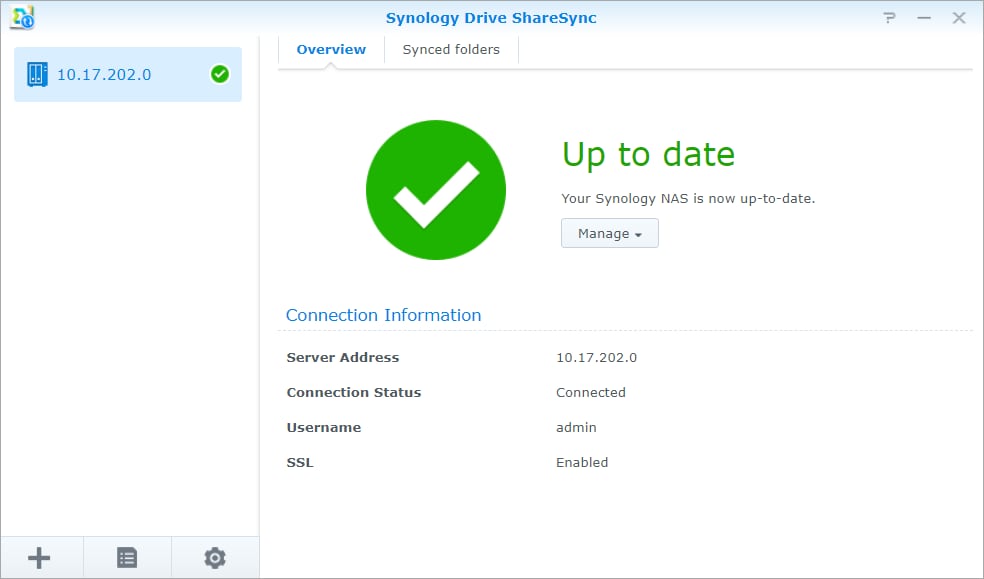
Step 1: To begin, open Synology Drive Share Sync on your local Synology NAS.
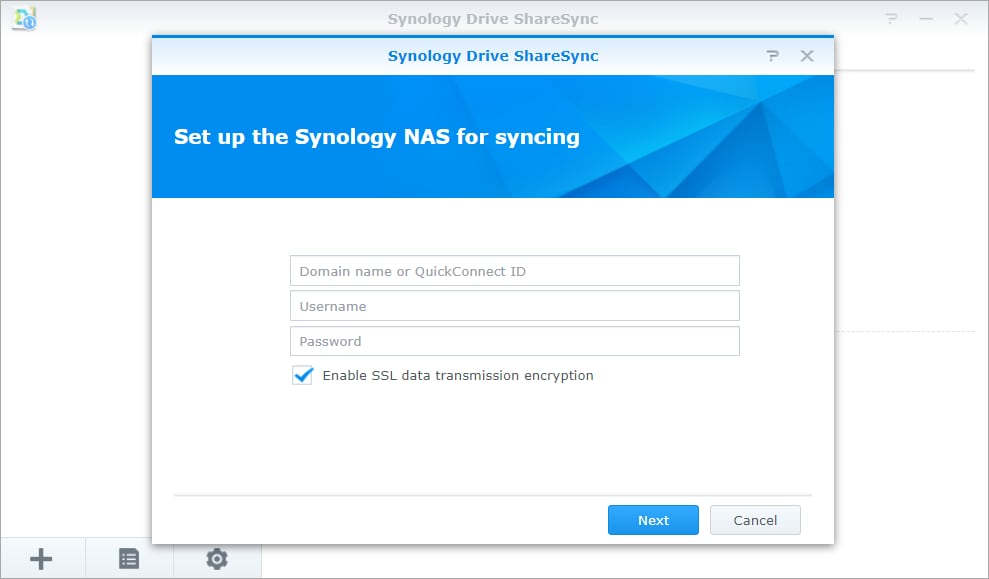
Step 2: Enter the QuickConnect ID or the IP address, password, and username of the remote Synology NAS to proceed. You must enter the domain name or username if you’re a domain user. You’ll have to use ‘username@Base_DN’ for LDAP users to log into your remote Synology NAS.
Step 3: You’ll need Port forwarding to connect to the remote Synology NAS on a different network. To do this, you must configure the remote router to forward the connection to the Synology NAS Server through port 6690.
Step 4: Synology Drive ShareSync will have to verify the SSL certificate. If this fails, it means someone is trying to intercept your connection, or it’s an untrusted self-signed certificate. Next, you can apply for a Let’s Encrypt certificate for your remote Synology NAS’s domain name.
Step 5: If the SSL certificate is verified, a new connection will pop up on the left panel of the Synology Drive ShareSync.
Step 6: Go to the ‘Driver Admin Console,’ choose the remote and local folders you want to sync, and then tick the ‘Enable’ check box.
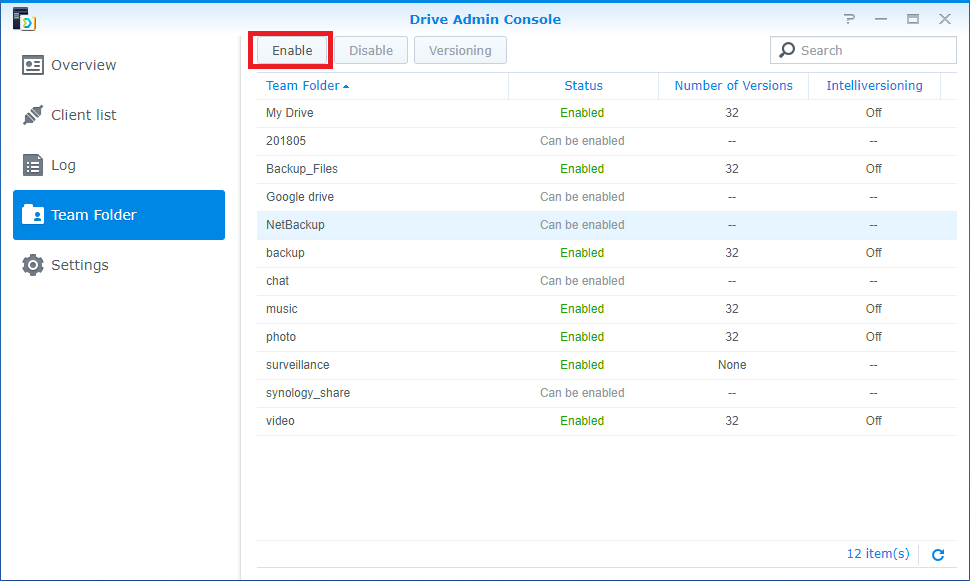
Step 7: Now, click ‘done’ to start syncing data between different NAS servers.
Step 8: You can create more sync tasks with the connected Synology NAS servers or add a new server by clicking the ‘+’ button in the Synology Drive ShareSync and repeating the abovementioned steps.
How To Sync Files Between Computer and Synology NAS via Synology Drive Client
Users can also synchronize files on their Synology NAS with their PC using the Synology Drive Client. This is another way to access files on your PC through your Synology personal cloud. This section will provide the steps you need to follow to achieve this; let’s begin.
Step 1: You can set up a connection between the Synology NAS and your computer. To do this, download and install the Synology Drive Client from the Synology Download Center.
Step 2: After installing your NAS, enable the user home service and launch Synology Drive Server from your preferred web browser.
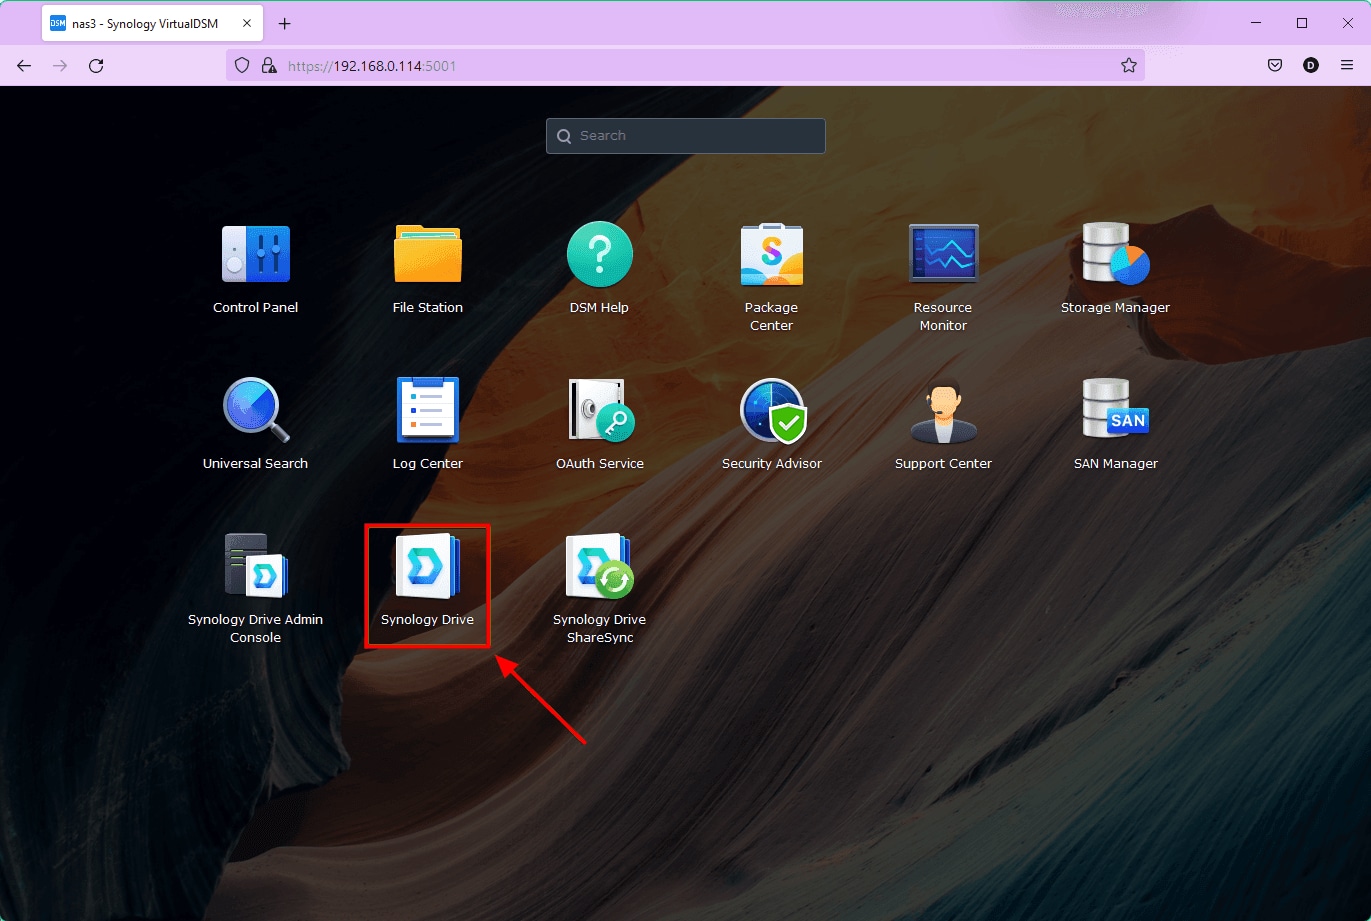
Step 3: On the DSM web interface, select Synology Drive; this should open up in a new browser tab.
Step 4: Now log into the web application and click ‘client,’ then select ‘download client’ from the user menu. This would automatically download the Synology Drive Client installer on your PC.

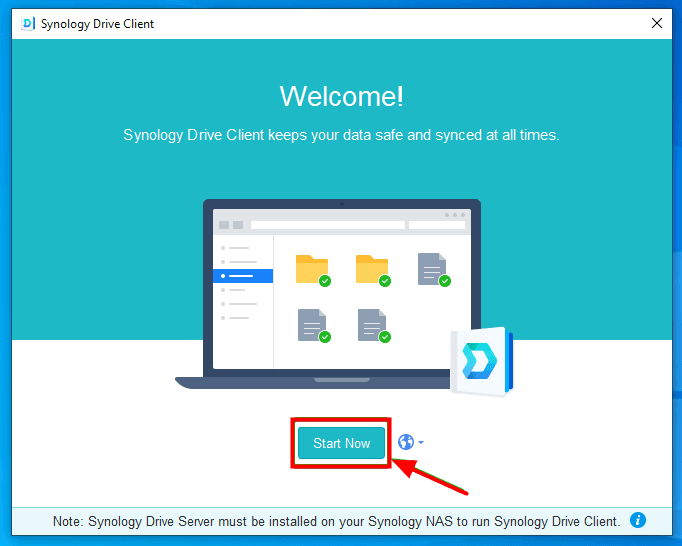
Step 5: Launch the Synology Drive Client after installation and click ‘Start Now’ to begin.
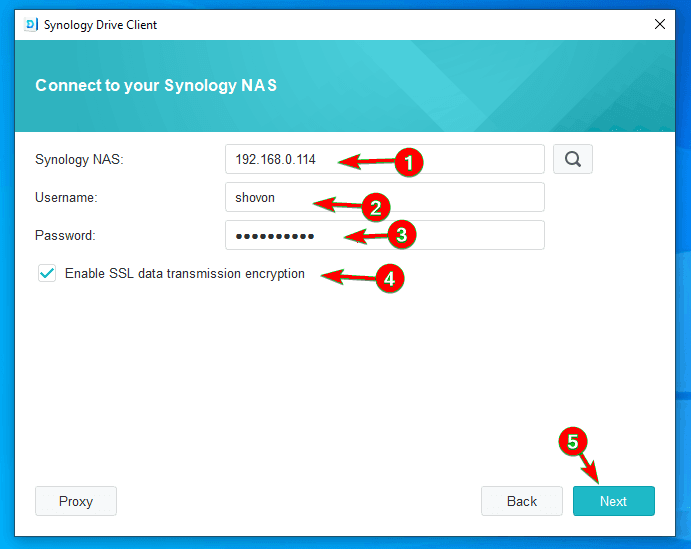
Step 6: Connect to your Synology NAS with the Synology Drive Server by providing either its QuickConnect ID or its domain name, user name, IP address, and password. After providing these details, click ‘Next.’
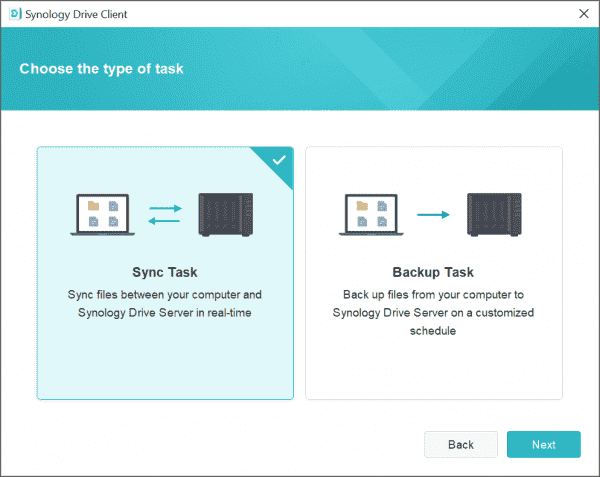
Step 7: Now, select ‘Sync Task’ and click ‘Next’ to proceed.
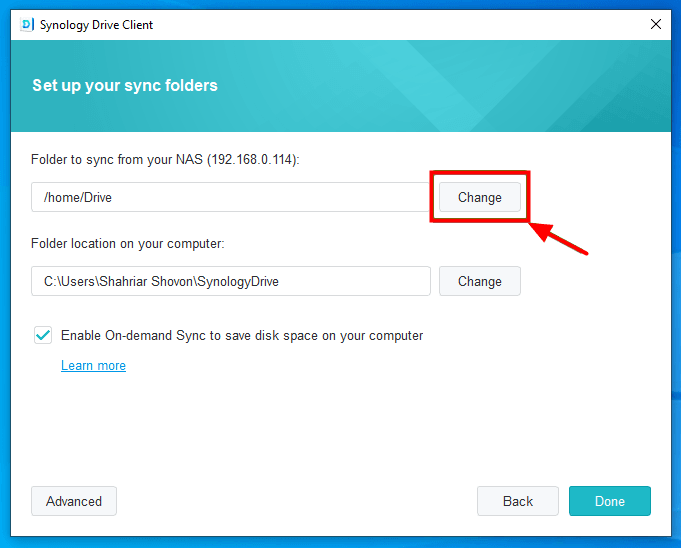
Step 8: Choose ‘change’ to select the folders you want to sync. For Synology Drive MAC and Synology Drive Windows, you must tick the ‘On-demand Sync’ button to save disk space.
Step 9: Once you choose the folders you want to synchronize, you can tick or untick the ‘Enable on-demand sync to save disk space on your computer’ option on Synology Drive Linux to enable on-demand sync.
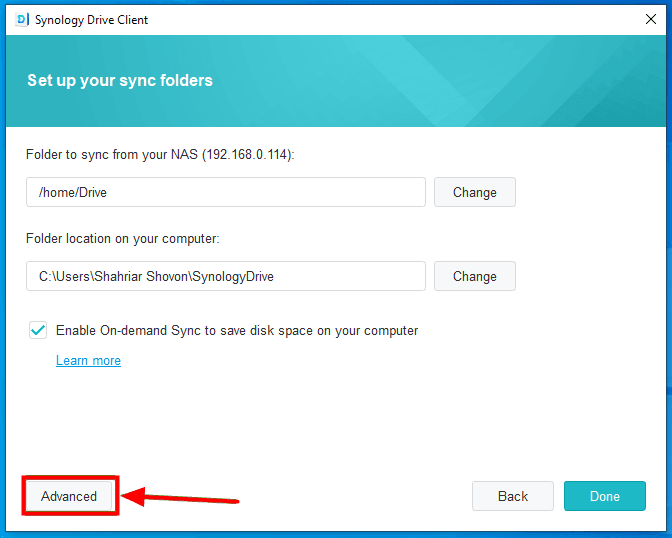
Step 10: Now, click ‘advanced’ in the bottom left corner of the screen to configure the advanced sync settings.
Step 11: On this page, you can filter the synced files by setting a maximum file size or blacklisting file types to avoid syncing them. You can also choose a direction for the syncing process on the sync mode tab.
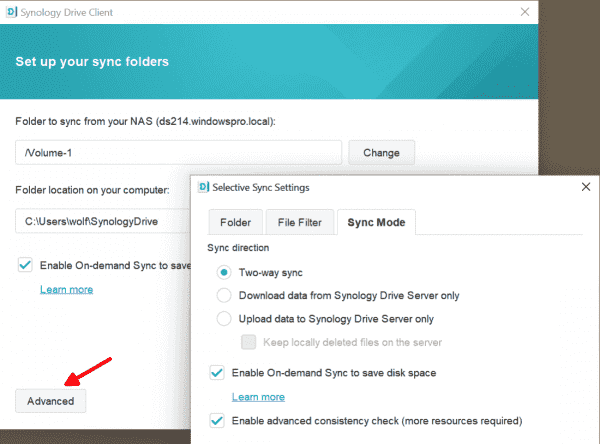
Step 12: After tweaking the advanced setting, click ‘apply’ to save the new settings.
Step 13: Click ‘done’ to finish the syncing process.
You can always find the Synology Drive icon on the system tray. Left-click the icon, and it will show you records of file uploads and downloads. To launch the application, double-click the icon.
How To Sync Files Between Mobile Phones and Synology NAS via Synology Drive App
The Synology Drive mobile was released to enable data syncing between your Synology NAS and the mobile device. The mobile app also allows you to customize the synced task. Using the Synology Drive App provides users with easy access to the Synology Cloud drive on the go. You can also enhance the protection of your mobile data using the two-way syncing feature and photo backup. Follow the steps below to sync files between mobile phones and Synology NAS through the Synology Drive App.
Step 1: First, download the Synology Drive App on your mobile phone and launch it after installation.

Step 2: Log into your Synology NAS by providing the username, password, IP address, and QuickConnect ID.
Step 3: On the screen, tap the ‘+’ option at the bottom left corner to create a new task to sync data between your mobile phone and the Synology NAS.
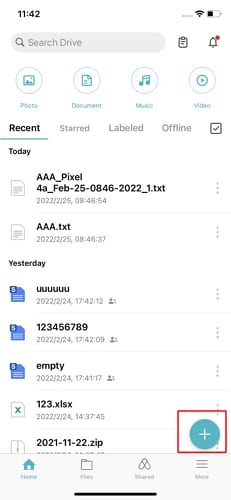
Step 4: You will have to specify the folder on the server you want for the sync task. For the Synology Drive iOS version, a local sync folder named ‘Drive’ will automatically be created.
Step 5: Users also have to choose the sync direction and whether the Synology Drive Server should keep the latest modified version of the files or the version on the server. The option not taken will be discarded by the server.
Step 6: You can also choose to enable auto-sync on the server. This will determine whether the app will auto-sync when the mobile device is connected to Wi-Fi or charging.
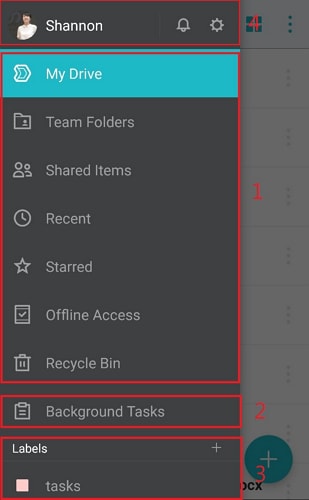
Step 7: Once you choose the right settings, click ‘done,’ and it will sync your files. You can view the status of synced files by tapping on ‘Background Tasks’ and then choosing the ‘Sync Tasks’ option.
How To Use Synology Drive in Combination with Synology C2 Storage
Synology C2 storage is a cloud backup option you can use at home and for enterprises. It can also work as a remote file server accessible from your local network. To successfully back up data on your Synology Drive Server to Synology C2 storage, you must use Hyper Backup. You also need to ensure you have a Synology Account to proceed. Follow the steps below to use Synology Drive with Synology C2 Storage.
Step 1: First, you must download and install Hyper Backup on your PC.
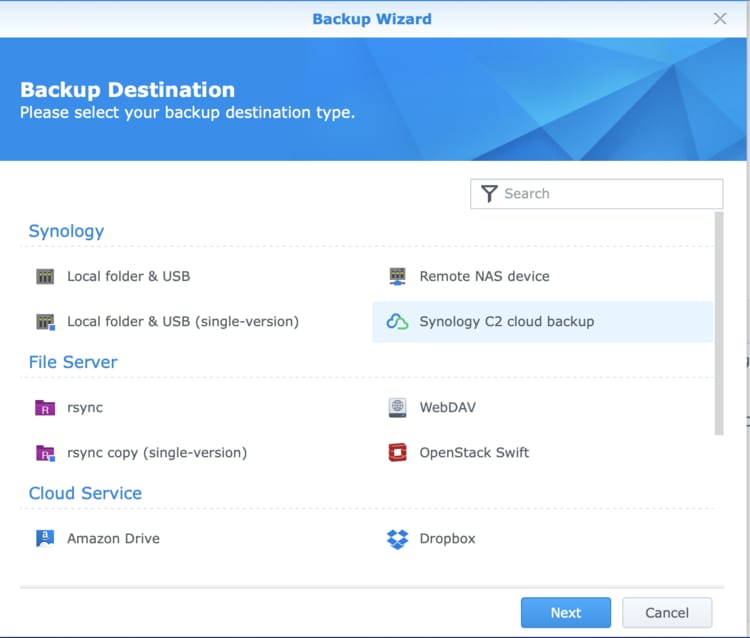
Step 2: After installation, launch the Hyper Backup application and click the ‘+’ icon on the lower left corner of the screen. Choose ‘Data Backup task’ from the options that appear.
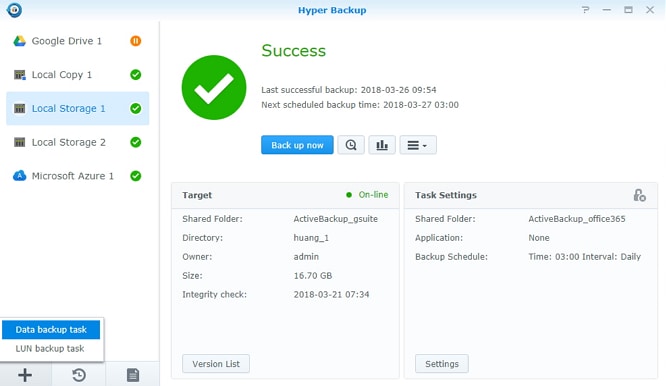
Step 3: Next, choose ‘Synology C2 Storage’ as the backup destination.
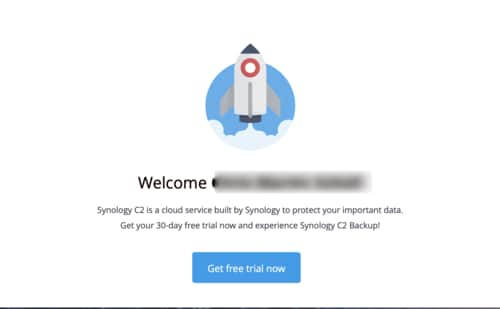
Step 4: Enter the Synology account and password and follow the instructions to complete the backup task.
Step 5: If this is your first time using Synology C2 Storage, you will have a 30-day free trial to explore the app.
Step 6: You have to choose a plan and your region. Synology C2 Storage will require you to provide your credit card to create the backup plan. Note that you won’t be charged during the free trial period.
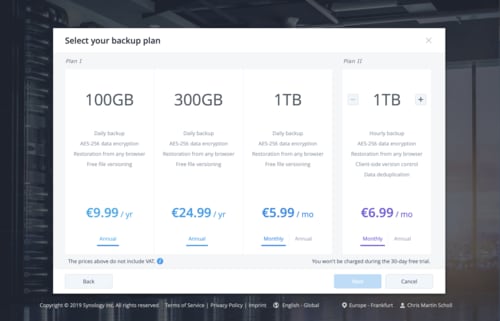
Step 7: Once you confirm your subscription, you can successfully start using the Synology C2 Storage.

More Related
How To Setup Plex on Synology NAS
How to Run a Speedtest on Synology NAS Devices
Synology Drive Predecessor: Synology Cloud Station
The Synology Drive Server was released as a successor to the Synology Cloud Station Server. This application allows you to synchronize files between the Synology NAS and your PC. It also had a mobile counterpart, Synology DS Cloud, used to synchronize files between Synology NAS and mobile devices. The Synology Cloud Station was compatible with Windows, Mac, and Linux OS. However, it had limitations that were fixed on the Synology Drive Server.
Differences Between the Synology Drive and Synology DS Cloud
Although they performed similar tasks, the main differences between Synology DS Cloud and the Synology Drive Server are below.
Synology Drive Server |
Synology DS Cloud |
| Allows for periodic version rotations | Users can only manually access historical versions |
| Users can manage files via the web portal | Users can only manage files through the application |
| Users have the option of restricting the download of the sharing links | You can’t limit who downloads the sharing link |
| The Synology Office ensures online editing for users | There’s no online editing feature for users |
| Users can also manage files shared by others | You have limited access to files shared by others |
| You can backup folders using Hyper Backup | It doesn’t offer integration with Hyper Backup to back up the application |
| You can also sync the files shared by others | You can only sync your files |
There are many factors you need to consider before you make the upgrade from Synology Cloud Station to Synology Drive Server. For more information, you can go to the page upgrade from Synology Cloud Station to Synology Drive.
Conclusion
Synology Drive can be beneficial when sharing files easily with friends and colleagues. Setting up the Synology Drive Server is relatively easy, and it comes with many features that make collaboration seamless. This is the best option if you want to set up a personal cloud storage solution easily. Consider the above factors for users already on the Synology Cloud Station before upgrading to the Synology Drive Server package.
For Windows Vista/7/8/10/11
For macOS X 10.10 or later


