


 TL;DR:
Replacing your laptop's hard drive involves verifying whether your system supports a 2.5-inch SATA or an M.2 NVMe interface, and then either performing a clean OS installation via a recovery USB or directly cloning your existing system.
● Before initiating the replacement or cloning process, check your Windows 11 BitLocker status and retrieve the 48-digit Recovery Key from your Microsoft Account, as an encrypted drive will block access to your data in a new hardware environment.
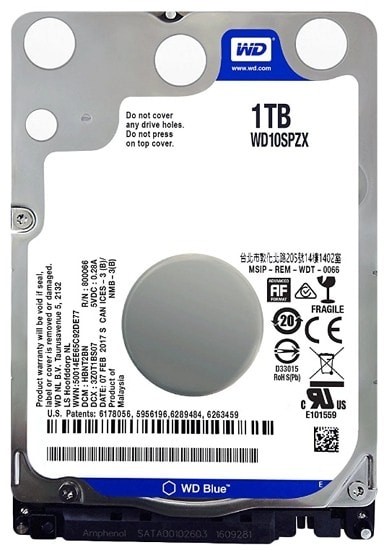
● For older laptops requiring 2.5-inch drives, upgrading to a SATA SSD (e.g., Samsung 870 EVO) provides speed benefits over HDDs, whereas modern ultrabooks require M.2 NVMe PCIe SSDs (e.g., WD Black SN850X) for compatibility.
● To upgrade without reinstalling the operating system, you must connect the new drive externally and use the Disk Clone feature in Wondershare UBackit to transfer all OS data, files, and registry settings prior to physically swapping the hardware.
Ask AI for a summary
 ChatGPT
 Perplexity
 Gemini
 Claude
 Grok
Grok
If you're puzzled by the possibility of replacing a laptop hard drive, this guide can help you learn everything about it. In most situations, PC and Mac users consider replacing their laptop hard drives due to unexpected situations, such as malware/virus infection, disk corruption, partition loss, and hard drive failure.
In such scenarios, we recommend replacing your laptop's hard disk before it fails and corrupts all the stored data, including your operating system files.
Preparation Steps Before Changing Your Laptop Hard Drive
Before you start replacing a hard drive on your laptop, there are a couple of things you should do to ensure everything goes smoothly. Though the process may not be as simple as on desktop computers, you can pull it off successfully by following these steps.
Check Compatibility
Checking hard disk compatibility helps you ensure your new hard drive is fully compatible with your laptop model. Why does this matter? Because compatibility check tells you whether your new storage device can work with your laptop device and the operating system installed on it.
| Laptop Type | Drive Interface | Recommended Upgrade | Key Benefit |
| Older Laptops (Pre-2018) | 2.5-inch SATA | SATA SSD (e.g., Samsung 870 EVO) | 10x speed boost over HDD |
| Modern Ultrabooks | M.2 NVMe (PCIe) | NVMe M.2 SSD (e.g., WD Black SN850X) | Ultrafast boot (under 10s) |
| Gaming Laptops | M.2 NVMe + SATA | Dual Drive Setup | Massive storage + speed |
Start by ascertaining the hard disk's physical size. Most laptop models support 2.5-inch hard disks, meaning you won't be able to fit and connect hard drives larger than that. Even more so if you're using an ultra-portable/ultra-thin laptop. Newer models aren't compatible with 2.5" hard drives and can't support such storage devices.
In these situations, we recommend going with an M.2 SSD. Additionally, check interface compatibility to ensure you have a spare SATA port and a SATA power cable for connecting SATA HDDs. While the cable supplies power to the HDD, the port ensures seamless data transfer to and from your HDD.
You may be also interested in: How to Recover LUKS Partition?
Acquire a Suitable HDD Replacement
There are three laptop hard drive models you can consider using:
- Western Digital Scorpio Blue 320GB Internal Hard Drive (8 MB buffer cache, SATA compatible, 5400 RPM, 320 GB storage space);
- Toshiba 500GB Laptop SATA Internal Hard Drive (8 MB buffer cache, SATA compatible, 5400 RPM, 500 GB storage space, 384 Mb/s transfer rate);
- Western Digital Blue 500GB Internal Laptop Hard Drive (8 MB buffer cache, SATA compatible, 5400 RPM, 500 GB storage space, WD shockguard technology).
In addition to these HDD models for laptops, consider upgrading your HDD to SSD. SSDs are faster, safer, and more reliable than their HDD predecessors, guaranteeing faster OS loading and data transfer times.
Newer SSD models also come with more storage space and are largely compatible with various laptop models. Our recommendation is to opt for a 1 TB or 2 TB laptop HDD/SSD.
How To Replace Your Laptop Hard Drive With Reinstalling the Windows OS
Here's a step-by-step guide to changing the hard drive in a laptop.
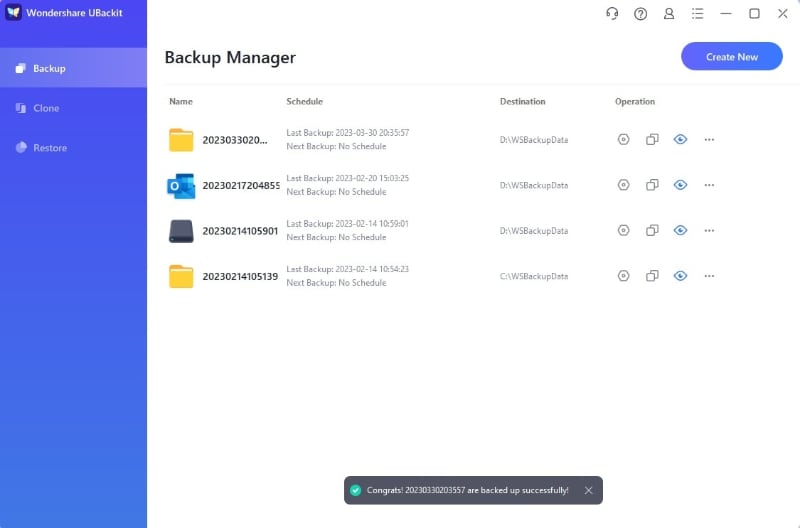
Step 1. Backup Your Data
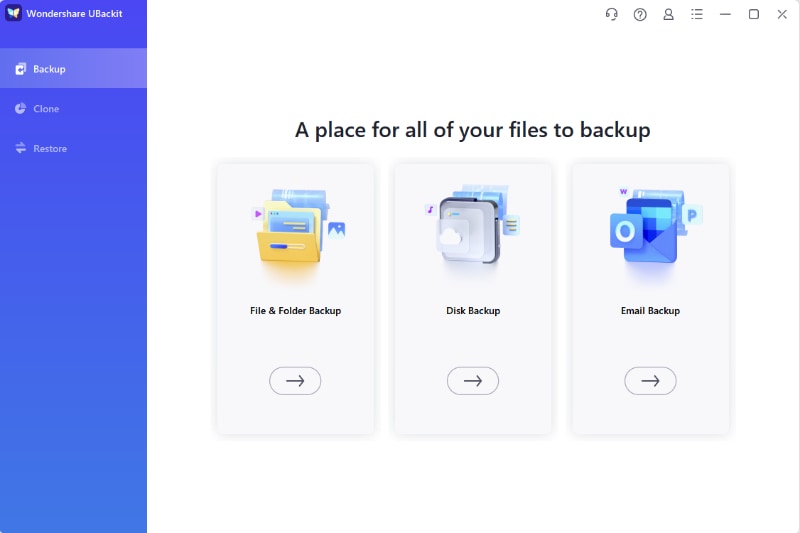
Backing up your data is the first thing you should do before replacing a hard drive on your laptop. The safest, easiest, and most reliable way to back up your entire hard drive is to use a professional backup manager - Wondershare UBackit.
Caution: Check Your BitLocker Status
Before removing your old drive or starting the cloning process with UBackit, ensure you have your BitLocker Recovery Key. Windows 11 often encrypts drives automatically. If you move your cloned drive to a new hardware environment and BitLocker is active, you will be prompted for a 48-digit key to access your data. You can find this in your Microsoft Account under "Devices."
UBackit is a data backup software for managing your disk clone, disk backup, partition backup, file backup, you name it.
With UBackit, you can perform a range of backup operations, such as:
- Back up your local and external hard drives;
- Clone disks and partitions;
- Back up entire partitions to avoid data loss and disk corruption;
- Back up your Outlook emails;
Backing up files, folders, partitions, and hard disks with UBackit is as straightforward as it gets. Download, install, and launch UBackit on your computer, and follow these steps to back up your files.
- Navigate to the main interface and select Backup;
- Click Disk Backup;
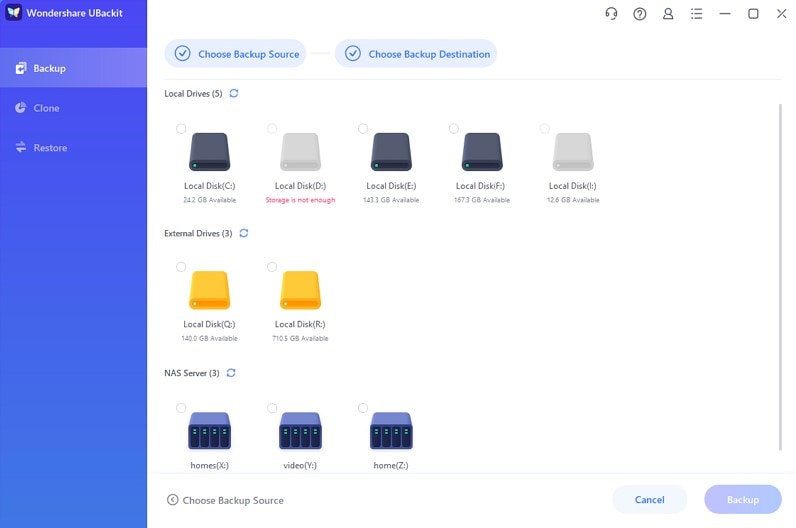
- Select the old laptop hard disk as the backup source from the available options and click Select;
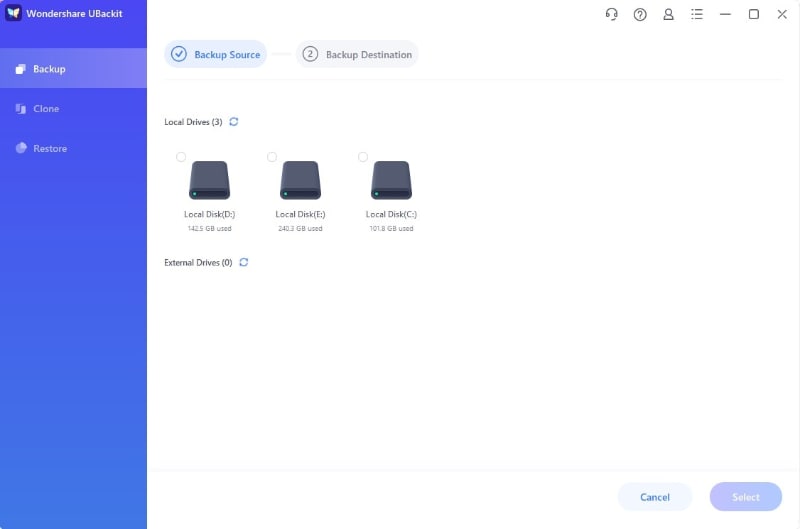
- Once you've selected the backup source, select a Backup Destination to save your newly created data backup;
- Click Backup to start backing up your data;
- Allow UBackit to complete the backup process;
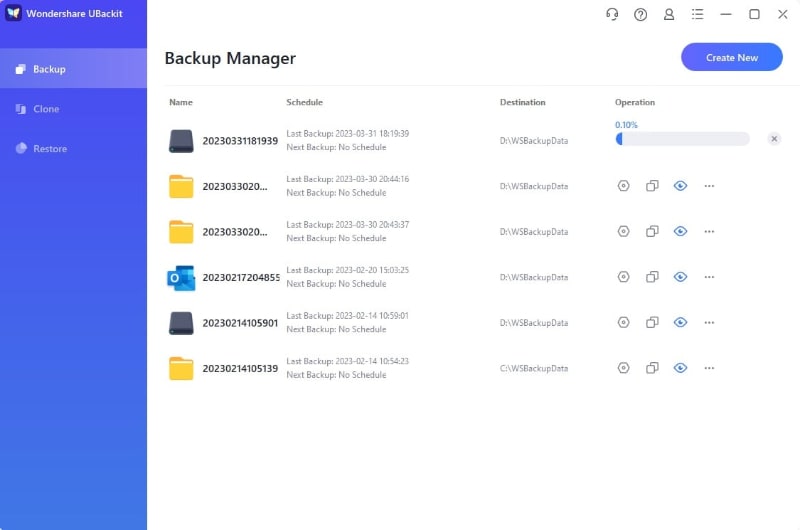
- UBackit will notify you when the process is completed.
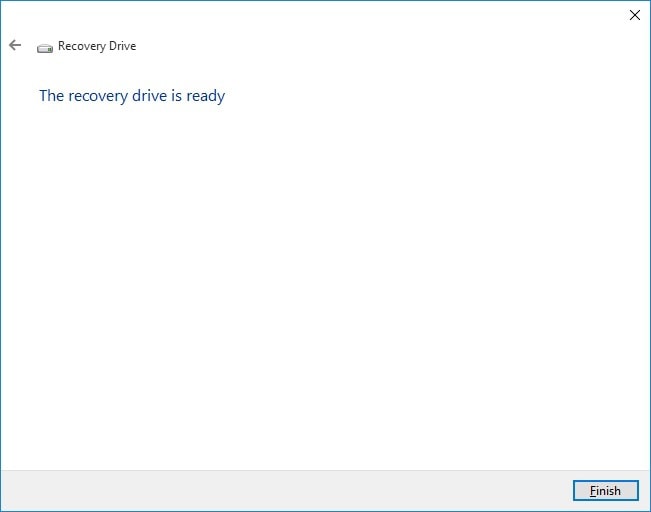
Step 2. Create a Recovery Disc
Once you've backed up your data, create a recovery disc to reinstall Windows OS on your laptop. A Windows OS recovery disc stores the data and tools required for restoring and repairing Windows OS files using available intel saved to your hard drive.
Your recovery disc will tap into related hard drive data to ensure the proper functioning of your Windows operating system. In addition, you can rely on your recovery disc to repair system corruption and reinstall Windows if need be.
Follow these steps to create a recovery disc for reinstalling Windows 10 using a bootable USB drive.
- Type Create recovery in the Search bar and hit Enter;

- Click Create recovery drive windows 10 and connect the USB drive to your computer;
- In the Recovery Drive window, click Next;

- Allow the wizard to prepare the OS files for copying to your USB drive;

- Select the USB flash drive as a recovery disc and click Next;

- Click Create to create the recovery drive;

- Wait for the wizard to complete the process;

- Click Finish to complete the recovery drive creation process.
Step 3. Remove the Old Laptop Hard Drive

Turn off your laptop and unplug any cables before starting. Inspect the laptop case to find the door on it. Open the door by unscrewing the screws or by triggering a sliding mechanism. Locate the hard drive and look for the data connectors and power cables.
Remove them from the drive and use the manufacturer's instructions for installing the new hard drive. The documentation should help you learn how to disconnect the old hard disk from data and power connectors.
You can also check your specific model laptop online to receive guidance. Typically, you'll see four or six small screws keeping the disk in the case. Unscrew them and remove the drive carefully from the case.
Step 4. Place the New Drive
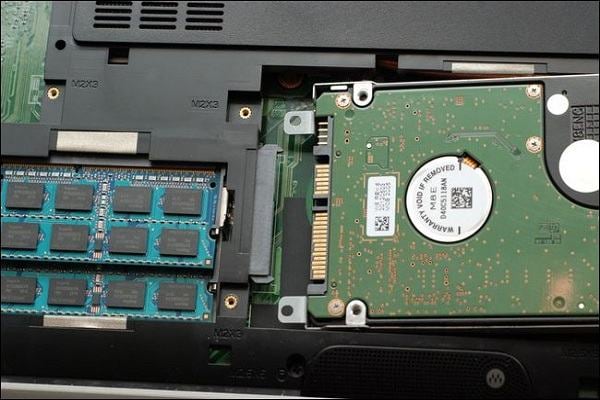
Installing the new hard drive on your laptop is a relatively simple process. Simply reverse the steps you've already taken to remove the drive. Place the drive in the original case, connect the power cables and data connectors, seal the disk with the screws, and close the laptop case.
Step 5. Reinstall Your OS
After installing the new hard drive, the next step is to reinstall Windows 10/11 on your laptop. Turn on your computer and connect the recovery USB drive. Follow these steps to reinstall your OS:
- Press a specific key to enter BIOS (typically F2);
- Access the Boot Menu when the startup screen appears;
- Select the USB recovery drive to boot your laptop from the medium;
- Select the keyboard, time, language, and other settings and click Install now;

- Enter the product key of Windows 10 or select I don't have a product key;
- Accept the license terms and choose a licensed edition;
- In the Windows Setup window, select Custom: Install Windows only (advanced);

- Select the unallocated space for your new hard drive and click Next (nonpartitioned hard disks are displayed as unallocated space);
- Wait until the Windows Setup wizard finishes reinstalling Windows on your laptop;
- After the installation process is complete, follow the on-screen instructions to configure your Windows.
Step 6. Reinstall Your Programs and Restore Your Files From Backup
Once your laptop is up and running again, use the backup you've created with Wondershare UBackit to restore your files and programs. Connect the external drive containing your backup to your laptop, and follow these steps to get your files back.
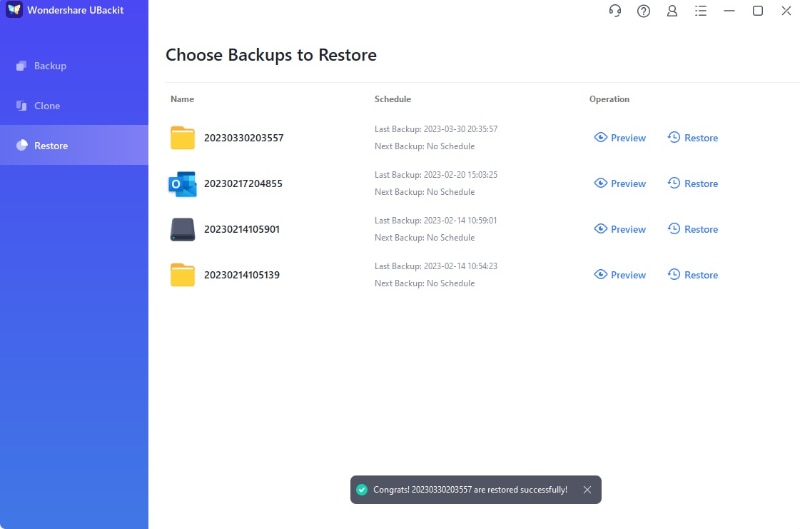
- In the main menu, click Restore and select the backup version you want to restore from the list of available backups;

- Click Restore to retrieve the entire backup with all the files in it;
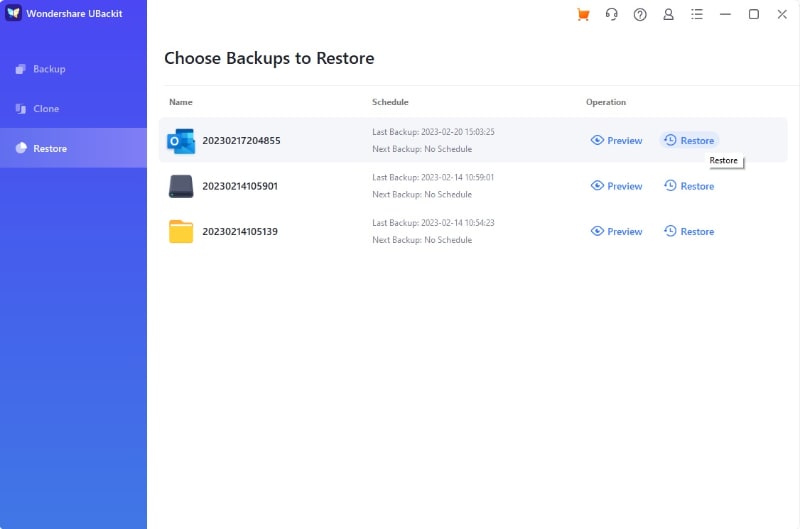
- Click Preview if you want to restore specific files and folders;
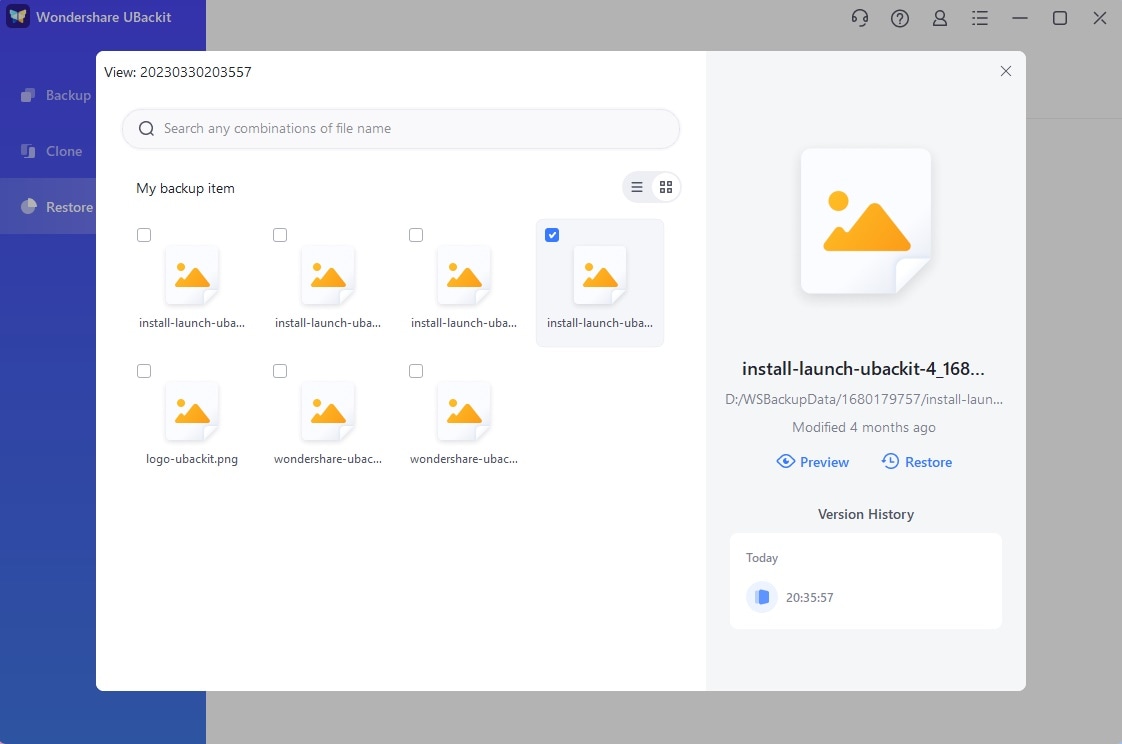
- Select where you want to save your backup;
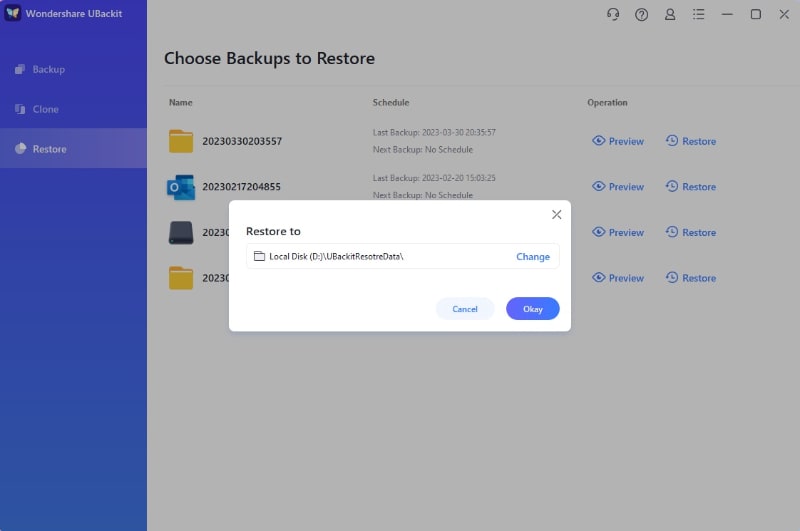
- Wait for UBackit to complete the restoring process;
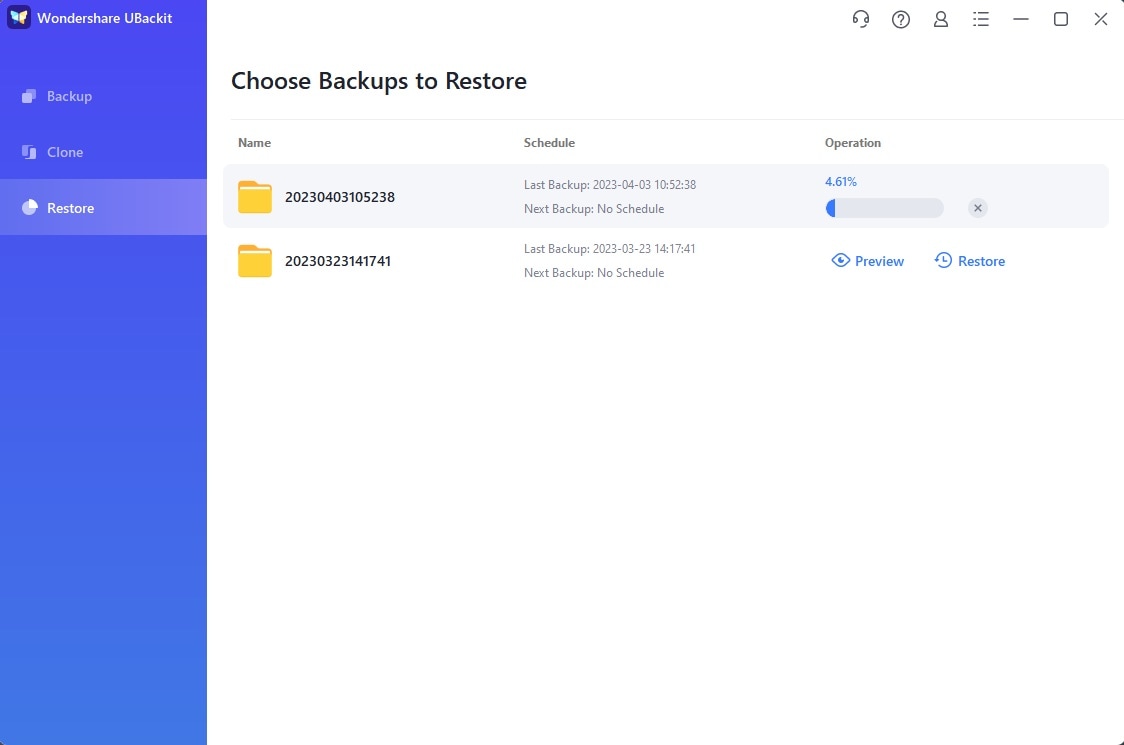
- After UBackit completes the restoring process, you can access the location where the backup has been restored.
How To Replace Your Laptop Hard Drive Without Reinstalling the OS
We've taken you through the steps of replacing your laptop hard drive with reinstalling Windows. The procedure requires you to back up the files from the old disk so you can restore them to the new drive.
But what happens if you don't want to bother with OS reinstallation? Find out below.
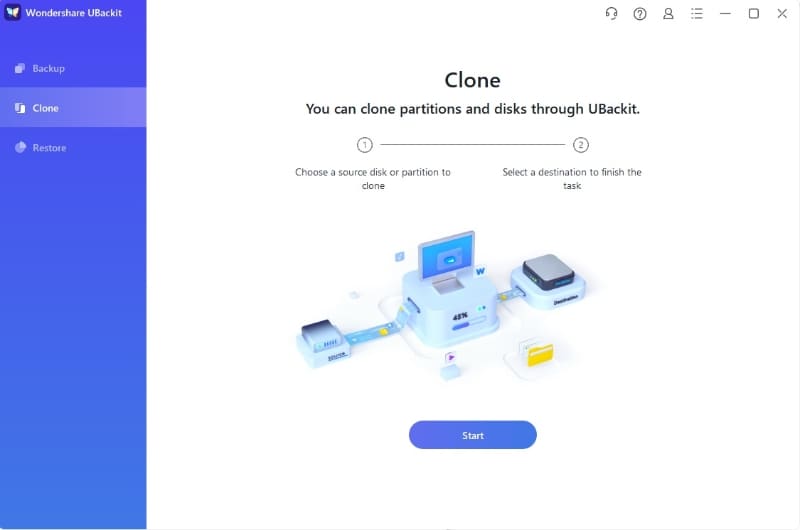
Step 1. Clone Your Old Hard Disk to the New One
Disk cloning does exactly what its name suggests - it lets you clone your old hard drive to the new one. Thanks to that, you can bypass Windows reinstallation and simply transfer all your OS data, files, folders, programs, documents, apps, registry, and more from the old disk to a new hard drive.
Before removing the old laptop hard drive, use the UBackit Disk Clone feature to save your entire old hard disk to a new one. Download, install, and launch UBackit on your laptop (if you don't have it installed), then follow these steps to clone your old hard drive to the new one.
- Connect the new hard drive to your computer;
- Navigate UBackit to the Clone section and click Start;
- Select the old hard drive that you want to replace as the source disk and click Next;
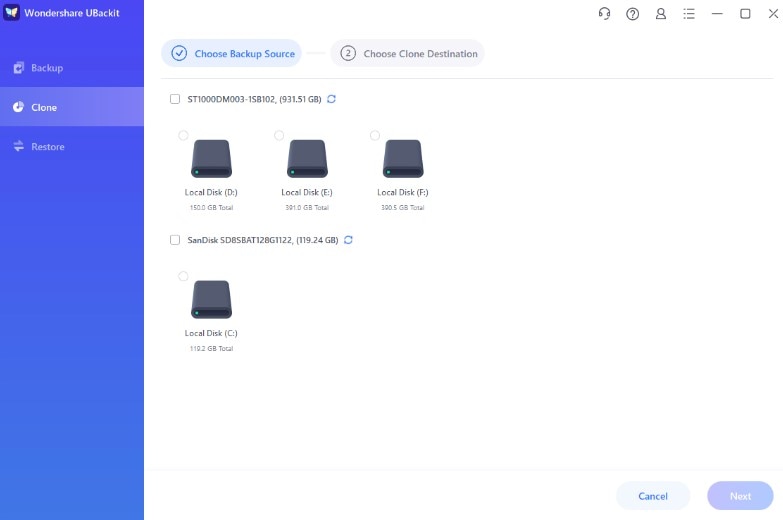
- Select the new hard drive as the clone destination and click Clone;
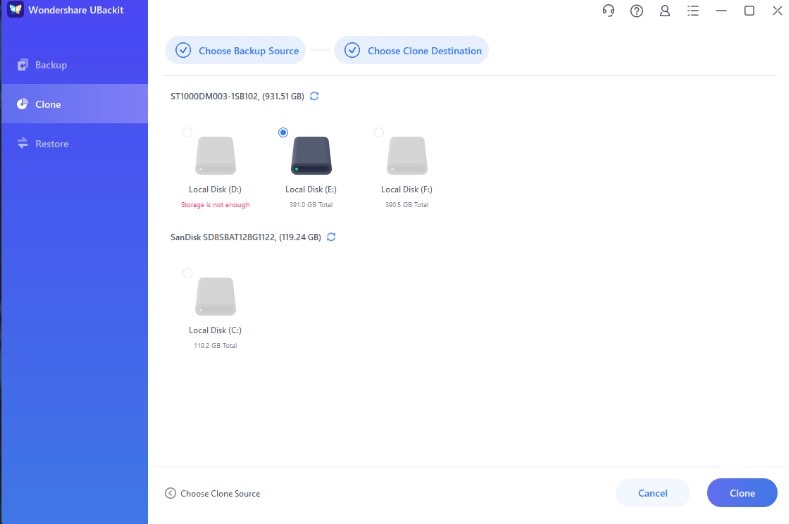
- Confirm your actions by clicking Continue;
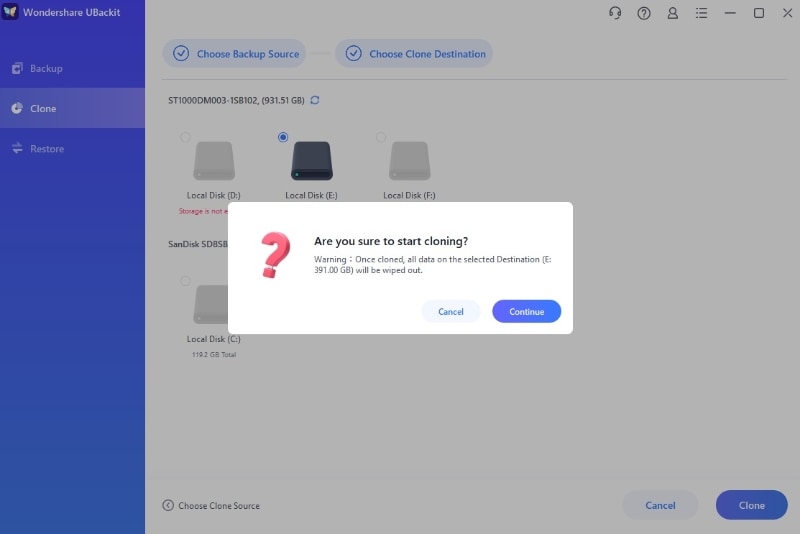
- Wait until UBackit clones your old laptop hard drive;
- Click Okay to complete the disk clone.
Now that you have a clone of your old hard drive, you can safely proceed to replace the old disk with a new one.
Step 2. Remove the Old Hard Drive From Your Laptop
As mentioned above, turn off your laptop, unplug all cables, locate the hard drive case, unscrew it, remove power cables and data connectors, and remove the old drive.
Step 3. Place the New Drive
Place a new hard drive in the case and reverse the removal steps. Use the disk clone to boot your laptop from a new hard drive, and you're good to go.
Reasons Why You Should Replace Your Laptop Hard Drive
Laptop hard drive replacement is necessary for the following situations:
- Your laptop has been running slow;
- It takes forever to access your files stored on a hard disk;
- You can't back up your data;
- Downloading files leads to random error messages;
- You can't save new files to your hard drive;
- Your hard drive is nearly full;
- You're experiencing signs of hard drive failure, such as computer crashes, system freezes, missing files, failure to open files, etc.
If your laptop takes excessive time to access your files and folders, you should replace your hard drive to avoid data loss and system failure.
In addition, timely hard disk replacement allows you to install a newer and faster hard drive with more storage space, which could significantly speed up your system and ensure top laptop performance.
Try Wondershare Recoverit to Recover Lost Data
 Security Verified. Over 7,302,189 people have downloaded it.
Conclusion
This guide showed you how to remove and replace your laptop hard drive with and without Windows reinstallation. Just remember to back up or clone your hard drive data before hard drive removal to avoid data loss and ensure seamless continuation of your regular operations.
Use a professional backup manager like Wondershare UBackit to create multiple copies and disk clones of your hard drive data, and you'll never have to worry about losing your files again.
FAQs About Replacing Laptop Hard Drive
-
Can you just swap hard drives in a laptop?
Yes, you can easily replace hard drives in a laptop. Get the new drive ready, turn off your laptop, unplug it, and remove the battery. Unscrew the hard drive case, replace the old disk with the new one, and reboot your laptop. -
Is it worth replacing the hard drive on the laptop?
Replacing an old hard disk on a laptop allows you to avoid numerous problems related to a bad hard drive. If an old hard drive is showing signs of drive failure, replace it as soon as possible to avoid data loss, system crashes, etc. Back up your files before replacing the old disk to ensure you save all your files, including your operating system data. -
Does replacing a hard drive erase everything?
Yes, inserting a new hard drive instead of an old one will leave you with an empty hard disk. Thankfully, you can easily transfer all your files and folders using UBackit's disk clone feature. It ensures that everything on the old disk safely migrates to the new hard drive. -
How can I replace my laptop hard drive without losing data?
You can avoid data loss when replacing your laptop hard drive in two ways:- Back up all your data on an external drive or cloud;
- Create a hard disk clone to preserve everything stored on your drive.
-
What is the lifespan of a laptop hard drive?
HDDs typically last between three to five years. SSDs, on the other hand, are more durable and could last up to 10 years or more.


