Photo Recovery
- Recovers deleted or lost photos effectively, safely and completely.
- Supports data recovery from 500+ data loss scenarios, including computer crash, partition loss, accidental human error, etc.
- Supports 1000+ file formats recovery with a high success rate and without any quality loss.

How to Clear or Empty Photoshop Scratch Disk on Windows[2026 Full Guide]

Jun 29, 2026 • Filed to: Photo/Video/Audio Solutions • Proven solutions
 TL;DR:
To resolve the "scratch disks are full" error in Photoshop on Windows, you must free up drive space by manually deleting temporary files or allocating additional unfragmented storage partitions via the Edit > Preferences > Scratch Disks menu.
● Navigate to C:/ > Users > "User" > App Data > Local > Temp to safely delete leftover files starting with ~PST or Photoshop Temp caused by forced application closures.
● For optimal performance, assign your scratch disks to an SSD that is separate from your computer's virtual memory and your large project files.
● You can assign more than the default 60% of total RAM to Photoshop in the Performance menu, but allocating too much limits system resources and causes your PC to run slower.
Ask AI for a summary
 ChatGPT
 Perplexity
 Gemini
 Claude
 Grok
Grok
If you are working on Photoshop for a while, you must have come across the most annoying thing that is the scratch disk error. In this article, we will talk about what it is, how does this work, and how you can tackle several issues that you may face while editing.

What does it mean to clear Photoshop scratch disk?
Before we get to the how-to clear part, first let us see what is a scratch disk and how does it work.
When you refer to clear photoshop scratch disk error, you refer to the part where you start getting pop-ups like "your scratch disk is full". Scratch disk space can be set to erase all data so that the disk space is available for new work.
A scratch disk is a virtual storage that the software uses to store data temporarily while it is running. The system uses the scratch disk space to store some parts of your project. When you are working on some large projects and the drive that the software is using as its storage is almost full, it causes photoshop scratch disk errors.
Reasons behind "scratch disks are full" error
Temporary files are one of the most noteworthy causes behind the scratch disk are full error. They usually pile up if you keep closing the application forcibly. They take a lot of space. Photoshop is unable to quit all the open files at once when you abruptly close it. So, it stores such files on your computer.
Below are a few reasons that are possible:
- Lack of space on the drive location of the scratch disk
If you are getting a "scratch disk is full" message, then you should clear your disk space. Go to whichever drive is defined as the default storage of your Photoshop and clear some space on it. You can also add a drive for Photoshop to use as scratch space.
- The part of the disk allotted to photoshop is full
You can try defragmenting your drive. Photoshop requires unfragmented free space on the scratch drive to work properly. To defragment your space, all you need to do is to search for the defragmentation utility on the start menu and run them.
How to clear Photoshop scratch disk on Windows?
Now that you are familiar with what is scratch disk space and how does it work. Let us move on to how to clear your scratch disk. There are a few different ways in which you can handle the issue. We have arranged them chronologically for you.
Solution 1: Increase space
The best and the easiest thing that you can do is allot new disk space to Photoshop. Follow the steps mentioned below to know how to set up a new hard drive. If you wish, you can choose multiple drives at a time.
Step 1: Open Edit menu on Photoshop
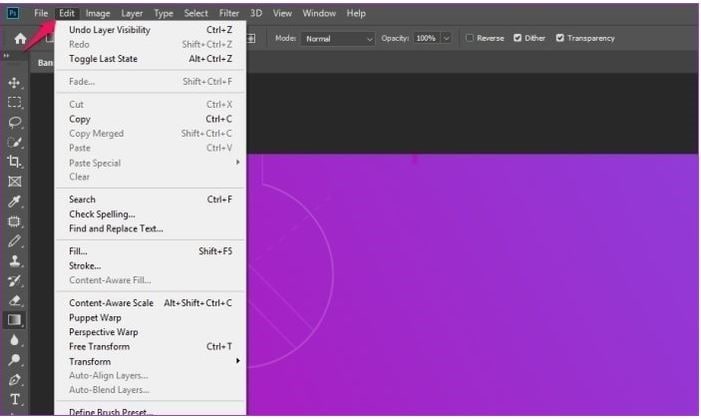
Step 2: Select the preferences option from the drop-down on the screen
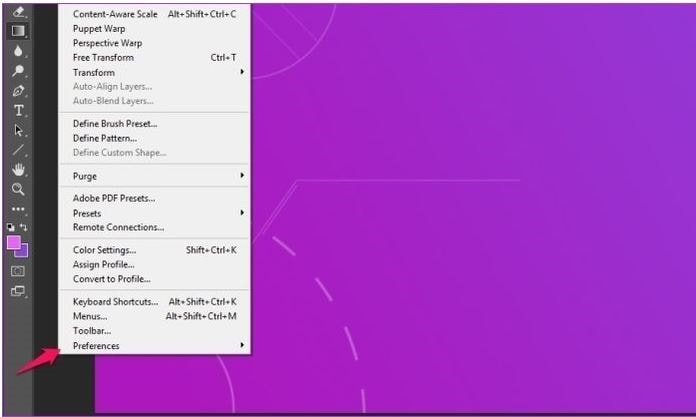
Step 3: In preferences, select the scratch disk option to open up the Scratch Disk menu.

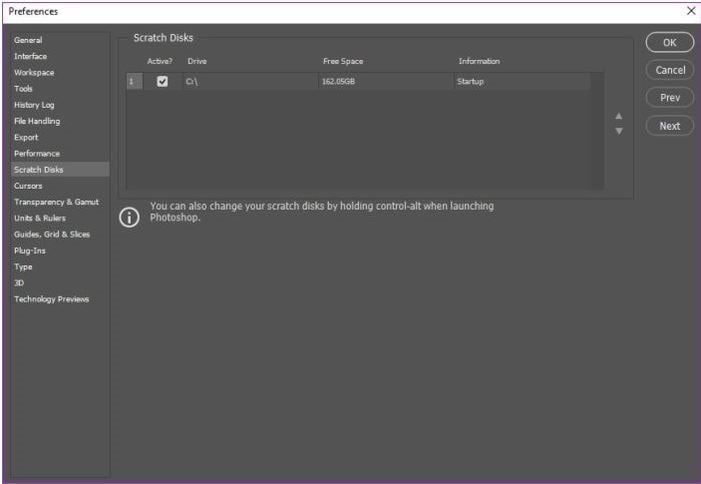
Step 4: In the Scratch disk menu, select the drive(s) you want to use as your scratch space and click OK.
Solution 2: Delete temporary files.
If you more often than not close Photoshop forcibly without allowing it to close all the running projects, it is going to leave a huge chunk of temporary files behind. These files take up a lot of space if you do it very often.
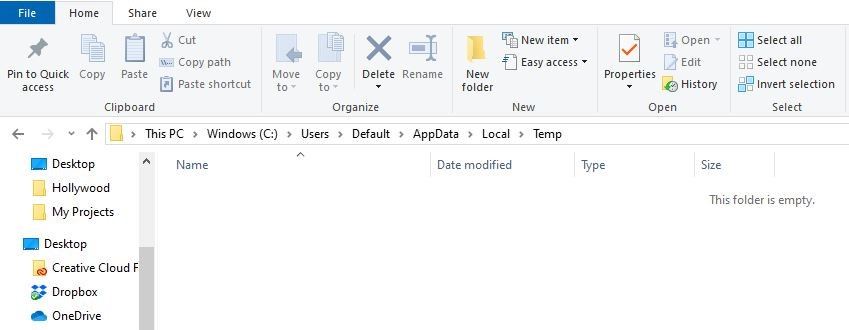
However, these temporary files can be easily identified and deleted. Most of these files start with ~PST or Photoshop Temp. You can delete them safely without any risk of losing your important data. Your temporary files are located in the C drive. To delete them follow this path; C:/ > Users > "User" > App Data > Local > Temp.
Solution 3: Increase the RAM assigned to Photoshop
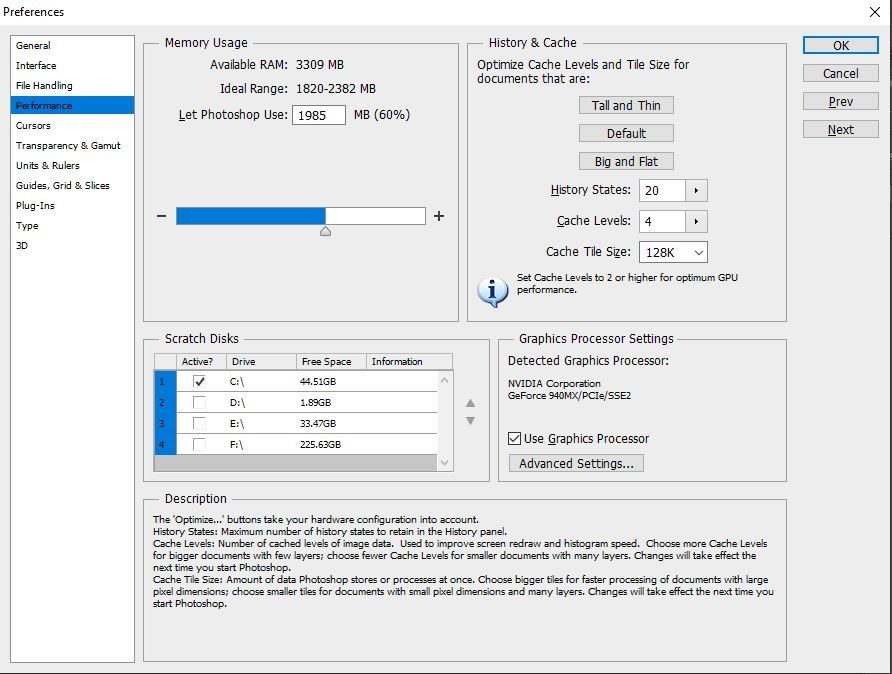
Photoshop is set to use 60% of the total RAM by default. You can choose to allow more RAM to it. By doing so, you will be permitting more storage. Follow the steps mentioned below:
Step 1: Go to Edit > Preferences and click on Performance

Step 2: In the Performance menu, adjust the sliders in Memory Usage to increase RAM. Just do not allow to much space as it can cause your PC to function slower.

Solution 4: Adjust your scratch disks
You can allow Photoshop to use other partitions to prevents these issues from happening. Generally, only the C drive is set to serve as a scratch disk, but you can assign other partitions as well to share the load.
Step 1: Go to Preferences in the Edit
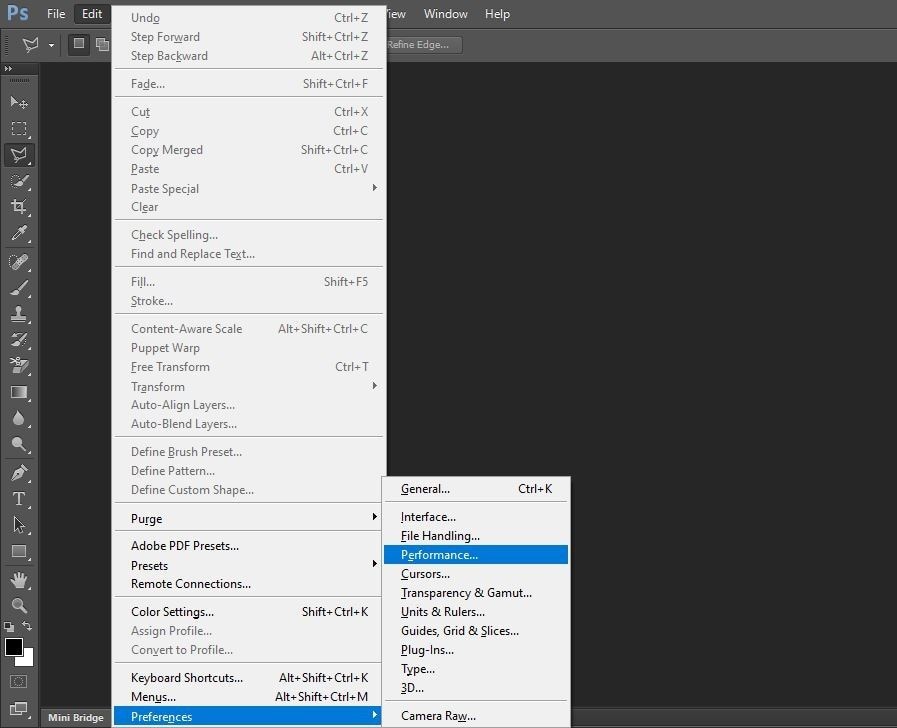
Step 2: Go to Performance and then Scratch disks.
Step 3: Check the boxes in front of your desired drives and click OK.
How to recover lost photos after clearing the disk?
Now, you may lose some photos in the process. But, you can recover them. There are several ways to recover your deleted files and photos from windows or Mac. One of the best ways is to use Recoverit Data Recovery.
Recoverit Data Recovery - The Best Photo Recovery Software
- Recover corrupted/deleted files from the computer, USB hard drive, memory card effectively, safely, and completely.
- Supports to restore corrupted files and loss due to virus attack, the program crashes or computer loses power.
- Recover 1000+ types of data with a high success rate and without any quality loss.
- Supported OS: Windows 11/10/8/7/Vista and Mac OS X 10.10 or later.
 Security Verified. 3,591,664 people have downloaded it.
Follow the steps given below to see how to recover your data using the Racoverit Data Recovery.
Before retrieving any data, you need to let Recoverit run on your PC.
Double click on the software to launch it. You will need to give it a few seconds to initiate the data recovery program. To recover your data follow the below steps.
Step 1: Select a location
To recover the data, select a location under the "Devices" tab or "Desktop" under the "Select Location" tab Click on start to move forward.

In case the path of your lost data is known to you, you can also choose "Select Folder" under the "Select Location" tab.
Click on the start button to proceed.
Step 2: Scan the location
Recoverit will automatically launch an all-around scan. With its advanced algorithm, you can find all you lost data Once you have found your data, you can pause the scan

Step 3: Do advanced video recovery
If you have lost a large-sized video file and want to recover it, then you can click on the "Advanced Video Recovery" feature on the bottom-left of the screen. A deep scan will be performed to particularly to recover lost videos.
Step 4: Preview and Recover
At last, you can preview the recovered videos on the native interface. Just choose the videos you wish to recover and click on the "Recover" button. A browser window will open up that will let you locate the folder of the videos you wish to save. You should preferably save your recovered videos to another location instead of the original path to avoid overwriting of data.

How to build Photoshop scratch disk on Windows?
There are several steps by which you can build photoshop cs6 scratch disk on your Windows operating system. Building a scratch disk is very important to have space for your projects. Follow the below-mentioned steps to build a scratch disk on windows.
Step 1: Choose "Preferences" in the Edit menu.
Step 2: Select "Scratch Disks"
Step 3: In the preferences box, select or deselect the drives you want to enable or disable.
Step 4: Click "OK" to save changes.
Below are some recommended settings you should keep in mind for the better performance of scratch disks.
- For best performance, the scratch disks should be connected to the port with the highest bandwidth limit of all the ports. Various ports have different bandwidth.
- Set the scratch disk to a defragmented hard disk that has an abundance of space to enhance performance. You can specify additional scratch disks if you have more than one hard drive.
- Keep your scratch disks on a different drive than the one assigned to store your large files while editing.
- A solid-state disk performs comparatively better than hard disks. SSD can be preferred for both start-up and scratch disk.
- Defragment drives with your scratch disks regularly.
- Your computer's virtual memory and the scratch disk should not be on the same drive.
At last, you can perform do several possible functions to get enough space for photoshop. In rare instances when Photoshop's preferences files get corrupted, it can affect the handling of scratch disks. Resetting the preferences and then reconfiguring the scratch disk preferences can resolve the "scratch disks are full" error.
There are many possible errors in Photoshop, but you do not need to worry for we are here to help you overcome them.
Fix Media File Issues
- Recover & Repair Photos
- Recover deleted photos.
- Recover photo booth.
- How to repair JPEG images?
- What is JPG File?
- What is GIF File?
- Guide for PNG File
- Recover Videos
- Best video recovery software for Windows
- Best video recovery software for Mac
- Recover DVR recordings
- Recover CCTV footage
- Recover deleted Vivint videos
- Recover deleted MKV files
- Recover deleted Youtube videos
- Recover deleted CapCut videos
- Recover After Effects Project
- Recover Premiere Pro Project
- Recover iMovie Project
- Recover videos from GoPro
- Repair Videos
- Fix error code 0xc00d36c4.
- Repair corrupted MP4 video.
- Fix 0xc10100be video error.
- Solve blurry videos.
- Fix MOV can't play on QuickTime.
- Free video repair software.
- Fix frozen video files.
- Recover & Repair Audio
- Moov Atom Not Found ?
- Repair your MP4 file online.
- Can't play recorded video?
- AVI/MP4/MKV cannot render?
- Fix 0xc00d5212 error of AVI.
- Recover & Repair Cameras


Eleanor Reed
staff Editor