


Want to unblur a video that looks soft, pixelated, or unclear? Start by checking whether the original file is actually blurry. A low-quality stream, a compressed video someone sent you, and footage recorded out of focus require different fixes. For mild softness, a sharpening tool can make edges look more defined; for low-resolution footage, AI video enhancement may improve perceived clarity. Neither method can guarantee the recovery of details that the camera never captured.
This guide explains how to make a blurry video clearer on Windows, Mac, and common editing platforms, including what to do when the sharper original was lost. Keep an untouched copy of the video before experimenting, and compare each result against the same frame at full size.
In This Article
Part 1. Why Is My Video Blurry?
A video may look blurry because of what happened during recording, exporting, uploading, transferring, or playback. Before using a video unblur tool, identify where the quality changed. The following checks help you choose a fix that addresses the cause rather than adding more processing artifacts.
Identify the Type of Blur
Compare the camera original, any edited or downloaded copy, and the version playing on your screen. Use this symptom guide to decide where to start.
| What You See | Likely Explanation | Best First Move |
| Edges look slightly soft in every copy | Mild focus softness or low contrast | Try modest sharpening in CapCut or Premiere |
| Faces or fine textures are unclear in a small original | Low source resolution, noise, or heavy compression | Try AI enhancement on a short test clip |
| Fast movement leaves streaks or smears | Motion blur recorded by the camera | Manage expectations; stabilization does not remove recorded smear |
| The frame wobbles or looks skewed when the camera pans | Camera shake or rolling shutter distortion | Use iMovie stabilization or rolling shutter correction |
| Sharp locally, blurry on YouTube or after sharing | Reduced playback quality or a compressed transfer | Check playback settings or obtain the original file |
| Original has disappeared; only a blurry forwarded copy remains | Missing source file | Look for the original in backups or recover it if deleted |
| Video freezes, has broken frames, or will not open | Possible corruption rather than ordinary blur | Preserve the file, then investigate file repair |
Understand What Video Sharpening Can Fix
Sharpening increases the contrast around existing edges, so mildly soft video can appear clearer. AI enhancement can reconstruct or synthesize plausible texture, but it cannot prove what an unreadable face, sign, or object originally looked like. Upscaling an already blurry 480p source to a 4K file changes pixel dimensions; it does not automatically restore genuine optical detail. If the entire scene was filmed far out of focus, a clean re-recording is often the only dependable option.
Part 2. Five Practical Ways to Unblur a Video
Choose the workflow that matches your symptom and operating system. All of these methods work on a copy of the original, and each has a different purpose: sharpening, AI enhancement, motion stabilization, or better playback. They are not interchangeable repairs for every blurry video.
Method 1: Sharpen Mildly Blurry Video in CapCut
Best for: A video that plays correctly but looks slightly soft, especially around text, clothing, and other edges. CapCut's desktop Sharpen slider lets you adjust edge contrast without attempting to rebuild the whole video.
Step 1. Open CapCut on your computer, create a project, import a copy of the blurry video, and place the clip on the timeline.
Step 2. Select the clip. Open the right-side Adjust panel and locate Sharpen. Increase it gradually, viewing an area with fine detail at 100% scale.

Step 3. Toggle the adjustment on and off. Stop when detail looks clearer but before you see bright outlines around objects, exaggerated noise, or unnatural skin texture.
Step 4. Select Export. Use a resolution appropriate to your source and an adequate bitrate. Matching a high-quality source preserves more detail than repeatedly exporting a low-quality file.

For menu details and export troubleshooting, refer to CapCut's official blurry-video instructions. Sharpening does not reverse a missed focus point or extensive motion blur.
Method 2: Enhance Low-Resolution Video With Filmora AI
Best for: Older clips, noisy recordings, or small compressed files that need an AI-assisted clarity pass. Wondershare Filmora offers AI Video Enhancer models that process footage rather than simply increasing an edge slider. Model availability and processing limits can vary with the version or plan.
Step 1. Launch Filmora for Windows and create a project. Import your video, then drag the clip onto the timeline.
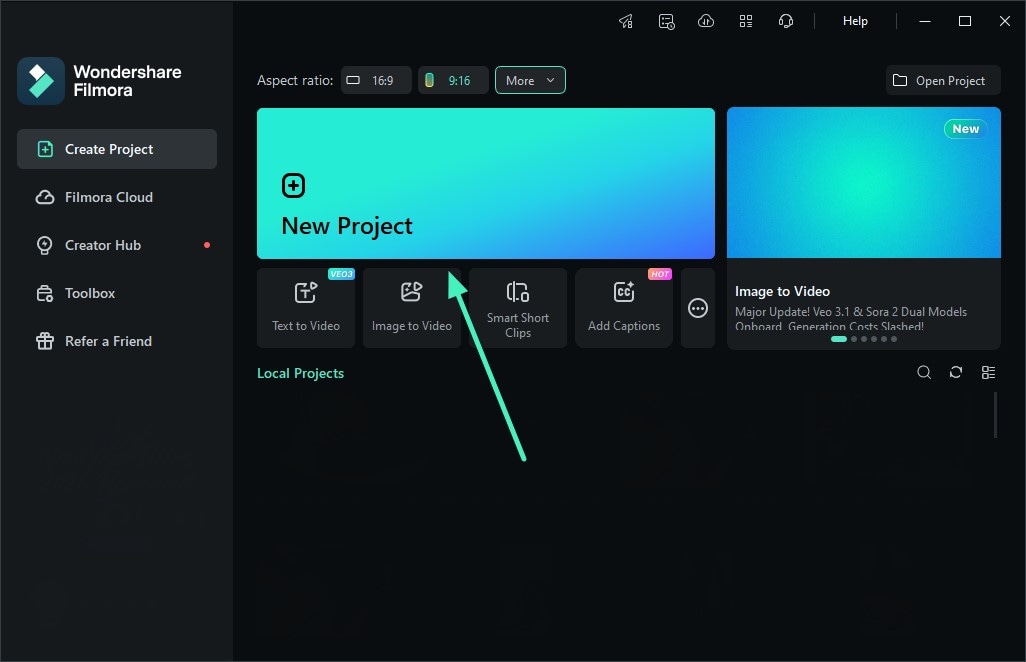
Step 2. Select the clip. In the right properties panel, open Video > Basic and find AI Video Enhancer. Choose a general enhancement model such as Enhance or Generative Enhance if it is offered in your installed version.
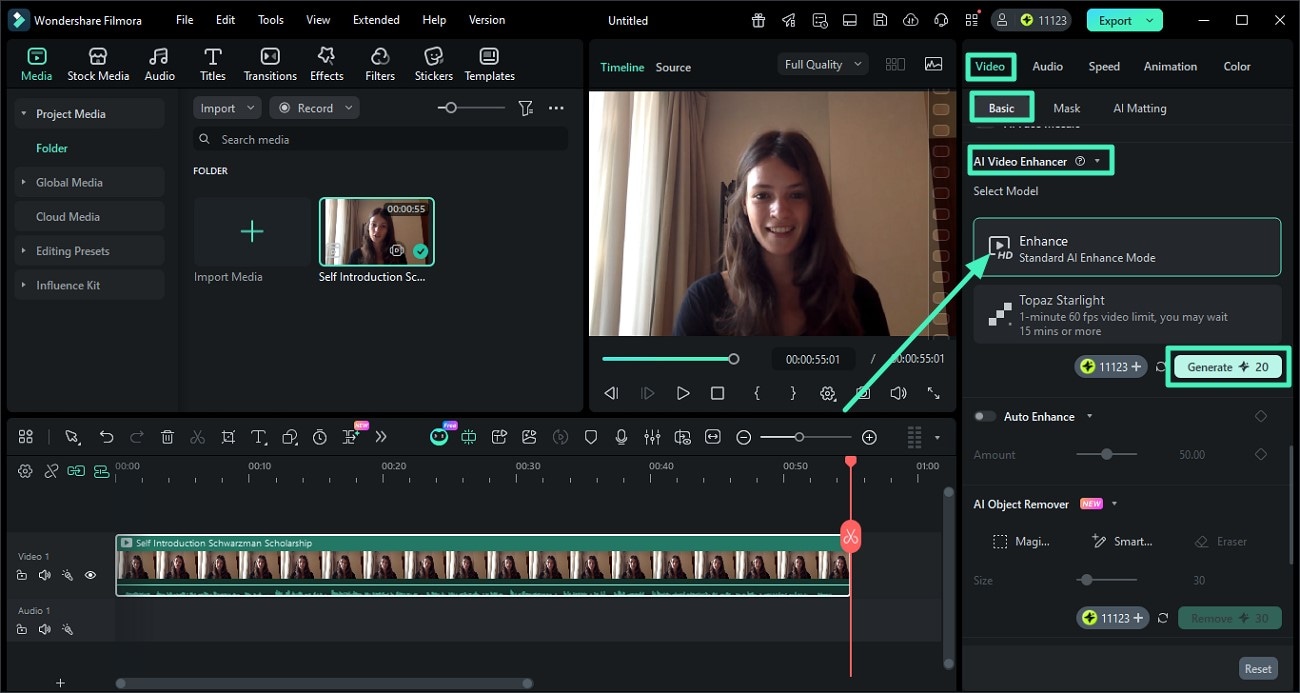
Step 3. Click Generate when prompted and wait for processing. Preview a short sample first, particularly faces, fine lines, and moving objects, which can look artificial after aggressive enhancement.
Step 4. Compare the enhanced output with the original. If the new version looks natural, choose Export and save it separately.
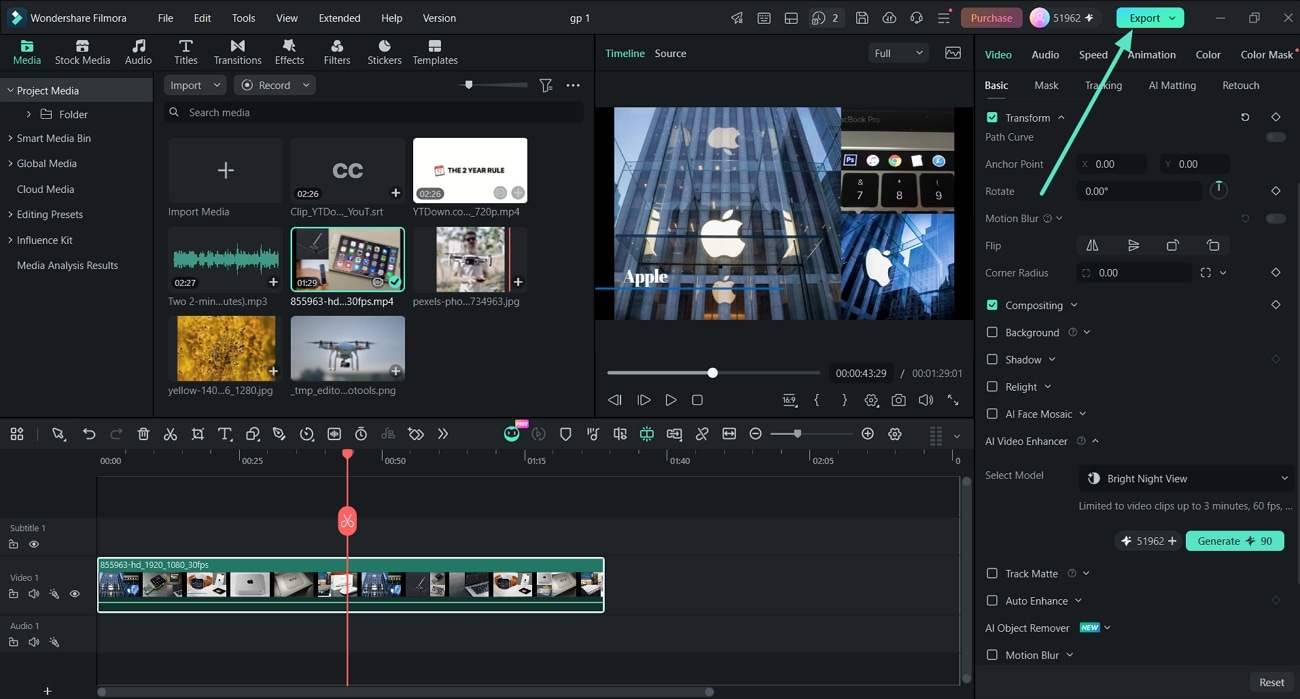
The current Filmora AI Video Enhancer guide documents the available models and workflow. AI-generated improvements may be useful for viewing but should not be treated as faithful reconstruction of missing evidence.
Method 3: Adjust Sharpness in Adobe Premiere
Best for: Editors who want controlled sharpening on an individual clip or an adjustment layer. Premiere's Unsharp Mask effect lets you balance the sharpening amount, edge radius, and threshold. Excessive settings can create halos or amplify digital noise.
Step 1. Import your video into Adobe Premiere and place it on a sequence timeline. Select the clip you want to refine.
Step 2. Open Effects, search for Unsharp Mask, and apply that effect to the clip.

Step 3. Open Effect Controls and adjust Amount, Radius, and Threshold conservatively. Inspect both moving frames and a paused frame instead of judging only the small preview thumbnail.
Step 4. Compare the treated frame against the original; then export the finished sequence using a suitable bitrate for its source resolution.
Adobe's official blur and sharpen effects reference explains the tools. This improves edge appearance rather than restoring detail lost during recording.
Method 4: Stabilize Shaky Footage in iMovie
Best for: A Mac video that looks distracting because the camera was shaking, or a fast pan that created skewed, wobbly geometry. Stabilization can make playback feel steadier, but it cannot remove motion smear already recorded in individual frames.
Step 1. Open an iMovie project on your Mac and select a clip in the timeline.
Step 2. Above the viewer, choose Stabilization and enable Stabilize Shaky Video. Adjust the slider while previewing the result.
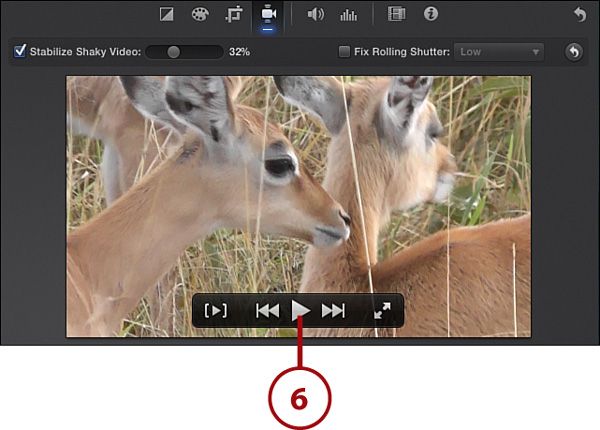
Step 3. If straight lines appear wobbly during a rapid camera pan, try Fix Rolling Shutter. This corrects a different distortion; it does not sharpen out-of-focus subjects.
Step 4. Watch the stabilized clip for cropping or edge artifacts, and export only if the change actually improves the result.
Check Apple's iMovie stabilization instructions for current control descriptions. Interface appearance can differ from older example screenshots.
Method 5: Switch to a Higher Video Playback Quality
Best for: A video that is sharp in the saved original but blurry while streaming. In this case, the player may be delivering a lower-resolution version. Changing playback quality does not edit or repair the original video file.
Step 1. Play the video on YouTube, then open the player's Settings menu.
Step 2. Select Quality and choose the highest available resolution your connection can handle.

Step 3. Replay the same scene. If the upload is recent, wait for the higher-resolution version to finish processing; if the original upload itself was blurry, no playback setting will restore it.
See YouTube's playback-quality guidance for the controls available on your device. Other platforms may have different menus or automatic quality selection.
Part 3. How to Fix Blurry Videos Sent to You
If a friend sends a blurry video that looked clear on their phone, the transfer method may be the problem. Some messaging apps create smaller compressed copies to make sending faster. Sharpening those copies can improve edge appearance, but requesting the higher-quality original usually helps more.
First, compare the version in your chat with the same clip in the sender's camera roll or photo library. If theirs is clearly sharper, ask them to resend the original file through a file-sharing link, direct device transfer, or a document/file attachment option where available. Avoid forwarding and re-exporting the compressed copy repeatedly. If only the blurry version survives, use a modest sharpening pass or test AI enhancement, keeping expectations realistic.
This is a genuine user problem, not just a hypothetical workflow: a Reddit discussion about footage becoming blurry in the shared final version illustrates why comparing the source and delivered versions matters. A forum report can demonstrate the symptom, but it does not establish a universal technical cause.
Part 4. What if the Clear Original Video Is Missing or Damaged?
Sometimes the low-quality copy is all you have because the sharper original was accidentally deleted, the camera card was formatted, or a transfer failed. This is a file recovery situation, not a normal video-enhancement task. Treat physically unstable drives differently from healthy devices, and do not overwrite the storage holding missing files.
Recover a Deleted or Lost Original Video

Best for: The original high-quality MP4 or MOV has been deleted or is missing from a readable card, USB drive, or computer. Recoverit is relevant here because finding the genuine source file may give you better clarity than editing a compressed forwarded copy. It is not a general video unblur tool.
Step 1. Stop recording or saving new files to the affected drive. If the storage device disconnects repeatedly, makes unusual noises, or shows physical damage, stop scanning and consult a professional recovery service.
Step 2. Open Recoverit, choose the detected storage location where the video was lost, and start a scan. Do not install recovery software onto the affected drive if you can avoid it.

Step 3. Filter the results for relevant video formats, check available previews, and confirm that the file appears to be the original rather than a thumbnail or compressed derivative.
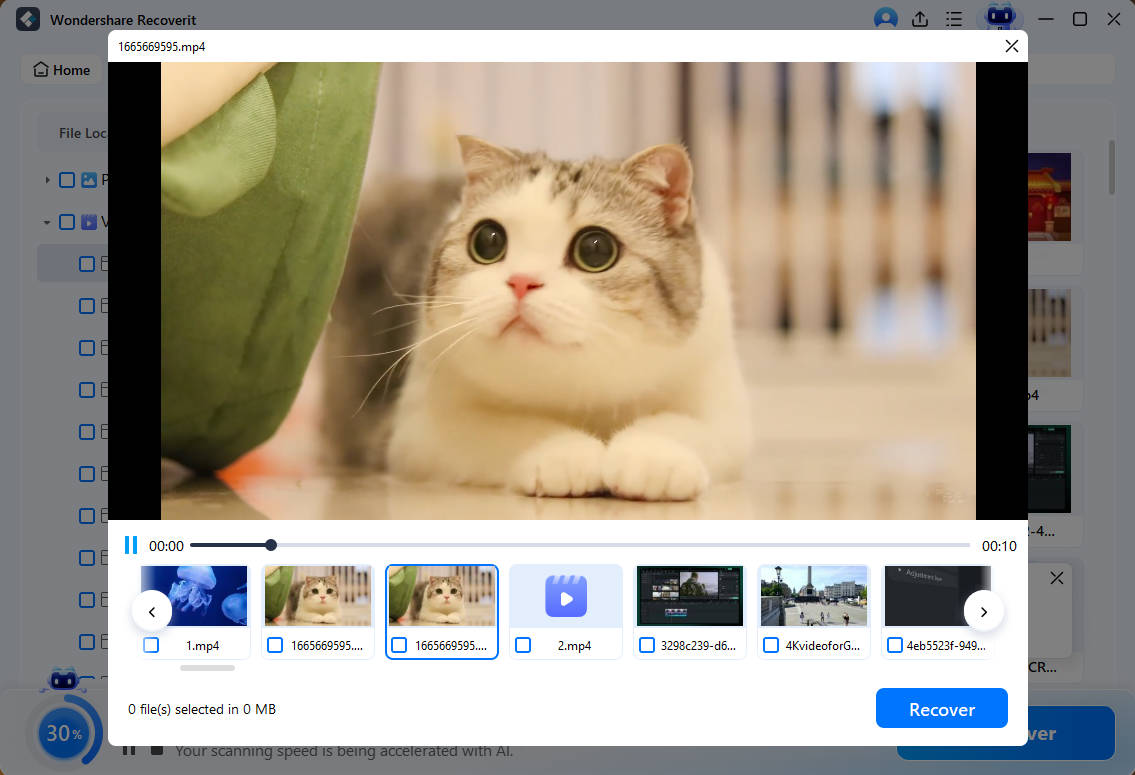
Step 4. Select the file to recover and choose a different healthy destination drive for saving it. Open the recovered copy and compare it with the blurry version. Recovery is not guaranteed, especially if the original data has been overwritten.
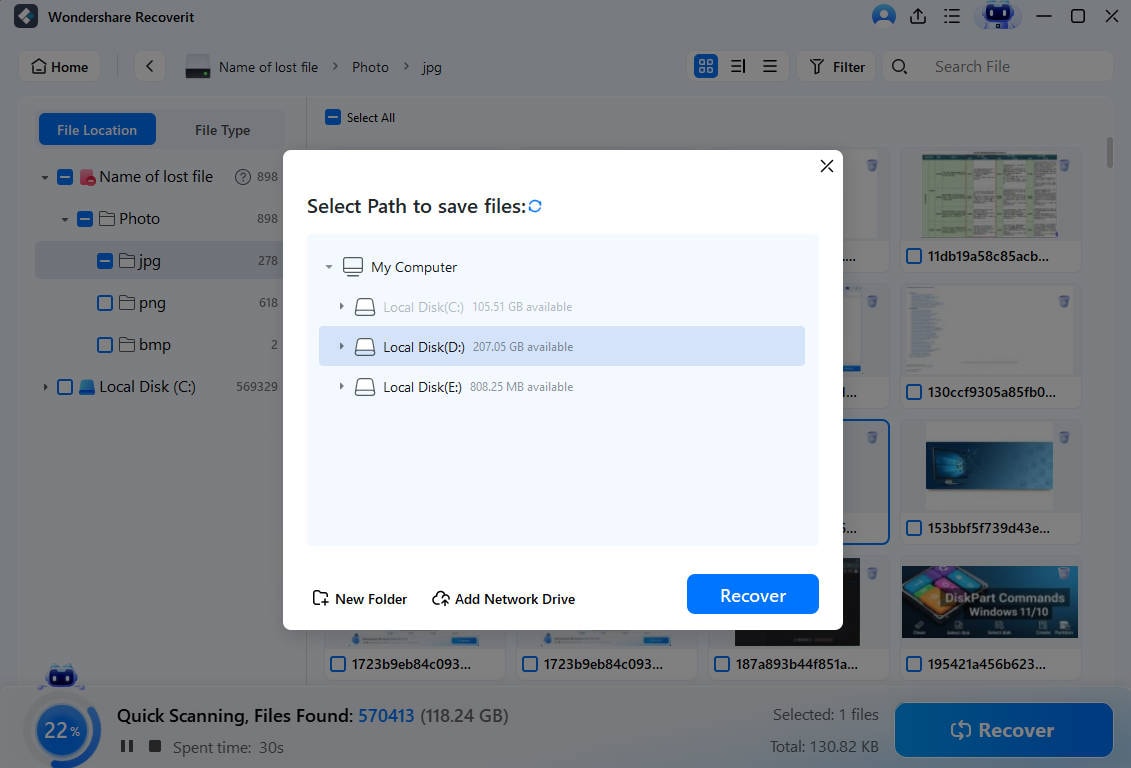
Note: Available preview and save functions depend on the current edition and license. Recovery software normally needs the device to be detectable; it cannot repair physical damage or restore already-overwritten data.
Repair an Unplayable Video After Recovery
Best for: You recovered a video file, but it will not open, contains broken frames, or has a damaged structure. This differs from a playable clip that merely looks soft. Recoverit 15's documented File Repair workflow may help with supported corrupted files, but successful playback is not guaranteed.
Step 1. Keep the recovered original untouched. In Recoverit, open File Repair and add a copy of the corrupted video.
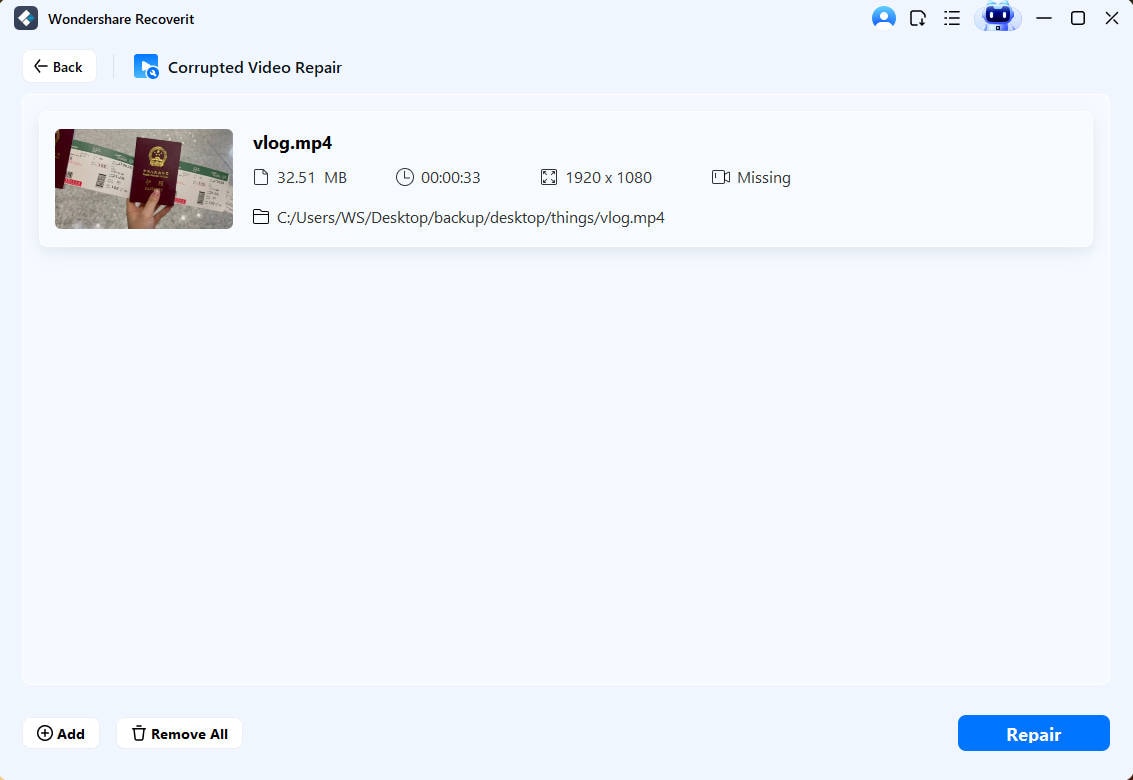
Step 2. Choose Repair and wait for the process to complete. If offered, check the repaired preview and save the result to a healthy drive.
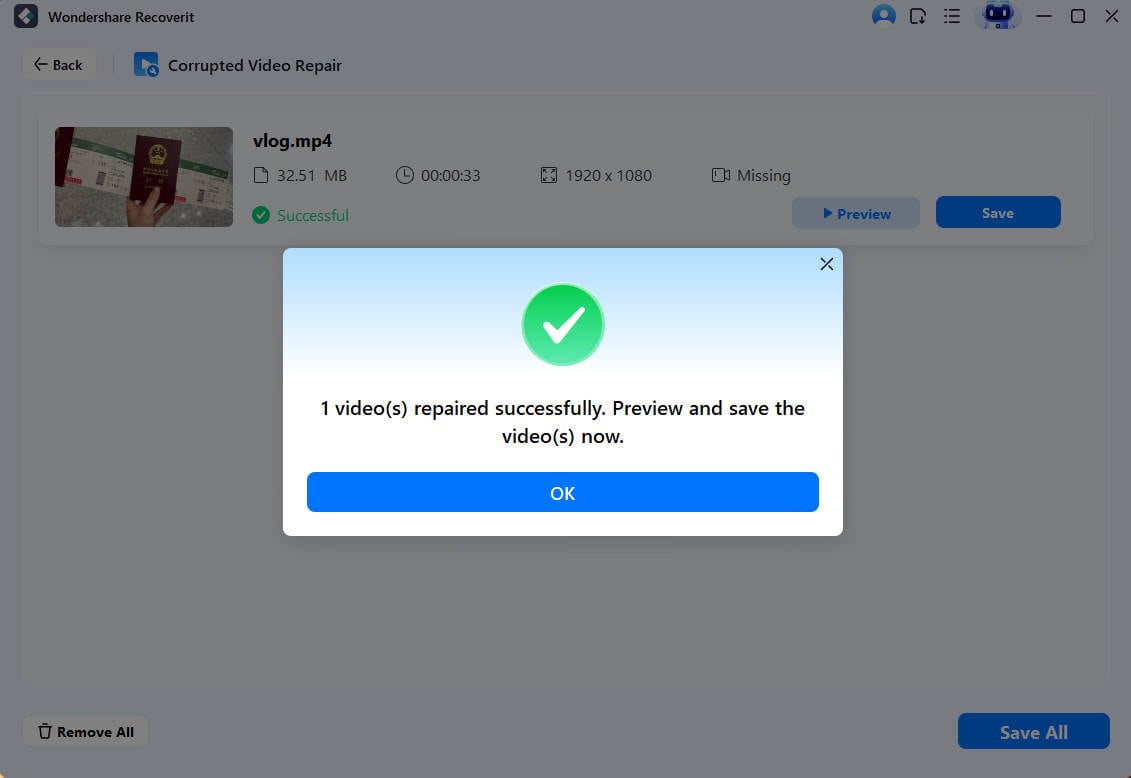
Step 3. If standard repair is unsuccessful and the interface offers Advanced Repair, follow the prompts to supply a healthy sample recorded with the same device and similar settings. Compare playback after saving; repair cannot guarantee clearer optics or restore details never recorded.
The official Recoverit Windows guide covers scanning, previewing, saving, and file repair. Do not run repair on the only remaining copy.
Part 5. How to Prevent Blurry Videos
Enhancement works best as a final touch, not as a substitute for a good source. A few changes during capture and sharing usually preserve more natural detail than aggressive post-processing.
- Check focus before recording: Tap the subject on a phone screen when appropriate, and check a test clip before an important take.
- Use enough light: Better lighting can allow a faster shutter and reduce movement smear, though exact exposure depends on the camera.
- Support the camera: Use a stable grip or tripod for longer shots and avoid rapid, uncontrolled pans.
- Keep the original file: Back up the camera source before cropping, converting, transferring, or exporting it.
- Choose sensible export settings: Match the source dimensions and frame rate when practical, avoid unnecessary repeated recompression, and select an adequate bitrate.
- Send the file, not just a preview: When clarity matters, use a transfer option that preserves the highest-quality original available.
If your issue is specifically blocky footage recorded on a phone, this guide to pixelated Android videos covers that narrower symptom without treating every blur problem as data loss.
Conclusion
The best way to make a blurry video clear depends on how it became blurry. Try CapCut or Premiere for mild softness, Filmora AI for low-resolution footage, iMovie for shaky framing, and higher playback quality for a stream that looks worse than its original. If someone sent you a blurry copy, ask for the source before sharpening it. Recoverit becomes relevant when that original file has disappeared or when a recovered video is actually corrupted, not when an otherwise playable video is simply out of focus.
FAQ
-
Can you completely unblur a video that was filmed out of focus?
Usually not. Sharpening can emphasize existing edges and AI enhancement can produce plausible detail, but neither guarantees a faithful restoration of information the camera did not record. -
How do I make a video less blurry without paying for software?
First compare the highest-quality original with the blurry version. If the problem is low playback quality, change the player setting. For mild softness, try the adjustment controls available in an editor such as CapCut; export and licensing options may vary. -
Why are videos sent to me blurry even though they look clear on the sender's phone?
The message may contain a reduced-quality copy. Ask the sender for the original video as a file or through a sharing option that preserves source quality. A compressed copy generally cannot be made identical to the source by sharpening. -
Does converting a blurry MP4 to 1080p or 4K make it sharp?
Not by itself. A larger output resolution does not recreate genuine detail missing from a low-resolution or unfocused recording. Good export settings help preserve existing quality. -
Can video stabilization remove motion blur?
Stabilization reduces unwanted frame movement and may improve viewing comfort. It does not undo the streaking recorded inside an individual frame when the camera or subject moved during exposure. -
Should I use Recoverit to remove blur from a video?
Use a video enhancement or editing tool for ordinary softness. Recoverit is relevant if your clearer original is deleted or inaccessible, or if a video file needs supported file repair after recovery. Data recovery and optical deblurring are different tasks.


