

 TL;DR:
To stop automatic movie recording interruptions on a DSLR, switch to a certified high-speed memory card formatted to FAT32 or exFAT, as slow write speeds are the primary cause of sudden capture failures.
● Decrease the video resolution or frame rate settings to reduce data processing strain, and record in shorter bursts to prevent camera sensor overheating during extended sessions.
● Update your camera to the latest firmware version to patch older video mode bugs and improve overall hardware compatibility with SD cards.
● If an unexpected stoppage leaves your video files corrupted or unplayable, utilize data recovery software like Wondershare Recoverit to rebuild the broken file structure and restore the damaged frames.
Ask AI for a summary
 ChatGPT
 Perplexity
 Gemini
 Claude
 Grok
Grok
DSLR users often face unexpected interruptions in video recording, especially during key moments. The unclear alert and absence of detailed guidance can leave both new and seasoned users searching through settings, uncertain of what triggered the issue. This sudden pause disrupts the shoot and adds a layer of stress and confusion.
The issue can affect any DSLR model, especially during long or high-resolution recordings. While some users restart the device or adjust settings blindly, a few simple checks can often resolve the problem.
This guide offers clear, practical steps to fix the movie recording has been stopped automatically error in DSLR cameras and prevent it in future shoots, helping you record smoothly and confidently.
Try Recoverit to Recover & Repair Video/Photo/Docs etc.
![]() Security Verified. Over 7,302,189 people have downloaded it.
Security Verified. Over 7,302,189 people have downloaded it.
Common Causes: Why "Movie Recording Has Been Stopped Automatically"?
Some users see this alert during important moments, such as travel shoots or live events. The interruption can break the recording and leave only a small part of the clip saved. The problem can appear even when the camera seems fine. This makes the issue frustrating for many users. The causes listed here help you understand the full picture.
- Slow memory card: A slow card cannot write data fast enough. The camera stops recording to prevent data loss. Slow cards often create delays during fast action scenes.
- Low storage space: The card fills up fast during long shooting. When the free space becomes too small, the camera may stop. This is common when recording at high quality.
- Overheating problem: Long sessions heat the sensor and internal parts. The camera stops to protect itself. Heat can also affect battery life during long work.
- Wrong file system: A card with an unsupported file system can fail during recording. This happens more during high-resolution capture. The format of the card matters more than many users think.
- High resolution or high frame rate: These settings create large files. A weak card or a slow processor can struggle. High frame rate modes use more resources than regular modes.
- Old firmware version: Older firmware can cause recording bugs. Some models freeze during use. Updates often include stability fixes for video modes.
- Card compatibility issue: Not every card matches the full-speed needs of a DSLR. Low-grade cards show errors more often. Matching card type with camera model helps avoid problems.
- Damaged or corrupted card: A damaged card can interrupt recording and produce unstable files. Cards wear out after long use and may become less stable.
How to Fix "Movie Recording Has Been Stopped Automatically"?
Some users feel unsure about which fix to try first. The steps in this part give a clear plan. You can follow them in order or pick the one that matches your situation. If the issue returns often, use several methods. These solutions work for short clips and long shoots.
Method 1: Check available storage space on the memory card
Running out of space can happen without noticing it, especially during long sessions. Large video files fill cards faster than photos. Some users record many clips but forget to clear old files. A small amount of free space may look fine, but it is not enough for smooth video capture.
Recording video uses storage fast. When only a small amount of free space remains, the process may stop. This check is a simple first step. You only need a few seconds to confirm the free space. Many users fix the issue at this step alone.
How does this method help
- It removes space issues.
- It helps the camera write at a stable speed.
- It reduces sudden interruptions.
- It improves overall recording stability.
Steps
Step 1: Open the camera menu and check storage space.
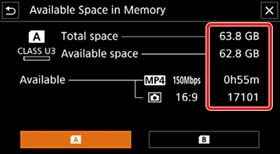
Step 2: Delete unwanted files or move them to another computer.
Method 2: Format the SD card to the correct file system (FAT32 or exFAT)
Many users skip the formatting step when buying a new card. However, formatting sets the card for your specific device. It removes old file blocks and prepares the full storage area. This helps the camera read and write data faster.
A card with the wrong file system may not handle large video files. Formatting prepares the card for clean writing. A correct format makes the card perform better in long sessions. It also reduces the risk of unexpected errors during recording.
Formatting also removes old file fragments. It gives the camera a fresh and stable base for recording. Files save faster and open without issues.
How does this method help
- It fixes write speed issues.
- It prevents file system conflicts.
- It reduces recording errors.
- It improves memory card performance.
Steps
Step 1: Back up your files.
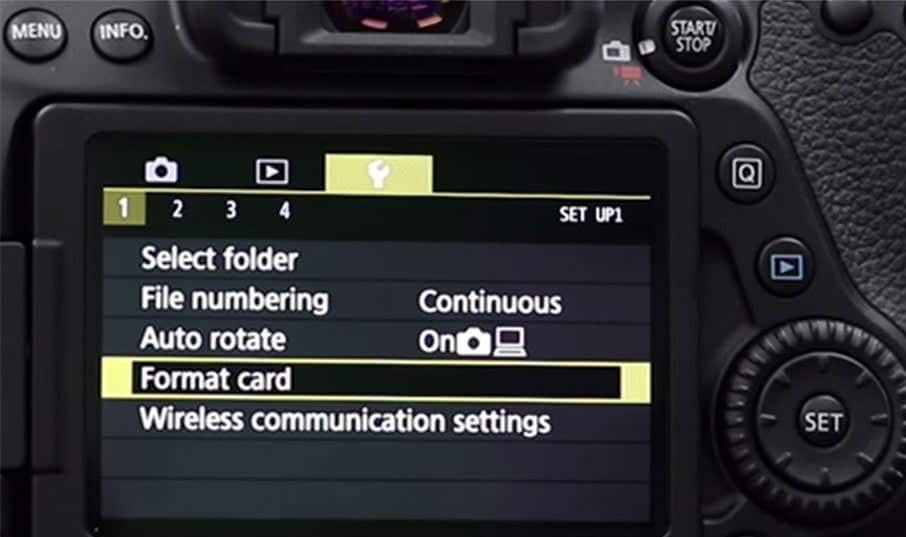
Step 2: Format the card in the camera menu.
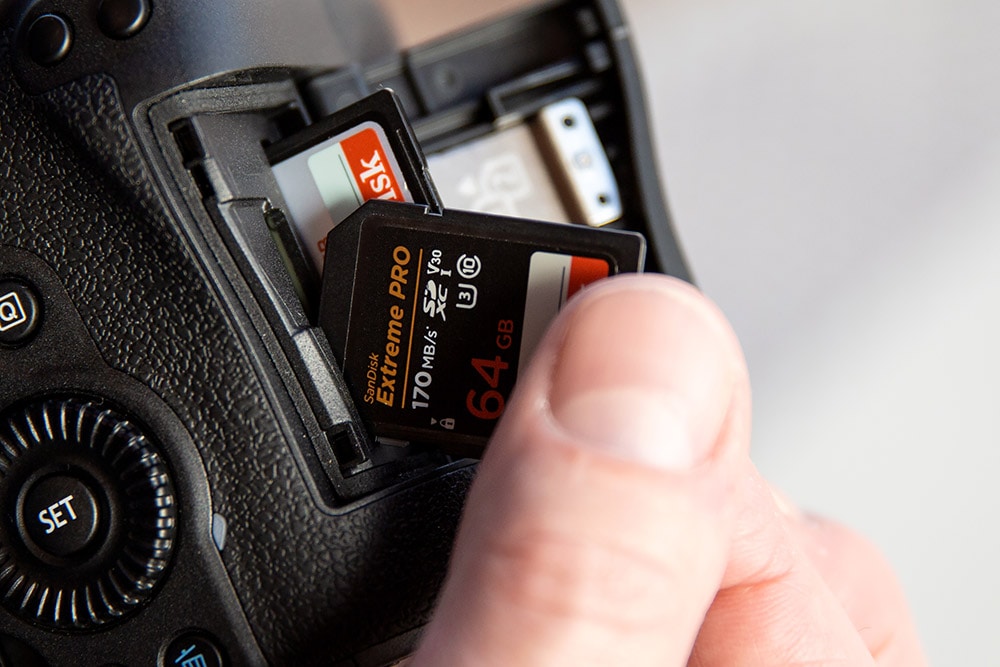
Method 3: Use a high-speed memory card compatible with video recording
Some cards look similar on the outside but work very differently in speed. Checking the card speed rating is important. Fast cards support smooth recording in high settings. Slow cards may work for photos but fail during long video sessions.
Many video problems come from slow cards. A card must match the speed needed for smooth video writing. Without enough speed, the camera cannot process data fast enough. This leads to sudden stops or incomplete files.
How does this method help
- It supports high-resolution capture.
- It avoids write delays.
- It boosts overall speed.
- It reduces mid-shoot stops.
Steps
Step 1: Check your camera manual for card types.
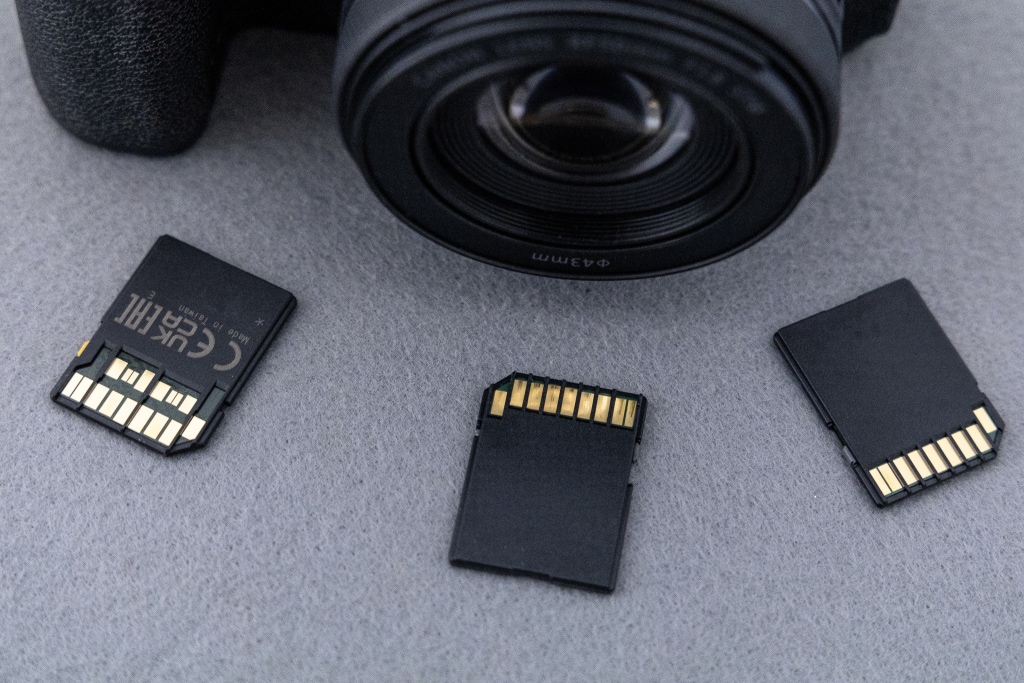
Step 2: Buy a certified high-speed card.
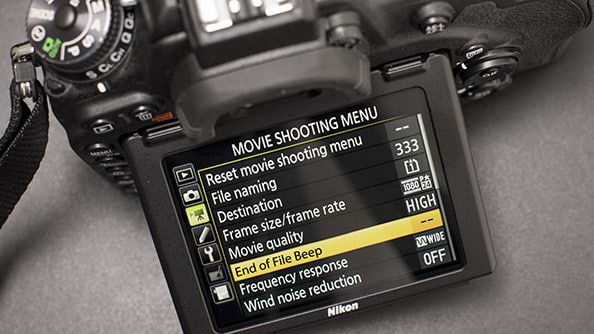
Method 4: Reduce video resolution or frame rate settings
Lowering settings helps the camera work smoothly. High settings create heavy data flow. This puts pressure on the card and the internal processor. Reducing the load helps avoid stops.
High resolution creates larger files. A slow card or warm camera may struggle. Lower settings help the device handle data better. This is useful in long shoots where the camera needs more time to keep cool.
Lower settings make the workload easier. Cameras perform better with reduced pressure. It also helps beginners who are testing different modes.
How does this method help
- It lowers the file size.
- It reduces stress on the card.
- It supports longer recording sessions.
- It avoids heat buildup.
Steps
Step 1: Open video settings.

Step 2: Select a lower resolution or frame rate.
Method 5: Prevent camera overheating by recording in shorter intervals
Long continuous recording heats up the internal parts. A warm environment makes this worse. Giving your device rest helps control heat levels. This keeps performance steady during long shoots.
Heat is a major reason for recording stops. Sensors and processors warm up fast during long work. Hot parts slow down recording functions. Many users notice more errors on warm days or outdoor locations.
Short bursts give the camera time to cool. This simple habit avoids many sudden stops. It keeps the device in safe temperature limits.
How does this method help
- It protects internal parts.
- It reduces thermal warnings.
- It keeps recording stably.
- It improves long-term camera life.
Steps
Step 1: Record in small segments.
Step 2: Let the camera rest between takes.
Method 6: Update camera firmware to the latest version
Many users forget to update the firmware. These updates often include fixes for video modes. They also improve card compatibility. Updating keeps your device in good working condition.
New firmware fixes many bugs. Some updates focus on video stability. These improvements help reduce unexpected stops. Updated firmware also improves low-light video work.
How does this method help
- It removes old bugs.
- It improves system stability.
- It adds new functions.
- It enhances hardware performance.
Steps
Step 1: Visit the brand support page.
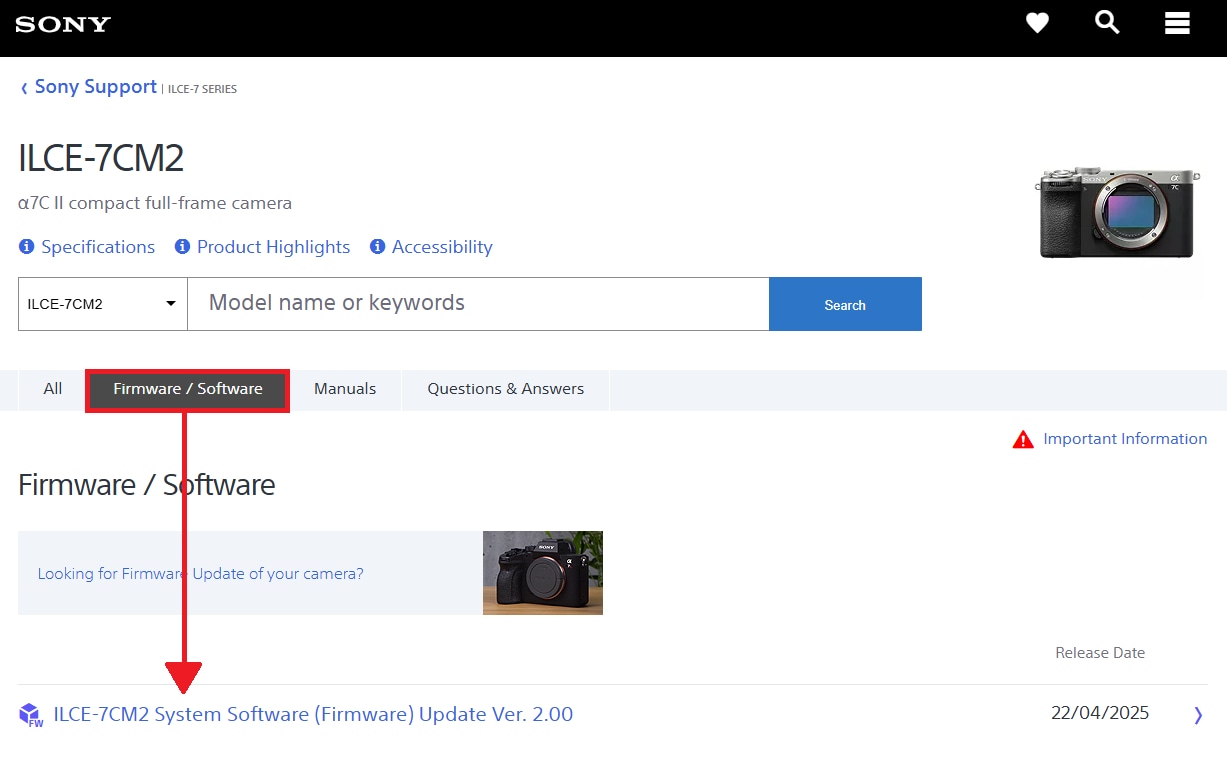
Step 2: Install the new firmware version.
Method 7: Test with a different SD card or external storage device
Testing with a second card helps confirm the cause. If the new card works fine, then the old card was the problem. This simple test saves a lot of time.
Some cards fail even if they look fine. Trying a second card helps check if the card is the real cause. If the problem remains, then another method may be needed.
How does this method help
- It confirms the source of the problem.
- It prevents data loss.
- It gives better performance.
- It avoids card-related stops.
Steps
Step 1: Insert a new or high-speed card.
Step 2: Try a short test video.
Part 3: Recover Lost DSLR Footage Instantly with Recoverit
Interruptions can damage video files. A broken file often cannot play in any software. Tools can help restore these files. This part explains how a recovery tool works and when to use it.
When the video stops without warning, files may get damaged. Some users also need to know how to repair corrupted videos from a Canon camera or how to recover lost/deleted videos from a Canon camera during such events. Recording stops can break the file structure. This leads to unreadable clips. A tool like Recoverit helps repair and restore videos that break during recording.
Recoverit is made for simple use. It works on memory cards and cameras. Many users trust it because it supports many formats. It recovers files even when the card fails. The tool handles damaged clips and restores broken frames. It fits well with the issues explained earlier.
Why use Recoverit
- It restores damaged videos.
- It recovers deleted clips.
- It supports many camera models.
- It handles card corruption.
- It keeps file quality stable.
- It is easy to use.
Recovery steps
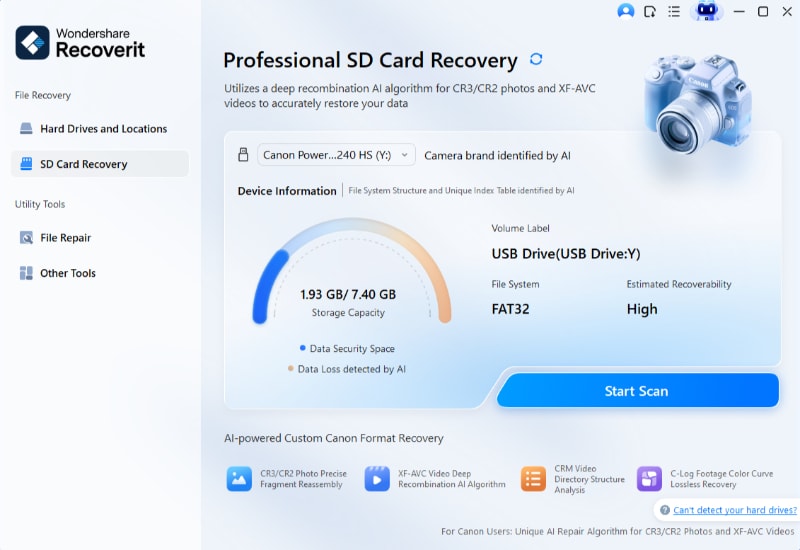
Step 1: Install Recoverit on your PC and open the program. Select SD Card Recovery. Choose the card or device that has the lost videos.
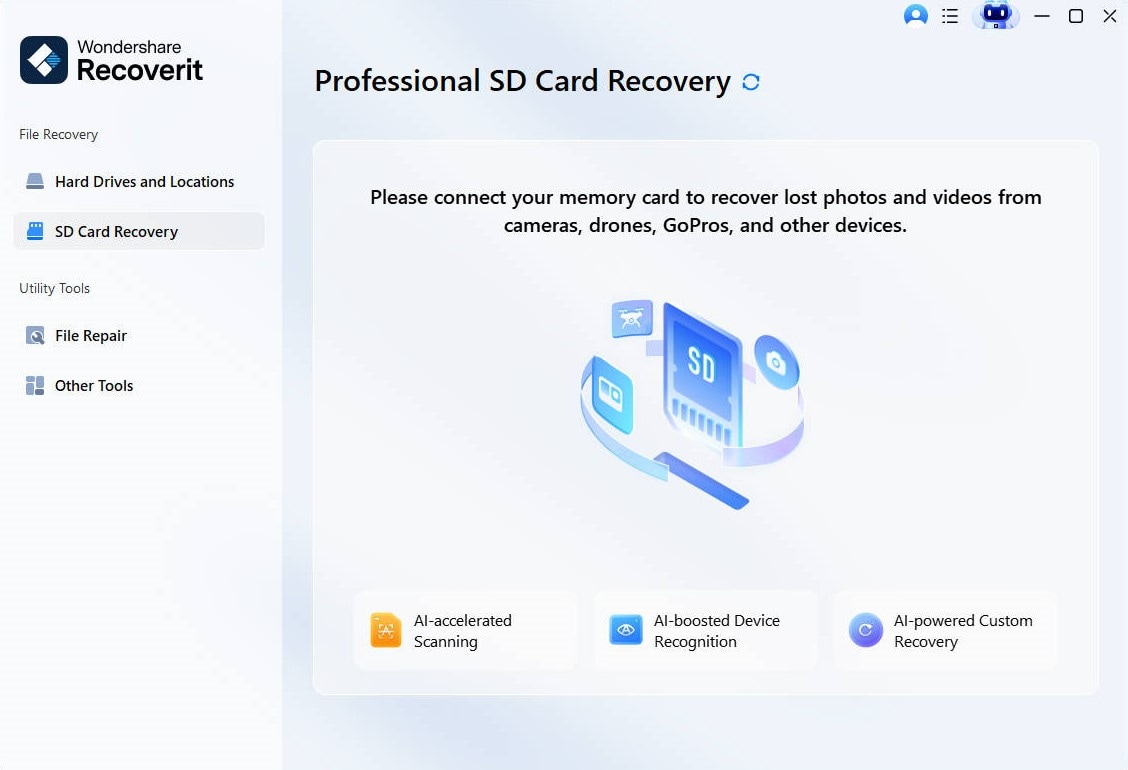
Step 2: Click Start Scan. Scan the location.
Step 3: The tool checks for missing and damaged files.
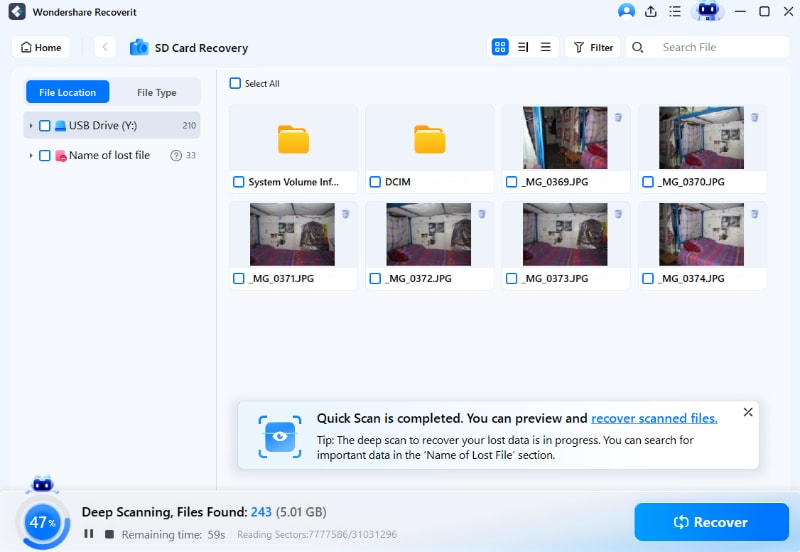
Step 4: Preview and save the recovered videos. Select the files you want to restore and save them on your computer.

Conclusion
You now have a clear view of why this problem happens and how to stop it. These methods are simple and work well for many users. You can fix the issue at home without extra tools. With the right habits, your device will perform better.
Video recording interruptions can break the flow of an important moment. This problem often comes from simple causes like card speed, heat, or old firmware. Checking these areas removes most issues fast. You can use these steps for all future shoots.
If the interruption causes file loss, a recovery tool can save the day. Small habits like using good cards and cooling the camera also prevent future stops. With these methods, your DSLR will record videos in a stable and smooth way. This gives you more control and confidence during long projects.
Try Recoverit to Recover Lost Data
![]() Security Verified. Over 7,302,189 people have downloaded it.
Security Verified. Over 7,302,189 people have downloaded it.
FAQs
-
1. Why does my DSLR show this message often?
Most of the time, the issue comes from a slow or damaged card. It can also happen due to heat or wrong settings. A few simple checks usually fix it. Testing different cards also helps confirm the cause. -
2. Can corrupted videos be repaired?
Yes. A repair tool can rebuild the file structure. It can recover damaged frames and save the clip in a viewable form. These tools work well for many memory card issues. -
3. Does high resolution cause more recording stops?
Yes. High settings need more speed. A slow card may not handle it. Lowering the settings helps. This also reduces heat during long recordings.


