How Can I Resolve Video Flickering Issue?

Jun 03, 2026 • Filed to: Photo/Video/Audio Solutions • Proven solutions
The big problem that comes with flickering is while shooting you won't find any flicker but right after shooting while reviewing the shots (Post productions), you will discover unwanted strobing effects in your shot videos.
In this article, we are going to learn various ways and solutions to remove flicker from your videos.
Part 1. What Does Video Flickering Mean?
In general, the brightness of every screen keeps changing continuously. Flickering happens when the change in the brightness of the video or screen is long enough to be noticed by the viewers.
What happens is that when you take one image from your camera the fluorescent light is at that time and while another time it is off. This phenomenon keeps going on when you shoot the video which gives you uneven or different lighting results even though your camera settings remain the same or identical.
Understanding the Concept of Lights
To understand the flickering concept deeply let's dive deep into its concept of lights. It is because flickering is all an issue of lack of light information (photons) captured/recorded by the camera. Unlike natural sunlight, which is constant, electronic lights that work on AC can cause flickering.
The power fluctuation is fast enough to not be noticed by human eyes. Hence, human eyes observe flickers. Moreover, Light flicker depends on the source of light, it is all about the light itself and the amps going into it.
| Flicker Symptom | Technical Root Cause | Primary Fix |
| Rolling Black Bars | Shutter Speed vs. LED PWM frequency. | Adjust Shutter to 1/50 or 1/60. |
| Constant Strobing | Mismatched NTSC/PAL regional power. | Switch Camera Region (NTSC/PAL). |
| Inconsistent Brightness | Fluorescent gas discharge cycle. | Lower Shutter Speed (longer exposure). |
| Fine Lines/Moire | Sensor readout speed vs. Light cycle. | Use Repairit Desktop (Advanced). |
Part 2. How to Remove Flicker from Video | Online & Desktop
As discussed above, video flickering is one of the most annoying issues. It makes your videos look extremely unprofessional. It can be caused due to poor lighting setup, fluorescent lights, or LED panels. It can also be caused due to the source of the light and how many amps are going into the bulb.
| Feature | Repairit Online | Repairit Desktop |
| Max File Size | Up to 3GB (High Limit) | Unlimited |
| Batch Repair | Up to 10 Files | Unlimited Batching |
| Advanced Repair | Standard Logic | Sample File Technology |
| Best For... | Quick mobile/social clips. | Pro-Res/4K/Large Raw footage. |
In this section, we shall learn how to remove flicker from your videos on a computer or camera.
Solution 1. Camera Settings That You Should Keep in Mind
Your camera setting mostly depends on the region you are in. In Europe, the recommended frame rate is 50 fps while in North America the standard frame rate is 60 fps. You should set up your shutter speed concerning the frame rate. The faster you go with the shutter speed, the more flickering you are going to get. For example - If you have set your shutter speed at 1/200 or above you are most likely to encounter flickering, it can be less or more depending on how much you increase or decrease the speed.
Solution 2. Use Plugins in Your Video Editing Software
Plugins are quite easy to use and you can follow up the instructions provided with them to eliminate the flickering issue from your videos. They are available in paid as well as free versions. They are mostly compatible with your video editings software like Premiere Pro, Final Cut Pro, Avid, Resolve, and Vegas.
Solution 3. Remove Flicker from the Video Using Video Repair Tool
As mentioned above, it is most likely that the problem is because of the source of the video. Very often than not your original clip is intact but the problem is with your video data source, if that is the case then you should consider using repair tools. There are several video repair tools available in the market that will resolve your issue of flickering.
1. How to Repair Flickering Video Using Repairit Video Repair Online?
Therefore, we should keep our options open and switch to the video repairing tool. Wondershare Repairit Online repairs your videos for free and makes them perfectly running.
How does this tool work? Let's find out in the next sections.
Before actually using the software, we should be well aware of the advantages that it will offer. Hence, let us take a look!
- It is free to use.
- You do not have to sign-up.
- It is an efficient tool as it repairs the videos in seconds.
- It has the capacity to repair around 10 videos in a row.
- It can deal with three video formats.
- You can count on this software for being protective and secure.
Following them precisely will allow you to repair the infected videos and have a great experience through the process.
Step 1: Browsing the Damaged Video
The software only demands one thing. You just have to insert the video in the (+) button and then wait for a couple of seconds as the uploading finishes.
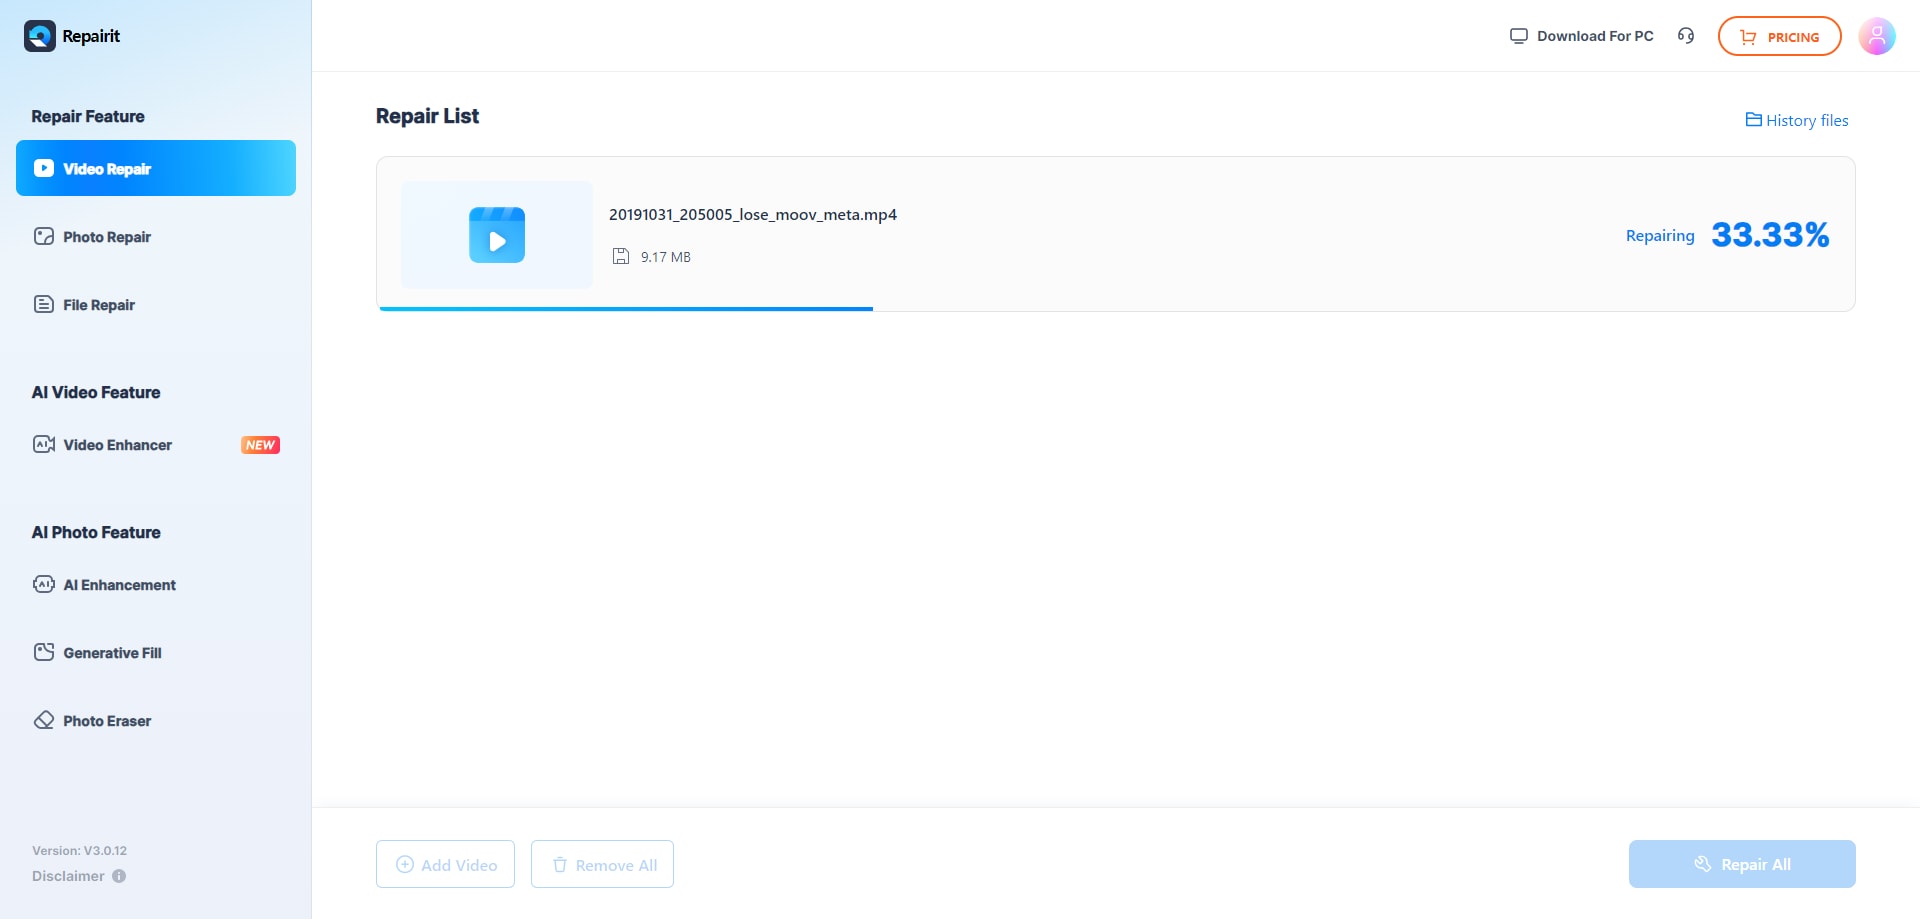
Step 2: Repairing Process
After the video is uploaded successfully, the Online Repair Tool uses liberty and starts the repairing process automatically without wasting any second.
Step 3: Saving and Repairing Next Videos
In a small interval, the video is repaired. You can preview and then save it. The software also offers you to repair the next video from your system hence, promising efficiency and effectiveness.

2. How to Repair Flickering Video Using Wondershare Repairit Desktop?
Wondershare Repairit Online and Wondershare Repairit for Desktop Version both are promising software, and their use depends upon the nature of the corrupted video. Therefore, before you chose either of them, keep the background knowledge of the format, length, and size of the targeted video. If your video deals with three formats like MOV, 3GP, and MP4, then just choose the online version and get rid of corrupted videos in seconds.
However, you have to go for Wondershare Repairit Desktop Version if the video is greater than 200MB and video formats are more than ten. Download it to your computer and start the repair process.
It is used to share corrupted and not playing videos on Windows and Mac. The steps which you need to follow to repair your videos on Windows are mentioned below:
Step 1: Add Corrupted Video
The first thing you need to do is to add the corrupted video on the surface of the software. To add the videos, click the middle area of the interface "Add video and start repairing", or click the "Add" button.

After adding the corrupted video, the interface shows the information of the corrupted video as File Name, File Size, Date Created, File Path, Operation.

Step 2: Repair Video
Click the "Repair" button, once the repairing is complete, a window pops up. It tells you to save and preview the repaired video. Click "OK" to save the repaired video.
If the video is severely corrupted, choose advanced repair.

Advanced repair – add sample video
Click the folder icon and add a sample video to repair it. "A sample file is a valid file created with the same device and the same format as the corrupted video." This box appears on the screen.

Step 3: Save Video
Click the "Save" button, an interface prompt will be visible to you. "Select a path to save the recovered files. Please do not save files to the path where you lost them."

Part 3. How to Fix Video Flickering on Phone?
With new and better phones being introduced in the market, people are using them instead of buying expensive cameras. Of course, phones are not high-quality video cameras, but they still provide very high-quality videos. Let us take a look at the steps by which you can eliminate flickering from your iPhone.
Solution 1: Turn off the portrait mode
iPhones are very well known for their cameras. Nowadays, they are generally coming with dual cameras. One is a wide-angle lens and the other one is a telephoto lens. Whereas wide-angle lenses offer generous aperture, telephoto lenses do not perform well in the dark.
It is advisable to turn off the portrait mode because this mode requires both the lenses to work simultaneously. Turning it off will reduce the flicker sensor factor when focusing on your subject.
Solution 2: Replace your LED Lights
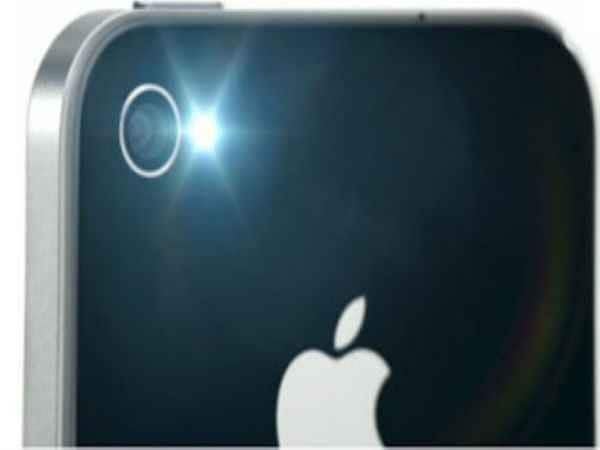
Lights are the main reasons for your videos to flicker, it does not matter whether you play them on the phone or your PC. Try changing your lighting and replace those low-quality LED lights from your set up. The camera captures the rapid changes in the brightness which we cannot see from our normal vision. That is why you should keep your lighting in check.
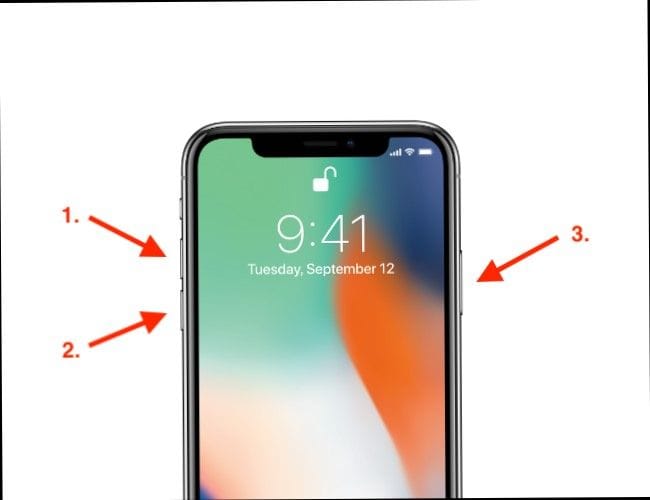
Solution 3: Hard reboot your iPhone
Try restarting your phone or force restarting your phone, if you will. This is not guaranteed, but this might fix your flickering issue. To force restart your phone, press and hold the sleep and home button and wait until the Apple logo appears on the screen.
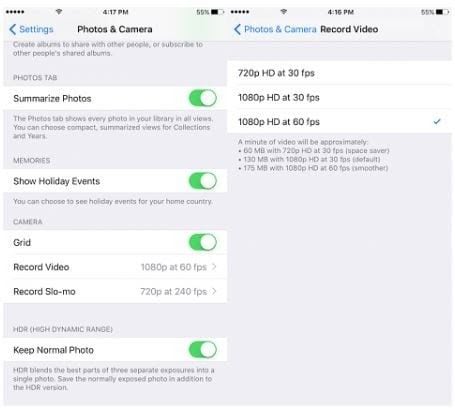
Solution 4: Disable 60 FPS video recording on the iPhone
By default, iPhones are set to record videos at 30 FPS, but the newer generations offer a smoother recording of 60 FPS with 1080p resolution. High frame rate videos may give you some smooth videos but they will not be flicker-free. Disable the 60FPS video recording to get flicker-free videos.
Part 4. What Causes A Video Flicker?
Video flickering can be caused while recording in the following situations or conditions:
- Due to Fluorescent Bulbs and Neon Lights: If you've ever filmed fluorescent bulbs or neon (artificial lights) lights then for sure you've noticed the most frustrating aspect of these lights to produce unwanted flicker in the footage. It usually happens due to your camera having a different shutter frequency than the light source, or from the nature of the emitted light.
- Due to Corrupted Video Source: Sometimes, even after shooting and reviewing the perfect shot/video can get flickers in it. Because your data source which is browsed by your device to execute or run your video files gets corrupted due to some anonymous reasons.
Now there is not always a single reason for it. It may be caused by various reasons such as storage media crash, sudden power-loss, partial download, virus attack on your storage media, header corruption, and due to any malicious software in your device.
- While Shooting Slow-motion Video or Time Lapse: If you're into the time-lapse videography or stop animation profession then most probably you've run into the common issue of inconsistent lighting or luminance. No matter if you're not changing the lens and camera setting but the flicker will persist which is actually due to less availability of light. Moreover, while shooting slow motions there is always a need for more light with a special low-light camera having more FPS (Frame Per Second) facility in it. If you're not having these options then you may generate flickers while shooting.
- Frame Per Second and Shutter Speed: When it comes to video, the frame rate and shutter speed go hand in hand, this is called the 180-degree shutter rule. This rule calls for doubling your frame rate for your shutter speed. For example: if your frame rate is set at 24 fps you should set your shutter at double speed to match 1/50. Now, technically it should be 1/48, but most of the cameras do not have this.
- Due to Motion Blur: Motion blur is something that is not easy to capture. If you are shooting for motion blur and you're having a camera that can shoot at 6 fps or more, and with it, you need a faster shutter speed to take the perfect shot with motion blur. If not, then your video can produce an unwanted flicker.
Moreover, it also depends upon your artistic choice on how much motion blur you need in your footage. However, most of the movies use a standard motion blur rule with a 180-degree shutter rule, which says that your shutter speed should be double than the frame rate to avoid flicker or disruption.
Part 5. How to Avoid Video Flicker When Recording Videos?
Flickering is a common problem that is caused by certain frame rates and shutter speed combinations in artificial lighting. Avoiding flicker while shooting is much better than repairing your videos later. There are a few ways in which you can stop the flicker from happening.
- Prefer Shooting in Natural Lighting: Lights are the most crucial element when it comes to shooting a video. To avoid flickering in your videos, prefer shooting in natural lighting. This is the ultimate solution to all of your flickering issues.
- Camera Settings: While lights may solve most of your issues but you still need to keep your camera's setting in check, especially your frame rate and shutter speed. The value of these two elements should be as close as possible.
For example - If your shutter speed is set at 125 and the frame rate is nowhere near that value, you are very likely to discover flicker in your videos. Try keeping both values as close as possible but not the same. You can try setting the 120 fps frame rate and shutter speed to 125.
- Flicker-Free Tool: Technology has always saved us from many complicated technical things. You can use the Flicker-free tool calculator app just before starting the shoot which will make you find flicker-free shutter speed and frame rate combination when you're shooting under artificial lights.
- Do You Have A CMOS Sensor on Your Camera? The camera's having advanced CMOS sensors are now known to avoid flickering effects produced due to fluorescent LED lights, traffic signals, and other artificial lights. Sony has come up with a series of such cameras to avoid the effect of Video flickering while recording the footage. So, you can go for it, if you are always into more Cinematic and live recording fields to avoid frustrating flickers.
- NTSC OR PIL: While shooting anything you should know that lighting frequency matters a lot as discussed above. If you're shooting in the America region then choose the NTSC settings in your camera and if you're doing the same in the Europe or Asia region then change it to PIL. This will help your recording device understand the region and its lighting intensity to capture the image accordingly.
Conclusion
So, these were the problems, symptoms, and solutions to flickering. We have tried to put our best in this article so that you can extract the most out of it.
We hope that our piece has helped you fully to understand the flickering concept and how to solve it.
Don't forget to share your feedback down below in the comment box.
People Also Ask
-
What causes flicker in videos?
It's usually caused by a mismatch between your camera's frame rate and the frequency of artificial lights (like LEDs or fluorescents). Lights often pulse faster than our eyes can see, but the camera captures it as a flicker. -
What is the easiest way to prevent flicker while filming?
Manually adjust your camera's shutter speed. Try setting it to a multiple of the AC power frequency (e.g., 1/50 or 1/100 sec in 50Hz regions, or 1/60 or 1/120 sec in 60Hz regions). -
Can flicker always be completely removed?
Not always. It depends on how severe the flickering is. You can almost always make it much better, but very bad flickering can permanently damage the video quality, making it impossible to remove entirely without some visual loss. -
Is there a free way to fix flicker?
You can try Wondershare Repairit video repair online tool to remove the flicker from your video. Or download Wondershare Repairit desktop tool to fix the flickering video file.
Fix Media File Issues
- Recover & Repair Photos
- Recover deleted photos.
- Recover photo booth.
- How to repair JPEG images?
- What is JPG File?
- What is GIF File?
- Guide for PNG File
- Recover Videos
- Best video recovery software for Windows
- Best video recovery software for Mac
- Recover DVR recordings
- Recover CCTV footage
- Recover deleted Vivint videos
- Recover deleted MKV files
- Recover deleted Youtube videos
- Recover deleted CapCut videos
- Recover After Effects Project
- Recover Premiere Pro Project
- Recover iMovie Project
- Recover videos from GoPro
- Repair Videos
- Fix error code 0xc00d36c4.
- Repair corrupted MP4 video.
- Fix 0xc10100be video error.
- Solve blurry videos.
- Fix MOV can't play on QuickTime.
- Free video repair software.
- Fix frozen video files.
- Recover & Repair Audio
- Moov Atom Not Found ?
- Repair your MP4 file online.
- Can't play recorded video?
- AVI/MP4/MKV cannot render?
- Fix 0xc00d5212 error of AVI.
- Recover & Repair Cameras


Eleanor Reed
staff Editor