


 TL;DR:
To resolve Microsoft Word not showing recent documents in the Windows taskbar, sign out and back into your Microsoft account to restore synchronization or manually adjust the application's display limit.
● If the document history is disabled, navigate to File, Options, Advanced, and Display within Word, then specify a number greater than zero in the Show this number of Recent Documents setting.
● When the actual document files are lost, search File Explorer for automatic backup copies using the .wbk extension, or locate AutoRecover temporary files with the .asd extension in the %AppData% directory to copy and rename them as .docx files.
● For files permanently deleted or lost due to drive formatting that built-in methods cannot retrieve, a third-party data recovery tool like Recoverit must be used to scan the original hard drive location.
Ask AI for a summary
 ChatGPT
 Perplexity
 Gemini
 Claude
 Grok
Grok
So you see that Word recent documents not showing in taskbar. You are not the only individual having this problem. On the other hand, many Windows users are confronted with the problem of recently opened Word files not being featured in the taskbar or the "Recent" section of the Start menu. The problem could arise out of some system settings, a Windows update, or even due to a bug in Microsoft Word.
Thankfully, there are a number of things that can be done to restore the recent documents list. The solutions range from fixing settings in Word to changing options in Windows Registry. Such simple troubleshooting steps have always helped in resolving this issue. In this article, we talk about the best solutions to mend your Word Recent Documents not showing in the taskbar issue as soon as possible.
Try Recoverit to Perform Word File Recovery
 Security Verified. 3,591,664 people have downloaded it.
In this article

Why are Word Recent Documents Not Showing in the Taskbar?
If your Word not showing recent documents, it can be not very pleasant, particularly if you usually rely on this feature for quick file access. This could happen for various reasons. Mostly, it is due to one of the settings in Microsoft Word being disabled or set to restrict the number of recent files shown. In addition, Windows settings for either the taskbar or the Start menu could block recent documents from appearing.
A glitch in some recent Windows updates could probably render this feature dysfunctional. These updates tend to reset or manipulate several settings, making older documents invisible in the taskbar or Start menu. Corruption in the user profile or settings could additionally result in the Word application exhibiting problems with showing recently accessed documents.
If you are not sure how to find recent documents in Word, there are other methods. You could manually go to the "Recent" section in Word by starting the application and selecting "File," followed by "Open." Here, you will see a list of recent documents that are not showing in the taskbar. You also have the option of customizing how many recent documents Word keeps track of, ensuring that your most important documents are always within reach.
You can restore recent documents and keep your files within reach by tweaking both Word and Windows settings. These few adjustments will help you resolve the problem faster and return to productivity to fastness.
How to Fix Word Not Showing Recent Documents in Windows Taskbar?
Suppose you ever find it difficult to know how to fix Word not showing recent documents in the Windows taskbar. In that case, you are not alone, as it is an issue that can arise due to system settings updates or errors with the application itself. Luckily, you can easily fix this. Essentially, this tutorial will be a guide on troubleshooting and solving the problem, including how to find recent Word documents recent doc and to restore the list.
Solution 1. Re-Login Your MS account
The issue of Word recent documents being hidden can sometimes be resolved by signing in and out of the Microsoft account. Since it uses the same account, they sync well with the document history, but re-logging will re-establish that sync. In case this is not enough, you can also check on how to clear Word recent documents for a fresh start.
Steps:
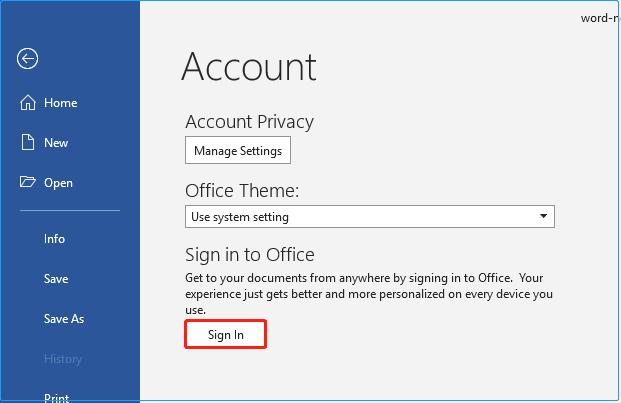
1. Open a blank Word document and click on File> Account.
2. In the Sign in to Office section, click Sign In. Alternatively, you can click the Sign In button in the upper-right corner of the Word document.
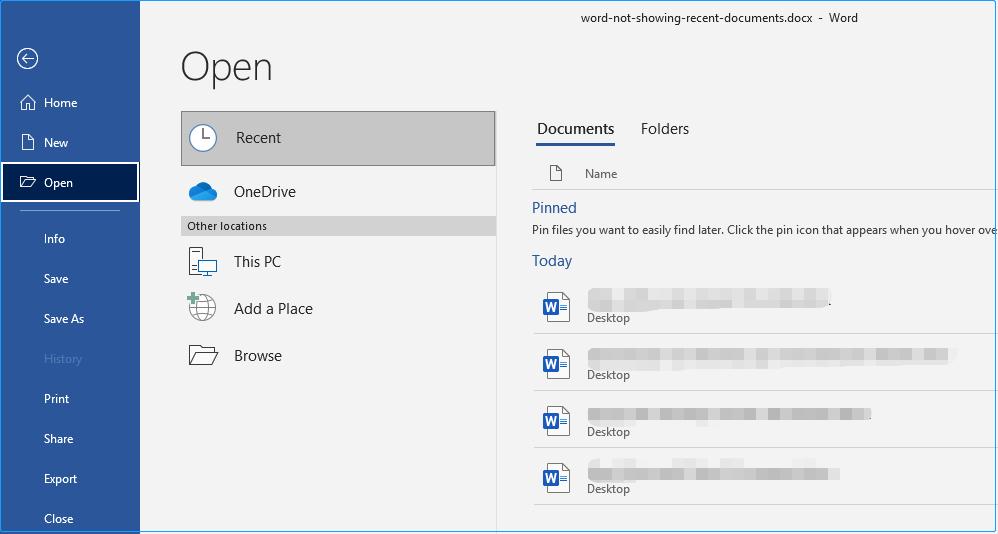
3. To log in, enter your Microsoft email ID and password. After logging in, click on File > Open > Recent to open the documents you have been working on recently. Alternatively, you can right-click on the Word icon pinned to the taskbar to access them.
Solution 2. Re-Enable the Recent Documents Feature
The Word Recent Documents is usually enabled as a default, but it can sometimes accidentally get deactivated or misconfigured. If logging back into your Microsoft account did not solve the issue of Word not displaying recent documents, try re-enabling the feature and resetting it for quick access to recent files.
Steps:
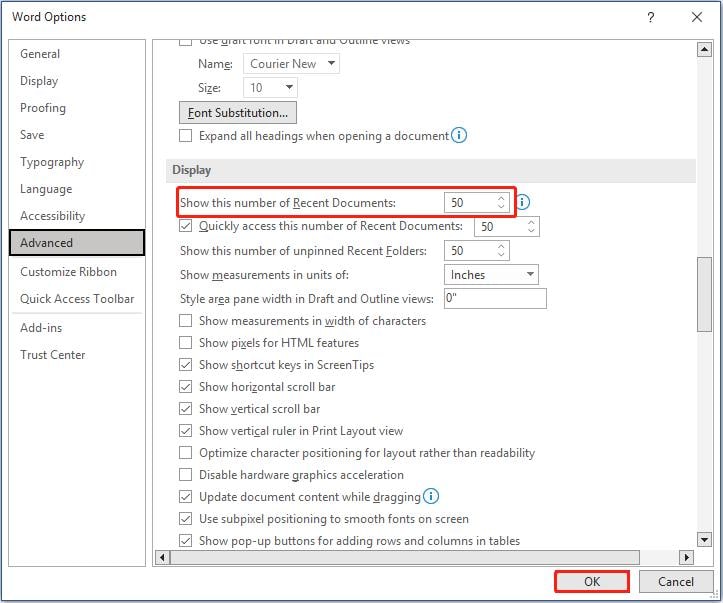
1. Open a Word document and go to File> Options > Advanced.
2. In the Word Options window, scroll down to the Display section. Find the "Show this number of Recent Documents" setting and select how many recent files you want to display. Click OK to save changes.
3. Doing this should reflect your recent Word files again; otherwise, they might be erased. Try to find them on your computer or check the Recycle Bin for the recent Word documents.
Solution 3. Recover From Backup Files
Are you facing the issue of saving my Word document, but it has now disappeared? You could recover lost files using backup copies. Most MS Word versions would save backup copies automatically to the same folder as the originally saved File with a .WBK extension. To recover your document, you need to make sure that the backup file is commensurate with the original. This method can be helpful in retrieving lost files from the Microsoft Word history of documents.
Steps:
1. Open File Explorer from the Start menu and navigate to the folder where the Word file disappeared.
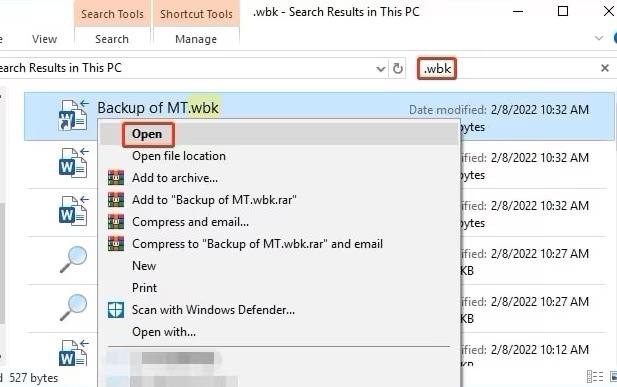
2. In the Search bar at the top right, type ".wbk" and press Enter to search for backup files in the folder.

3. Look for files that start with "Backup of" followed by the original Word document name. These are backup copies saved by Word.
4. Once you find the correct File, right-click on it and select Open to check its contents.
5. After successfully opening the document in MS Word, save it to a different location to prevent future loss.
Solution 4. Recover Searching Temp Files
You might have lost your Word document, and it is not present in the recycle bin or backup files. You can still fix the issues with Word documents disappearing using temporary files. MS Word AutoRecover saves temp files .ASD format helps restore lost documents. In this guide, I will be showing how to recover missing files and also deal with Word recent documents not showing in taskbar.
Steps:
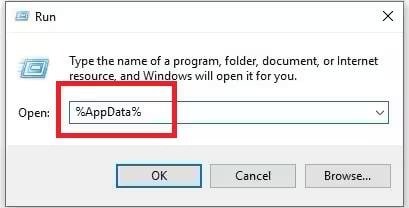
1. Press Windows + R to open the Run window on your computer.
2. In the Run dialog box, type "%AppData%" and press Enter. This will open the temporary files folder.
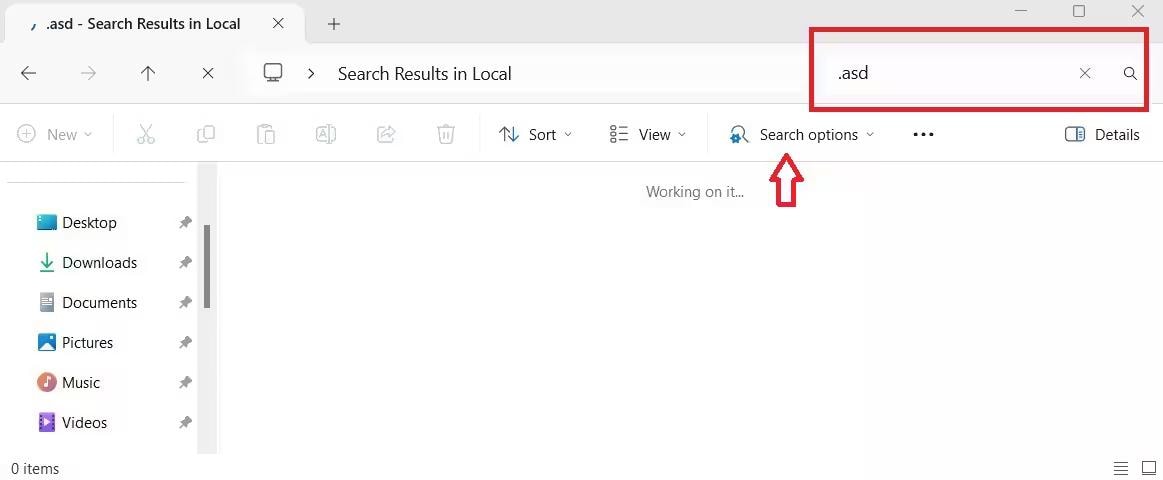
3. In the File Explorer window, type ".asd" in the search bar (top right) to find Word temp files. Click Search Options, then Date Modified, to sort by the most recent files.
4. From the search results, find the Word document you want to recover and copy it.
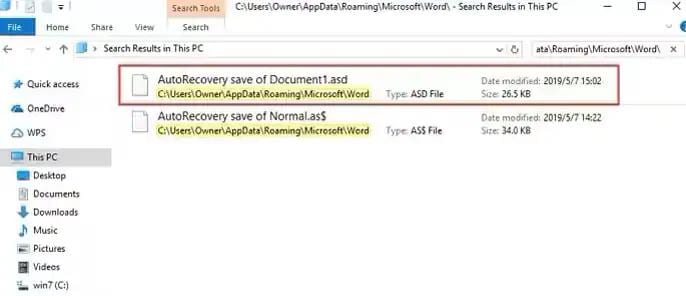
5. Paste the copied File to a safe location and rename the extension to ".docx". Now, you can open and access your Word document.
Bonus Tips: Recover Missing or Lost Word File Using Recoverit
The recovery tool of choice for many users facing this issue concerning "Word not showing recent documents" happens to be a third-party tool such as Recoverit. Recoverit data recovery software recovers lost and formatted files in a user-friendly fashion. Recovered files include deleted Microsoft Word documents, among others. Recoverit will recover anything that was lost to accidental deletion and formatting or system crashes through its advanced scanning algorithms that can retrieve hard-to-recover data in a very efficient manner.
Key Features of Recoverit -
- Multiple File Formats- Recoverit retrieves various types of files, including videos, photos, documents, messages, etc.
- Recover Formatted Drive- It recovers files lost even from formatted storage devices that have had data deleted.
- Multiple Storage Devices- Supports recovery from hard drives, SSDs, USB drives, memory cards, and external drives.
Steps:
1. Get the Recoverit data recovery tool from the official website and install it on your Windows or Mac system. Make sure not to install it on the same drive where your Word file disappeared to avoid overwriting data.
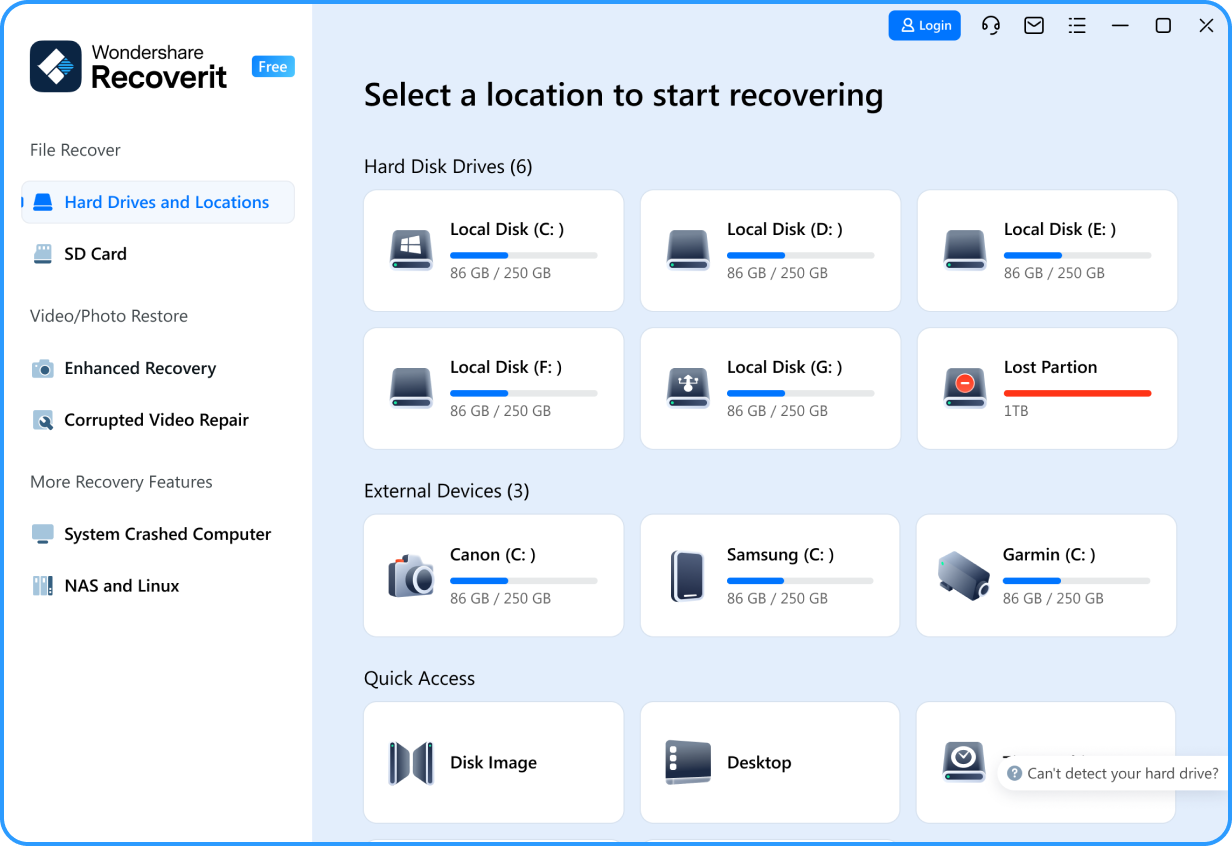
2. Open Recoverit, click on "Hard Drives and Locations" in the left panel, and select the drive where the missing Word file was last saved under the "Hard Disk Drives" section.
3. Click the "Start" button to begin scanning. Recoverit will first perform a quick scan to locate lost Word documents.

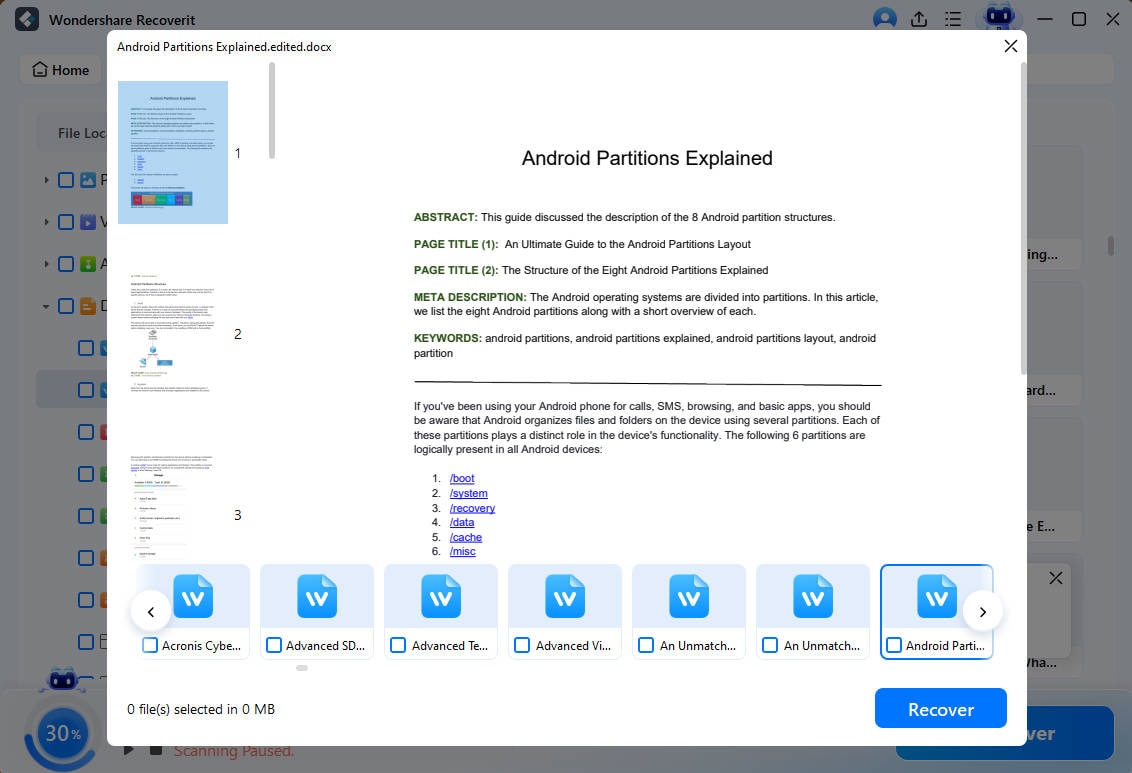
4. Once the scan is complete, preview the recoverable files. Select the Word document you want and click "Recover" to restore it.
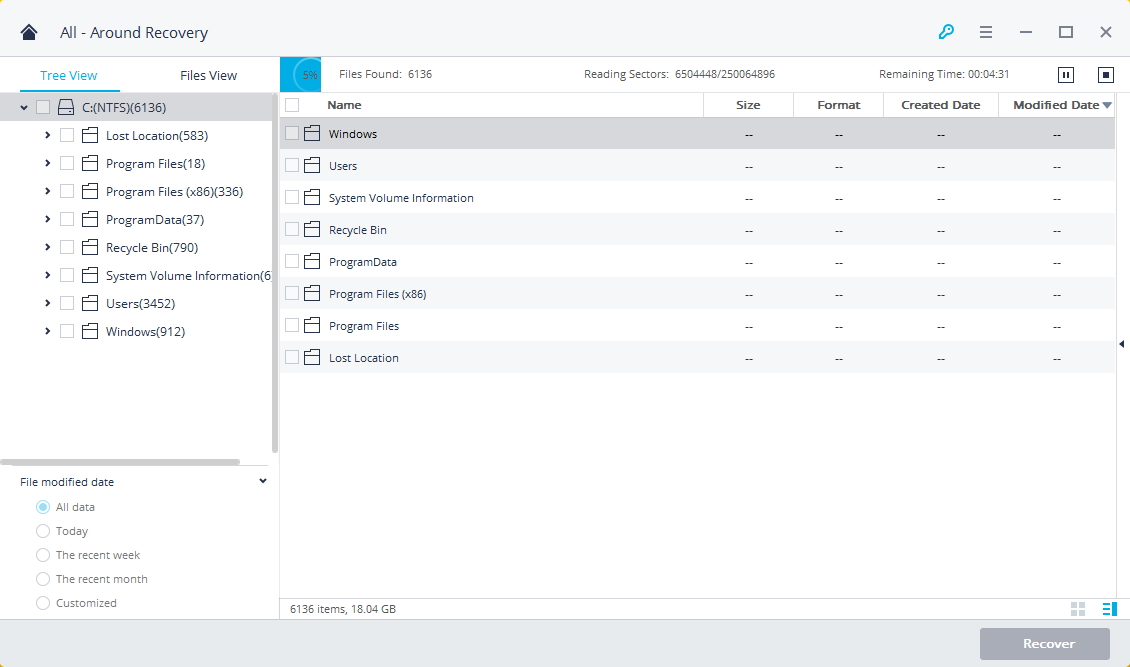
5. If your File isn't found, click "All-Around Recovery" for a deeper scan. After completion, preview the File and click "Recover", saving it to a new location, not the original drive.
Find out how to fix the issue and learn simple methods to recover corrupted Word files.

How to Avoid Word Document Disappeared Issues?
Losing a Word document is more than an annoyance, especially if it contains highly important work or personal information. There are means and methods of recovery, but the best methods are always to stave off the situation in the first place. With a few simple steps, one can protect themselves from sudden inconveniences regarding their documents and be able to access them easily whenever required.
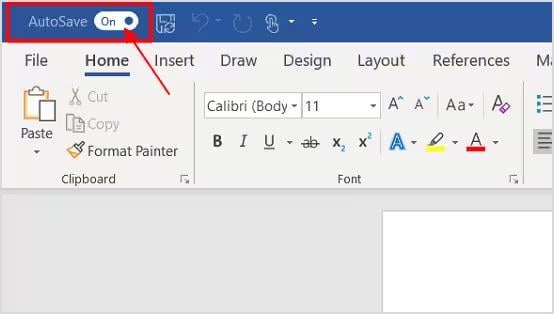
1. Enable AutoSave and AutoRecover
Microsoft Word has AutoSave and AutoRecover features incorporated, which can help prevent data loss. File > Options > Save should have both enabled. Set AutoRecover to every few minutes so that if Word crashes, you can recover something. This way, you don't have to keep worrying about losing a document before saving it manually.
2. Regularly Backup Your Documents
Anyone can tell you that backing up files is one of those easiest tips to escape loss. Important Word documents should then be accessed in the cloud through OneDrive or Google Drive, which syncs all changes automatically. You can also have one copy on an external drive or USB stick. Having more than two is to ensure that, when a file is lost, you have another means of accessing it.
3. Keep a Record of Your Recent Documents
Therefore, you will easily find your work by using the Recent Documents feature in Word. All you need to do when you want to find your recent documents in Word is to open the Word and tap File > Open > Recent, and all your previously opened files will be shown in that list. Besides, quickly access your common documents by pinning them to this list. No longer will you be confused about where your files are, and you'll also reduce your chances of misplacing valuable work.
4. Save Files in a Dedicated Folder
Combine all your Word documents into a single folder rather than leaving them scattered. This makes it easier to organize and reduces the chances of them being accidentally deleted. Should you need to know how to find recent Word documents recent doc, you will have a structured system to access them in an orderly manner.

Conclusion
Losing a Word File is a cause of stress, but there are ways to recover from it or avoid it from happening again. Be it re-logging into the Microsoft account, re-enabling Recent Documents, recovering from backups or temp files, or using Recoverit to fix missing files. Enable AutoSave and backup files, and keep the recent documents clean for organizing. In case it is a necessity, one can also learn how to clear Word recent documents to remove unnecessary documents, keeping the workspace clutter-free.
FAQ
1. Why is my Recent Documents list missing in Microsoft Word?
The Recent Documents list could be missing owing to disabled settings, a corrupted Word profile, or an unintentional clearing. You can re-enable it by going to File > Options > Advanced > Display.2. How do you activate Recent Documents in Word?
Go to File> Options > Advanced, then down to the Display section and change the "Show this number of Recent Documents" option. Click OK to save the changes.3. Why did my Recent Documents disappear following a Windows update?
A Windows upgrade may reset Word settings, wipe history, or corrupt the profile. To restore missing data, re-enable the Recent Documents function or check your backup and temporary files.


