How to Move Programs from C Drive to D Drive Windows 10
Windows 10 operating system automatically installs applications on the C Drive, since that is the partition where it resides and, therefore, by default, it is the place where the rest of the programs will be located. However, for either security or practicality reasons, a user may want their files and applications to be installed on a different partition or volume (D Drive). Many may think that their applications should be uninstalled to later install them in the new location, however, it is possible to move them using various methods, which will be addressed in this post.
Part 1: Method to Move Programs from C Drive to D Drive in Windows 10
Q: I have recently acquired a new drive. Installing again all of my programs one by one from my C Drive will be a very slow process. Is there a way to just move all the applications to the new drive?
C Drive is the volume where Windows 10 is installed, so the rest of the applications will also be installed there automatically. If a new drive is purchased, any user may have the concern of re-installing all their applications, a task which would mean a lot of time. Fortunately, there are several methods to be able to move the applications to the D Drive (default name of the new volume) without having to install them again, also preserving the information and configuration that they had until the last moment they were used.
Moving applications and files to a new drive are highly recommended; this will not only free up space on the C Drive and allow the operating system to work more smoothly. The hard drive will have a better performance by having less information in its storage and, perhaps the most important aspect is user safety, since, if malware were to leak into the operating system, you will be able to format your C Drive without having to move your information, which is a huge advantage since it will be a much more practical task than having the files and applications on the same drive where Windows 10 is installed.
Part 2: How to Move Programs from C Drive to D Drive in Windows 10
If you need to move programs from C Drive to D Drive and you use Windows 10, there are several methods. Below you will know several of them:
1. Move programs in Apps & Features:
You can move the programs directly from the control panel, through the Apps & Features tool. All you have to do is follow these steps:
Step 1: Go to Windows settings

Click on the Windows icon and then click on the gear icon to open Windows settings.
Step 2: Click on "Apps"

Now, in the Windows settings window click on "Apps." This will open the "Apps & features" tool.
Step 3: Scroll and find the program you want to move

Once you opened the "Apps & features" tool, scroll and find the program you want to move. Then just click on "Move."
Step 4: Choose a location

A new dialog box will emerge, click on the white rectangle, and select the volume or partition where you want to move the program. Then just click on "Move" and the application will be transferred to the new location.
Step 5 (optional): Corroborate

If you want to make sure that your program has been correctly moved to the new location, just repeat steps 3 and 4 and if in the dialog box "This PC" is shown as a location to move the application, that is evidence that the process was properly done.
2. Move programs in Apps & Games:
You can also move programs to another location through the Apps & Games tool. This method is similar to the last one. You just have to follow these steps:
Step 1: Go to Windows settings

Click on the Windows icon and then click on the gear icon to open Windows settings.
Step 2: Type "storage" on the search box

Once you are in the "Storage" window, click on the search box and type "storage."
Step 3: Click on "This PC (C:)"

On the storage window, click on "This PC (C:)." Remember this is the location where the apps are originally installed. If you want to move apps from another location, select the right one.
Step 4: Click on "Apps & games"

From this list, click on "Apps & games."
Step 5: Scroll and find the application or game you want to move

Once you opened the "Apps & games" tool, scroll and find the program or game you want to move. Then just click on "Move."
Step 6: Choose a location

A new dialog box will emerge, click on the rectangle, and select the volume or partition where you want to move the program or game. Then just click on "Move" and the application will be transferred to the new location.
3. Move Program Files Using Registry Editor:
You can move your program files to another drive using Regedit. Make sure you have closed all your programs before beginning this process. Afterward, follow the next steps:
Step 1: Copy "Program Files" and "Program Files (x86)" folders and paste them on your D Drive

Go to your Local Disk and copy both "Program Files" and "Program Files (x86)" folders and past them to your new location (in this case, your D Drive). This process may take several minutes.
Step 2: Open Registry Editor tool

Press and hold "Win" and "R" keys at the same time and Run tool will be opened. Type "Regedit" on the white box and then click "OK." This will open the Registry Editor tool.
Step 3: Go to the folder to edit "Program Files" and "Program Files (x86)" locations

Once you open Registry Editor, follow this path: HKEY_LOCAL_MACHINE\SOFTWARE\MICROSOFT\Windows\CurrentVersion.
Step 4: Modify the location of "Program Files"

Right-click on "Program Files" and then select "Modify."
Step 5: Edit location

You have to change the location. Just erase the letter and type the correct one, in this case, it should be the letter "D." Then click "OK." After this you modify "Program Files (x86)" location, so you just have to repeat steps 4 and 5 selecting "Program Files (x86)" instead of "Program Files."
4. Move Program Files Using mklink:
You can also use mklink command through Command Prompt, this command creates a directory or symbolic file or hard link. You can use this to link the program files to your new location (in this case, your D Drive). Doing so is not difficult, just follow the following steps to be able to do this task:
Step 1: Copy "Program Files" and "Program Files (x86)" folders and paste them on your D Drive

Go to your Local Disk and copy both "Program Files" and "Program Files (x86)" folders and past them to your new location (in this case, your D Drive). Take into account that this process may take several minutes.
Step 2: Open Command Prompt tool

Go to win menu and type "CMD", then right-click on its icon and select "Run as Administrator" option.
Step 3: Type the corresponding commands
Once you opened Command prompt tool, type mklink and hit "Enter". Then type this:
/J "Program Files" "D: Program Files" and hit "Enter" again.
This step will link D Drive as the new directory to Program Files. Remember that "D" character is for the new link drive. If it has a different character you should type it instead of "D."
5. Move Program Files Using UBackit:
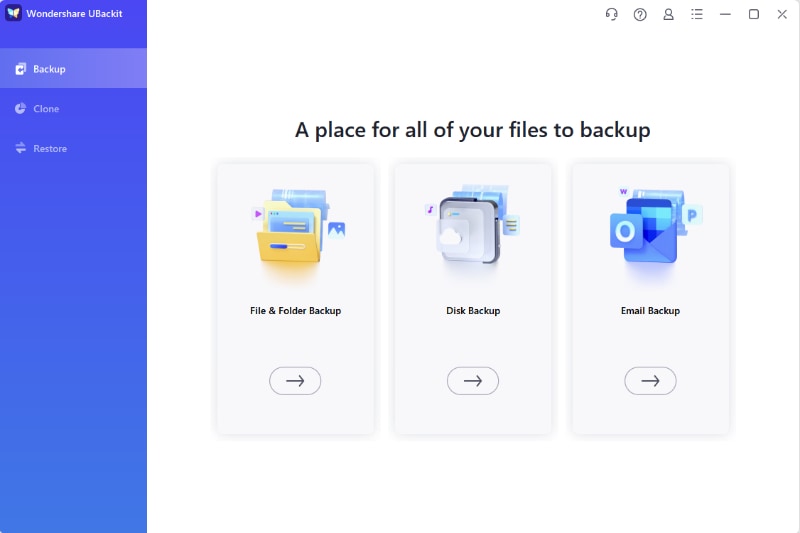
To easily move programs from C drive to D drive, consider using backup software such as Wondershare UBackit. This user-friendly program allows for seamless data transfer in just three steps. Additionally, it offers a free trial period of 30 days.
To transfer data from the C to D drive using UBackit, follow these specific steps:
1. Download and Install
Obtain UBackit from the official website and install it on your computer. Then, launch the program.

2. Select the Files
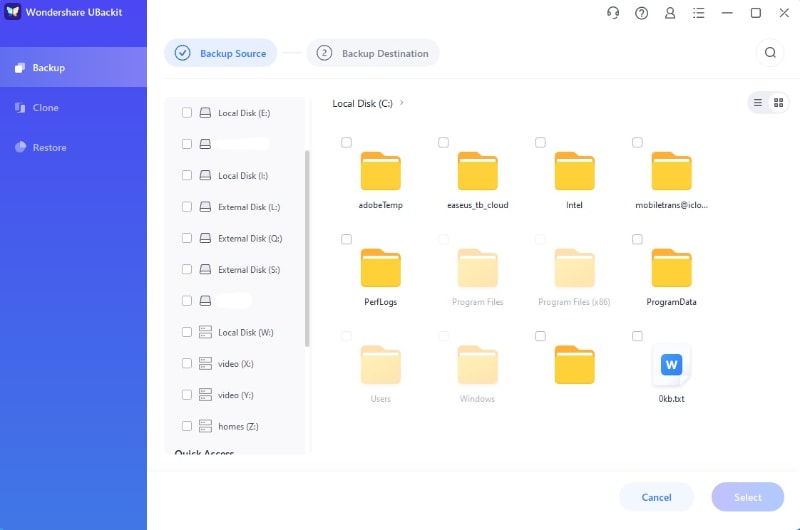
Choose the File&Folder Backup option and locate the program folder you wish to transfer. Select it and proceed to the next step.

3. Select Backup Destination
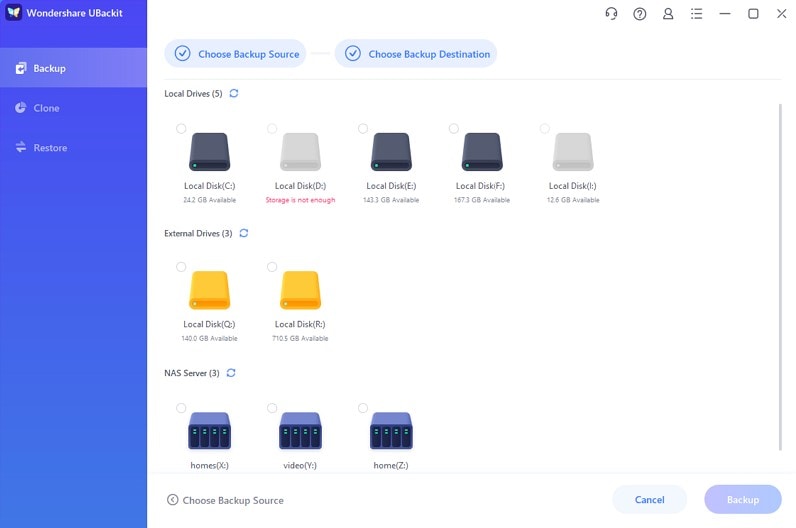
Designate the D drive as the destination for the transfer. Then, initiate the backup process.

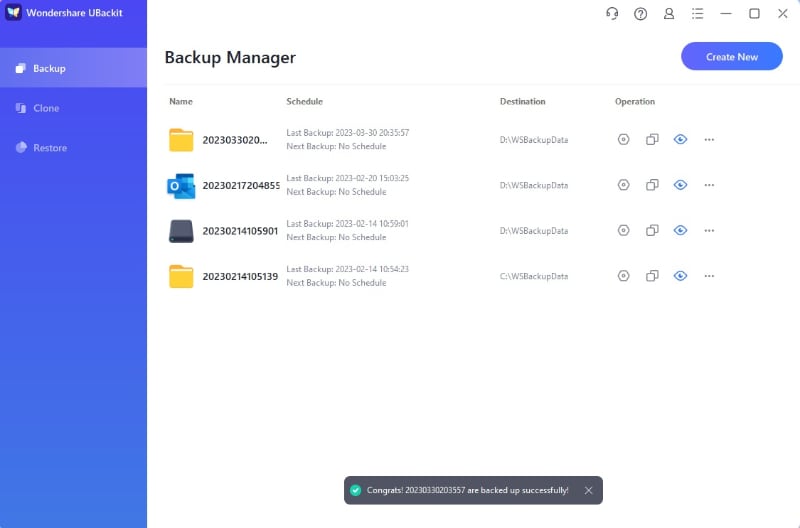
Allow the process to finish. Once completed, the files will have been successfully backed up and transferred to the D drive.

Part 3. Recover the Data Lost While Transfering Programs from C Drive to D Drive
The processes that have been shown on rare occasions generate a loss of information, however, they are not exempt from something like this happening. If you do not have a backup and accidentally formatted your D drive, you will surely think that there is no solution, but there is Recoverit, professional software to recover your files, documents, and programs even if they were completely deleted. Just do the following to recover your information:
Video Tutorial on How to Recover Deleted Files on Windows 10/8/7 Easily?
Step 1: Select a Drive

Launch Recoverit and look into "Hard Disk Drives". Your drive will be there. Select and click on "Start".
Step 2: Scan Your Drive

Recoverit will initiate a scan on the drive. You'll have great features you can use to streamline the scan and recovery process. For instance, you can simply tick the file types you want to recover instead of each one.
Step 3: Preview and Recover Drive Data

The conclusion of the scan will reveal a long list of the files the software found. Recovering them is just a matter of you selecting all the files or specific ones and clicking "Recover". The files will all be retrieved and saved on any location of your choice.
Conclusion
Moving your applications to another disk, as well as changing the address of the Program Files folder is a very positive idea that means that your C Drive will work more smoothly, in addition to having other advantages already mentioned. Despite the fact that this procedure does not imply high risk, it is always advisable to make backups and having software such as Recoverit, since, in the event of any unexpected event, you will have it on hand so that in a matter of a few clicks you can recover all your information.
People Also Ask
-
How do I transfer data from a dying hard drive?
You can copy the data from the dying hard drive to a new one. For this purpose, just copy the data and browse the new hard drive (C drive). Then, select the folder in the new hard drive, and paste it there.
-
Can files be recovered from a failed external hard drive?
Yes, you can recover the files from the dead or failed hard drives. However, your computer must recognize the failed hard drive, so you can use the recovery software for retrieving the files.
-
How much does it cost to recover data from a hard drive?
The average costs of data recovery range from $100 to $700, depending on various factors. In particular, the costs of data recovery depend on the type and severity of the damage, and what needs to be done for data extraction.
-
Does cloning a drive make it bootable?
Yes, cloning the hard drive results in the bootable hard drive with the computer when you undertake the clone. The users can clone to the hard drive installed on USB and computer.
-
Is it better to clone or image a hard drive?
Imaging is suitable for people who want various backup options, and you will be able to save the images without consuming too much space. Imaging is suitable for people who have downloaded a virus and want to shift back to the disk image. On the other hand, cloning is suitable for fast recovery.
What's Wrong with Drive
- Recover Your Drive
- Fix Your Drive
- Format/Wipe Drive
- Know Your Drive


 ChatGPT
 Perplexity
 Google AI Mode
 Grok
Grok


Theo Lucia
chief Editor