Imagine that you are typing a critical document on your Mac. You suddenly get a crash notification, and when you reboot your Mac, you find that most of the files on the SSD are gone. It may appear as a horrible scenario, and, luckily, we have found several ways to resolve this problem. In this article, we will discuss the top Mac SSD data recovery methods that are effective and convenient.
Try Recoverit to Perform Mac SSD Data Recovery

In this article
Part 1. Is It Possible to Recover Data From a Mac SSD?
The first question that users would present when they have lost data on a Mac SSD is whether the data recovery process can indeed be possible and productive. The positive news is that the lost information in this storage device can be recovered, although the effectiveness varies according to the conditions under which the information was lost. Take an example, when the SSD has suffered physical damage or bad firmware, the possibility of recovery reduces to a minimum.
Nevertheless, when appropriate and timely recovery procedures are applied, it is usual that data that has been lost in Mac SSDs is restored successfully. In most cases, it can be a combination of Mac SSD recovery software tools and troubleshooting at the system level, depending on the extent of data loss.
Part 2. Common Causes of Data Loss on Mac SSDs
It is essential for you to understand why the data was lost in the first place before attempting the recovery. Mentioned below are some of the common causes that can lead to data loss on a Mac SSD:
- Accidental Deletion: Users may unintentionally delete important files or folders while organizing or clearing storage.
- Formatting Errors: Reformatting the SSD without a backup can erase all existing data, and you would need to recover files from the SSD Mac.
- macOS Update Failures: Interruptions or errors during macOS updates can corrupt system files or lead to missing data.
- File System Corruption: Logical damage to file systems like APFS or HFS+ can make data unreadable or disappear entirely.
- Improper Ejection or Power Loss: Disconnecting external drives without ejecting or sudden power outages can make the drive corrupt and result in data loss.

Part 3. 5 Methods to Recover Files From SSD on a Mac
Having discussed the reasons for data loss on an SSD, let us now explore the solutions to get back the lost files. Mentioned below are a few of the top solutions you can try for effortless data recovery:
1. Best Option: Recovering Data from a Mac SSD with Data Recovery Software
One of the most reliable MacBook SSD data recovery solutions is to try Wondershare Recoverit on your computer. This advanced data recovery tool offers high-quality file retrieval functionality for various storage devices, including SSDs on Mac. It performs an in-depth scan of your storage to find the damaged or lost files in no time. Moreover, you can search for a specific recoverable file using the dedicated search bar.
The tool offers an advanced recovery mode to perform deep recovery for highly damaged or corrupted files on different devices. Besides data files, you can use this tool to recover zipped folders and emails. The success recovery rate of Recoverit is 99.5%, which is one of the highest among other recovery tools.
Incredible Features Offered by Recoverit
- Preview Before Recovery: Users get the ability to preview the scanned files within Recoverit’s interface before saving them to their device.
- Multiple File Formats: Recoverit provides support for more than 1000+ file formats for instant and effortless data recovery.
- Batch Recovery: You can save time and effort by not saving each separately, as the platform supports batch Mac SSD recovery for its users.
Step-by-Step Guide For SSD Mac Data Recovery with Recoverit
As discussed, Recoverit offers a comprehensive solution for retrieving damaged or lost files on different storage devices. Let us explore the steps for recovering the data on an SSD using Recoverit:
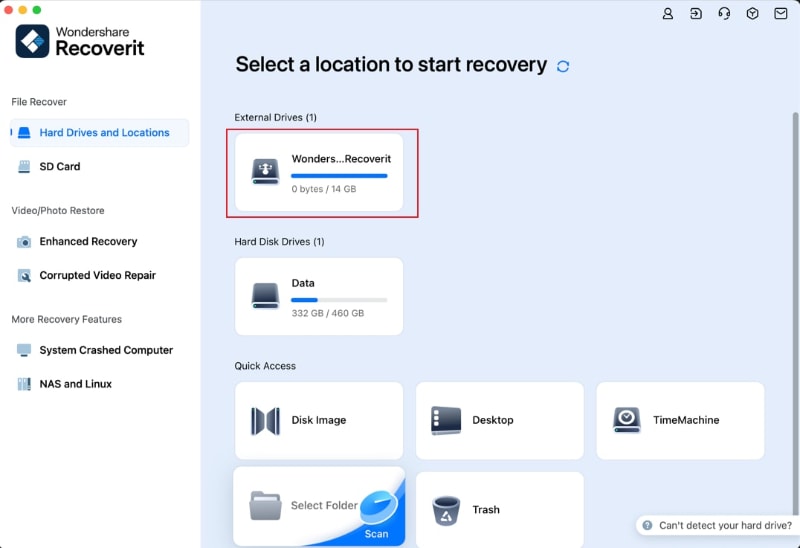
Step 1. Select From the Available Storage Spaces
To begin the process, launch Recoverit on your device and select the SSD storage from the options provided on the homepage. The tool will start the scanning process as soon as you select the storage device.
Step 2. Select The Recoverable File
Once the scan is complete, the tool will display all the recoverable files within its interface. Select your desired file by clicking on it and pressing the “Recover” button at the bottom.

Step 3. Preview the Recovered File
Before saving the files to your device, preview them within its interface and finally press the “Recover” button to save the results.

2. Retrieve Data From a Mac SSD With Disk Utility
Disk Utility is a built-in macOS app that helps manage and troubleshoot internal and external drives. The First Aid feature in Disk Utility can scan and repair issues within the file systems. Once the file system is repaired, you can easily restore the file on your Mac. Provided below are the steps to recover files from an SSD Mac with the Disk Utility:
Step 1. Open the Disk Utility program on your Mac and click on the SSD in which your lost files were saved. Now, locate the “First Aid” option from the top-right corner and click on it.

Step 2. Select the “Run” button on the following dialogue box to let the utility run the process and repair and recover the files in the selected drive.

3. Restore from Time Machine Backup
Time Machine is Apple’s built-in backup tool that automatically saves copies of your files over time. If your data is lost or corrupted, it lets you roll back to a previous version. However, bear in mind that it only works if it is enabled across the Mac device. Learn how to use this utility for Mac SSD data recovery on your Mac in the following section:
Step 1. Head to the Finder App on your device and search for the Time Machine utility. Next, choose the storage for your lost files in the following small window by clicking on the option. Now, head to the top-right corner of the screen and press the small “Clock” icon to press “Enter Time Machine.”

Step 2. Go to the timelines on the right and locate the date from which you want to recover the data. Press the “Restore” button after previewing the files and folders in the window.

4. Mount Your SSD to Another Device
In case the Mac does not acknowledge the SSD and is unable to boot it, another solution is to mount it on another device. It is an approach that entails eliminating the SSD and attaching it to a functional Mac or PC.
A matching enclosure or adapter, like a USB-to-SATA or Thunderbolt connector, will be required. After that, the second device can be connected, which will read the SSD like an external drive, allowing you to successfully browse or recover files in the SSD Mac.

5. Contact Data Recovery Service
It may be time to contact a professional data recovery service if all other recovery methods fail. These experts specialize in retrieving data from physically damaged or severely corrupted SSDs. This method is often the most expensive but offers the highest chance of success in extreme cases. Choose a certified provider with experience handling Mac SSDs and encrypted file systems to successfully get your data back.
Part 4. [Alternatives] Other Mac SSD Data Recovery Solutions Available For Consideration
Mentioned below are some of the other Mac SSD data recovery solutions that you can consider for data retrieval:
1. R-Studio
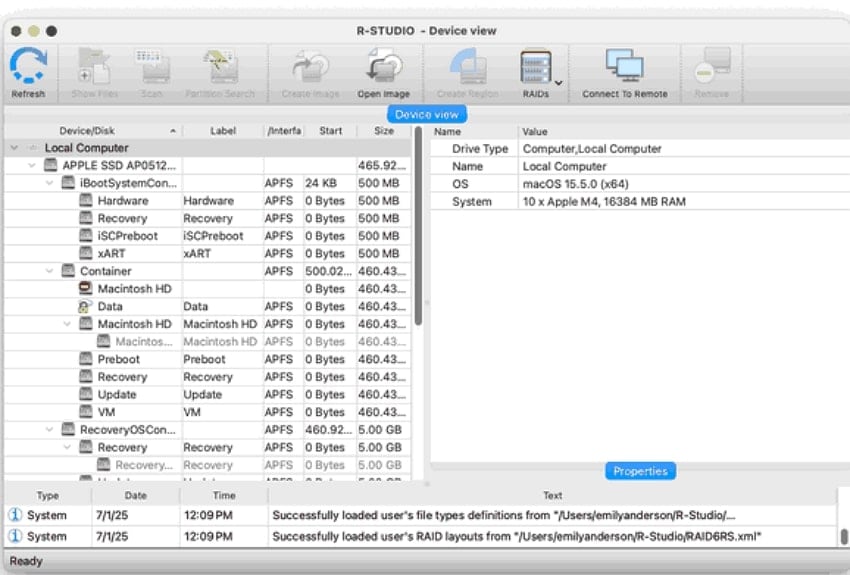
With multiple file formats supported, this data recovery tool allows you to get back images, videos, and documents. R-Studio offers direct access to the system disk even when the Mac's system integration protection is enabled. You get the ability to visualize the scanning process to track each recovered file as per your requirements. Moreover, it provides support for Mac, Linux, and Windows for convenient data recovery.
Key Features
- The disk imaging feature of this tool mirrors your disk and recovers files through it.
- You get the ability to sort files within the tool’s interface for efficient data management.
- Users can preview the file in the tool before recovering it to their device.
2. TestDisk
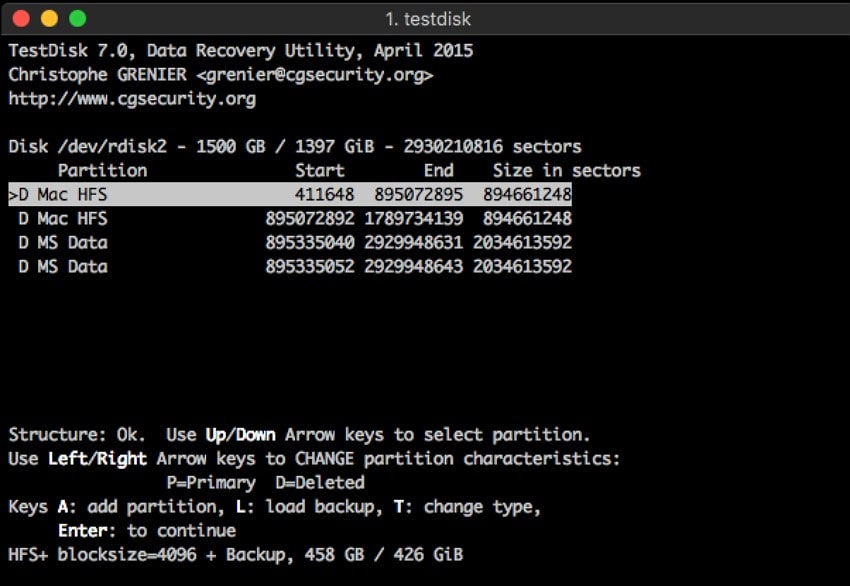
TestDisk is a powerful, open-source data recovery tool that’s especially useful for recovering lost partitions and repairing corrupted drives on a Mac SSD. It works through a simple text-based interface in the Mac Terminal, letting users scan their drives to locate deleted or damaged partitions and recover missing files. The tool is very effective at rebuilding partition tables and restoring access to data that might seem lost.
Key Features
- It efficiently fixes corrupted boot sectors to restore drive accessibility and get back the data.
- The platform is compatible with multiple file systems, including FAT and APFS.
- You get the ability to undelete a file from supported file systems.
3. PhotoRec
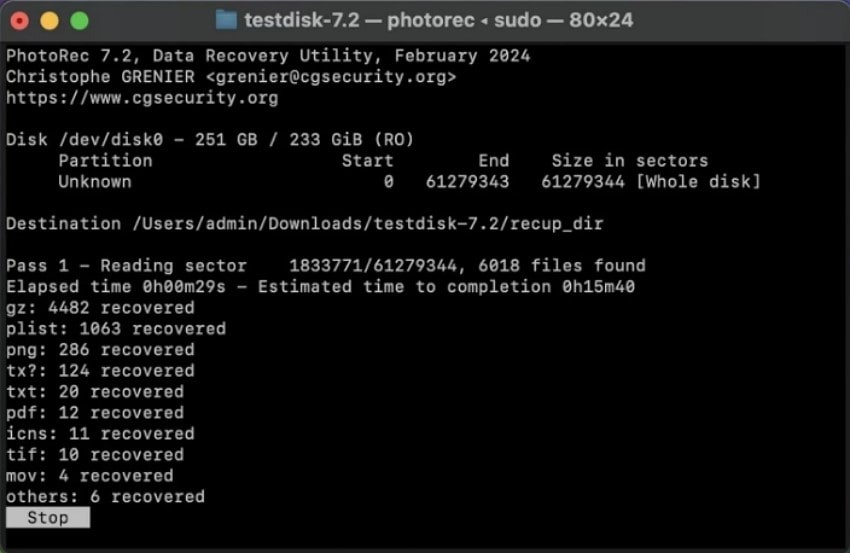
This Mac SSD recovery tool helps users retrieve lost files from a variety of storage devices, including SSDs. PhotoRec bypasses the file system and searches for underlying data blocks even when the file system is severely damaged. Moreover, the read-only access of this tool ensures that no data is overwritten during recovery.
Key Features
- The tool supports data recovery for more than 480 file extensions on various operating systems.
- File headers are used by this recovery tool to identify and recover files accurately.
- It recovers the file without writing to the source drive to prevent further data loss.
4. iBoysoft Data Recovery
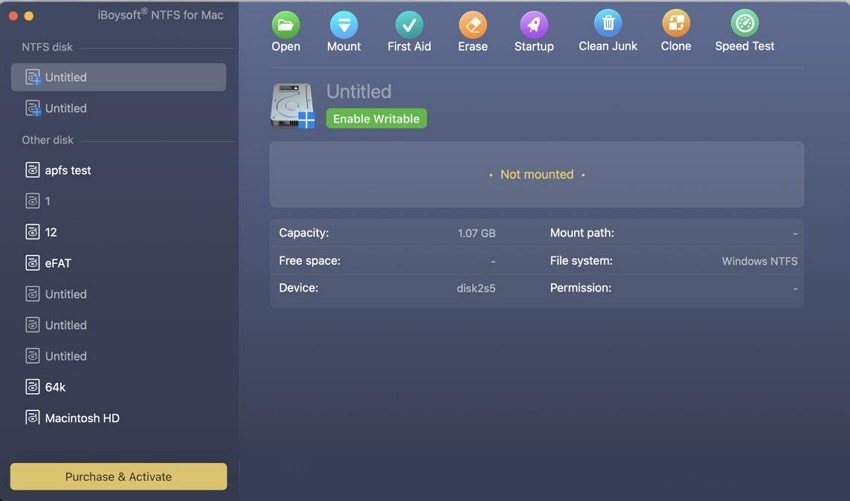
It is a reliable software designed specifically for Mac users to recover deleted and lost files from internal and external storage devices such as SSDs. The tool supports a wide range of file systems such as APFS and FAT32. iBoysoft Data Recovery can retrieve data from formatted and corrupted drives, which makes it a versatile solution for various data loss scenarios.
Key Features
- You get Mac SSD recovery even from an emptied Trash and lost partitions.
- The tool lets you preview the files before recovering them to your system.
- Its macOS Recovery Mode lets you recover from unbootable Mac systems.
5. Data Rescue 6
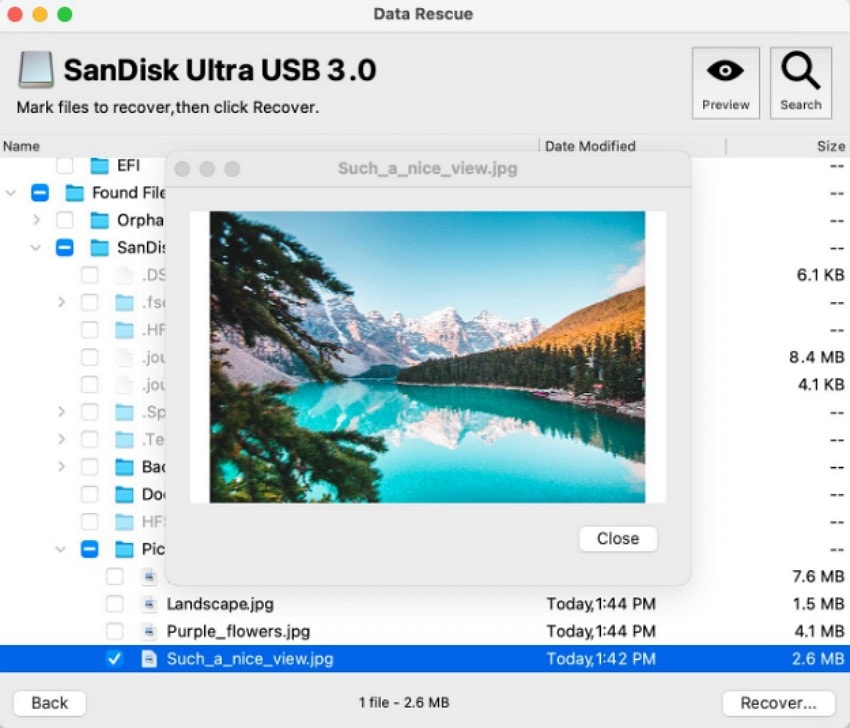
Data Rescue is a reputable data recovery software tailored for Mac users to recover deleted or lost files. It provides support for various storage devices, including SSD and USB drives. The tool offers an easy-to-use interface for both novice and advanced users. Moreover, it allows users to create a bootable recovery drive for inaccessible or non-booting Macs.
Key Features
- The platform supports cloning of problematic drives to reduce wear during recovery.
- A secure data wiping option is offered by the tool to overwrite the drives in a safe manner.
- It offers a fast scan for instant recovery and a deep scan for severely corrupted file recovery.
Part 5. Essential Tips for Maintaining and Protecting Your Mac SSD
Having known all the useful methods of getting data lost in a Mac SSD restored, it is also necessary to pay attention to the prevention of further loss of data. The following are some of the key things every Mac user must consider in order to secure his/her Mac SSD:
- Enable TRIM Command: This option assists your SSD in effectively handling data blocks that are not used and avoids slowing down.
- Do Not Overfill SSD: Leave at least 20-30 percent of free space to achieve speed and minimize wear on memory cells.
- Periodic Firmware Updates: Check and install firmware updates for your SSD company to address bugs and enhance performance.
- Safely Eject Drives: Always eject external SSDs properly before unplugging to avoid data corruption or loss.
Conclusion
To sum it up, this article discussed various ways to perform Mac SSD data recovery to retrieve your lost or damaged files. However, one of the most reliable solutions to get back your data is using Wondershare Recoverit. The tool offers high-quality data recovery while keeping the original quality and formatting of the file intact.
FAQ
-
1. Can an SSD on a Mac become corrupted on its own?
An SSD on a Mac can become corrupted on its own, but this usually happens due to underlying causes rather than spontaneous issues. Common reasons for SSD corruption include overheating that damages the memory chips. -
2. How to recover lost files on an SSD on a Mac?
There are various methods to retrieve data from an SSD on a Mac, such as using Time Machine or Disk Utility. However, to perform deep data recovery for intense loss, you can use tools like Wondershare Recoverit. -
3. Can Recoverit retrieve multiple files at once?
You can recover more than one file at a time using the functionality of Recoverit, as it supports batch data recovery to save you time. -
4. Can I recover my long video and large files with Recoverit?
Users get the ability to retrieve large files irrespective of the type, as Recoverit offers support for more than 1000+ file formats for MacBook SSD data recovery.


 ChatGPT
 Perplexity
 Google AI Mode
 Grok
Grok


