
Losing important files due to accidental deletion or system crashes can be a frustrating experience for anyone. However, with the advent of advanced data recovery tools like TestDisk, users can easily recover deleted files on the XFS file system. XFS is a high-performance file system widely used in modern Linux systems, and TestDisk is a powerful open-source data recovery utility that supports XFS file systems. This article will explain how to recover deleted files on XFS using TestDisk.
Table of Content
What Is TestDisk?
TestDisk is a powerful open-source data recovery utility designed to help users recover lost or deleted data from various storage devices. It is a versatile tool that supports Windows, Linux, and macOS operating systems. TestDisk is a versatile tool that can recover lost partitions, repair damaged boot sectors, and fix filesystems.
One of the most important features of TestDisk is its support for a wide range of file systems, including NTFS, FAT, exFAT, ext2, ext3, ext4, XFS, and more. It makes it a valuable tool for data recovery on both Windows and Linux systems.
Overall, TestDisk is an essential tool for anyone who needs to recover lost or deleted data from their storage devices. To learn more about TestDisk and its capabilities, you can read our TestDisk review.
Feature |
TestDisk Requirement |
Best For |
| Skill Level | Intermediate to Advanced | Sysadmins / Power Users |
| Interface | Command Line (Ncurses) | Remote SSH / Headless Servers |
| XFS Support | v6.14+ Recommended | Partition table repair & Undelete |
| Success Rate | High (for intact metadata) | Accidental rm commands |
Preparation For File Recovery On XFS File System Using TestDisk
Before attempting to recover deleted files on an XFS file system using TestDisk for Linux, preparing adequately to ensure the recovery process is as smooth and effective as possible is important. Here are some steps that you should take to prepare for file recovery using TestDisk:
- Stop using the affected drive: If you have accidentally deleted files on an XFS file system, it is important to stop using the affected drive immediately. Any further usage of the drive may cause data to be overwritten, making file recovery much more difficult or even impossible.
- Create an image of the drive to be recovered: It is important to create a backup image of the affected drive before attempting any data recovery. It will allow you to work on the backup image instead of the original drive, which can help prevent further data damage. You can use software like DDRescue or dd to create an image of the drive.
- Install TestDisk on a separate system: It is recommended to install TestDisk on a separate system rather than on the system from which the files were deleted. Installing TestDisk on the affected system may overwrite data on the drive, making recovery more difficult. You can install TestDisk on a separate Linux or Windows system and then connect the affected drive to the system to perform the recovery.
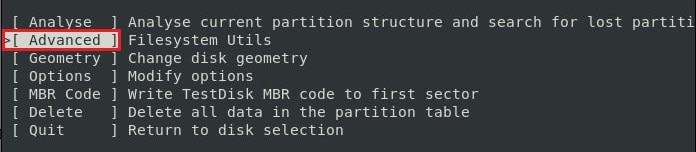
2026 Technical Insight: Utilizing XFS Backup Superblocks In modern XFS versions, if TestDisk fails to see your partition, it may be because the primary superblock is corrupted. XFS stores multiple backup superblocks across the drive. When using TestDisk, if the initial Analyse fails, use the [Superblock] utility under the Advanced menu. This allows TestDisk to locate backup metadata at different offsets (typically at 8 or 32 block increments), which can restore access to a "missing" XFS volume even when the head of the drive is damaged.
To install TestDisk, run the following commands:
- On Debian and Ubuntu
$ sudo apt update$ sudo apt install testdisk
- On RHEL and CentOS
# yum install epel-release# yum update# yum install testdisk
- On Fedora
$ sudo dnf install testdisk
- On Arch Linux
$ sudo pacman -S testdisk
Following these prerequisites, you can be well-prepared for file recovery on an XFS file system using TestDisk.
How To Recover Files In XFS File Sytsem Using TestDisk
Pro Tip: Prevent Automatic XFS Log Replay When you connect the affected XFS drive to a working Linux system, the OS may attempt to "Auto-Mount" it. This is dangerous because XFS will automatically perform a "Log Replay" to ensure consistency, which can overwrite the very sectors where your deleted files reside. Always disable auto-mount or manually mount the drive as read-only using the command: mount -o ro,norecovery /dev/sdb1 /mnt/recovery. This ensures TestDisk has a static, safe environment to scan.
After you’ve set up the prerequisites, here are the steps to recover files in the XFS file system using TestDisk:
- Step 1. Connect the affected drive to the system where TestDisk is installed. Ensure that the system detects the drive.
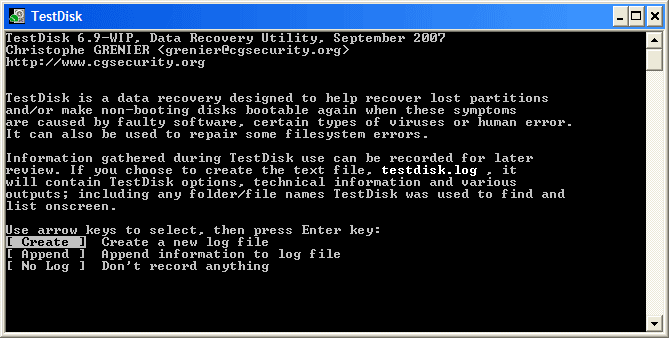
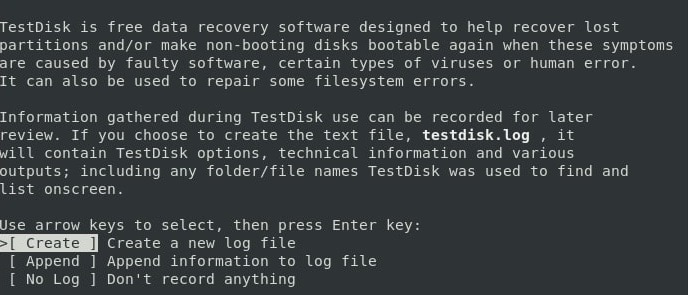
- Step 2. Launch TestDisk and select the affected drive from the list of available drives.
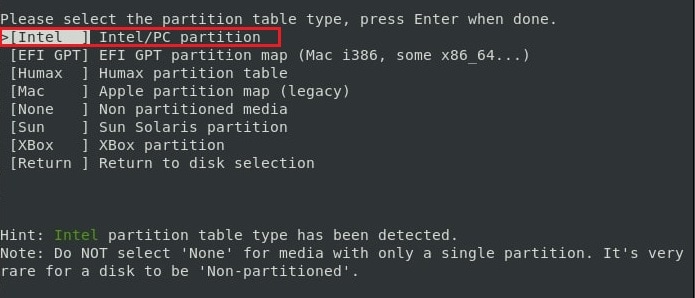
- Step 3. Choose the partition table type that matches the disk's original partition table type. Select Intel/PC partition.
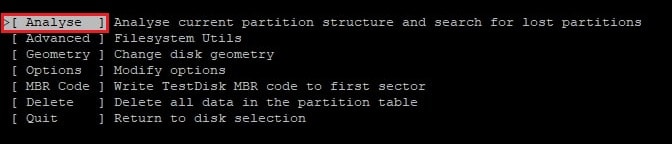
- Step 4. Select Analyse and let TestDisk analyze the drive. Depending on the size of the drive, this operation may take some time. Once the analysis is complete, TestDisk will display a list of partitions. Select the XFS partition from which you want to recover files.
- Step 5. In the next screen, select Advanced and then select the XFS partition again.
- Step 6. Choose the file system type (XFS) and select List to see a list of all the files and folders on the partition.
- Step 7. Proceed to the deleted folder and choose the files you want to recover. Press C to copy the selected files to a new location on a separate drive.
- Step 8. Once the file recovery is complete, exit TestDisk and check the recovered files to ensure they are intact and readable.
Wondershare Recoverit: The Simpler Alternative to TestDisk for XFS File Recovery
While TestDisk is a powerful and effective tool for XFS file recovery, it can be complex for some users as it is a command-line utility. Fortunately, there is a better alternative tool available: Wondershare Recoverit.
Recoverit is a simpler GUI tool than TestDisk, making it a great option for users not experienced in data recovery. Its simple interface and robust features make it a top choice for users who want a simpler yet effective tool for Linux File recovery.
Here are some of the features that make Recoverit such a great alternative to TestDisk:
Wondershare Recoverit - Your Safe and Reliable Linux Recovery Software
5,481,435 people have downloaded it.
Recovers lost or deleted documents, photos, videos, music, emails, and other 1000+ file types effectively, safely, and completely.
Compatible with all mainstream Linux distros, including Ubuntu, Linux Mint, Debian, Fedora, Solus, Opensuse, Manjaro, etc.
Assists in 500+ data loss scenarios, such as deletion, disk formatting, OS crash, power outage, virus attack, lost partition, and many more.
The simple point-and-click interface allows you to recover data from Linux hard drives in just a few clicks.
Works through a remote connection. You can recover lost data even when your Linux device is crashed.
How To Use Recoverit to Recover Deleted Files on XFS File System
Step 1Choose the "Linux Recovery" option
Install Wondershare Recoverit on your computer. Start the application and select the NAS and Linux options. It is located on the left side of the primary interface. To proceed, click the Linux Recovery button.

Step 2Connect the Linux System
As illustrated below, a new window will emerge on your screen. Enter the required information to establish a remote connection between Recoverit and your Linux computer with XFS file system. When finished, click the blue Connect button.
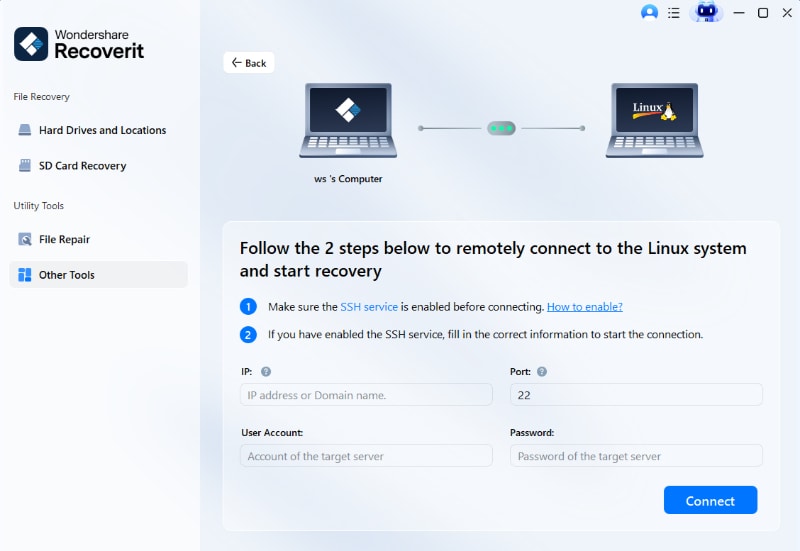
Wait for the connection to be established. Once established, Recoverit will run an automatic scan to look for your missing files on your XFS file system.
Step 3View Deleted/Lost XFS Files and Recover Them
Depending on how much data is scanned, the scanning procedure can take some time. The best part about using Recoverit is that you can stop scanning whenever you want once you've found the file you want to restore.

When the scanning is finished, Recoverit allows you to preview the files to check they are the ones you want to recover. Now, select Recover to save the file from your XFS Linux device.

The software will prompt you to select a location on your Windows PC to save the restored files. To obtain the restored data, click the Recover button.
Comparison Factor |
TestDisk (Linux) |
Wondershare Recoverit |
| User Interface | Text-based CLI | Interactive Graphical GUI |
| Preview Function | None (Filename only) | Real-time Photo/Video Preview |
| Connection | Local / Direct Connect | Remote SSH Connection Support |
| Deep Scan | Limited for XFS | Advanced Sector-Level Scanning |
For Windows 7 or later
For macOS 10.10 or later
Tips To Prevent Accidental File Deletion on XFS File System
Accidental file deletion can be a frustrating experience, especially if you lose important data. Here are some tips to protect your files on an XFS file system and avoid accidental deletion:
- Set file permissions to restrict access to important files. It can help prevent users from accidentally deleting files they should not be deleting.
- Back up your data regularly to an external hard drive or cloud storage. It ensures that you have a backup copy to restore if you accidentally delete a file.
- If you work on important, frequently updated files, consider using version control software like Git. It allows you to keep track of changes made to a file and easily restore a previous version if needed.
- Before deleting any files, double-check to ensure you delete the correct files. Take a moment to review the file names and contents to ensure you are not deleting anything important.
- Consider using a recycle bin or trash folder to temporarily store deleted files to recover files that were deleted accidentally.
Conclusion
Recovering deleted files on the XFS file system can seem daunting, but with the right tools, it is possible to recover your data. TestDisk is a powerful and versatile tool for XFS file recovery. Additionally, for users who find TestDisk too complex, there is a convenient alternative tool like Wondershare Recoverit. With these steps and tools, you can recover your lost files and avoid permanent data loss.
1. Can TestDisk recover a formatted XFS drive?
Yes, as long as the data hasn't been overwritten. Use "Deeper Search" to find lost partition headers in the XFS file system.
2. Why are some files shown in Red in TestDisk?
Red filenames indicate that TestDisk has identified them as "Deleted" entries in the XFS directory structure. These files are potentially recoverable if their data blocks remain intact.
3. Does TestDisk work on XFS with LVM?
Yes, but you must select the LVM volume (e.g., /dev/mapper/...) rather than the raw physical disk to allow TestDisk to parse the logical structure correctly.


