
 TL;DR:
To successfully install Linux Ubuntu on a Synology NAS, you must utilize the Synology Virtual Machine Manager to boot an Ubuntu ISO image onto a configured DiskStation with at least 8GB of total system memory.
● The virtual machine configuration requires allocating a minimum of 2 CPU cores, 2GB of RAM, and 25-30GB of dedicated storage space to ensure smooth operation.
● After completing the initial Ubuntu setup through the VM interface, you must change the ISO file for bootup setting to "Unmounted" in DiskStation before restarting the virtual machine.
● Running the `apt-get install qemu-guest-agent` command in the Ubuntu terminal is necessary to enable communication between the NAS and the virtual setup for remote power management.
Ask AI for a summary
 ChatGPT
 Perplexity
 Gemini
 Claude
 Grok
Grok
If you have been tirelessly trying to install Linux on Synology NAS without satisfying results, know that you’re not the only one to experience this issue. Although it may seem like an easy step-by-step process, there are some nuisances that puzzle most people, especially those who aren’t tech-savvy or familiar with Synology Ubuntu.
Luckily, this guide should help you address such problems and learn the best ways to build your Synology virtual machine Ubuntu powerhouse.
First, you’ll need a compatible Synology NAS and Ubuntu ISO image. Once you have these readily available, we can move to the hard part of Installing Ubuntu on Synology NAS.
Install Ubuntu on Synology NAS
Step 1. Set Up Your Synology NAS (Compatible With Ubuntu)
Before you install Linux on Synology NAS, you should ensure compatibility with Ubuntu. You can do that by connecting the Synology Diskstation with the Ubuntu server.
Setting up this connection will also require a successfully configured DiskStation and shared folder for saving your content to the Ubuntu server.
Follow these steps to connect Synology NAS to Ubuntu:
- Open the Diskstation Web Application;
- Navigate to Control Panel > Shared Folder;
- Select NFS-Access;
- Create a new connection and open a shell on your Ubuntu server.
There, you just connected a Synology NAS to your Ubuntu server. Now, set up your NAS using Web Assistant by following these tips:
- Select Set Up;
- Click Install Now to install the DiskStation Manager;
- Complete the installation process and allow the NAS to restart;
- Create a new admin user account by following the instructions on display;
- Select Go to get to the Synology Web GUI.
Once you complete these steps, your Synology NAS should be ready for Ubuntu. The recommended practice is to use a Synology NAS with 8GB or more memory to ensure successful Linux Ubuntu installation.
Step 2. Download an Ubuntu ISO Image
Run your Synology NAS and visit the official Ubuntu website to download the ISO image. Navigate the site to the Ubuntu Desktop tab and select Download. You’ll see the latest available version of the image. Download the image file and choose the destination where you want to save it.
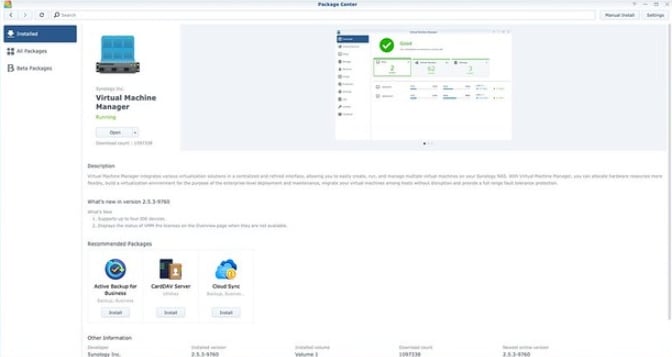
Step 3. Download and Install Virtual Machine Manager
The following steps and images will take you through the process of downloading and installing the Virtual Machine Manager:
- Open Synology DiskStation web interface;
- Select the Package Center from the top menu on the left;
- Sign up for the Beta Program by visiting the Beta section and checking the “Yes, I want to see beta versions” tab;
- Find the Utilities section and navigate it to the Virtual Machine Manager tab;
- Select Install.
You should see the Virtual Machine Manager icon in the DiskStation menu if the installation process was successful.
Step 4. Create a System Image and Configure
Navigate the Virtual Machine Manager user interface to the System Image section to set up the Ubuntu ISO image by doing the following:
- Select Create;
- Choose the name of your System Image in the Name section;
- Choose ISO File in the Type section;
- Click on the Select a file from DiskStation section, select Browse to upload the Ubuntu image, and click Next;
- Choose Your NAS and hit Apply.
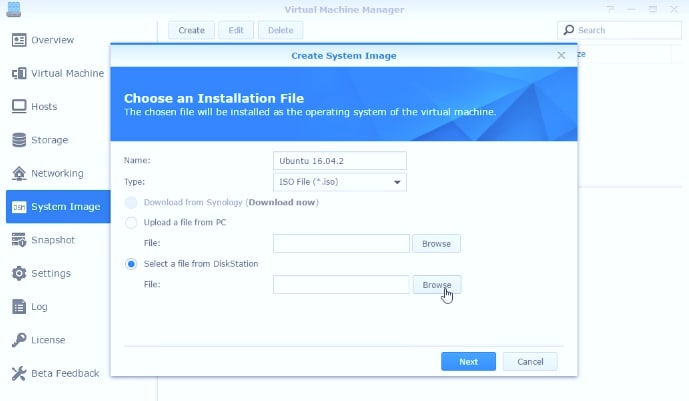
It will take a while for your system to create the image. Once the system creates the image, configure your system by selecting the storage option for saving system images.
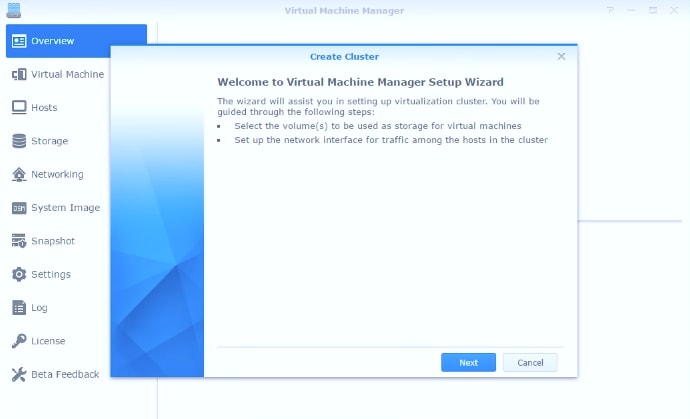
Step 5. Create a Virtual Machine and Configure
Here are the instructions to create and configure your virtual machine:
- Run the Virtual Machine Manager app and click on the Virtual Machine tab;
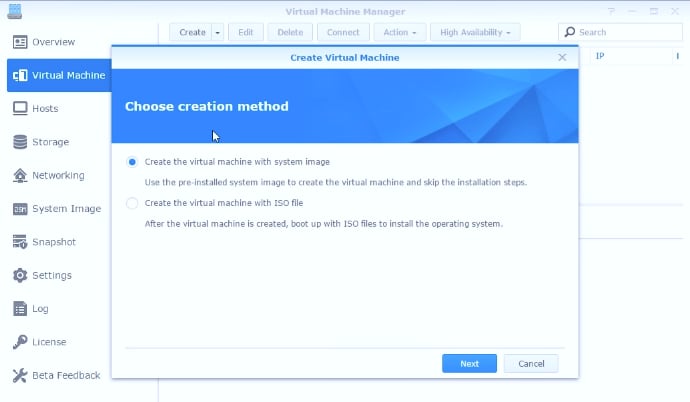
- Select the “Create the virtual machine with system image” option;
- Click Create > Next.
Once the system creates a Virtual Machine, proceed to configure your new setup by fine-tuning all the specifications:
- Name your VM in the Name tab;
- Choose how many CPU cores you want to use (a friendly piece of advice is to opt for at least two CPUs to ensure smooth running and maximum efficacy);

- Choose how much RAM you need (the recommended minimum is 2GB of RAM);
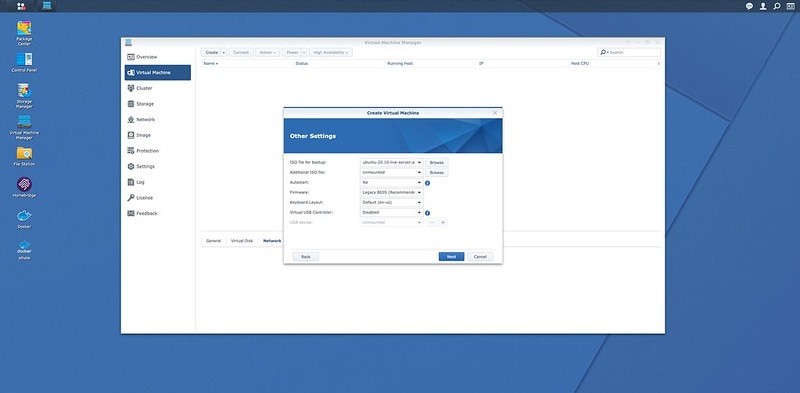
- Boot up your ISO system file by selecting System Image in the “ISO file for bootup” section;
- Choose the required amount of space for your Virtual Machine (25-30GB);
- Click Next > Apply.

Step 6. Install Your Ubuntu OS on Synology NAS
Here is how to install your Synology NAS Ubuntu system:
- Run the Virtual Machine app;
- Select Action > Power On;
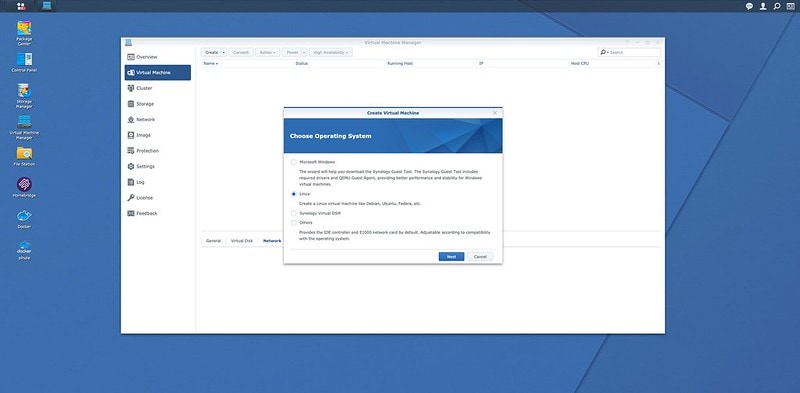
- Select Synology NAS > Apply;
- Click Install Ubuntu in the Welcome window;
- Opt for Install Updates > Install Third Party Software While Ubuntu is Being Setup > Continue;
- Follow the instructions in the User Account section and click on Continue;
- After the installation process, run DiskStation and choose Edit;
- Change the ISO file for bootup setting to Unmounted.
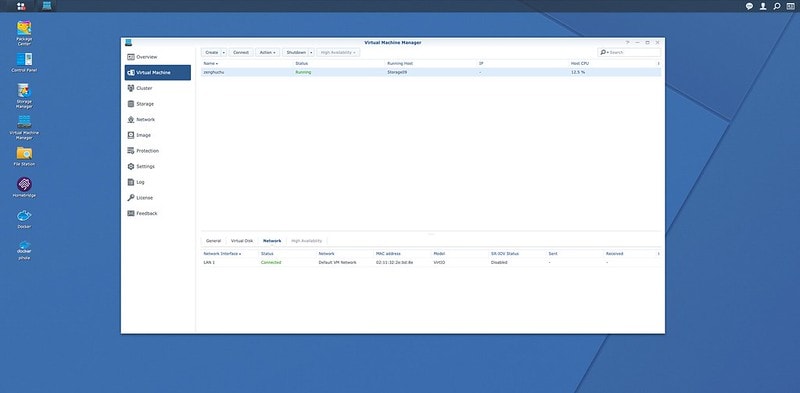
Restart your Virtual Machine to ensure Linux Ubuntu is successfully installed on your machine.
Step 7. Install a Guest Agent
Choose your Synology Ubuntu virtual machine and click Connect to install a Guest Agent on Linux. Follow these steps:
- Type in
sudo -ito access the administrator’s permissions; - Use the
apt-get install qemu-guest-agentcommand for the Ubuntu operating system; - Enable the Ubuntu Guest Agent using the
systemctl enable qemu-guest-agentcommand; - Verify the Guest Agent using the
systemctl status qemu-guest-agent
The Guest Agent allows your Synology NAS to connect with the Virtual Machine, exchange information, and enable you to restart or shut down the virtual setup.
Bonus Tip - Secure Your Synology Data With a Data Recovery Tool
You’ve probably experienced the pain of deleting valuable and important data by mistake or due to virus infection, disk damage, or power outage. If you don’t want to go through this nightmare again, you should secure your data with a user-friendly NAS data recovery tool.
One highly recommended NAS recovery software is Wondershare Recoverit. You can use it to recover deleted files from Synology NAS quickly and safely. The best part about Recoverit – it can recover files from Linux, Windows, and Mac systems.

Wondershare Recoverit - Your Safe and Reliable NAS Recovery Software
5,481,435 people have downloaded it.
Recovers lost or deleted documents, photos, videos, music, emails, and other 1000+ file types effectively, safely, and completely.
Compatible with all popular NAS vendors, including Synology, QNAP, ASUSTOR, Western Digital, Buffalo, LaCie, etc.
Facilitates 500+ NAS data loss scenarios, such as deleting, formatting, OS crash, RAID failure, defective controller, power failure, virus attack.
Supports all RAID types, including RAID 0, 1, 5, 6, and 10.
Recovers NAS data through the remote connection without disk pull-out.
Using Recoverit is as straightforward as possible. Download, install, and run the NAS data recovery tool to locate your Synology NAS in the NAS and Linux section.

Follow the instructions on the screen to connect Recoverit to your NAS device and allow it to scan the found drives for lost data. Preview the located files to ensure that you’re recovering the correct data, and hit Recover.
For Windows XP/Vista/7/8/10/11
For macOS X 10.10 or later
Conclusion
Congratulations, you’ve successfully installed Linux Ubuntu on Synology NAS. As you can see, getting Synology Ubuntu setup to work isn’t too difficult. However, there are critical steps you must take to ensure a successful installation process.
Keep in mind that it takes around 30 minutes to complete the installation process. Once the system completes the installation, you can customize your Synology Ubuntu system by editing settings, filling in your details like country, selecting your system settings, and more.


