Your PS4 needs the latest software to deliver optimal performance. Plus, you will get access to all the latest features. However, if the automatic PS4 update download and installation fails, you must do it manually. Here is a step-by-step guide on how to update PS4 with a USB.
In this article
Basic Requirements to Meet Before the PS4 Update
- 💪 USB thumb drive& local drive: at least 480 MB of free space
- 👍 USB interface 3.0
- 📎 PS4 USB port: dust-free and operational
Before downloading the latest PS4 software update and formatting your USB, you must ensure your USB thumb drive meets the PS4 requirements. One of them is that your USB must have at least 480 MB of free space.
While PS4 can use a USB stick with a USB interface below 3.0, we don’t recommend it because it can slow down the read speed. So, be sure to use one with the USB interface 3.0.
Download and installation requirements are easy to meet. Ensure you have enough space on your local drive (480 MB) to download and store the latest PS4 console update file. While at it, ensure that your PS4 USB port is dust-free and operational.
How to Install a PS4 Update From a USB
Once you meet the basic requirements, you can discover how to update PS4 with a USB. Let’s start with formatting your USB stick.
Step 1: Format a USB Drive to FAT32 or exFAT
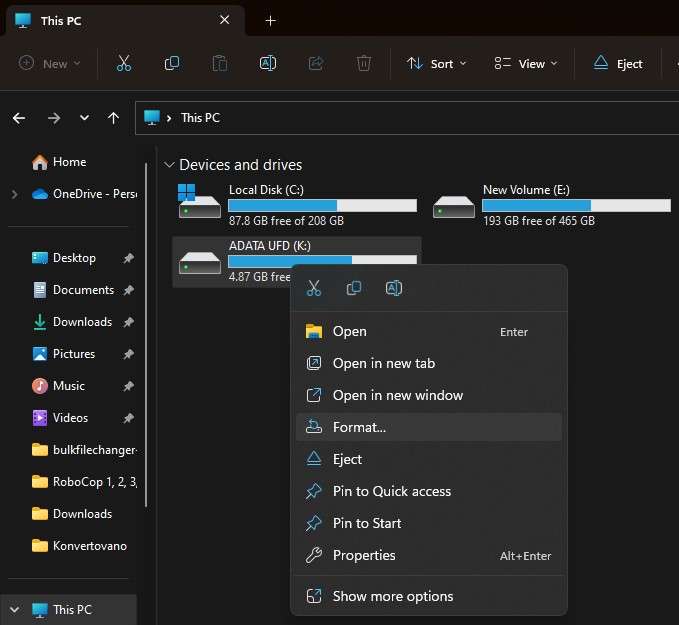
Insert your USB drive into your PC, open File Explorer, navigate to This PC, right-click the USB drive, and select Format.

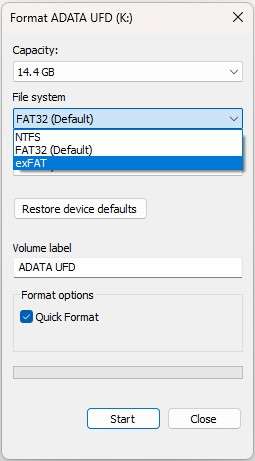
In the USB drive format dialog box, navigate to the File system drop-down list and select FAT32 or exFAT. Check Quick Format and click Start. Give it a second for the format to complete. Now your USB drive is ready.

If you’ve accidentally formatted a USB drive storing data you don’t want to lose, you can quickly recover it with dependable and easy-to-use software like Wondershare Recoverit. Here is how Recoverit can help you retrieve data.
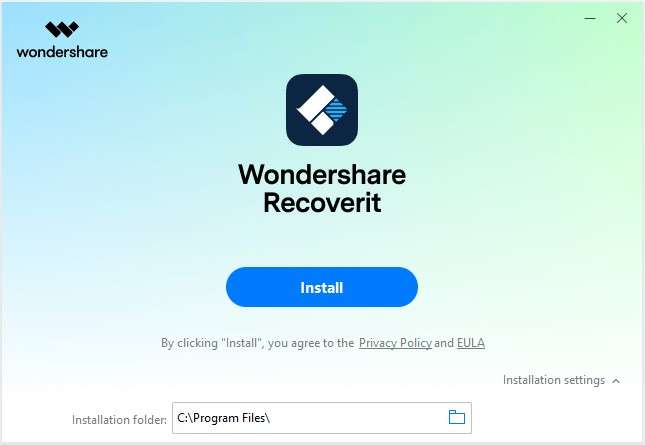
- Download and install Wondershare Recoverit.
Head to the official Wondershare Recoverit website to download and install the software. The installation wizard will guide you through a simple process. The installation takes under a minute.

- Plug in your USB drive.
Plug in your USB drive and wait for your system to recognize and detect it.
- Open Wondershare Recoverit and select your USB drive.
Start Wondershare Recoverit and click your USB drive in the right section of the screen.

- Scan the USB drive.
Once you select your USB drive, Wondershare Recoverit will scan it and let you view all the recoverable files. At this point, you can pause or stop the scan. The progress percentage is available in the bottom left corner.

- Recover your files.
Once the scan completes, preview all the recoverable files. Select those you wish to retrieve, click Recover, and choose the location where you want to store them.

Step 2: Download the Latest PS4 System Software
Now that you’ve formatted your USB drive, it’s time to see how to download the PS4 update to the USB.
We don’t recommend using unofficial sources to download PS4 console updates. Always visit the official PlayStation website to download the PS4 console update file. Wait for the download to complete.

Next, use File Explorer to access your USB drive. Create a PS4 folder and an UPDATE sub-folder. Copy the file you’ve downloaded to the UPDATE folder. Right-click it to rename it as PS4UPDATE.PUP.

Step 3: Install PS4 System Software Update From the USB
Now you have everything correctly set up and ready to go. Here is how to install the PS4 update from a USB.
Method 1: Update the PS4 System Software on the Home Screen.
You can update your PS4 from a USB on the Home screen.
- Connect the USB drive to your PS4.
Connect your USB drive to PS4 and navigate to the Home screen.
- Go to the Function Menu and access Settings.
While on the PS4 Home screen, press the Up button on your D-pad to access the Function menu. Use controls to go to Settings and press the X button. Navigate to System Software Updates and press X again.

- Accept the System Software License Agreement and wait.
PS4 will display the System Software License Agreement, which you must accept by pressing the Accept button with the X button on your console. The installation will start. Once it completes, your console will restart.

Method 2: Manually Update the PS4 System Software in Safe Mode
If the update fails, don’t panic. You still have a few options. You can manually update the PS4 system software in Safe Mode.
- Start PS4 in Safe Mode.
Hold the Power button on your console for seven seconds to turn off your PS4. Press the Power button again once the console is off, and hold it for seven seconds until you hear the second beep. Connect your DS4 controller with the USB cable and press the PS button. Now, you will have access to Safe Mode.
- Update the PS4 system software with a USB.
Connect your USB drive to your PS4 and select Update System Software in the Safe Mode options with the X button.

- Update from the USB and wait for the installation to complete.
You will see the following screen. Select the first option (Update from USB Storage Device) and confirm with the X button. Your console will copy the file from the USB and start the update. Once the update completes, the console will automatically restart.

How to Reinstall the PS4 System Software
If both methods fail, you must reinstall the PS4 system software. In other words, restore your PS4 system to default factory settings. However, create a backup of all data on your PS4 beforehand, as this process will delete all your apps, games, and user information. Here’s what to do once you sort all your data.
- Start your PS4 in Safe Mode.
Hold the Power button on your console for seven seconds to turn off your PS4. Press the Power button again once the console is off, and hold it for seven seconds until you hear the second beep. Connect your DS4 controller with the USB cable and press the PS button. Now, you will have access to Safe Mode.
- Reinstall the system software.
In the Safe Mode options, navigate to Initialize PS4 (Reinstall System Software). Confirm your selection with the X button on your controller. Follow the on-screen instructions to complete the system software reinstallation process.

FAQ
-
Why can’t my PS4 read the USB flash drive during the update?
PS4 can’t read all file systems. The chances are your USB has an unsupported file system like NTFS. Reformat your USB to FAT32 or exFAT to avoid this error. -
Can I use a USB 2.0 drive to update PS4?
PS4 supports 2.0 and 3.0 USB protocols. It means you can use your USB 2.0 drive to update your PS4. However, your data transfer speed will suffer. We recommend using USB 3.0 to complete PS4 updates and enjoy the best performance. -
How can I enter Safe Mode on PS4 to manually update the system software?
To enter Safe Mode, hold the Power button for seven seconds to turn off your console. Once the console is off, press the Power button again and hold it for seven seconds, releasing it after the second beep.
Conclusion
In this article, you’ve learned how to update PS4 with a USB following simple steps. As you can see, you need a USB drive with at least 480 MB of free space and proper directory structure. You can update your PS4 from the Home screen or Safe Mode. If you don’t succeed or get an error, you can reinstall your PS4 system software.
You’ve also discovered a convenient method to restore files from your USB drive with Wondershare Recoverit, should you happen to format a drive with data you don’t want to lose.


 ChatGPT
 Perplexity
 Google AI Mode
 Grok
Grok


