Quick Answer: How to Fix Error 0xc1010103
The fastest way to fix the 0xc1010103 error is to try playing the video file with a different media player like VLC. If that fails, the file is likely corrupted and needs to be repaired using a tool like Wondershare Recoverit. For other solutions, continue reading below.
Have you ever been all set to enjoy a video, only to be stopped by the 0xc1010103 error? It's incredibly frustrating when this error pops up, leaving your video unplayable. This error is common, and many people face it while trying to watch their favorite content.
Picture this: you're in the middle of an exciting movie, and suddenly, everything comes to a halt. The screen shows 0xc1010103, and you're left wondering what went wrong. The video file cannot be played, and it feels like your viewing plans are ruined. But don't worry, there are ways to fix the 0xc1010103 can't play error.
This article is here to help you understand this error and provide simple solutions. We'll guide you through the steps to prevent the 0xc1010103 video error and ensure your videos play smoothly in the future. From repairing corrupted files to updating drivers, we've got you covered. Let's dive into the fixes and get your videos playing again!
In this article
Part 1: What is the 0xc1010103 Error?
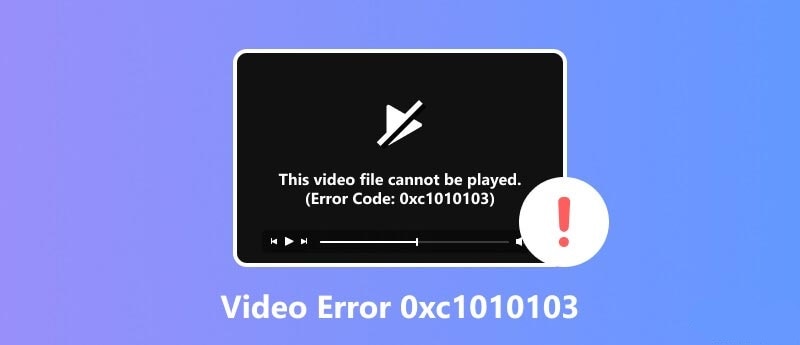
The 0xc1010103 error is a video playback problem. It means the video file can't be played.
This error happens when a video file is corrupted or not supported. It stops the video from playing. Knowing why it happens can help you avoid the 0xc1010103 video error in the future.
Part 2: What Causes the 0xc1010103 Error?
The 0xc1010103 error can be quite annoying, but understanding its causes can help in preventing it. This error can result from various factors. Here are some reasons:
- Corrupt Video File: If the video file is damaged, it might trigger this error.
- Unsupported Video Format: Trying to play a file in an incompatible format can cause an error.
- Outdated Media Player: An old media player might not support new video formats.
- Missing Codecs: The required codecs to decode the video might be missing.
- Damaged File System: Problems within the file system can lead to this error.
- Incomplete Video Download: Videos that aren’t fully downloaded can cause playback issues.
- Hardware Issues: Problems with your hardware, like the graphics card, can affect video playback.
Understanding these causes can help you prevent the 0xc1010103 error and ensure smooth video playback in the future.
Part 3: How to Fix 0xc1010103 can't play error
Let's explore ways to fix the 0xc1010103 can't play error. Each fix has simple steps to follow:
Fix 1: Use Recoverit Corrupted Video Repair to Fix Videos
One of the most common reasons for the 0xc1010103 error is a corrupted video file. When a video file is corrupted, your media player might struggle to read it, causing this frustrating error. That's where Recoverit Corrupted Video Repair comes in handy. This powerful tool is designed to repair damaged or corrupted video files, making them playable again.
Using Recoverit is easy and works well. It fixes many video formats and can repair several files at once. Whether your video got corrupted while transferring, downloading, or due to a crash, Recoverit can help. It scans the damaged file, finds the problems, and fixes the video.
Here’s how to fix 0xc1010103 error in windows using Recoverit:
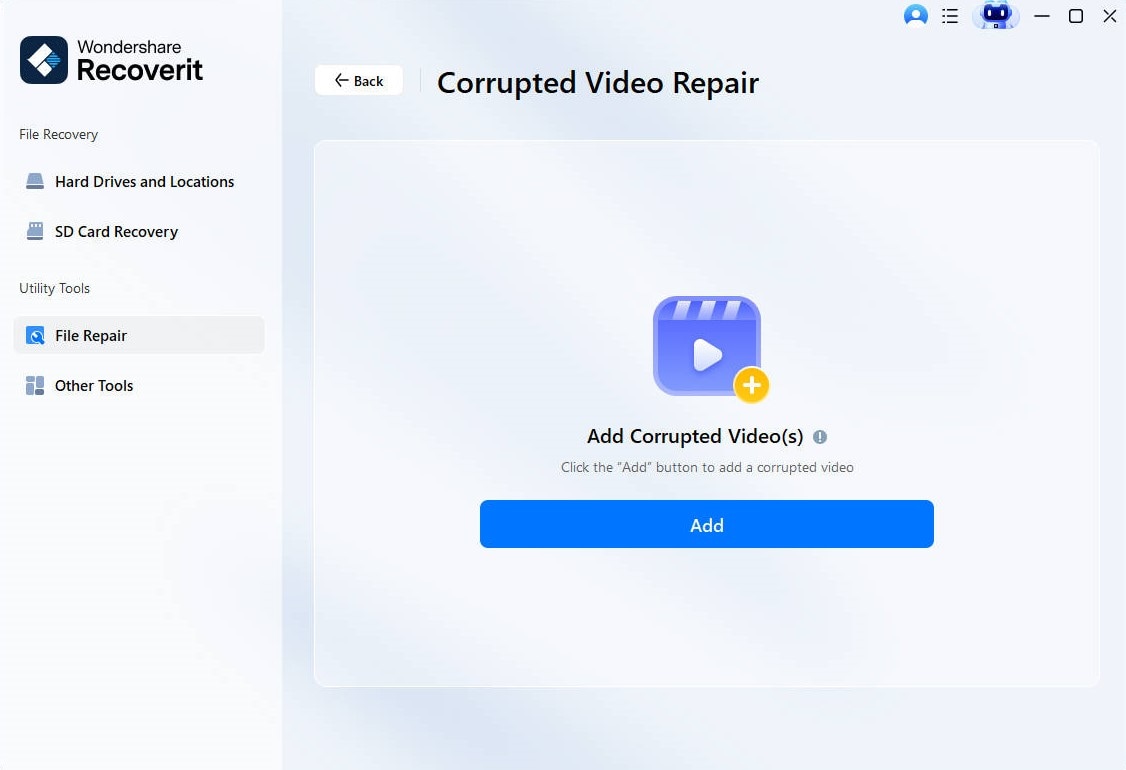
- Download and install Recoverit. Open Recoverit and select Corrupted Video Repair. Add the corrupted video file.

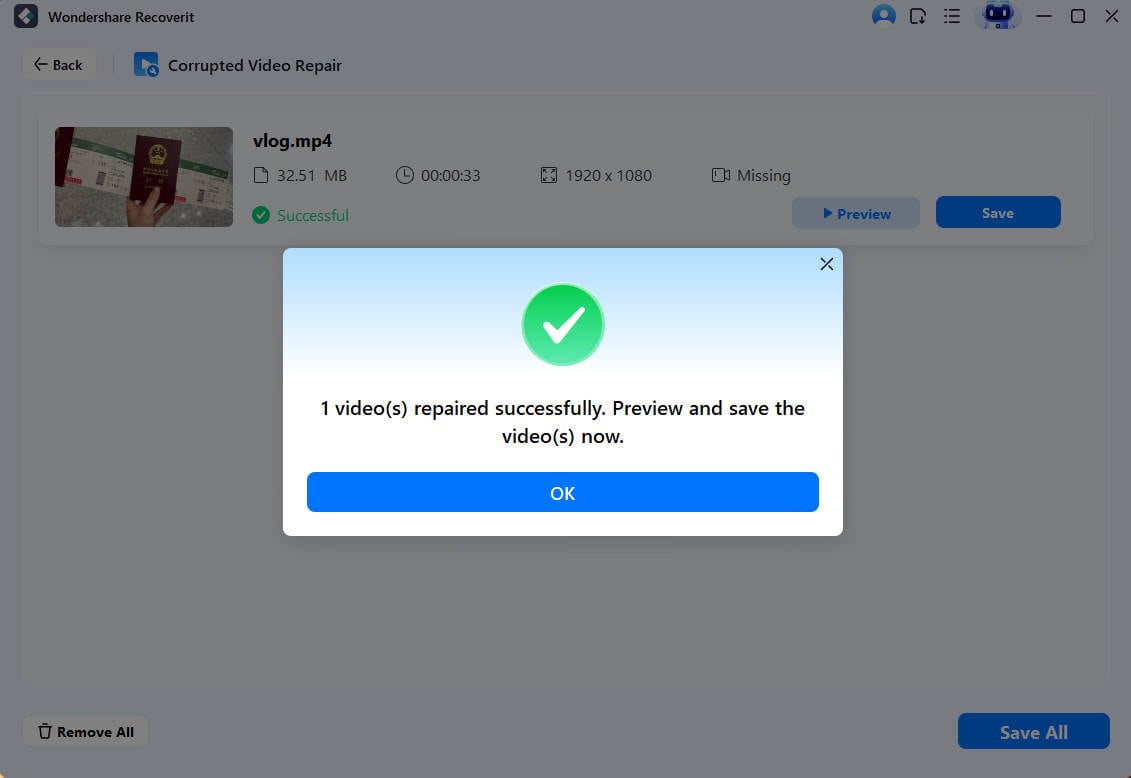
- Click Repair. Wait for the process to complete.

- Preview and save the repaired file.

Fix 2: Update Display Drivers
Outdated display drivers are a common cause of the 0xc1010103 error. Display drivers are crucial for your graphics card to function correctly and support video playback. If your drivers are not updated, they may not be compatible with the latest video formats or media player updates, leading to playback issues.
Keeping your display drivers updated ensures that your system can handle new video files and formats without any errors. Regular updates can also fix bugs and improve performance, providing a smoother viewing experience.
Here are the steps to update your display drivers and potentially resolve the 0xc1010103 error.
- Open Device Manager. Expand Display adapters. Right-click your graphics card. Select Update driver.

- Follow the on-screen instructions. Restart your PC.
Fix 3: Clear Temp Files and Restart PC
Temporary files are made by your system and apps while you use them. These files take a lot of space on your hard drive. Sometimes, they get corrupted and cause problems like the 0xc1010103 error.
Clearing your temp files regularly can free up space and remove any corrupted files that might be causing playback problems. Restarting your PC afterward helps to refresh the system and apply the changes. This simple maintenance step can often resolve the error and improve your system's overall performance.
Follow these steps:
- Press Win + R to open Run. Type %temp% and press Enter.

- Delete all files in the Temp folder. Restart your PC.
Fix 4: Uninstall Windows Media Player
Windows Media Player is a built-in media player for Windows that supports a wide range of video formats. However, if the player itself becomes corrupted or outdated, it might lead to the 0xc1010103 error. Uninstalling and then reinstalling Windows Media Player can help resolve issues related to the player.
This process ensures that any corrupted files within the player are removed and replaced with fresh ones. It can also update the player to its latest version, enhancing compatibility with different video formats.
Here are the steps to uninstall and reinstall Windows Media Player to fix the 0xc1010103 error.
- Open Control Panel. Click Programs. Now select the option to Turn Windows features on or off.

- Uncheck Windows Media Player. Restart your PC. Re-enable Windows Media Player.
Fix 5: Install Codec Packs
Codecs are essential for decoding and encoding video files. Without the proper codecs, your media player might not be able to play certain video formats, leading to errors like 0xc1010103. Installing a codec pack can provide your media player with the necessary tools to handle various video files.
Codec packs like the K-Lite Codec Pack include a comprehensive set of codecs that support many video formats. Installing such a pack can resolve playback issues and prevent errors. Follow these steps to install a codec pack and fix the 0xc1010103 error.
- Download a codec pack (e.g., K-Lite Codec Pack). Run the installer.

- Follow the on-screen instructions. Restart your PC.
Fix 6: Open Video in VLC Player
Sometimes, the issue lies with the media player itself. VLC Player is known for its versatility and ability to play a wide range of video formats without requiring additional codecs. If your current media player is causing the 0xc1010103 error, opening the video in VLC Player can be an effective solution.
VLC Player bypasses many common playback issues and supports even the most obscure video formats. It’s a reliable alternative to your default media player. Here are the steps to open your video in VLC Player and avoid the 0xc1010103 error.
- Download and install VLC Player. Open VLC Player. Click Media and then Open File.

- Select the video file.
Part 4: Tips to Prevent the 0xc1010103 Video Error
Preventing the 0xc1010103 video error is easier than fixing it. Follow these tips to avoid this error and enjoy seamless video playback.
- Keep Your Media Player Updated: Always use the latest version of your media player. Updates often include fixes for bugs and support for new video formats.
- Use Compatible Video Formats: Ensure your videos are in formats supported by your media player. This reduces the risk of encountering playback errors.
- Avoid Untrusted Sources: Download videos from reputable sources. Untrusted websites might provide corrupted or incompatible files.
- Regular Malware Checks: Perform regular scans to keep your PC free from malware. Malware can corrupt video files and cause playback errors.
- Use Reliable Video Repair Tools: Tools like Recoverit Corrupted Video Repair can fix minor issues before they become major problems. It's a good practice to have one ready.
- Back-Up Important Videos: Regularly back up your important video files. This ensures you have a copy in case the original gets corrupted.
- Check Hardware Regularly: Ensure your hardware, especially the graphics card, is in good condition. Hardware issues can also cause playback errors.
- Avoid Running Too Many Programs: Running multiple programs simultaneously can cause software conflicts. This might result in video playback issues.
By following these tips, you can prevent the 0xc1010103 video error and enjoy your videos without interruptions.
Conclusion
The 0xc1010103 error can indeed be quite frustrating. It interrupts your viewing experience and leaves you puzzled about what went wrong. However, the good news is that this error is fixable with the right steps. By understanding the causes of this error, you can not only fix it but also take measures to prevent it from happening in the future.
First, make sure to follow the steps provided to fix the 0xc1010103 can't play error. Start by ensuring that your media player and display drivers are up to date. Outdated software can often lead to compatibility issues and errors. Next, consider using tools like Recoverit Corrupted Video Repair to fix corrupted video files. This tool can help restore damaged videos to their playable state.
It's important not to let the 0xc1010103 error stop you from enjoying your videos. With these tips and fixes, you can tackle this error head-on and keep it from recurring. Regular maintenance, such as updating software and repairing videos, will go a long way in ensuring smooth playback. By taking these proactive steps, you'll be able to enjoy your videos without interruptions and keep the 0xc1010103 error at bay.
Try Recoverit to Recover Lost Data
Security Verified. Over 7,302,189 people have downloaded it.
FAQ
-
What is the 0xc1010103 error?
The 0xc1010103 error is a video playback issue in Windows that prevents your video file from playing. This error usually indicates that the video file is either corrupted or in a format that is not supported by your media player. -
How do I fix the 0xc1010103 error in Windows?
You can fix the 0xc1010103 error by: 1. Using a different media player like VLC. 2. Repairing the corrupted video file with a tool like Wondershare Recoverit. 3. Updating your display drivers. 4. Installing missing video codecs. 5. Clearing temporary system files. 6. Reinstalling your media player. -
How do I fix a file that cannot be played?
To fix a file that cannot be played due to corruption, use a specialized video repair tool. For example, Wondershare Recoverit can analyze and fix the damaged sections of the video file, making it playable again. Simply add the file, click 'Repair', and save the fixed version.


 ChatGPT
 Perplexity
 Google AI Mode
 Grok
Grok


