Are you struggling with being unable to play games because there's not enough space? That can be a tough thing to deal with. It is important to identify the methods through which you can upgrade and opt for a PS4 hard drive replacement. Running out of space on PS4 devices is a common issue, and most people are struggling with it.
Now, you can either add an external hard drive or upgrade it. Replacing the internal hard drive is a good option, and you wouldn't have to take up a lot of space. As a result, you can get along with it and start upgrading. You can go through the blog to learn how to upgrade PS4 hard drive.
Try Wondershare Recoverit to Perform Data Recovery

In this article
- Back Up Your PS4 Data
- Power Off and Unplug Your PS4
- Slide the Plastic Casing Off
- Remove the Screw Holding the Drive
- Pull Out the HDD
- Remove the Enclosure Screws
- Place the New Drive in the Bracket
- Replace the Enclosure Screws
- Put the Drive Back in the PS4
- Reinstall the System Software
- Sign In and Restore Your PS4
What Do You Need to Upgrade PS4 Hard Drive?
When you are manually upgrading your PS4 hard drive, you must pay attention to all the information. Therefore, to upgrade PS4 hard drive, you will need the following:
- The USB stick or FAT32 USB SSD or HDD that has some space in it.
- The laptop is connected to the internet.
- PS4 controller and micro USB cable.
Which PS4 Hard Drive Replacement Should I Get?
When you upgrade the PS4 hard drive, you need to ensure that you have the type of drive you want as a replacement. For the PS4 hard drive replacement, you must understand how long you plan to use it on the PS4 and how much space you need.
The space usually depends on the type of console you have. On average, it is advisable to double the storage of the hard drive so that there is space in the storage device for future usage as well. When you opt for a free upgrade PS4 to PS5 you can choose the best drive.
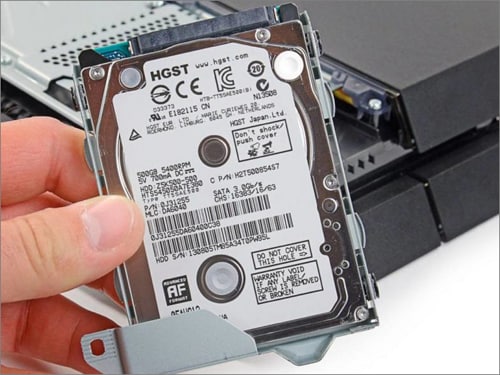
Below are the two replacement options that you have as a replacement for the PS4 hard drive upgrade:
- Hard Disk Drive (HDD): HDD is a traditional option and is available by default for PS4. It is very slow but costs less in terms of gigabytes.
- Solid State Drives (SSD): These do not have any moving parts and use flash memory to store data. This will ensure that the system is fast. However, it is slightly expensive. So, if you have a strict budget for the hard drive, you will have to consider the same. Nonetheless, it is totally worth the price, considering the performance improves.
How to Upgrade PS4 Hard Drive?
Now, you have to be extremely mindful while upgrading the PS4 hard drive. You have to take care of all the steps and components so that you don't face any problems. Some of the prominent steps to follow on how to upgrade ps4 hard drive are as follows:
1. Back Up Your PS4 Data
Before swapping the disk, you must back up the PS4 data. Therefore, you will have to save screenshots, video clips and images. You can back up data from System settings.
System > Backup and Restore > Back up PS4.
Here, you will have to follow all the steps to back up data onto the external drive. If there is not enough drive or space, you can back up the data individually.
PlayStation subscribers have the flexibility to save all the PS4 backups in their cloud. To do this, you need to follow these steps: Settings > Application Saved Data Management > Saved Data in System Storage > Upload to Online Storage. You can select the game that you want to back up and upload all the necessary data to your PS Plus cloud storage.
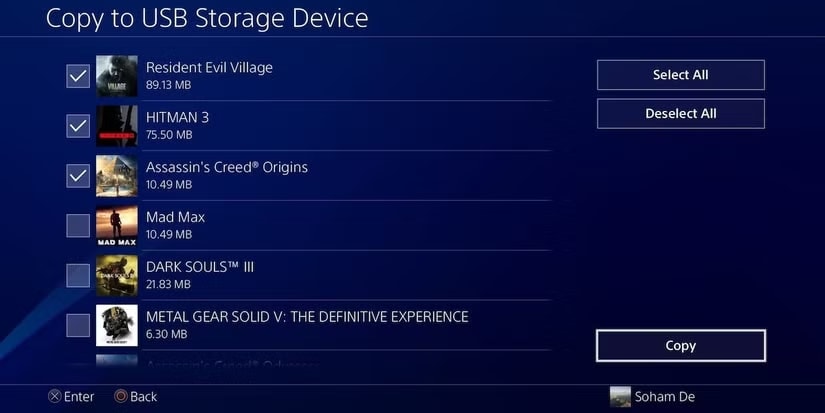
If you are not a subscriber, you have the option to copy and save the data to USB storage. Following the same steps as above, you will have to select the Copy to USB Storage Device option and then follow the next instructions on the screen for saving data to a flash drive.
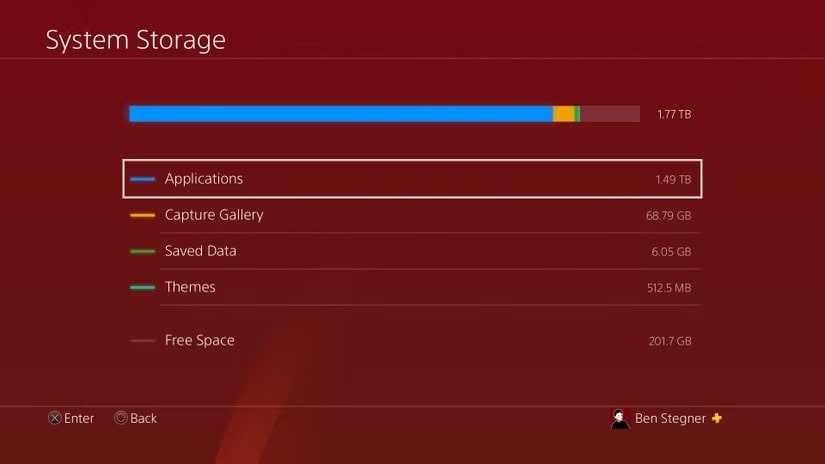
You can save the captures from the Capture Gallery Option under System Storage Management. In the Capture Gallery Option, you can check all the information that you have recorded. Now, you can click Options and then Copy to USB Storage Device. On the next page, you will have to hit the Share button and upload the media to save them.
2. Power Off and Unplug Your PS4
Before beginning the process of upgrading your PS4, you must ensure that the device is completely switched off. If you notice that the light is orange, it means that the device is in Rest Mode and not completely shut.
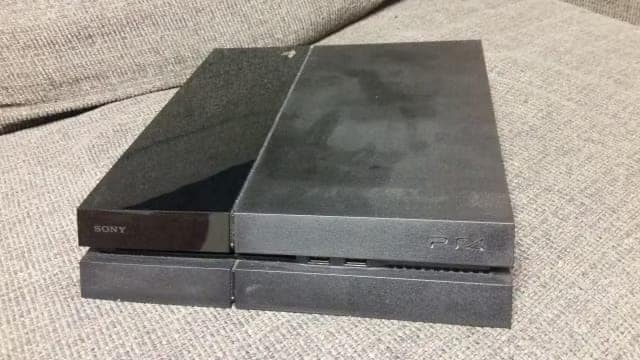
You will have to turn it off entirely. You must press the Power button on the console till you hear two beeps. This is an indication that the system has shut down. As soon as the PS4 shuts down completely, remove all the USB devices and wires that were connected to the drive.
3. Slide the Plastic Casing Off
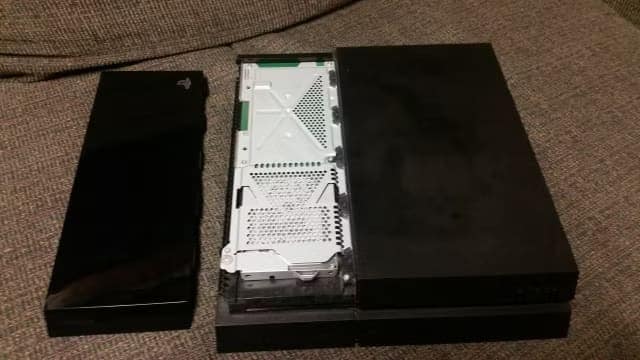
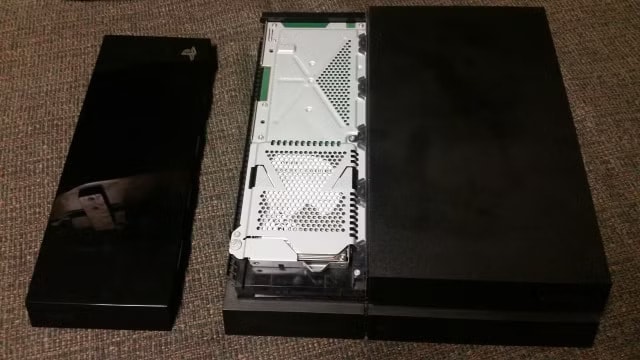
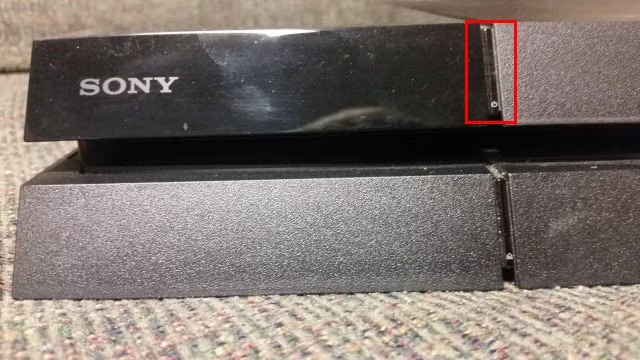
On the top, there are two sections of PS4. The right side of the PS4 console has a matte finish, whereas the left one has a glossy finish. Carefully handle the glossy part and slide it towards the left, away from the center. This will allow the glossy side, rather than plastic, to come off quickly without much struggle.
4. Remove the Screw Holding the Drive
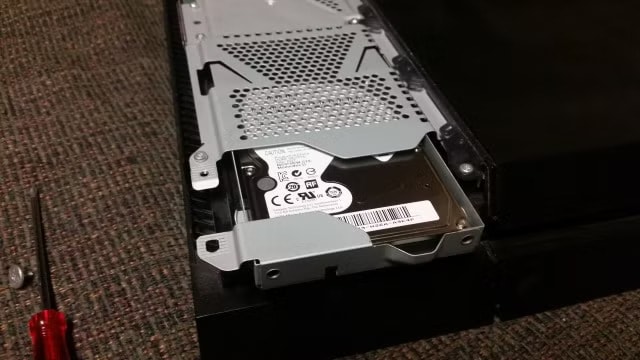
Hold the drive in one place and put in effort to remove the screw. The HDD must be intact so that there's no damage while you're removing it using the screw. The screws are silver in color and have the PlayStation logo on them. For unscrewing the screw, use a high-quality screwdriver.
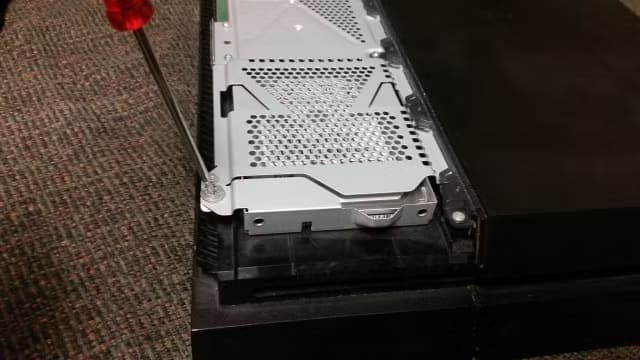
Loosen the screw gradually. Make sure that you are gentle during this process and not stripping it off. Once you have successfully removed the screw, keep it in a safe place so that you can put it back once the replacement is complete.
5. Pull Out the HDD
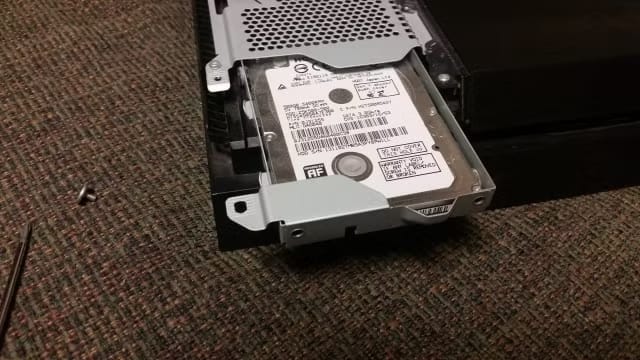
As soon as you have removed the screw, you can pull out the HDD from the enclosure. It will be held together in a safe place using a bracket.
6. Remove the Enclosure Screws
Four screws will be available around the enclosure, one of which will be hidden under the handle. If you want to remove the drive from the system altogether, you will now have to remove these four screws using the same method as before. However, you have to be extremely gentle while unscrewing so that you don't rip it off. Once the screws are lost, you can save the same in some safe space.
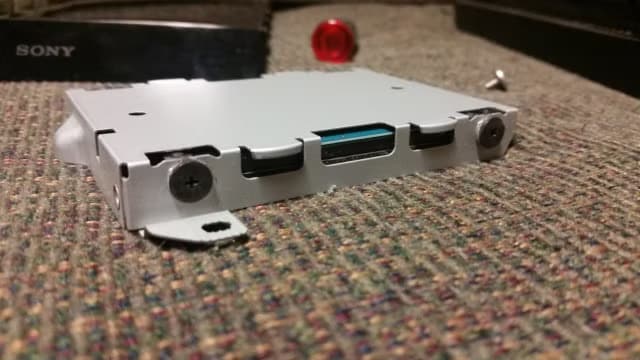
Sometimes you may experience some problems in removing the screws. So, you should use a slightly larger screwdriver to overcome this problem. While you're unscrewing, the drive may start sliding off. So, you should be very careful while handling it.
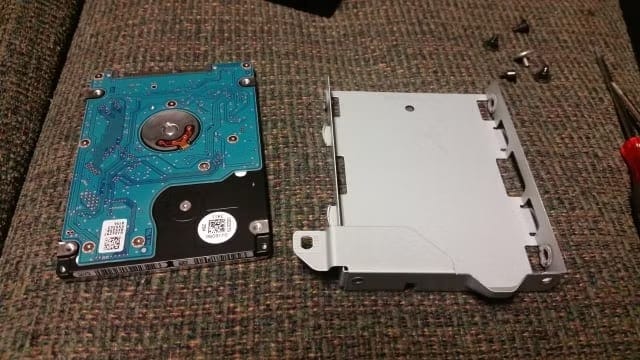
7. Place the New Drive in the Bracket
Once the old HDD screws are removed, you can remove it. Keep it aise and place a new drive on the bracket. It should be kept facing the same way as the old one and must fit completely.
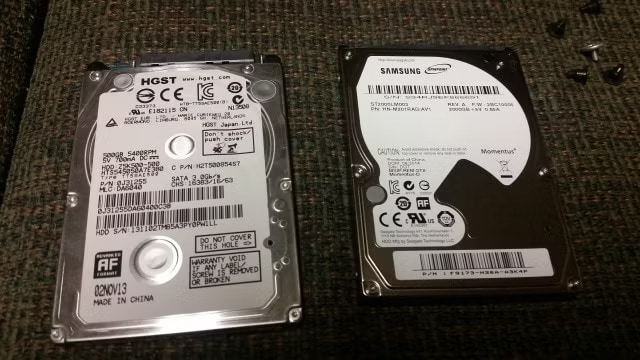
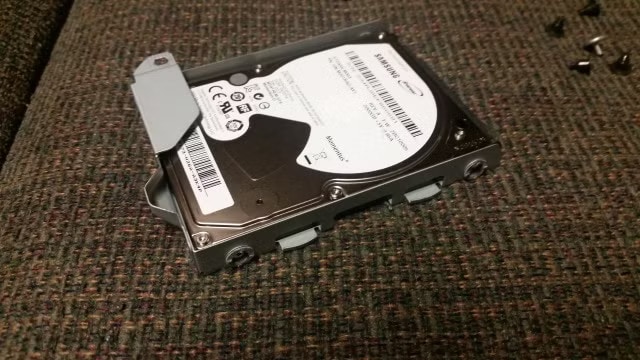
8. Replace the Enclosure Screws
Now, this is a sort of a reverse step. You will have to replace the four screws and attach the drive to hold it in the bracket. Make sure to turn the screws to the right to tighten them. However, do not tighten them extra, or it can be damaging.
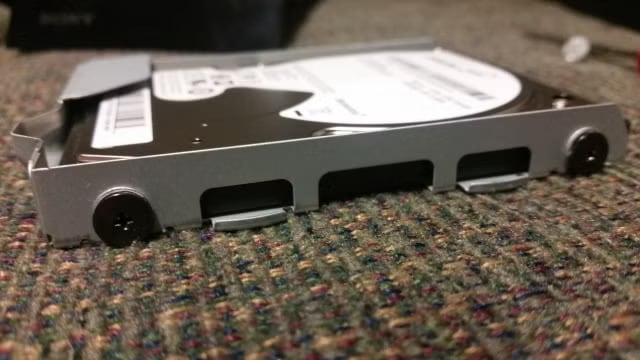
9. Put the Drive Back in the PS4
The bracket should be completed again so you can slide it back into the device. The handle that is there should be facing outwards. Now, get the PlayStation screw that you had removed earlier and put it back in. It shouldn't be too loose or too tight.
Once you have secured the screen, it is now time to put the glossy part that you had removed earlier back on.
10. Reinstall the System Software
The new PS4 hard drive will be installed physically. But now you will have to reinstall the PS4 software. The information about updating the software is available on the system's official page. You can follow the installation instructions for the PS4 console system software.
You need to do the following to reinstall the system software: The flash drive must be formatted as FAT32. In the formatted flash drive, you must make a folder called PS4 with no quotes or caps. It should be made at the root. Within that PS4 folder, create another folder known as UPDATE. Now, you will have to download the system software from Sony's website directly into this folder.
Now, connect the USB flash drive to the system while the PS4 system is turned off. This is the time to switch on your PS4. So, press and hold the power button for several seconds. You must hear two beeps.
This will move your PS4 in safe mode. You must begin the initialisation of PS4. Select update from the USB storage device and then OK. The PS4 system will take a few minutes to prepare. You have to be patient, so wait a little.
11. Sign In and Restore Your PS4
Once the PS4 controls are given back to you, it is time to begin the fresh installation process. You must sign into the device using your Playstation account, then fix the settings and redownload all the existing games from the PlayStation Store. Reverse the process and restore all the settings. Now, visit Settings and choose Application Saved Data Management. Apart from that, you can choose Saved Data in Online Storage or Saved Data on USB Storage.
Before restoring the savings, you will have to own a game. Before saving the data of the games that you own, you will have to install the same disc. Apart from that, you can download some digital games from the library as well.
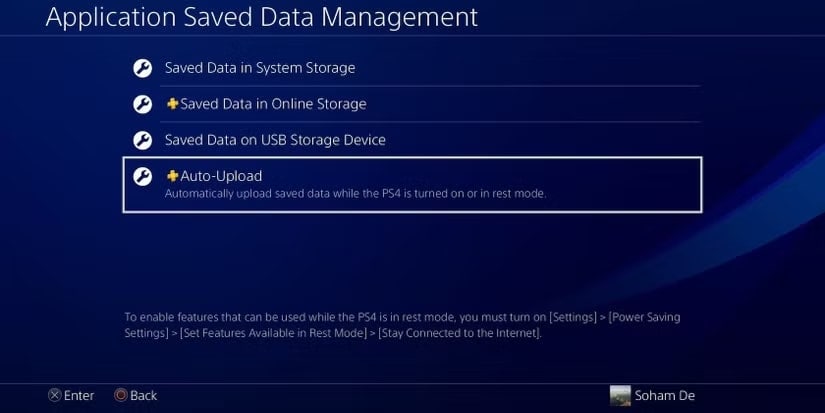
Once you have followed all the steps given above, things should be fine, and you must not face any device issues. However, make sure to back the data and save it in the same manner. Your hard drive will be upgraded, and you will have extra space to store your PS4 games.
Bonus Tip: Lost Data During PS4 Hard Drive Upgrade? Recover It with Wondershare Recoverit
Once you upgrade PS4 hard drive, you will notice some changes. You should consider checking your hard drive data. Sometimes, the hard drive data will be accidentally lost after an upgrade. Therefore, you will have to choose a reliable method for recovering the files. You must use tools like Wondershare Recoverit. The data may sometimes be lost in case of free ps4 to ps5 upgrade.
Wondershare Recoverit is a third-party data recovery software that will help you with all your informational needs. Therefore, it will help recover your lost data, like games, accounts, and history, from the upgraded drive in no time. The tool is compatible with almost all devices, protecting against file type and data loss scenarios. Wondershare Recoverit promises a 99.5% data recovery guarantee, which can surely be good for you.
Wondershare Recoverit is available for free download on Windows and Mac systems. You can download the software and get started with the data recovery process by following the steps given below:
Step 1: Upon installation of Wondershare Recoverit, you need to launch it and click on the Hard Drives and Location option under the File Recover section. Select your PS4 hard drive.

Step 2: In the new screen, you will notice that the scanning of lost files will begin.

Step 3: Once the scanning process is complete, all the recovered files will be available for preview. Click on the recovered files and select the ones that you want to recover. Click on the Recover option and save the files in a safe storage location.

Conclusion
By following the methods mentioned above, you should be able to understand how to upgrade PS4 hard drive and have enough space on it. It can either be a slow boost or a speed boost. It must be added to the PS4 and can take less than an hour. Sony has made it easy for PlayStation lovers to upgrade their HDD and have some extra space for new games. Now, if you accidentally lose any data during the transfer process, you can use a data recovery tool. Either way, it's a win-win situation, and you will get the best with respect to data recovery and also play the games with increased space.
FAQs
1. What happens when a PS4 hard drive goes bad?
If the PS4 hard drive goes wrong, it will lead to file corruption and data loss. Furthermore, it will cause firmware problems, thereby slowing down the performance. In some cases, the console will reset itself.2. How do I increase storage on my PS4?
You can replace the internal drive or use any external hard drive for increased storage on PS4. However, you will not be able to save data, themes and screenshots for the extended storage.3. How do you get more storage on PS4 without deleting games?
If you don't want to delete any games on PS4, you should consider installing the game into a new external USB storage device. However, you can also upgrade the console to HDD for better performance and get more games.


 ChatGPT
 Perplexity
 Google AI Mode
 Grok
Grok


