


 TL;DR:
To format an SSD for macOS compatibility, completely erase the drive and assign an appropriate file system using Mac's Disk Utility or Windows File Explorer.
● Select APFS (the default for macOS High Sierra and later) for exclusive use on modern Macs, HFS+ for older Mac operating systems, or exFAT if you need seamless read and write capabilities across both macOS and Windows PCs.
● Execute the formatting natively on Mac using Disk Utility or Terminal, or on a Windows PC using File Explorer or DiskPart; ensure you back up files first, as the process is destructive and enabling TRIM via Terminal makes data completely unrecoverable.
● If you accidentally format the wrong SSD or need to fix a corrupted RAW drive, immediately stop using the device and utilize dedicated recovery software like Wondershare Recoverit to scan and retrieve the wiped data.
Ask AI for a summary
 ChatGPT
 Perplexity
 Gemini
 Claude
 Grok
Grok
Whether you have a brand-new Solid-state drives (SSDs) or one previously used with a Windows PC, formatting is the essential first step for full compatibility with your Mac. This process ensures your drive uses the correct file system, allowing you to read, write, and store your data seamlessly and reliably.
This guide will provide clear, step-by-step instructions on how to format an SSD for Mac. We will cover the standard method using your Mac’s built-in Disk Utility and also provide a solution for formatting on a Windows PC, making the process of SSD card formatting for Mac use simple and straightforward.
Table of Content
Reasons Some SSDs Can't Work on Mac
If you are experiencing issues with your SSD, it may be a sign that it isn't compatible with your Mac device. Let's check out some of the most common reasons your SSD can't work on Mac:
- Formats – Mac devices require specific file systems (such as APFS or HFS+). If your SSD doesn't have some of these formats, your computer will not recognize it.
- Hardware – Not all SSD units are compatible with all devices. For instance, some SSDs are exclusive to Windows devices and won't work on your Mac.
- Connection – SSDs usually use Thunderbolt, USB A, and USB C connections. If your Mac doesn't have some of these, the SSD probably won't work.
Your SSD won't work on your Mac primarily because of formatting, but we are here to fix the issue.
When To Format Your SSD for Mac
You may wonder in which scenarios you should format your SSD. Here are several examples:
- Setting up your drive – If you have purchased a new or used SSD, you must format it to make it compatible with your device.
- Complete data deletion – Formatting will delete everything from your drive, especially if you use the secure deletion option. That will permanently remove the data you don't need anymore.
- Corruption – Your SSD may become corrupted or show a RAW file system. The best way to fix this issue is to format the drive.
- Performance – SSDs can start slowing down after some time, which may lead to other problems. If you want to avoid such scenarios, formatting your drive and giving it a fresh start will do the job.
Of course, numerous other scenarios may lead to formatting the drive, but these are the most prevalent.
Which File System Should You Choose for Formatting Your SSD for Mac?
You can choose a file system depending on your needs and preferences. Here are all the file system formats that are compatible with macOS, including what they are perfect for:
| File System Format | Developer | Decription |
| APFS (Apple File System) | Apple | APFS is specifically designed for SSDs and is the default file system for macOS High Sierra and later versions. It offers improved performance, better space efficiency, and advanced features like snapshots, clones, and encryption. |
| HFS+ (Mac OS Extended) | Apple | The Hierarchical File System Plus is an older version of APFS with fewer features. If you have an older Mac that doesn't support APFS, you should use HFS+ (Mac OS Extended) instead. |
| FAT32 | Microsoft | FAT32 is an older file system widely used for its compatibility with various devices and operating systems, but limited by a maximum file size of 4GB and a partition size of 2TB. |
| exFAT | Microsoft | exFAT is a universal file system designed for large-capacity storage devices, providing seamless compatibility between Windows and macOS systems, making it ideal for external drives and file sharing. |
| NTFS | Microsoft | Mac devices can only read the NTFS (New Technology File System); they can't write to an NTFS drive if they don't have corresponding third-party software. However, it is the perfect system if you use your SSD for professional purposes. |
All these options have their purposes, so choose one according to your needs and preferences. In most cases, APFS is the best choice for an SSD on a Mac due to its optimized performance and features. However, if you need cross-platform compatibility with Windows systems or have an older Mac, you may consider using exFAT or HFS+.
What To Do Before Formatting Your SSD for Mac
Before formatting your SSD for Mac, complete the steps below for the best experience.
Back up Your Data
If you have an SSD where you have stored some of your valuable data, backing up that data is crucial. However, corruption or a RAW file system might prevent you from accessing the contents of your SSD. In such scenarios, you can try multiple methods to help you recover data from a RAW drive.
Then, you can start formatting your external SSD drive for Mac; the process will wipe all your SSD contents. Wondershare Recoverit is a safe bet since it covers hundreds of data loss scenarios and can successfully retrieve thousands of file types. You can also use it as a backup plan if things go sideways.
Connect Your SSD
To format your SSD, you must connect it to your computer. The connection will depend on your computer's model and type. You can watch tutorials on connecting your SSD to a specific Mac device or use external adapters to connect your drive.
Enable TRIM & NVMe Format Your Device
TRIM is a program that handles garbage files and speeds up your SSD. However, be careful with this option as it will make all the data non-recoverable. Head to Terminal and input the trimforce enable command to turn on the feature.
How To Format an SSD for Mac on Mac
Way 1. Format an SSD on Mac Using Disk Utility
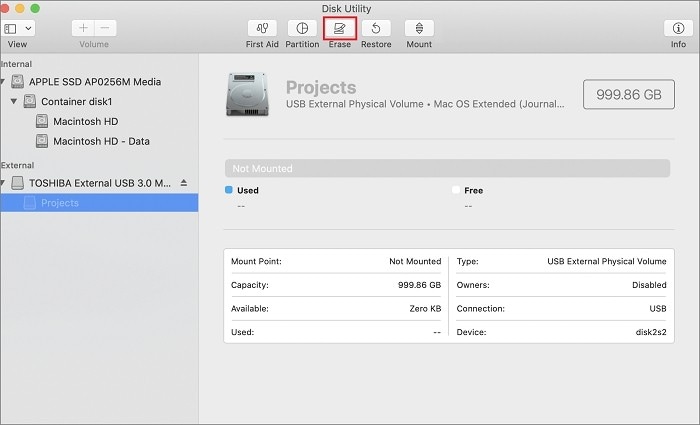
Disk Utility is a built-in Mac tool for seamless storage management. You can enjoy numerous features within the program, one of which is the formatting option. Here's how to perform an internal or external SSD format on Mac using Disk Utility:
- Find Disk Utility on your Mac and run the program.
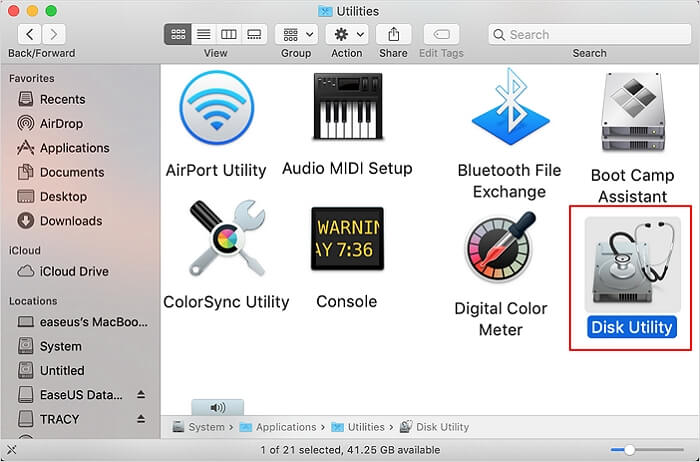
- Find your SSD from the list of available options and select it.
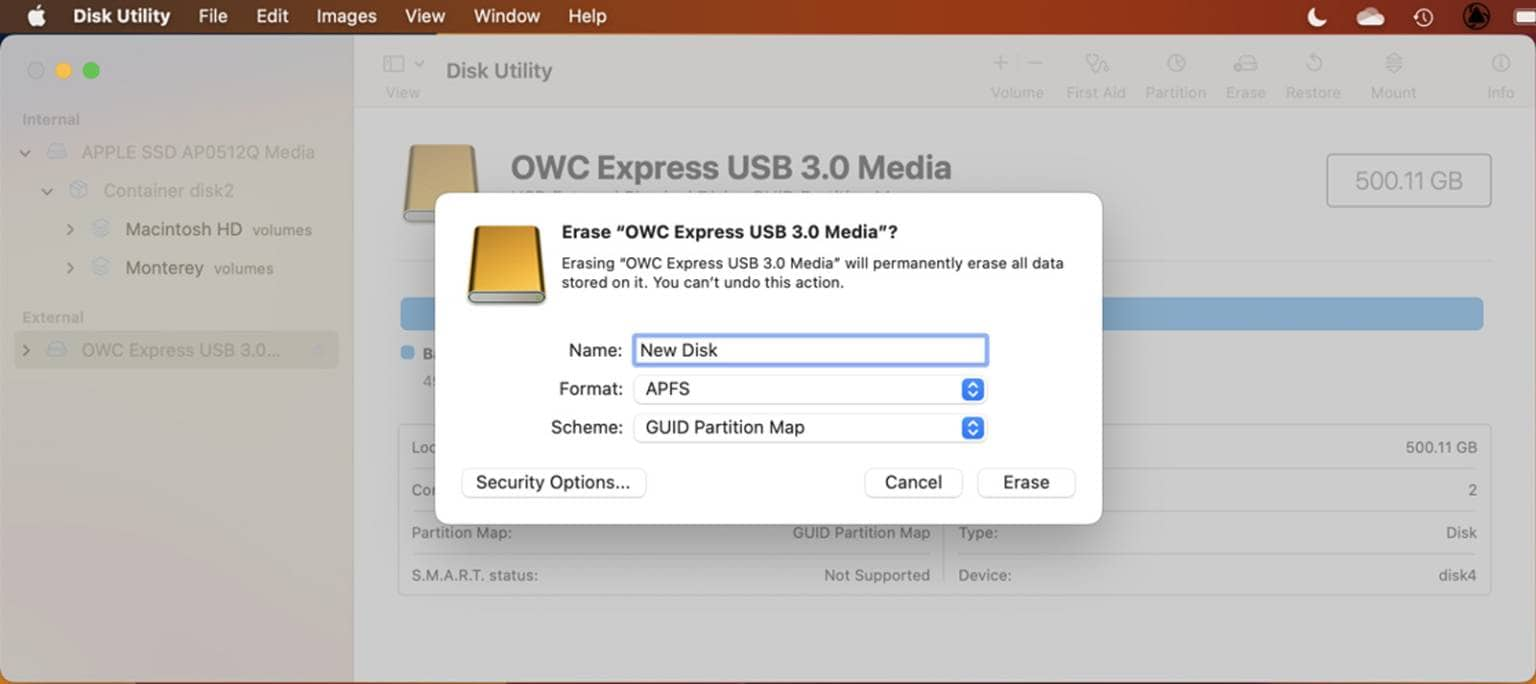
- Click Erase in the action pane.
- Name your SSD and choose a file system format in the dialog box.
- Click Erase to finish the process.
This formatting method is quick and easy; it is beginner-friendly and takes only a few minutes.
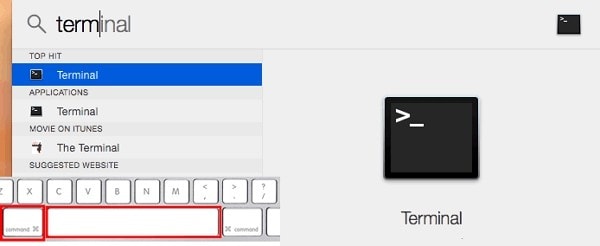
Way 2. Format an SSD on Mac Using Terminal
Terminal is an application where you can type commands and tell the program what to do with the desired device. It is perfect for formatting internal and external SSDs on Mac but may seem complicated to beginners. We recommend opting for Disk Utility if you haven't used Terminal.
Here's how to use Terminal to format your SSD on Mac:
- Press Command and Space keys together, type "Terminal" in the search bar, and open the Terminal app from the search results.
- Run the
diskutil listcommand. - Find your SSD and remember its name and number.
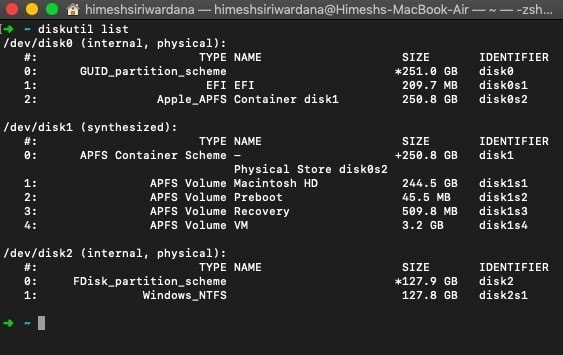
- Type the
diskutil eraseDisk JHFS+ diskname diskidentifiercommand, replacing JHFS+ with the desired file system, diskname with your disk's name, and diskidentifier with your SSD's number. Press Enter to complete the process.
Although it seems complicated, you will quickly get the hang of the formatting experience on Terminal.
How To Format an External SSD for Mac on Windows
Way 1. Format an External SSD for Mac Through Windows File Explorer
Formatting an external SSD for Mac on a Windows PC can be easily done using the Windows File Explorer. It allows you to format the drive with the exFAT or FAT32 file system, which are compatible with both Windows and macOS. This method is user-friendly and doesn't require any advanced technical knowledge.
- Connect your external SSD to your Windows PC using a compatible cable or adapter.
- Open This PC or My Computer on the Windows desktop.
- Locate the external SSD under Devices and drives.
- Right-click on the external SSD, and select Format.

- In the Format window, choose exFAT or FAT32 from the File system dropdown menu.
- You can also assign a name for the external SSD in the Volume label box. This is optional.
- Check the Quick Format option to speed up the formatting process.
- Click Start to begin the formatting process.
- A warning message will appear, notifying you that all data on the drive will be erased. Make sure you have backed up any important data before proceeding.
- Click OK to confirm the formatting process.
Once the process is complete, your external SSD will be formatted for use on a Mac.
Way 2. Format an External SSD for Mac on Windows Through DiskPart
Another way to format an external SSD for Mac on a Windows PC is by using the DiskPart command-line utility. This method is more advanced and requires familiarity with the command prompt. Here's how:
- Connect your external SSD to your Windows PC using a compatible cable or adapter.
- Press the Windows key, type cmd, and then run the Command Prompt as administrator.
- In the Command Prompt window, type diskpart and press Enter to launch the DiskPart utility.
- Type
list diskand press Enter to display a list of all connected drives. - Locate the external SSD based on its size and note its disk number.
- Type
select disk X(replace X with the disk number of your external SSD) and press Enter. - Type
cleanand press Enter to remove all existing partitions and formatting on the external SSD.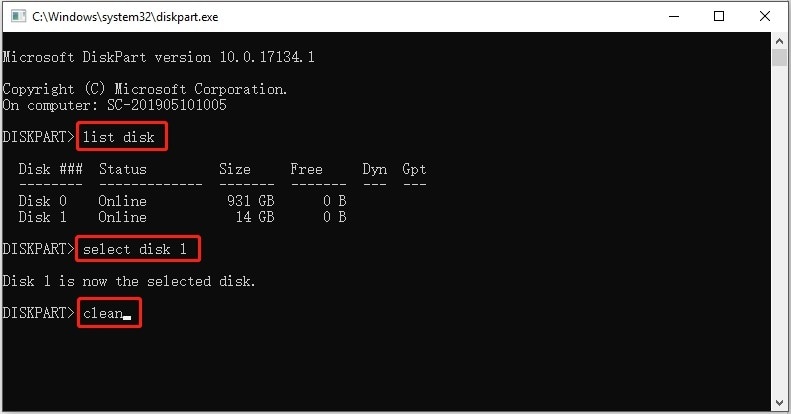
- Type
create partition primaryand press Enter to create a new primary partition on the external SSD. - Type
format fs=exfat quickand press Enter to format the partition with the exFAT file system. - Type
assignand press Enter to assign a drive letter to the external SSD. - Type
exitand press Enter to close the DiskPart utility.
Now your external SSD should be formatted for use on a Mac. You can safely eject the SSD from your Windows PC and connect it to your Mac.
How To Recover Data From an Accidentally Formatted SSD
Sometimes, things might go sideways, and you might accidentally format the wrong SSD. That is especially the case with formatting drives in Terminal since you might enter the name of another disk.
If you find yourself in this stressful scenario, don't worry. Wondershare Recoverit – Hard Drive Recovery is here to save the day and retrieve your data. When you notice you have formatted an incorrect SSD drive on Windows or Mac, stop using it and download Wondershare Recoverit. Follow the steps below to recover your data from SSD on Mac:
- Open Wondershare Recoverit and head to Hard Drives and Locations.
- Select your SSD from the available options.

- The program will scan for lost files. You can pause the process if you find all the files you want to recover.

- After scanning, preview your files and select those you wish to retrieve. Click Recover.

- Choose where to save the files.
Wondershare Recoverit is fast and reliable and will return your valuable data to your formatted SSD on Mac.
Conclusion
SSDs are among the most popular storage solutions in the modern world. Since they offer numerous benefits, you may have decided to use one on your Mac device. If so, you must format the SSD first. Now you know the two most reliable ways to complete this process.
However, have a backup plan if you accidentally format the wrong drive. Wondershare Recoverit is the best solution to retrieve lost files, so check it out to see how it suits your needs.
FAQs About Formatting SSD for Mac
-
Do I lose everything on my SSD when I format it for Mac?
Yes. The process of a computer formatting an SSD card is destructive and will completely erase all existing data. It is absolutely critical that you back up any important files to a different storage device before you begin to avoid permanent data loss. -
What is the best format to choose for my Mac SSD?
If you will only use the SSD with Mac computers, choose APFS (Apple File System) for the best performance and features like encryption. If you need to transfer files between Mac and Windows PCs, select ExFAT, as it is compatible with both operating systems. -
Can I format an SSD for Mac on a Windows computer?
Yes, you can. While you cannot format to a Mac-native file system like APFS on a PC, you can format the SSD to ExFAT. This makes the drive fully readable and writable on both macOS and Windows, which is perfect for transferring files between the two. -
My Mac isn't recognizing the SSD I want to format. What should I do?
First, check that the SSD is properly connected. Then, open Disk Utility and go to the "View" menu in the top-left corner, and select "Show All Devices." This often reveals the physical drive even if the volume isn't mounted, allowing you to select and format it.


