
 TL;DR:
To safely use a single external hard drive for both Time Machine backups and general file storage, use Mac's Disk Utility to create a dedicated backup partition with a storage capacity ideally two to three times larger than your Mac data.
● You must turn off Time Machine in System Preferences before initiating the partition process to prevent operational conflicts.
● If the partition option is unavailable in Disk Utility, you must first erase and format the entire drive to macOS Extended (Journaled) before adding the specific backup partition.
● Isolating Time Machine on its own partition prevents the backup encryption process from causing data loss or locking out standard files stored on the remaining drive space.
Ask AI for a summary
 ChatGPT
 Perplexity
 Gemini
 Claude
 Grok
Grok
Using an external hard drive for your Mac is smart, but dedicating the entire drive just for backups can feel wasteful. The most effective solution is to create a dedicated partition for Time Machine. This simple process allows you to safely store your backups while leaving space for other files on the same drive. By creating a separate partition for Time Machine, you ensure your backups are organized and protected without needing a second hard drive.
Part 1. What Is Time Machine and How It Works
What Is Time Machine?
Time Machine is the built-in backup tool of Mac that is mainly used to back up all the files of your Mac device (excluding macOS installation files) so that you can recover your files any time via Time Machine backup even if specific files get deleted from your Mac.
Supported Configurations
To proceed with the Backup process via Time Machine, you need to have a specific storage medium officially supported by Time Machine. Such as:
- A dedicated folder on any other Mac device connected to the same network.
- A volume or Storage drive connected to a Mac computer directly via USB or Thunderbolt and formatted as Journaled HFS+ or APFS. (You may need to format the drive in case of any connectivity issues.)
- Any storage drive shared by Apple Time Capsule connected to the same network.
- A storage drive connected to Apple AirPort Extreme 802.11ac model on the same network.
- Any local network volume connected with Apple Filling Protocol or SMB3 share.
Note: Before initiating the Machine Time backup process, you must ensure that you have set up your external drive with the Time Machine.
How does the Time Machine Works?
If you use a mac, you might be familiar with the working mechanism of the Time Machine. Still, here we have uncovered a few more facts about the Time Machine working process.
Does Time Machine always perform a full backup?
Generally, the Time Machine backups all the files or data except the installation files of macOS, but this is the case of the first-time backup process. Afterward, Time Machine will only back up the new files added to the system or any other change you made recently.
What is the frequency of Time Machine backups?
Time Machine automatically perform backups on an hourly, daily & weekly basis as per your scheduled time if it is turned on. However, you can also perform a manual backup via Time Machine anytime.
Will Time Machine remove previous backups?
The Time Machine doesn’t require removing the previous backups as long as enough storage space is left on an external hard drive for new backups. Suppose the backups folder on an external hard drive gets full; then the Time Machine will delete the oldest backups in order to save recent backups.
Note that the Machine Time backup might require some time to get complete. However, if you want to use any other fast, reliable way to back up your Mac data, you can readily opt for Wondershare UBackit; it is one the fastest & most efficient backup tools that help to recover lost data, too.
Part 2. How To Partition External Hard Drive for Time Machine
Although you can use the external hard drive for Time machine backups without partitioning, still it’s always a good approach either to use an entire external hard drive solely for Time Machine or create a separate partition for Time Machine backups. In case you want to use it for storage purposes also, then you should partition it to overcome the risk of data loss. Because if you encrypt your backups, you might lose the other data stored on the same external hard drive. Therefore, here we have thoroughly explained the operational steps to partition external hard drive for Time Machine.
Operational Steps:
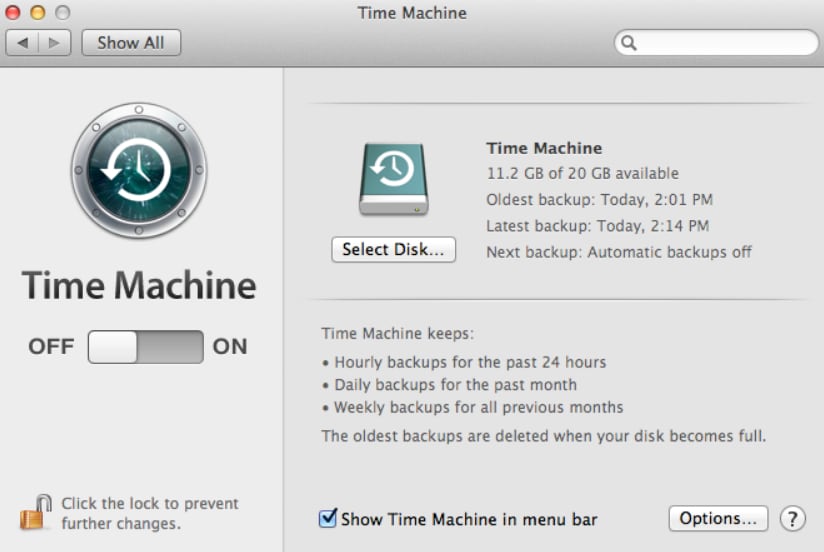
Step 1: Firstly, turn off the Time Machine by accessing it in System Preferences.
Step 2: Then, connect the external hard drive to your Mac device.

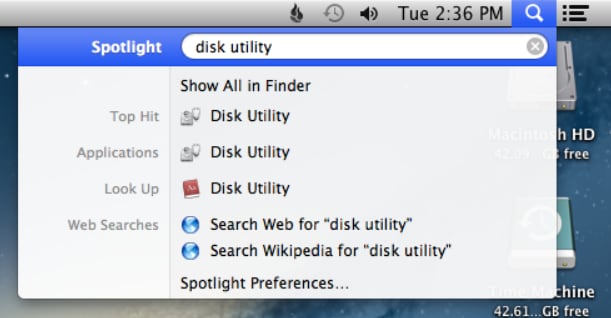
Step 3: Launch the Spotlight Search using Cmd + Space keys.
Step 4: Search the Disk Utility in Spotlight and open it.
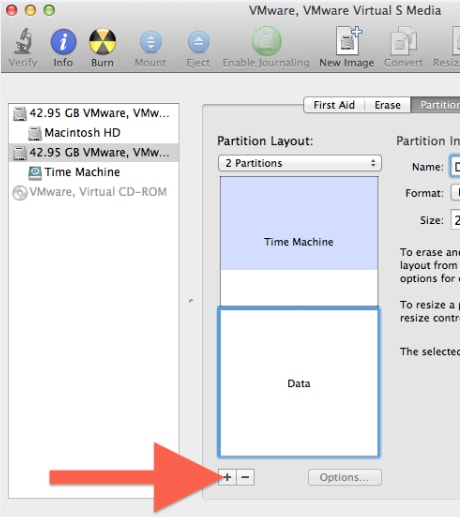
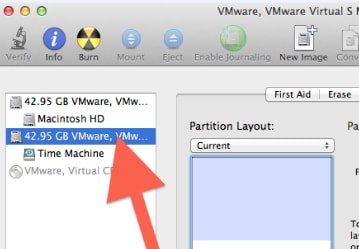
Step 5: In the Disk Utility window, select the external hard drive you intend to use for Time Machine and click on the Partition button located in the toolbar.
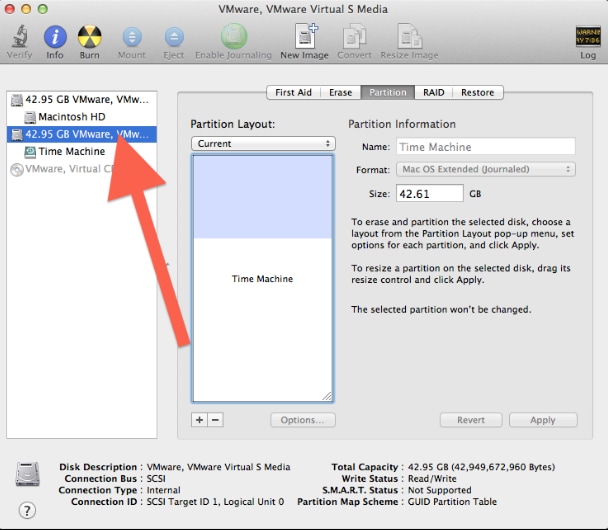
Step 6: Create a new partition by clicking on the + button.
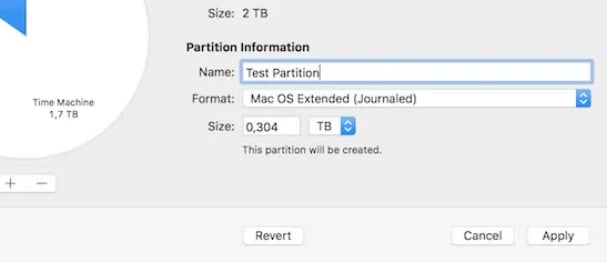
Step 7: You can resize the partition as per your requirement by moving the slider. Make sure to create a partition of enough storage capacity (ideally 2-3 times more than the mac data) so that it can work smoothly with the Time Machine Backup mechanism.
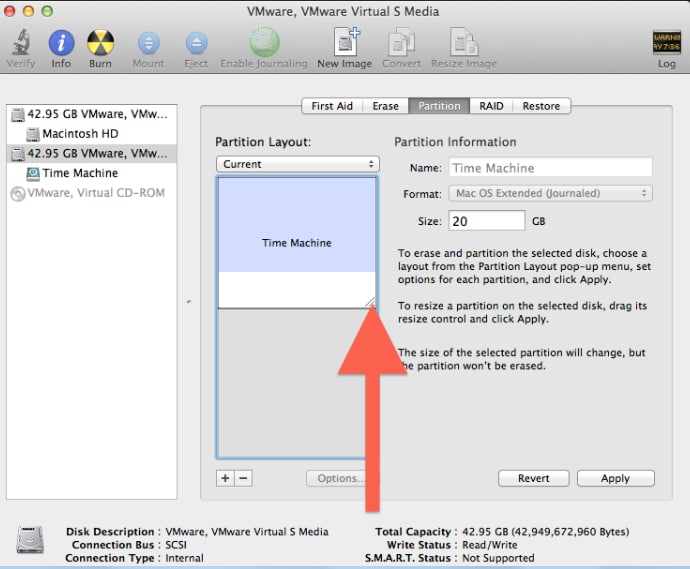
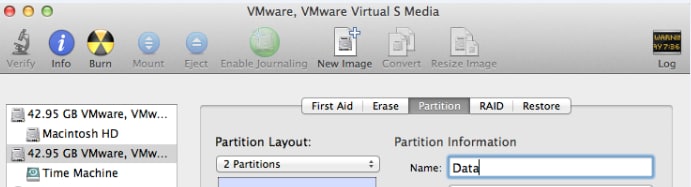
Step 8: Give a specific name to the newly created partition to identify it later on.
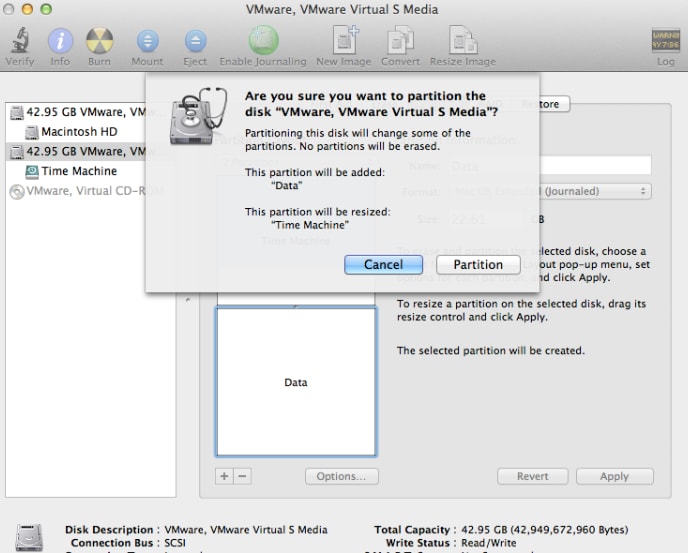
Step 9: Click the Partition button to confirm the changes.
In case if you can’t create a partition on your external Hard drive, then you need to follow the below stated steps:
Step 1: Select your external hard drive in the sidebar of Disk Utility.
Step 2: Click on the Erased button located in the toolbar to format the external hard drive.

Step 3: Select the Drive Partition name and choose macOS Extended (Journaled) format.
Once the drive is formatted successfully, you can create a new partition by following the above-stated operational steps.
Part 3. How To Recover Lost Files From External Hard Drive
In the Time Machine backup process, most of the time, you’re at risk of losing other important data stored on the external hard drive. Unfortunately, if you’ve been stuck in such a state, you instantly need to recover your lost data before it becomes unrecoverable. Therefore, in this connection, you can wholly rely on Wondershare Recoverit software to recover your lost files from the external hard drive.
Operational Steps:
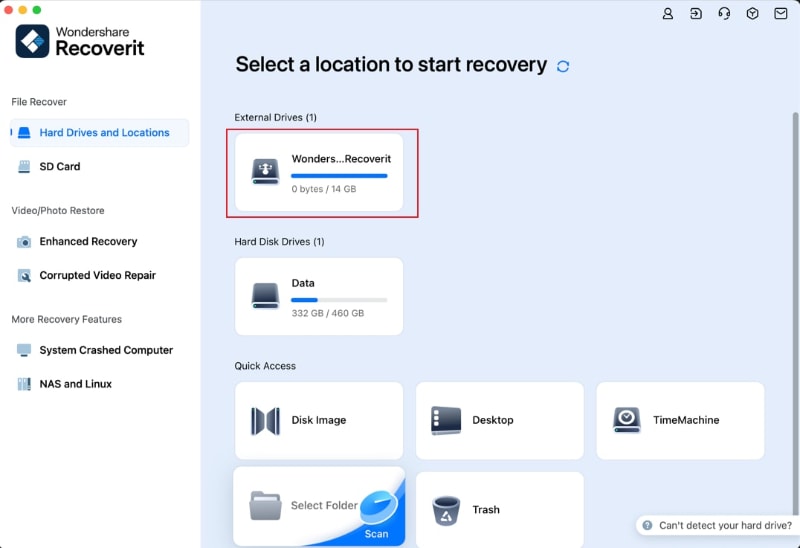
Step 1: In the first place, launch the Wondershare Recoverit application on your Mac.
Step 2: Then Select your external hard drive to initiate the Scanning process.
Step 3: The Recoverit will excavate the lost hard drive files in the Scanning process.

Step 4: You can Preview the recoverable files once the external hard drive is successfully scanned.

Step 5: Now, select the files you intend to retrieve and click on the Recover button.
Conclusion
Partitioning an external hard drive isn’t necessarily a condition for Time Machine, but the drive can work more effectively with a separate partition for Time Machine. This partitioning approach even proves to be quite efficient given the data security concerns. Therefore, in this article, we have demonstrated how to partition external hard drive for Time Machine in detail.


