


 TL;DR:
Partitioning a USB flash drive allows you to isolate multiple operating system installations and dedicated files on a single device, functioning best when formatted to FAT32 or exFAT for complete cross-platform compatibility across Windows, macOS, and Linux.
● Utilize built-in OS tools like Windows Disk Management, macOS Disk Utility, or Ubuntu's GParted to create the sectors, noting that the MBR partition scheme strictly limits you to four primary partitions while GPT supports up to 128.
● Restrict partitioning to newer, high-speed USB drives to avoid performance degradation, and be aware that individual partitions cannot share free space, making future resizing highly challenging.
● Back up all device contents before modifying the storage layout because the process wipes existing files, though lost data can potentially be retrieved afterward using recovery software like Wondershare Recoverit.
Ask AI for a summary
 ChatGPT
 Perplexity
 Gemini
 Claude
 Grok
Grok
Partitioning a flash drive or thumb drive is an excellent method to organize your folders. It can help users separate and carry multiple operating system installations, various rescue applications, and files, all on a single device.
Today, we'll show you what partitioning is, discuss when it can be helpful, and elaborate on what you need to consider before attempting to partition a USB flash drive.
We'll also provide detailed step-by-step instructions on partitioning a flash drive on Windows, macOS, and Ubuntu Linux and show you how to retrieve data lost due to formatting or partitioning.
Table of Content
What Does Partitioning a Flash Drive Mean?
Partitioning a flash drive, or any other internal or external disk drive, refers to dividing the drive's storage space into multiple sectors. Instead of all your files being in a single block, partitioning allows you to create numerous blocks, dividing each block for particular files and folders.
Should You Partition a USB Drive?
With all major operating systems supporting FAT32 and exFAT file formats, having one USB drive partition formatted this way makes it easily accessible on Windows, macOS, and Linux. There's no need to format your USB stick to more than one partition.
However, if you want to carry an operating system installation along your files or limit one system's files to said system while making specific folders accessible on other operating systems, then creating a USB stick with multiple partitions makes sense. It'll allow you to easily divide which files and folders are for each operating system.
On the other hand, having too many partitions means managing storage space is much more complex, as partitions don't share their free space with others. Resizing is challenging in all cases except if unallocated space is immediately after the partition you're trying to resize.
Things to do Before Partitioning Your Flash Drive
Before we can jump into partitioning the USB flash drive, there are a few things to consider. These prerequisites include the following:
Find a Working Flash Drive
You'll first need a working and reliable USB thumb drive. Its size doesn't matter, but its speed and age do, and you should only partition newer and faster USB drives, as having multiple partitions can impact the drive's performance.
Backup Your Drive Data
Creating a backup before partitioning is highly recommended, and you can use various built-in Windows, macOS, or Linux backup apps. Alternatively, you can use Wondershare UBackit in Windows, which provides additional backup and recovery features and provides more control over your backups.
How To Partition a USB Flash Drive on Windows 10/11
Now that we know more about partitioning, we can finally dive into the steps needed to do it. The first part of our guide will focus on the Windows OS, and Windows users can utilize the built-in Disk Management program. Here's how to use it:
- Press Windows + R, type in "diskmgmt.msc", and hit OK.
- Select your USB disk, right-click it, and tap Format.
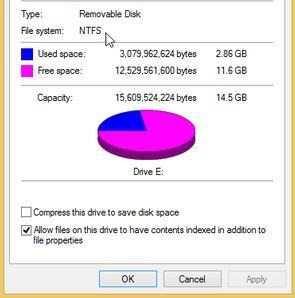
- Label the USB, choose NTFS as the File System, and hit OK.

- Right-click the USB and choose Shrink Volume.

- Adjust the size and click Shrink.

- Select the new Unallocated space, right-click it, and choose New Simple Volume.

- Follow the instructions, set its size, assign a drive letter, choose its File System, label the new partition, and hit Next.
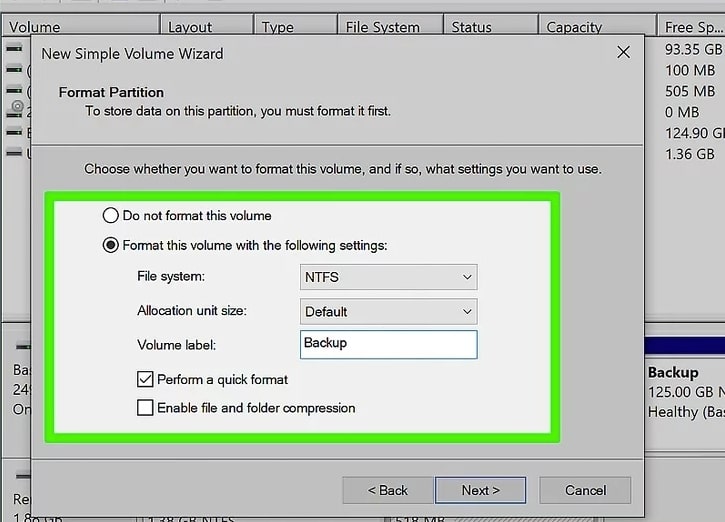
You'll now have a two-partition USB drive. It's also worth noting that the first three steps might be unnecessary depending on whether Disk Management allows you to shrink volumes immediately, which further depends on the USB's format.
How To Create Multiple Partitions on a USB Drive on Windows
Disk Management can be restrictive when creating multiple partitions, but you can repeat the same process above and make a few USB partitions. However, it's worth noting that NTFS and FAT32 only allow a few primary partitions but many logical ones.
How To Partition a USB Flash Drive on MacOS
Partitioning a USB stick or thumb drive on macOS requires a slightly different approach, but you can still use a built-in macOS disk tool. Here, the app is called Disk Utility, and we'll immediately jump into the steps to use it:
- Press Command + Space on your keyboard and search for Disk Utility.
- Open the app and set the View mode in the upper left corner to Show All Devices.
- On the left side, you'll see your USB drive as a physical disk and its partition as a volume underneath it. Select the top option - the USB disk.

- Tap the Partition button in the top part of Disk Utility, and choose Partition again.

- Hit the . button, name the partition, select its format, and set its size. Tap Apply > Partition > Done.
Mac OS Extended (Journaled) is recommended when choosing the format if you only use the USB drive on macOS. However, if you intend to transfer files between Windows, macOS, and Linux PCs, you should choose FAT32 (MS-DOS) or exFAT.
How To Create Multiple Partitions on a USB Drive on Mac
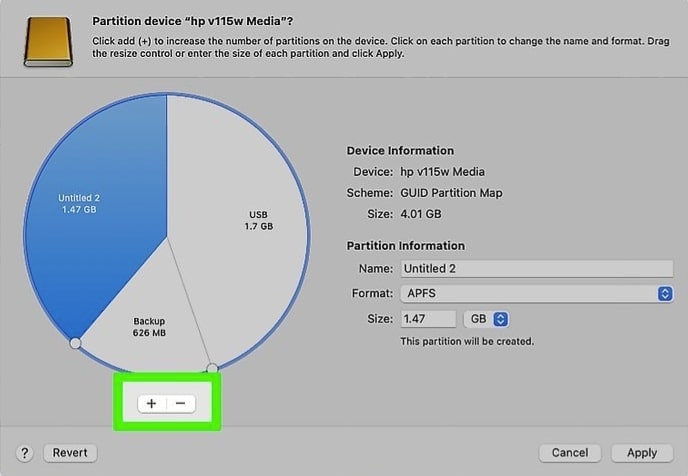
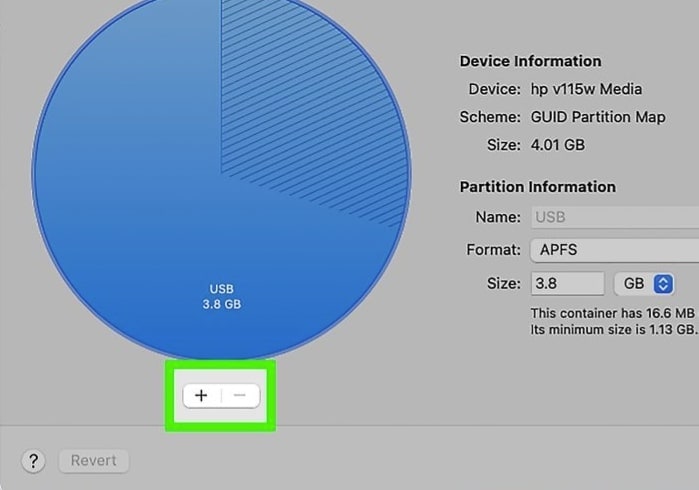
Adding additional partitions with macOS' Disk Utility is incredibly straightforward. When you tap the Partition button at the top of Disk Utility, your USB drive will appear like a pie chart, and you'll see . and . buttons next to it.
Hitting the . button will let you add multiple partitions to the thumb drive, and you can adjust their size, change their name, and choose their format. When ready, hit Apply > Partition > Done.
Try Wondershare Recoverit to Recover Data from Flash Drive
 Security Verified. Over 7,302,189 people have downloaded it.
How To Partition a USB Flash Drive on Ubuntu Linux
Linux offers multiple disk management and partitioning options. Advanced users might be comfortable with command line tools, but we'll rely on GParted, a graphical user interface tool, for your convenience. Here's how to use it:
- Look for and open the GParted app. Input your root password to open it. If it isn't installed, you can quickly install it through Terminal by entering the following command:
sudo apt install gparted - In the top right corner of the GParted app, select your USB drive. You'll have to rely on the drive's size, as they're often labeled as "/dev/sda" or "/dev/sdb" and so on.

- Navigate to Device and select Create Partition Table. It will let you choose MBR or GPT and erase the entire disk.

- Click on Partition and tap New.

- Adjust the partition's space, file system, name, and label, and choose whether to use primary or logical partitions. Tap Add when ready.

- Press CTRL + Return on your keyboard to apply changes in GParted. Alternatively, you can click Edit > Apply All Operations.
If you only use the USB drive on Linux, choose the ext4 file format. However, if you use the USB drive between other operating systems, go for the FAT32 or exFAT formats.
How To Create Multiple Partitions on a USB Drive on Ubuntu Linux
The number of partitions depends on your USB drive's partition scheme (MBR or GPT). MBR supports up to four primary partitions, while GPT supports 128. To add multiple partitions in GParted, you can repeat the previously mentioned guide's step 4, add as many partitions as your USB's partition scheme allows, and hit CTRL + Return to apply the changes.
How To Check if the Flash Drive Partition is Successful
Successful Partition a Flash Drive
- The user should make sure that the best process is carried out in this regard. This can be done by ensuring that the USB drive is inserted again after the partition process has been finished. It will now show multiple drives on the My Computer panel.
- It is also to be noted that the user should make sure that data can be transferred to and from the drive. If the partition was done correctly, then the user can be to use their drive.
Partition a Flash Drive Failed
If the partition has failed, the user will not be able to carry out any of the tasks that have been mentioned above. The following steps can fix this problem:
- The drive should be reinserted, and the process should be carried out once again.
- The user should also make sure that there are no viruses or malware on the drive.
If you lost the data of your flash drive, unfortunately, don't worry! You still have the chance to get lost data back. To recover files from USB flash drive, you can have a try the following tool.
How To Recover Data Lost Because of Partitioning
While partitioning thumb drives and USBs is often necessary, the process also may wipe all your data, which is why backups are essential. However, there is a way to recover lost data after partitioning, even if you've forgotten to create a backup beforehand.
All you need is a reliable data recovery tool, and you can scan the formatted USB drive for lost files, quickly retrieving deleted data. Wondershare Recoverit is one such tool, and the app can handle numerous data loss situations, including formatted drives, accidentally deleted data, lost partitions, system crashes, interrupted file transfers, viruses, malware, etc.
Using it is effortless - data recovery only takes a few minutes and steps. Here's what you'll need to do:
- Open Wondershare Recoverit on your computer and select SD Card.
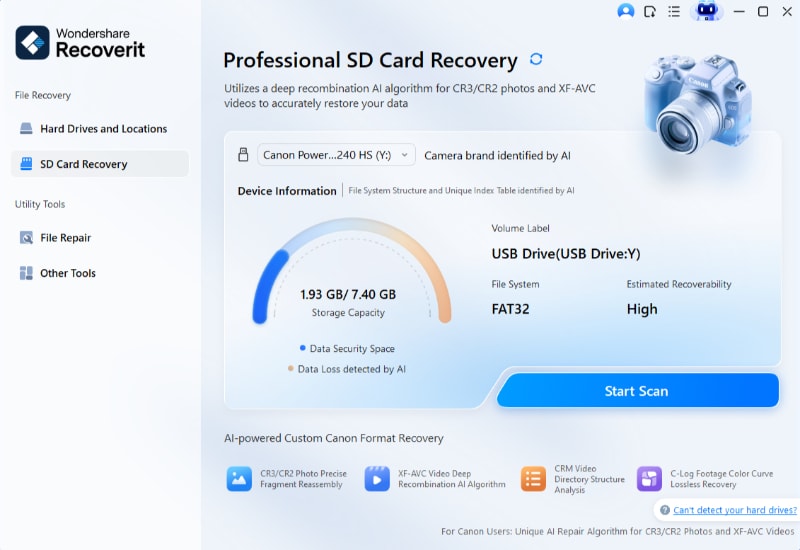
- Select the partitioned USB flash drive, and the app will automatically scan it for lost files.
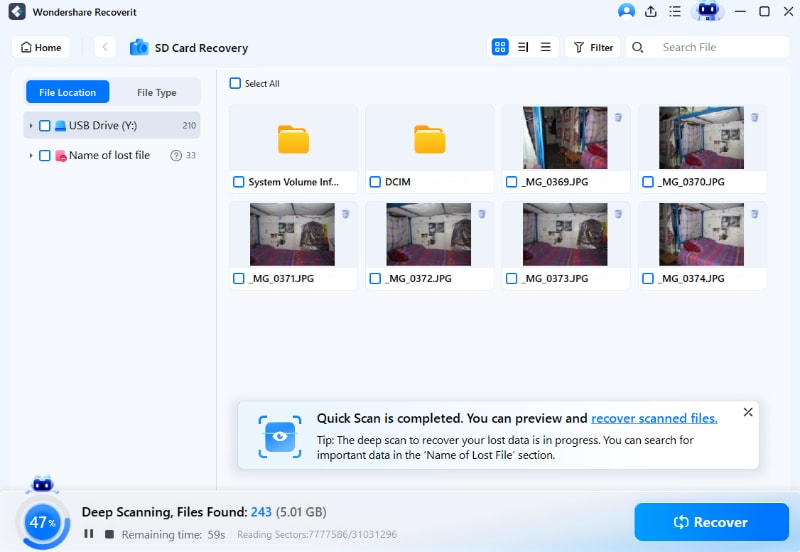
- You can adjust file filters to speed up the search and find particular data types.

- Tap Preview or double-click the file to see it and ensure it's the one you want.

- When ready, pause or stop the scan and hit Recover to save the files to your PC. Alternatively, you can let the scan complete.

With support for over 500 data loss situations, recovering data from a partitioned USB drives is a piece of cake for an app like Wondershare Recoverit. Having such an app by your side means you'll never again need to worry about losing precious files.
Conclusion
While it might be unnecessary for regular users who store data on USBs, partitioning a thumb drive allows professionals to put multiple operating systems on a single USB stick alongside files and folders. It allows for a clear division of OSs, rescue tools, and files in a single device, making partitioning quite helpful.
Suppose you're after the benefits of partitioned USB flash drives or multiple partitions where you can divide files and folders for different operating systems. In t
hat case, we've included detailed step-by-step guides for Windows, macOS, and Linux.
And if things go south, and you accidentally format a partition you shouldn't have or lose valuable USB drive data, an app like Wondershare Recoverit can effortlessly help find and restore your precious files.
FAQs About Partitioning a Flash Drive
-
Can a flash drive be partitioned?
Absolutely! USB flash drives can be partitioned like any other internal disk drive or external storage device. Windows, macOS, and Linux distributions like Ubuntu provide excellent built-in disk management tools that can help with this task. -
How do I split my USB into two partitions?
Windows Users can right-click the USB and select Shrink Volume in Disk Management, while Mac users can hit the Plus button in Disk Utility like in the guide above. Finally, Ubuntu Linux users can navigate to Partition > Resize/Move > change the partition's size and apply changes in GParted. Then, select the unallocated space and create a new partition using the guide above. -
What is the best partition format for a USB drive?
A few disk formats are compatible with different operating systems, so choosing one such format ensures your USB drive is readable on any computer. FAT32 and exFAT are excellent examples, as you can use the pen drive between Windows, macOS, and Linux PCs effortlessly. -
Can a flash drive have multiple partitions?
The number of partitions you can create on your thumb drive depends on your USB's storage space, format, and partition scheme. MBR and GPT influence the number of partitions, while specific formats allow you to make only a few primary partitions but many more logical ones. -
How do I merge USB partitions?
Merging USB partitions requires deleting the secondary partition and extending the primary one with the now available storage space. Disk Management users can hit Delete Volume, apply changes, and then Extend Volume, while Mac users can click Minus > Apply and then adjust the USB's pie chart to extend the primary partition. Linux Users can right-click, delete the secondary partition, and pull the primary one to take up the deleted partition's space in GParted. -
How do you partition a flash drive using DiskPart?
Like Linux distros, Windows also provides a command-line disk management tool - DiskPart. Here's how to use it:- Open the app by pressing Windows + R, typing in diskpart, and pressing Enter.
- Type in
list diskto show all your disks. - Add
select disk Xand change the X with your USB's identifier. - Type
cleanand thencreate partition primary size=X, but change the X with the desired size in megabytes. - Add
select partition 1and type informat fs=fat32 label='X', changing the X with the name for the partition. - Type in
exitand hit Enter when done.
-
How do you format a partitioned USB drive?
If you want to format a single partition, you can choose the partition and use one of the methods above for different operating systems. However, if you want to wipe the entire USB drive, it's best to delete all its partitions before formatting the USB device. -
How do I know if my USB is MBR or GPT?
Right-clicking a USB in Disk Management on Windows will let you select Properties, and choosing the Volumes tab will show you Partition style, telling you whether your USB drive is MBR or GPT. MacOS' Disk Utility will show you immediately upon opening the app and selecting the USB. At the same time, you can tap View > Device Information and look next to the Partition table in GParted.


