


Although they're highly advanced proprietary file systems, HFS and HFS+ are not immune to data loss. Besides accidentally deleting files, Mac users can still suffer from partition corruption, bad HDD sectors, virus attacks, and other factors that might leave your files inaccessible or delete your precious data.
However, there's no reason to be frustrated over this. Stay with us to learn about HFS data recovery and see how you can retrieve your important files in a few simple steps.
In this article
Causes of HFS/HFS+ Data Loss
Inaccessible files, lost data, invisible items, and many other issues with HFS/HFS+ partition's data are all considered data loss and can have various causes. These culprits most often include the following:
- Accidental file deletion;
- File transfer interruption;
- Mac drive formatting;
- Virus and malware infections;
- HFS/HFS+ partition deletion;
- HFS/HFS+ partition corruption;
- Physical damage to the storage device.
Whatever the cause of your HFS/HFS+ data loss, there's usually nothing to worry about. Your data is often recoverable, but a few other elements can also influence your chances of recovery:
Can You Recover Deleted HFS/HFS+ Data?
The recoverability of your HFS/HFS+ partition's data significantly depends upon a few factors, including some of the following:
- ⏰Time After Deletion – The longer you wait, the lower your HFS+ recovery chances.
- 📝Overwriten Free Space – Installation of new apps overwrites lost data and lowers your recovery chances.
- 🔧Physical State of the Drive – HFS data recovery at home is only possible if your Mac's HFS/HFS+ isn't physically damaged.
In most cases, you should be good to go if you stopped using your Mac device after losing files and didn't install any additional items that might overwrite your lost data and if you don't hear any beeping, tapping, or thumping noises coming from your Mac's disk drive.
Finding the Right Data Recovery Tool for HFS Data Recovery on Mac
Both HFS and HFS+ are case-sensitive file systems. That's why finding a professional data recovery tool that recognizes this is crucial, as a case-insensitive recovery app won't be able to find lost data or restore deleted files from an HFS or HFS+ partition.
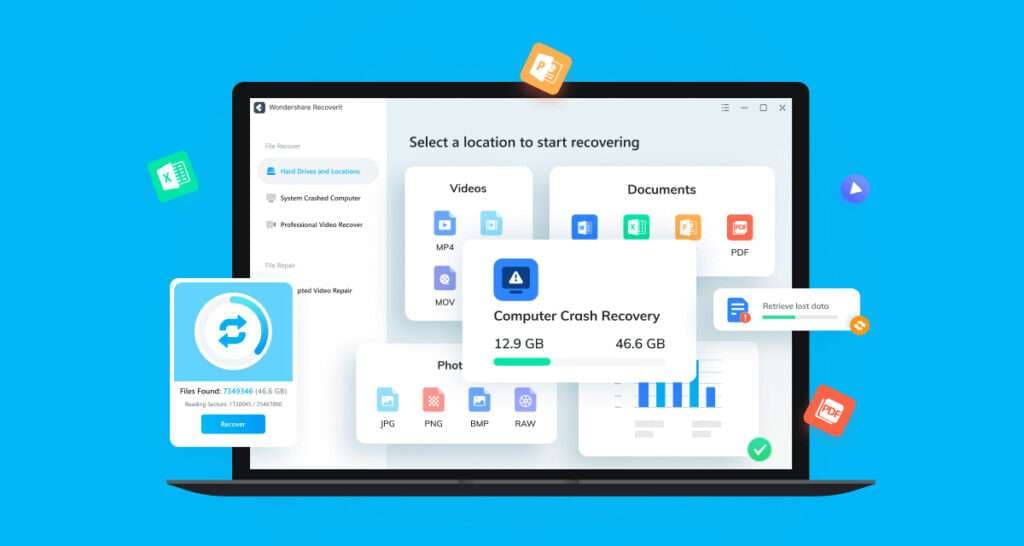
One such application is Wondershare Recoverit, and this immensely successful case-sensitive data recovery tool can effortlessly recover your Mac's data, regardless of the data loss situation, as the app supports over 500 data loss scenarios. It also supports 1,000+ file types, making it the perfect choice for all data loss situations.
How to Perform HFS/HFS+ Recovery
HFS recovery, including data recovery for HFS+, depends on what you're trying to restore. Depending on this factor, there are two methods to go about it, and the one you choose depends on whether you're trying to recover specific files from an HFS/HFS+ drive or restore an entire HFS or HFS+ partition.
Fortunately, Wondershare Recoverit supports both scenarios, and we'll cover both of these situations.
Recovering Specific Files from a HFS or HFS+ Partition
Regaining access to inaccessible files and recovering lost data with Wondershare Recoverit is a piece of cake. Thanks to the app's simplified and straightforward user interface, anyone can find their way around HFS file recovery.
Here are the how-to steps with pictures:
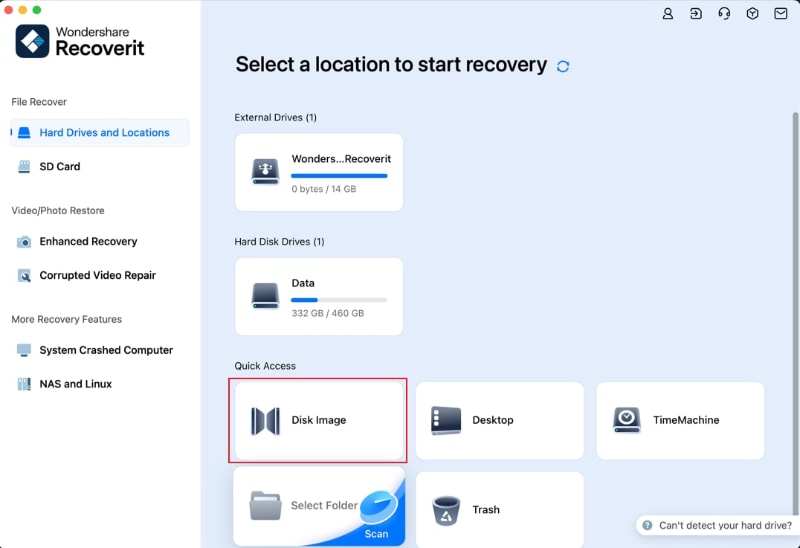
- Launch the app, tap Hard Drives and Locations on the left, and select an HFS or HFS+ partition.

- The app will immediately launch a deep scan on the selected HFS or HFS+ partition and search for all types of lost data.

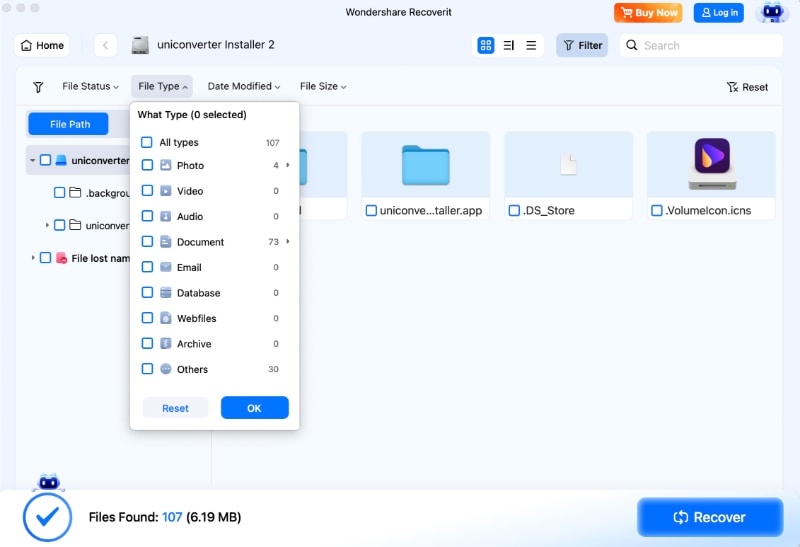
- You can then adjust numerous file filters to search for specific data types like images or music.
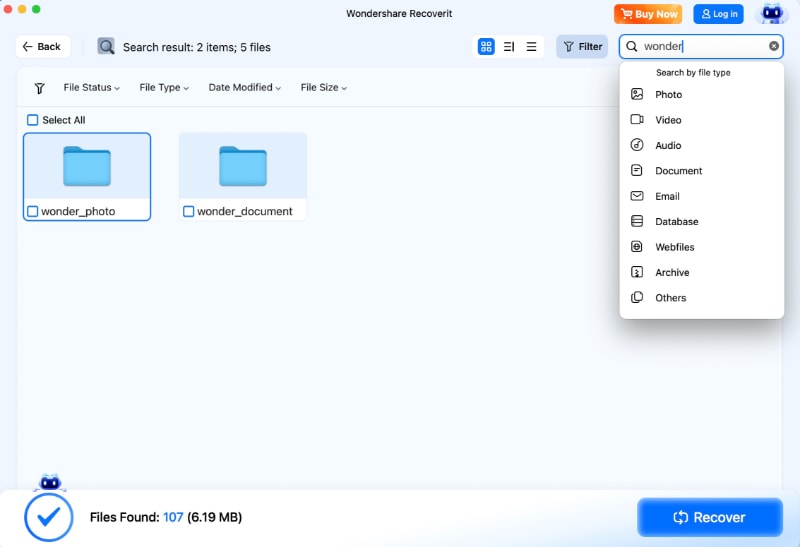
- You can add keywords to further pinpoint the app's scan and look for specific items.
- The app also lets you preview the located files before recovery to ensure it has found the correct data, and you can do that by tapping the Preview button.

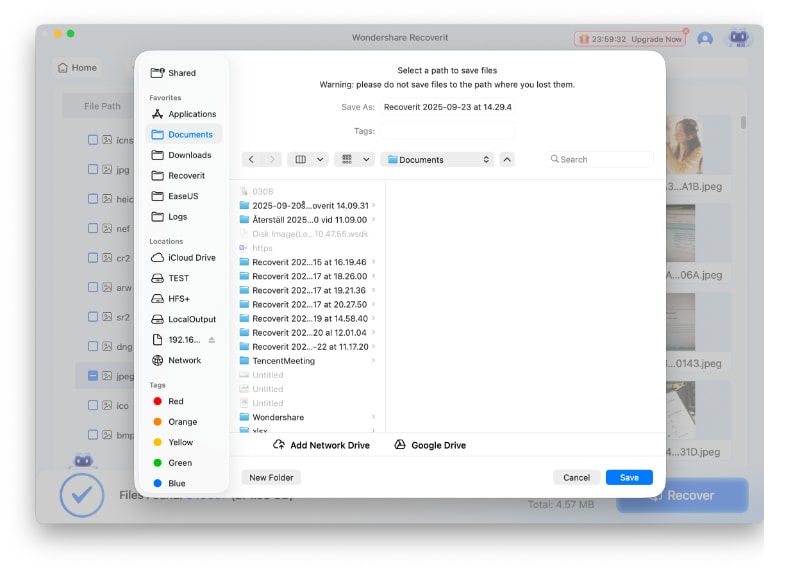
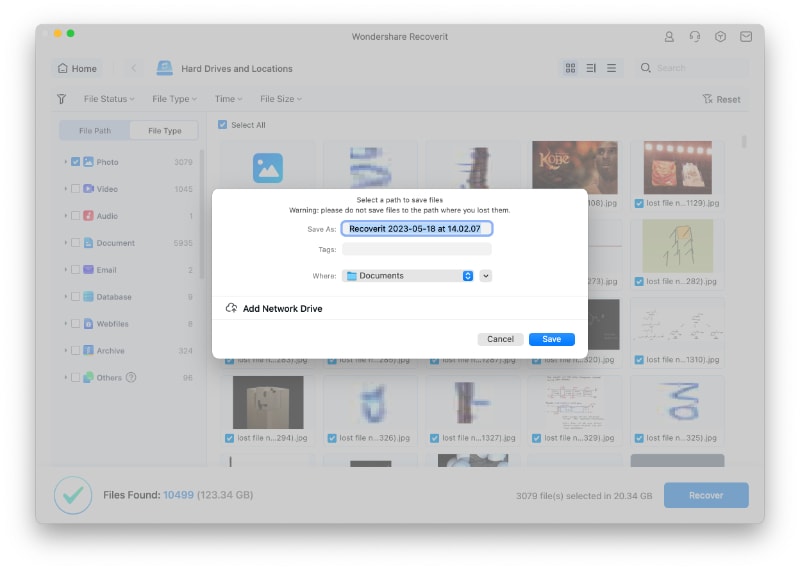
- Finally, select the files you wish to recover, tap the Recover button, choose a location, and tap Save to save the items to a safe location on your Mac.
That's all there is to using Wondershare Recoverit for HFS file recovery. By replicating these steps on your Mac, you'll have your specific files from an HFS or HFS+ partition within a few minutes.
Recovering an Entire HFS or HFS+ Partition
Recovering an entire HFS/HFS+ partition, also known as recovering from a Disk Image, is particularly useful for formatted and deleted HFS/HFS+ partitions and severely corrupted disk drives. It uses a mirror copy of your storage device and requires the following steps:
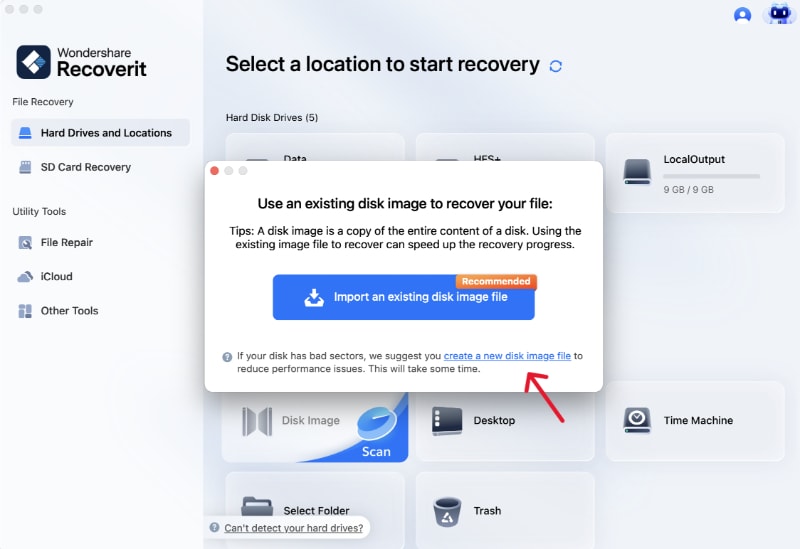
- Launch the app, select Hard Drives and Locations from the sidebar, and tap Disk Image.
- Choose the Create a new disk image file, select your HFS or HFS+ partition, and tap Create.
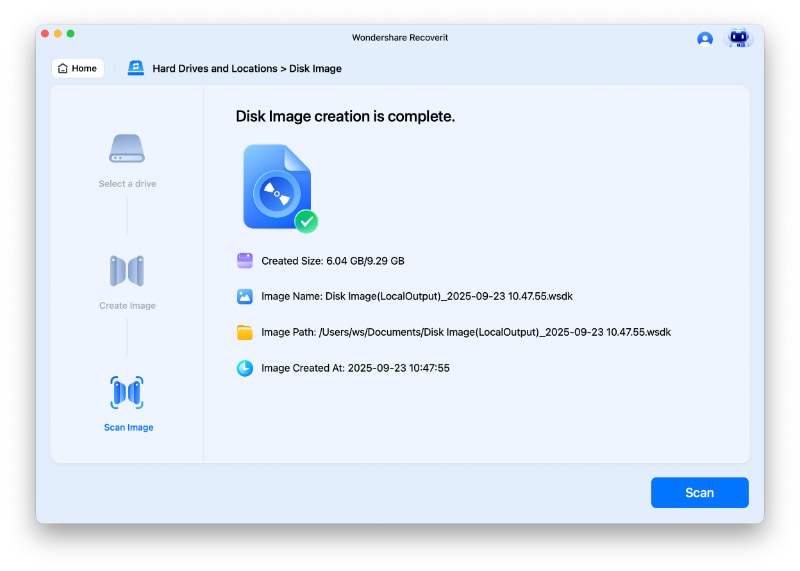
- Once the disk is created or loaded, you can tap the Scan button to scan the disk image and look through its files.
- You'll see the scan's progress at the bottom of your screen, and you can wait for it to finish or pause it if it has already found the files you're looking for.
- You can also preview the discovered files before recovering them by tapping Preview.
- Select the files you want to save, tap Recover, choose a saving location, and hit Save.
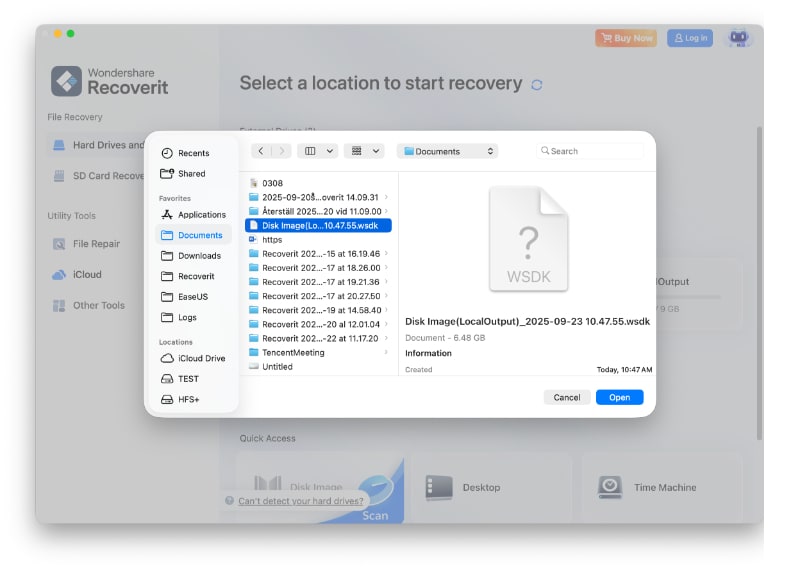
Alternatively, import an existing disk image by selecting the primary option in the previous step and tapping Open.
Whether you use an existing disk image or create a new one, the abovementioned steps will allow you to recover an entire HFS or HFS+ partition quickly.
Bonus: Can You Recover HFS/HFS+ Data on Windows?
While HFS and HFS+ are Apple-focused file systems, Windows users can still access HFS/HFS+ disk drives through third-party software like HFSExplorer, MacDrive, and Paragon's HFS+ for Windows apps. Data recovery apps like Wondershare Recoverit also allow users to perform HFS and HFS+ recovery on Windows machines.
The process is quite similar to the abovementioned steps for using this app. However, after connecting an HFS/HFS+ drive to your Windows computer, you must ignore the Unrecognized File System warning and cancel Windows' formatting dialogue.
Then, you can launch Wondershare Recoverit and follow the same steps for specific HFS/HFS+ file recovery.
Conclusion
Like any file system, HFS/HFS+ drives are prone to data loss, which can happen through file deletion, transfer interruption, formatting, corruption, etc.
However, since these are case-sensitive file systems, recovering data from such drives requires a case-sensitive professional data recovery tool, and Wondershare Recoverit fulfills these requirements.
The app supports two HFS/HFS+ recovery types: specific file and partition recovery. It even makes it possible to recover HFS/HFS+ partition files on Windows, making it an indispensable tool for all data loss situations.


