

 TL;DR:
To safely recover lost files on an Apple M1 Mac, first attempt restoration using built-in utilities like Time Machine or iCloud Drive, and rely on M1-compatible software like Wondershare Recoverit for permanently deleted or corrupted files.
● Stop using the affected internal SSD immediately and ensure any third-party recovery software is installed exclusively on an external drive to prevent irreversible data overwriting.
● Native macOS restorations require pre-configured setups; Time Machine depends on previously enabled local backups, while iCloud recovery must be executed via the "Restore Files" option within the iCloud web account settings.
● If files are inaccessible due to interrupted macOS updates or APFS file system corruption, run the First Aid function in the Disk Utility app to repair drive errors before attempting file extraction.
Ask AI for a summary
 ChatGPT
 Perplexity
 Gemini
 Claude
 Grok
Grok
After accidentally deleting important project files on their new M1 Mac, you might need a reliable method to recover them without risking further data loss. With Apple’s M1 chip architecture, recovering lost files can be a confusing and challenging process. Users require effective, compatible solutions tailored to the M1 environment to retrieve their valuable data safely.
This article explores the right methods and tools designed specifically to help users restore lost or deleted files on m1 mac recovery efficiently and securely. The methods discussed in this article ensure no data is permanently lost despite accidental deletion or system errors.
Try Recoverit to Perform M1 Mac Data Recovery
 Security Verified. 3,591,664 people have downloaded it.
In this article

Part 1. Overview of the Apple M1 Chip Technology
The Apple M1 chip technology revolutionizes computing by combining high performance and energy efficiency for modern applications. Below is a detailed table highlighting its core technical specifications and features to give users a better understanding of what is m1 and what is mac m1:
| Feature | Description |
|---|---|
| 💻Chip Design | Uses ARM architecture with 8 CPU cores: 4 fast and 4 energy-saving cores. |
| 📌Manufacture | Built using 5-nanometer technology with 16 billion tiny transistors. |
| 📈Speed | Fast cores run at up to 3.2 GHz, efficient cores at 2.1 GHz. |
| 💾Memory | 8GB or 16GB unified memory shared by CPU, GPU, and others. |
| 💽Graphics | Integrated 8-core GPU for smooth visuals and gaming. |
| 📹AI Processing | 16-core Neural Engine for quick machine learning tasks. |
| 🔋Power Use | Low power consumption (~14 watts) to enable longer battery life. |
Part 2. Why is Your Data Lost on M1 Mac?
Understanding why data may disappear or become inaccessible on M1 Mac helps in selecting the right recovery approach. Mentioned below are some of the common reasons that can cause data loss on your system:
- Hardware Failure: Although M1 Macs are equipped with fast and reliable SSDs, the drives can break down with time due to their limited lifespan. When the SSD begins to fail, files may become corrupt or unavailable altogether.
- File System Corruption: APFS file system, which M1 Macs use, can be corrupted due to improper shutdown or bad sectors on the drive. Such corruption can make files unreadable or can lead to random system behavior.
- System Update Error: Interrupted or unsuccessful macOS updates sometimes damage critical system files or partitions, resulting in stubborn data loss. Many users don’t realize that turning off the system mid-update can cause data loss, and apple m1 recovery might be needed.
- Problems with External Devices: Files may become corrupt in the process of transferring files by ejecting USB drives or memory cards improperly or using a defective device. These interferences usually lead to the loss of data in part or as a whole, and users are left frustrated.
- Malware and Security Threats: macOS is comparatively secure compared to other operating systems, but not free of malware. Certain malicious software may destroy files and encrypt data even when the users are prudent.
Part 3. The Built-in Mac M1 Recovery Options
Having learned what is m1 and what is mac m1 and the reasons for data loss, we will now explore the top methods to recover the files. Mentioned below are some of the most useful built-in recovery options that you can try to get back your data:
1. Time Machine Backup
Among the most popular recovery methods for your Mac, the use of the built-in Time Machine utility provided by the system should be mentioned. It takes periodic screenshots of your entire system, allowing you to navigate back in time and recover files you have lost or even restore your entire Mac. These backups can be browsed, and a single file or the entire system can be restored at any given point in time.
Firstly, you should make sure that you have the Time Machine backup enabled on your Mac device so that the utility can create the local backups. To understand how to apply this built-in feature to conduct an apple m1 recovery, read through the steps below:
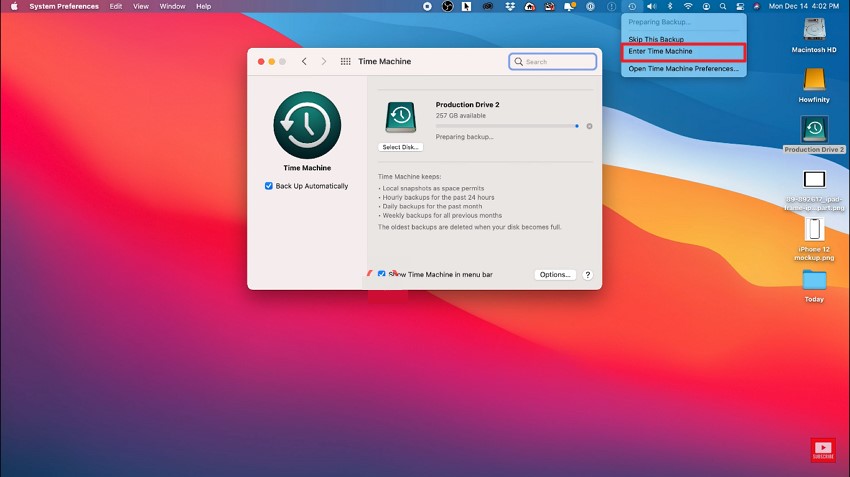
Step 1. Start by accessing the Time Machine backup from the Finder app and clicking on it. In the small window, locate your storage drive and head to the taskbar at the top-left. Expand the small “Clock” icon from there and click on the “Enter Time Machine” option.
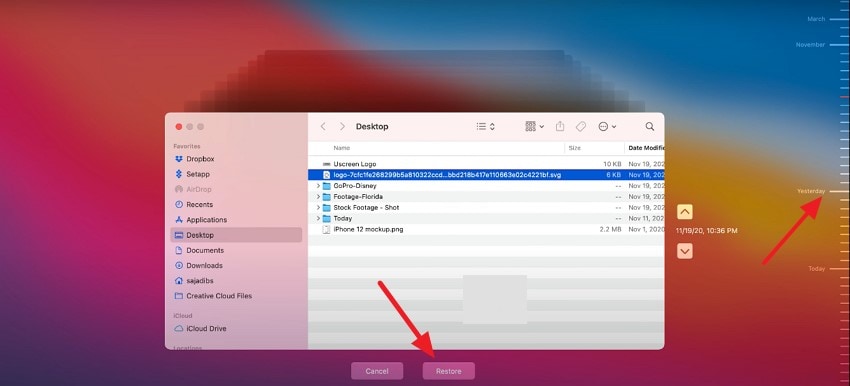
Step 2. Use the timelines on the right and navigate to the date from which you want the file to be recovered. Preview the folder of the file in the window and press the “Restore” button to successfully get back your file.
2. iCloud Drive
One of the most convenient methods to restore your files from your Mac device is using the iCloud backup. By storing your data in the cloud, it syncs everything seamlessly across your Apple devices. Your work is safely stored if you have enabled the iCloud backup across the Mac. Follow the steps mentioned below to learn how to use this cloud storage to restore m1 mac files:
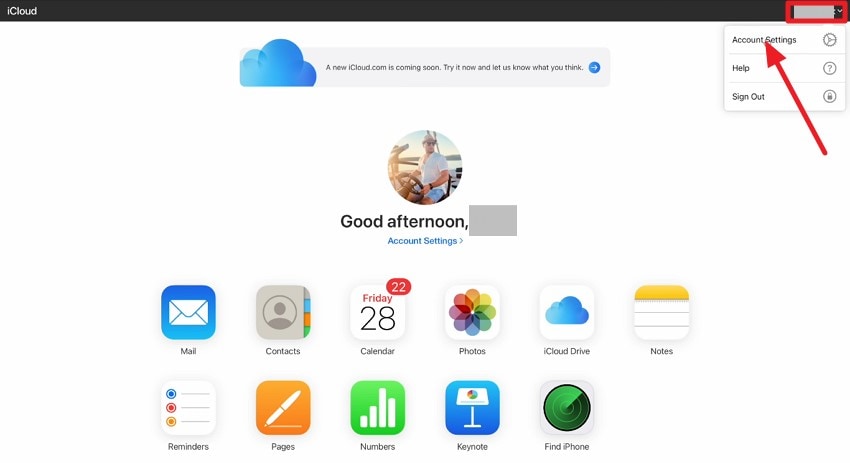
Step 1. Begin the process by heading to the official website of iCloud and signing in to your account. Next, go to the top-right corner and expand your profile to select the “Account Settings” option.
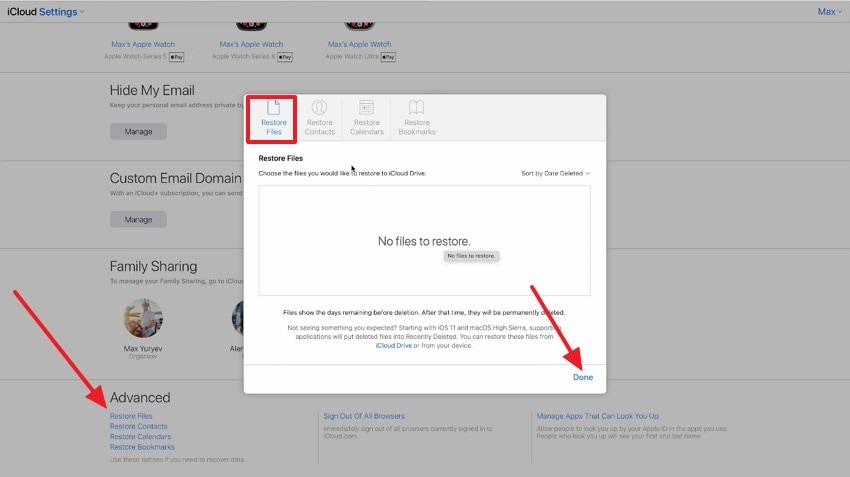
Step 2. Scroll through the following interface and locate the “Restore Files” option at the bottom. Click on it to enable the small window from where you select your desired files and press the “Done” button to complete the restoration process.
3. Trash in Mac
The Trash folder acts as a safety buffer for deleted files on a Mac, temporarily holding them before they’re permanently erased. When you accidentally delete a file, instead of disappearing instantly, it moves to the Trash, where it stays until you decide to empty it.
This simple but effective tool helps protect against accidental data loss, buying you time to recover important files. Learn how to restore mac m1 data by following the instructions provided below:
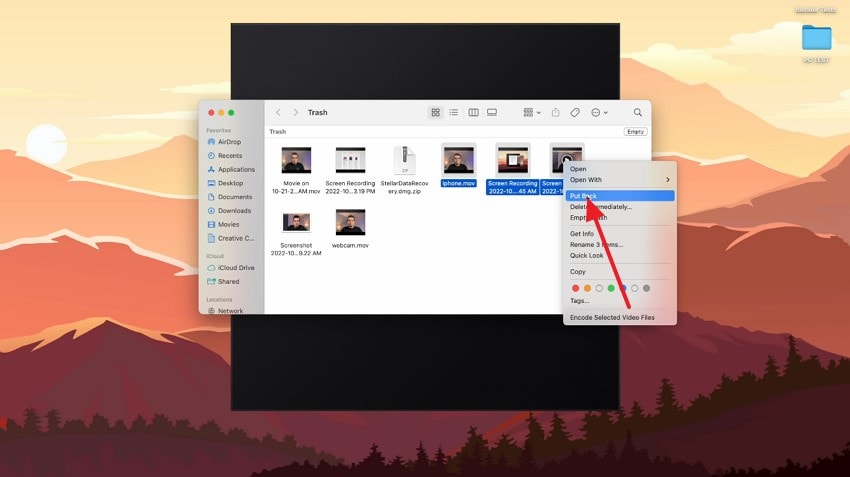
Instructions. Open the Trash folder on your M1 Mac and select the files that you want to recover. Next, right-click on them and choose the “Put Back” option to successfully retrieve the deleted files.
4. First Aid in Disk Utility
First Aid is a handy tool within the Disk Utility app that scans and repairs errors on your Mac’s drives and volumes. It checks the health of the file system, fixing issues that could cause data to become inaccessible or corrupted. Follow the steps mentioned below to learn the apple m1 recovery process with the First Aid function of Disk Utility:
Step 1. Open the Disk Utility program on your Mac and click on the drive in which your lost file was saved from the left. Now, locate the “First Aid” option from the top-right corner and click on it.
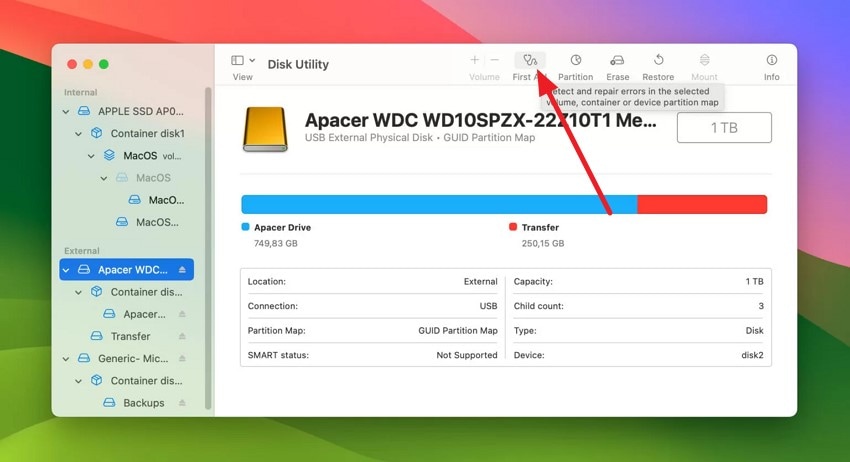
Step 2. Now, click on the “Run” button on the following dialogue box to let the utility run the process and repair and recover the files in the selected drive.

Part 4. Some Precautionary Measures to Take Before Trying Advanced Solutions
Before diving into advanced data recovery solutions for restore m1 mac, taking certain precautionary steps can significantly improve the chances of successful recovery. Provided next are some of the safety measures that you can consider while opting for a data recovery tool:
- Stop Using Affected Drive: Do not save new files or install software on the drive where the data loss has occurred. Doing so will help you prevent further data loss and prevent overwriting the recoverable data.
- Do Not Install Recovery Software on the Internal Disk: Installing the recovery software on the internal drive can overwrite the files you want to recover. This reduces the chances of successful retrieval and can even cause irreversible damage.
- Prepare External Drive: You must have an external drive to save the recovered files to avoid data overwriting. Using an external storage device to store recovered data ensures that your Mac’s internal drive remains unchanged.
- Back up the Current Data: Back up any remaining important files before the temporary recovery process takes place. This will prevent you from further data loss that can occur due to any malfunction or virus during the m1 mac recovery.
- Ensure Uninterrupted Power Supply: Make sure your device is sufficiently charged with a power backup to prevent unexpected shutdowns during the recovery process.
Part 5. The Best Recovery Software for M1 Mac Recovery: Easy Pickings
If all the above-mentioned built-in methods fail to recover your file, tools like Wondershare Recoverit provide the most effective results. This comprehensive tool automatically scans the storage and retrieves even the severely damaged files effortlessly. The tool also provides support for various external devices, such as micro SD and hard drives, to recover data instantly. Moreover, you can recover almost all types of files, including images and videos.
Besides this, you also get the ability to restore mac m1 zipped folders using this advanced tool. The tool offers a quick scan mode to instantly scan and recover the recently deleted files on your system. Recoverit not only restores your lost files but also keeps the quality and formatting of the original files throughout the recovery process.
Coherent Features Offered by Recoverit
- Batch File Recovery: You get the ability to select and scan multiple files for recovery within the tool, saving your time and effort of retrieving each file separately.
- Preview Before Save: The tool also provides the ability to preview the content of the file before recovering it to your system.
- Advanced Recovery Mode: With Recoverit, you get an advanced recovery mode that performs scanning and recovery on severely damaged files to process lossless restoration.
Comprehensive Guide on How to Restore Files on Mac Using Recoverit
As discussed, Recoverit allows you to conveniently recover your files and documents on your M1 Mac devices. To learn how to execute the apple m1 recovery process on a Mac, read the steps mentioned below:
Step 1. Select the Drive Location Across the M1 Mac
Start the process by launching Recoverit on your Mac and selecting the drive from the options provided to begin the scanning.

Step 2. Choose the File from the Scanned Files
Once all the retrievable files are scanned successfully within the interface, click on your desired file and press the “Recover” button at the bottom.

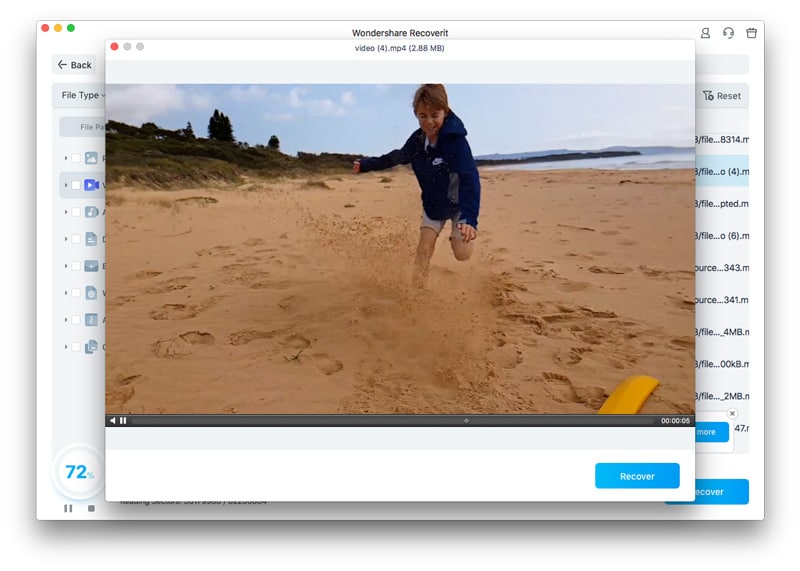
Step 3. Preview and Recover the File
Review the selected file within the tool’s interface and press the “Recover” button once you are satisfied with the results.
Conclusion
To wrap it up, this article discussed how you can perform m1 mac recovery for your lost or damaged files using various built-in fixes. The article also discussed how Wondershare Recoverit is one of the most reliable ways to retrieve all types of data and files that are lost or damaged.
FAQ
-
1. Why do files get lost or become inaccessible on M1 Macs?
Various reasons can cause data loss, such as file system corruption or an interrupted Mac update. Some more reasons could include malware infections or improper device handling. -
2. Can iCloud Drive be used to restore deleted files on a Mac?
Yes, iCloud Drive synchronizes your files across devices and stores them securely in the cloud, enabling you to perform a macbook m1 restore on lost documents. -
3. How does Wondershare Recoverit support M1 Mac data recovery?
Recoverit offers advanced scanning and recovery options optimized for M1 Macs, capable of restoring a wide range of file types while preserving their original quality. -
4. Can Recoverit restore multiple files at once?
Yes, Recoverit offers a batch processing utility for recovering multiple files at the same time from your device’s storage. This saves you the time and effort of retrieving each file separately from your drive.


