
 TL;DR:
First, connect the drive directly to the Mac with a known-good cable and check whether external disks are enabled in Finder. Then open Disk Utility and choose View > Show All Devices. If the physical disk appears but its volume is greyed out, try Mount. If important files are missing, recover or back them up before running First Aid or choosing Erase. If the drive is not detected in Disk Utility or System Information, test one other cable, port, power source, or Mac. Stop if the drive clicks, overheats, or repeatedly disconnects.
- Protect important data and avoid writing to the drive.
- Check the cable, port, hub, power adapter, and Finder visibility.
- Use System Information and Disk Utility to distinguish detection from mounting.
- Try Mount, then use First Aid only after considering data recovery.
- Recover data before formatting; use professional recovery for physical failure.
Ask AI for a summary
 ChatGPT
 Perplexity
 Gemini
 Claude
 Grok
External hard drives are useful for storing and backing up documents, photos, videos, and other important files. However, a Mac may sometimes fail to recognize an external hard drive, leaving the disk missing from Finder or showing as unavailable in Disk Utility.
The message does not always mean that the drive is dead. The problem may be as simple as a hidden Finder setting, a loose cable, insufficient power, an unmounted volume, an unsupported file system, or a damaged drive.

This guide explains how to identify the drive state and fix a Mac that will not recognize an external hard drive without putting your data at unnecessary risk.
Part 1: Why Won't a Mac Recognize an External Hard Drive?
The same symptom can come from different problems. A drive may be working but hidden in Finder, detected but unmounted, visible to macOS only as a USB device, or absent because of a cable, power, enclosure, controller, or disk failure.
| What you see | What it usually means | Best next step |
| The drive is visible in Disk Utility but not Finder | The volume may be unmounted, unsupported, or hidden from Finder | Check Finder settings, then try Mount |
| The physical disk and volume appear in Disk Utility but the volume is greyed out | macOS detects the device, but the volume is not mounted | Try Mount; recover important data before repair |
| The drive appears in System Information but not Disk Utility | The Mac sees a USB or Thunderbolt device, but the enclosure, power, controller, or file system may be failing | Test a known-good cable, direct port, power source, or another enclosure |
| The drive is absent from both System Information and Disk Utility | The connection, power supply, enclosure, controller, or disk may have failed | Limit testing and consider professional recovery if data is important |
Common causes include a faulty USB or Thunderbolt cable, an underpowered hub, a damaged port, an unsupported or corrupted file system, outdated macOS software, a damaged partition structure, or physical failure inside the external drive.
Part 2: How to Fix a Mac That Won't Recognize an External Hard Drive
Follow the methods in order. If the drive contains files you cannot replace, do not choose Erase or install recovery software on the affected drive before checking whether the data can be recovered.
Method 1: Protect the Data and Check the Connection
Before changing the disk, stop copying, deleting, formatting, partitioning, or repeatedly repairing it. Then perform one controlled connection check:
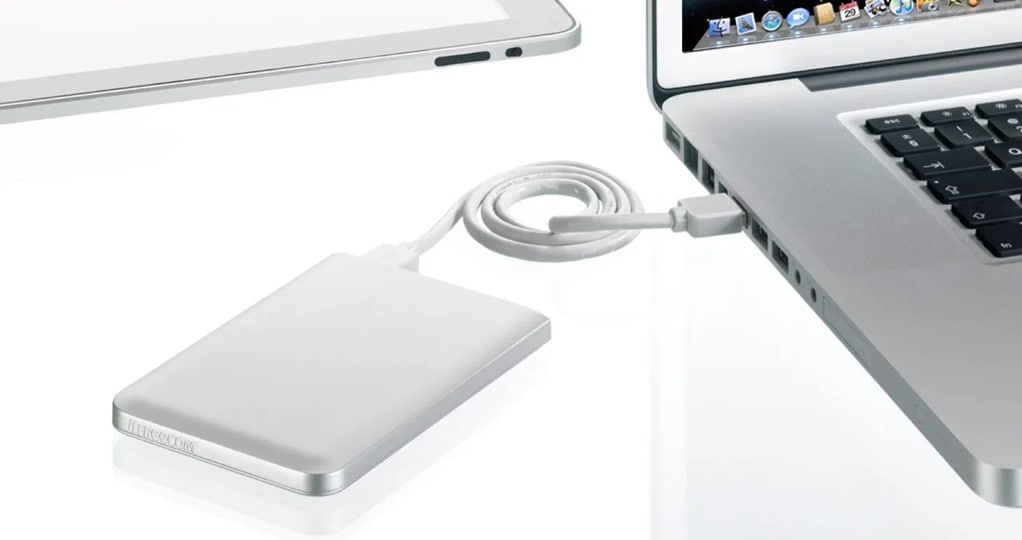
- Disconnect the external hard drive from the Mac.
- Inspect the USB, USB-C, Thunderbolt, or power cable for damage and try one known-good replacement.
- Connect the drive directly to the Mac instead of an unpowered hub or dock.
- Try another compatible port and confirm that the drive's power indicator turns on.
- If possible, test the drive once on another compatible Mac or computer.
Method 2: Make Sure External Disks Are Visible in Finder
A connected drive may be working but hidden from the Finder desktop or sidebar.
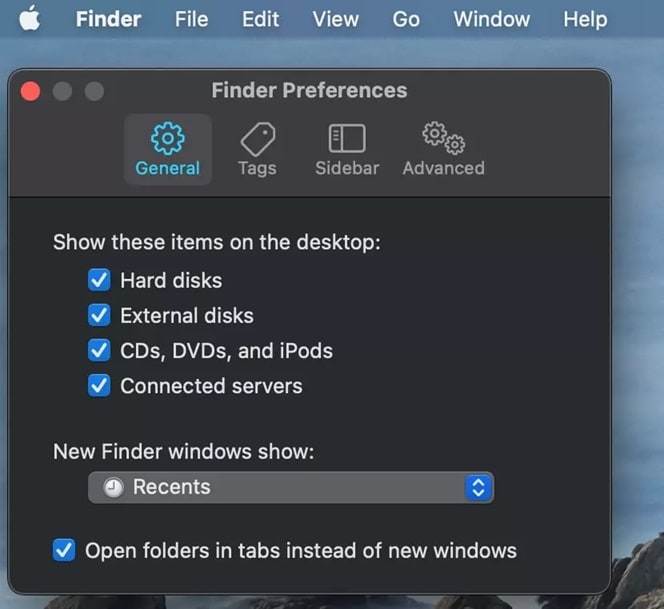
- Open Finder.
- Choose Finder > Settings from the menu bar. On older macOS versions, this may be called Finder > Preferences.
- Open the General tab and select External disks under “Show these items on the desktop.”
- Open the Sidebar tab and select External disks under “Locations.”
- Close the settings window and check Finder again.
Method 3: Check System Information and Disk Utility
Use these two tools to determine whether the problem is visibility, mounting, or device detection.
- Hold the
Optionkey, click the Apple menu, and open System Information. - Check the USB or Thunderbolt section. If the external drive or enclosure is listed, macOS can see the connection.
- Open Disk Utility from Applications > Utilities.
- Choose View > Show All Devices.
- Check whether the physical disk and its volume appear in the left sidebar.
If the drive appears in Disk Utility but not Finder, continue with Mount. If it appears only in System Information, focus on the cable, power, enclosure, controller, or file system. If it appears nowhere, avoid repeated reconnections when the data is important.
Method 4: Mount the Volume in Disk Utility
If the physical disk and volume are visible in Disk Utility but the volume is greyed out, macOS may simply have left it unmounted.
- Select the affected volume in Disk Utility.
- Click Mount in the toolbar. If the button is not available, select the physical disk and confirm the volume structure first.
- Wait for the volume to mount, then check Finder.
- If macOS asks you to initialize or erase the disk, choose Cancel when the files are important and recover the data first.
Method 5: Run First Aid After Protecting Important Files
First Aid can check and repair some file-system problems, but it is not a guaranteed recovery method. If the drive is unstable or the files are irreplaceable, make a recovery copy or use data recovery before repair.
- Open Disk Utility and choose View > Show All Devices.
- Select the affected volume and click First Aid.
- Review the warning and select Run.
- If the volume check completes, repeat First Aid for the related container or physical disk only when appropriate.
- Restart the Mac and check whether the drive mounts.

Method 6: Restart the Mac and Update macOS
A restart can clear a temporary storage or driver state. If the issue began after a system change, install the latest compatible macOS update after protecting important data.
- Choose Apple menu > Restart.
- After the Mac restarts, connect the drive directly and check Finder and Disk Utility.
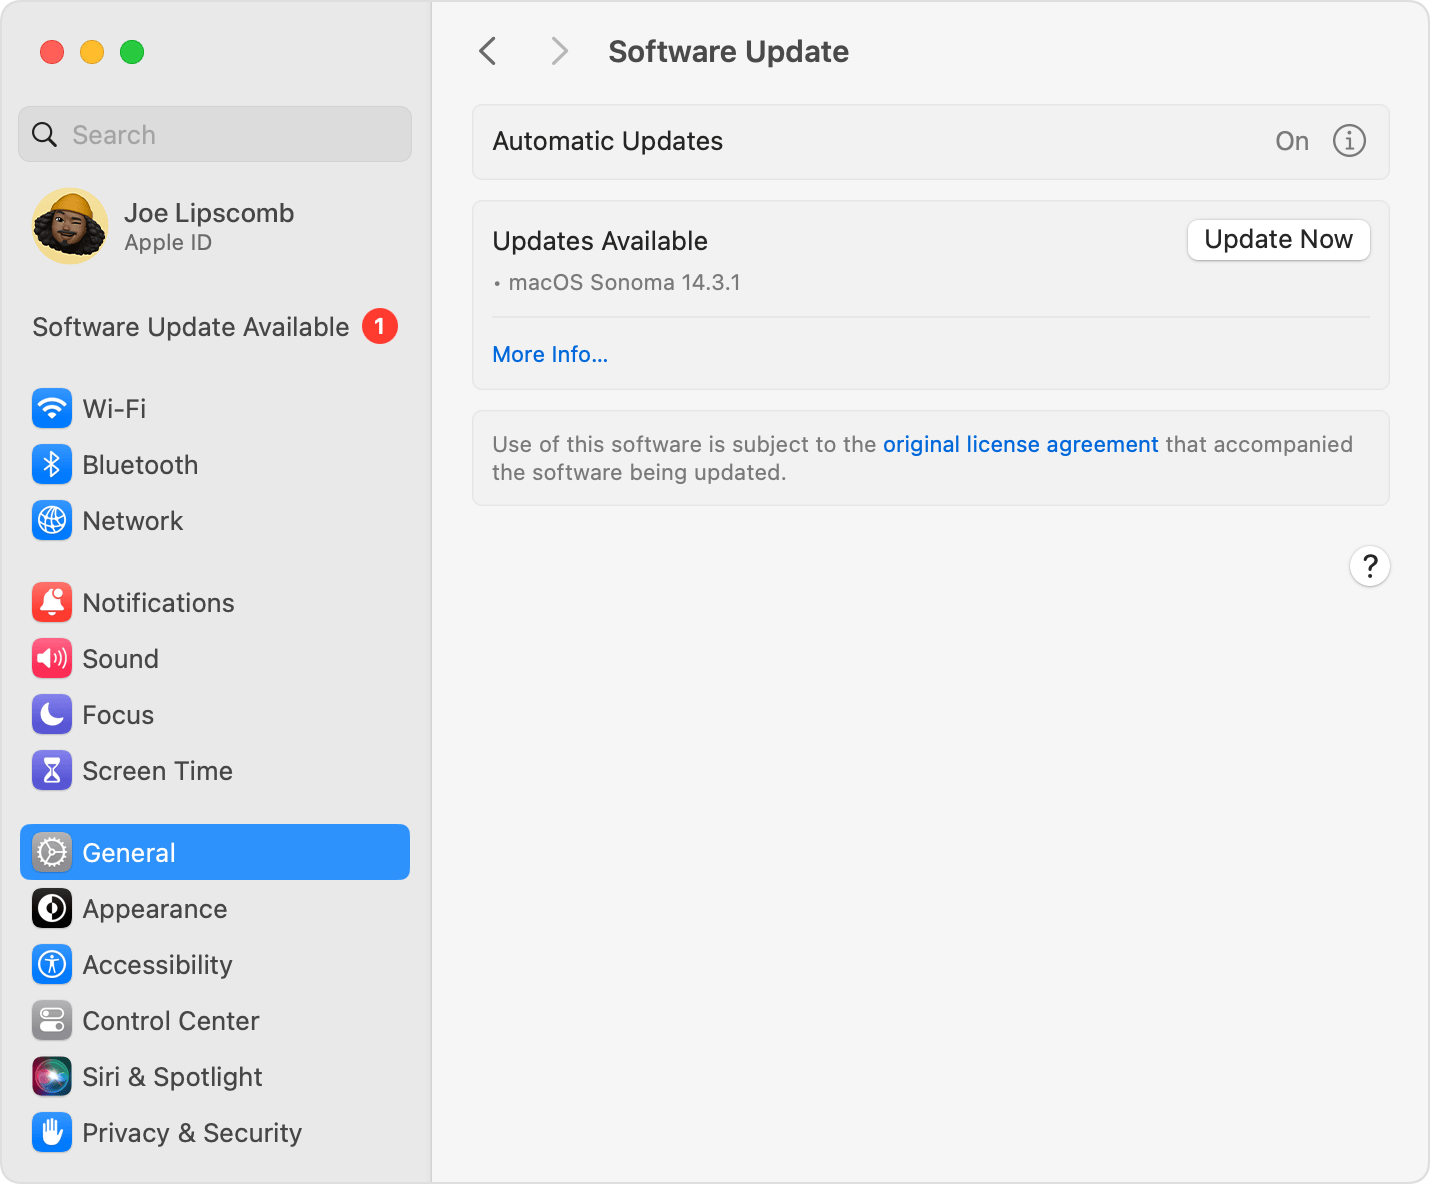
- Open Apple menu > System Settings > General > Software Update.
- Install an available compatible update and restart when prompted.
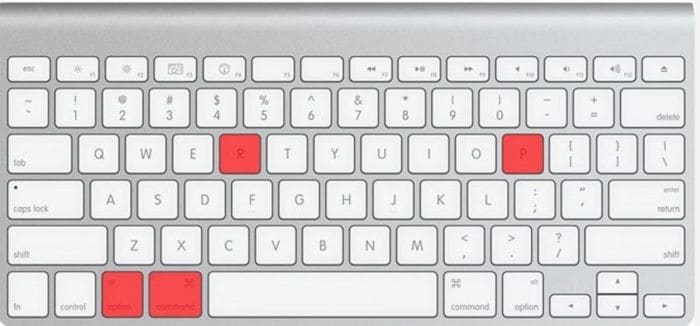
Method 7: Reset NVRAM on an Intel Mac Only
NVRAM reset may help with certain startup and hardware-configuration issues on Intel-based Macs. The usual Option-Command-P-R startup shortcut should not be presented as a universal fix for Apple silicon Macs, which handle startup settings differently.
- Shut down the Intel-based Mac.
- Turn it on and immediately hold
Option-Command-P-R. - Keep holding the keys for about 20 seconds, then allow the Mac to start.
- Reconnect the external drive and check whether it is recognized.
Method 8: Confirm File-System Compatibility
macOS can read some file systems with limitations and may not natively support others for normal read and write operations. A drive formatted for Windows, Linux, a NAS, or another device may not mount as expected on a Mac.
Check the format in Disk Utility or System Information. Do not erase a drive just to change its format when the files are still needed. Recover or copy the data first, then choose a format such as exFAT for cross-platform use or APFS for a Mac-focused workflow.
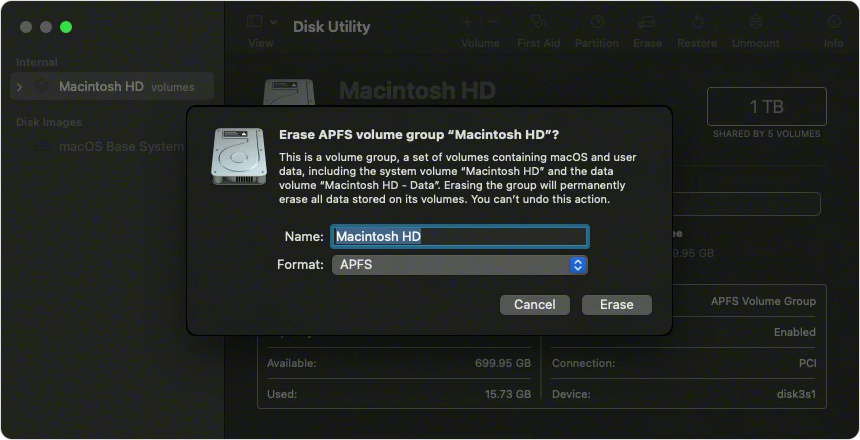
Method 9: Reformat the Drive Only After Data Is Safe
Erasing the drive can fix a corrupted file system or prepare it for a new workflow, but it deletes the existing file-system structure and may make recovery harder. Use this method only when the files are backed up, already recovered, or no longer needed.
- Back up or recover all important files to a different healthy storage location.
- Open Disk Utility and choose View > Show All Devices.
- Select the physical external drive and click Erase.
- Choose a file system appropriate for the devices that will use the drive, such as APFS or exFAT.
- Enter a name and click Erase.
Part 3: How to Recover Data Before Formatting an External Drive
If the external drive is detected but the files are missing, the volume will not mount, or the drive was accidentally formatted, recover the data before choosing Erase. Wondershare Recoverit can scan a detected storage device and help recover files from deletion, formatting, or some inaccessible-volume scenarios.
Recoverit cannot guarantee recovery from overwritten data, a drive that is not detected at all, or severe physical failure. Save recovered files to a different healthy disk, not back to the affected external drive.
Recoverit Data Recovery supports Windows and macOS. Use the version compatible with your operating system and storage device.
How to Recover Files from an External Drive on Mac with Recoverit
- Download and install Recoverit on the Mac. Install it on the internal drive or another healthy location, not the affected external drive.
- Open Recoverit and select the external drive or the location where the lost files were stored.
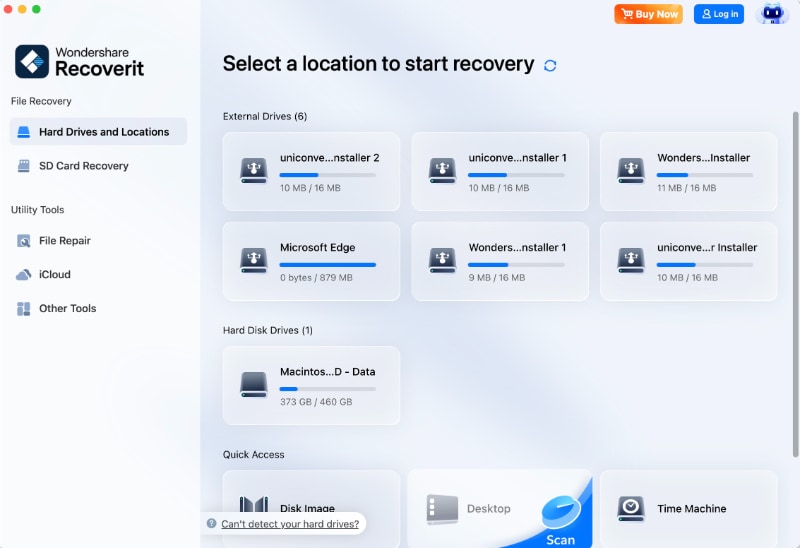
- Start the scan and let it search for recoverable files. Pause the scan if the drive becomes unstable.

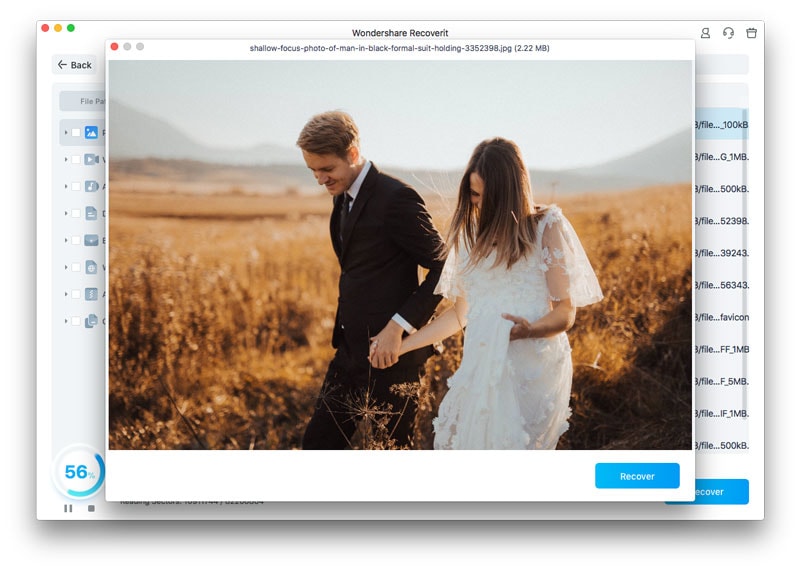
- Use the preview function to check file names and content where supported.
- Select the files you need and click Recover.
- Save the recovered files to the Mac's internal storage or another healthy external drive.
Part 4: Pro Tips to Avoid External Hard Drive Recognition Problems on Mac
- Use a reliable connection: Keep a known-good USB, USB-C, or Thunderbolt cable available and connect the drive directly when troubleshooting.
- Provide enough power: Use the original power adapter for desktop external drives and avoid relying on an underpowered hub.
- Choose a compatible file system: Use APFS for a Mac-focused workflow or exFAT when the drive must work across macOS and Windows. Confirm compatibility before erasing.
- Keep Finder visibility enabled: In Finder Settings, select external disks under both the General and Sidebar tabs when you want them visible.
- Eject before disconnecting: Use the Eject button in Finder to reduce the risk of file-system corruption.
- Maintain backups: Keep at least one additional copy of important photos, videos, documents, and project files.
- Watch for warning signs: Slow access, clicking, repeated disconnections, overheating, or read errors can indicate a failing drive.
FAQ
-
Why is my external hard drive detected but not showing in Finder?
Finder may be hiding external disks, or the drive may be detected but its volume is not mounted. Check Finder Settings, then open Disk Utility, choose View > Show All Devices, and try Mount if the volume is visible. -
What should I do if Disk Utility does not show my external hard drive?
Check System Information under USB or Thunderbolt, then test one known-good cable, direct port, power source, or compatible Mac. If the drive is absent everywhere or has physical warning signs, limit further testing and consider professional recovery. -
Should I click Erase when my Mac asks me to initialize the drive?
No, not when the drive contains needed files. Cancel the prompt and recover or back up the data first. Erase is a formatting operation that can remove the existing file-system structure. -
Is First Aid safe for an external hard drive with missing files?
First Aid can repair some file-system problems, but it is not a backup or guaranteed recovery method. If the files are important, recover or create a copy before running repair. -
Can a Windows-formatted external hard drive work on a Mac?
It depends on the file system and the macOS support available. Some formats may be readable but not writable, while others may require additional software. Confirm the format before changing or erasing the drive. -
Where should I save files recovered from the external hard drive?
Save them to the Mac's internal storage or another healthy external drive. Do not save recovered files back to the source drive because this can overwrite other recoverable data.
Conclusion
A Mac that will not recognize an external hard drive may have a visibility, connection, power, mounting, file-system, or hardware problem. Check the cable and power first, then use Finder, System Information, and Disk Utility to identify which state applies.
If the drive is detected and important files are missing, recover or back up the data before running First Aid or reformatting it. Erase the drive only after the data is safe or no longer needed. When the drive is not detected anywhere or shows signs of physical failure, stop repeated testing and seek professional help.


